Chapters
Table of Contents

Related Manuals for Videotec HEK26


Summary of Contents for Videotec HEK26
- Page 1 Aluminium and thermoplastic housing English - Instructions manual Italiano - Manuale di istruzioni Francais - Manuel d'instructions Deutsch - Bedienungslanleitung...
- Page 3 Aluminium and thermoplastic housing English - Instructions manual...
-
Page 5: Table Of Contents
Contents ENGLISH 1 About this manual ......................5 1.1 Typographical conventions ..........................5 2 Notes on copyright and information on trademarks ..........5 3 Safety rules ........................5 4 Identification ........................ 6 4.1 Product description and type designation ....................6 4.2 Product markings .............................. -
Page 7: About This Manual
About this manual Safety rules Before installing and using this unit, The manufacturer declines all responsibility please read this manual carefully. Be sure for any damage caused by an improper use to keep it handy for later reference. of the appliances mentioned in this manual. Furthermore, the manufacturer reserves Typographical conventions the right to modify its contents without... -
Page 8: Identification
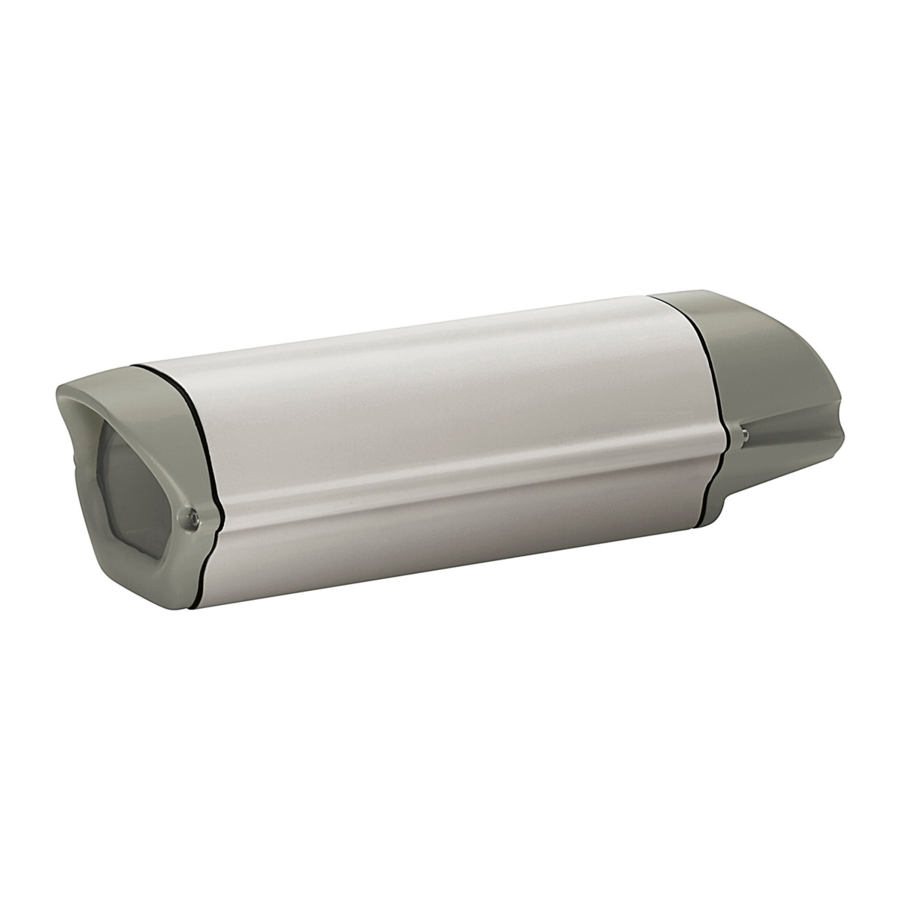
Identification Preparing the product for use Product description and type designation Any change that is not expressly approved by the manufacturer Innovative weatherproof housing for indoor/outdoor will invalidate the guarantee. installations. Made of extruded aluminium and plastic material, it is provided with an innovative opening Contents and unpacking system which allows access to the housing’s interior;... -
Page 9: Installing And Assembling
Installing and assembling 6.1.2 How to install the camera This chapter describes how to install the camera Only specialised personnel should be into the housing. We wish to remind our customers allowed to install and assemble the device. that power supply can be drawn from the power supply or heating circuit, if available, after Installation checking that the right supply voltage is used. -
Page 10: How To Install The Blower
Rotate the internal slide in order to IN 115/230Vac allow access to its lower part. Fix the PTC element (01), by means of the relevant plate (02), on the lowest part of the internal slide. Run the wires along the channel provided and through the hole (03). -
Page 11: 12Vdc Power Supply
6.1.4.1 12Vdc power supply 6.1.5 How to install the Remove the body as described in camera power supply paragraph How to open the housing. This chapter describes how to install the camera Fix the blower kit on the rear cover (01) using the power supply option into the housing. -
Page 12: Maintaining And Cleaning
PMMA window (BxH): Ø 72mm (2.8in) Disposal of waste Internal usable area (BxH): 82x62mm (3.2x2.4in) Internal usable length without accessories materials HEK26 260mm (10.2in) HEK30 300mm (11.8in) This symbol mark and recycle system Internal usable length with heater and/or power supply... -
Page 13: Technical Drawings
Technical drawings The values are in millimeters. 260 / 300 73.7 77.7 124.6 403 / 443 Fig. 15... - Page 14 MNVCHEKB_0839_EN HEADQUARTERS ITALY FRANCE UK / IRELAND U.S.A. / CANADA ASIA PACIFIC VIDEOTEC S.p.A. VIDEOTEC FRANCE S.A.R.L. VIDEOTEC UK SALES VIDEOTEC SECURITY, Inc. VIDEOTEC (HK) Ltd Tel. +39 0445 697411 Tel. +33 2 32094900 Tel. +44 0113 815 0047 Tel. +1 973 5950788 Tel.
- Page 15 Custodia in alluminio e materiale termoplastico Italiano - Manuale di istruzioni...
- Page 17 Sommario ITALIANO 1 Informazioni sul presente manuale ................5 1.1 Convenzioni tipografiche ............................ 5 2 Note sul copyright e informazioni sui marchi commerciali ........5 3 Norme di sicurezza ....................... 5 4 Identificazione ......................6 4.1 Descrizione e designazione del prodotto ..................... 6 4.2 Marcatura del prodotto ............................
-
Page 19: Informazioni Sul Presente Manuale
Informazioni sul Norme di sicurezza presente manuale Il produttore declina ogni responsabilità per eventuali danni derivanti da un Prima di installare e utilizzare questa unità, leggere uso improprio delle apparecchiature attentamente questo manuale. Conservare questo menzionate in questo manuale. Si manuale a portata di mano come riferimento futuro. -
Page 20: Identificazione
Identificazione Preparazione del prodotto per l'utilizzo Descrizione e designazione del prodotto Qualsiasi cambiamento non espressamente approvato dal Costruita in estruso d’alluminio e materiale plastico, costruttore fa decadere la garanzia. è dotata di un sistema innovativo d’apertura che permette un facile accesso al suo interno; il Contenuto e disimballaggio corpo ed il tettuccio scorrono avanti rimanendo attaccati alla parte anteriore della slitta esterna,... -
Page 21: Installazione E Assemblaggio
Installazione e 6.1.2 Installazione della telecamera Questa sezione descrive come installare la assemblaggio telecamera all’interno della custodia. Si ricorda che può essere prelevata l’alimentazione dal circuito L'installazione e l'assemblaggio vanno di riscaldamento o di alimentazione, ove presenti, eseguiti solo da personale specializzato. verificando preventivamente che sia quella corretta. -
Page 22: Installazione Del Ventilatore
Far ruotare la slitta interna in modo da IN 115/230Vac permettere l’accesso alla sua parte inferiore. Fissare il PTC (01), tramite la relativa piastrina (02), sulla parte inferiore estrema della slitta interna. Passare il filo nella sede predisposta (03). Camera OUT Heater OUT Fig. -
Page 23: Alimentazione 12Vdc
6.1.4.1 Alimentazione 12Vdc 6.1.5 Installazione dell’alimentatore Rimuovere il corpo come descritto nel per telecamera paragrafo Apertura della custodia. Questa sezione descrive come installare l’opzione Fissare il ventilatore sul fondo (01) tramite le apposite alimentatore all’interno della custodia. viti (02) in dotazione, con il flusso dell'aria rivolto L’alimentatore ha una tensione di ingresso di 100- verso l'interno. -
Page 24: Manutenzione E Pulizia
Finestra in PMMA (BxH): Ø 72mm Smaltimento dei rifiuti Dimensioni utili interne (BxH): 82x62mm Lunghezza utile interna senza accessori HEK26 260mm Questo simbolo e il sistema di riciclaggio sono validi solo nei paesi HEK30 300mm... -
Page 25: Disegni Tecnici
Disegni tecnici I valori espressi sono in millimetri. 260 / 300 73.7 77.7 124.6 403 / 443 Fig. 15... - Page 26 MNVCHEKB_0839_IT HEADQUARTERS ITALY FRANCE UK / IRELAND U.S.A. / CANADA ASIA PACIFIC VIDEOTEC S.p.A. VIDEOTEC FRANCE S.A.R.L. VIDEOTEC UK SALES VIDEOTEC SECURITY, Inc. VIDEOTEC (HK) Ltd Tel. +39 0445 697411 Tel. +33 2 32094900 Tel. +44 0113 815 0047 Tel. +1 973 5950788 Tel.
- Page 27 Caisson en aluminium et matériel thermoplastique Français - Manuel d'instructions...
- Page 29 Sommaire FRANÇAIS 1 À propos de ce mode d’emploi ..................5 1.1 Conventions typographiques ..........................5 2 Notes sur le copyright et informations sur les marques de commerce ....5 3 Normes de securité ....................... 5 4 Identification ........................ 6 4.1 Description et désignation du produit ......................
-
Page 31: À Propos De Ce Mode D'emploi
À propos de ce Normes de securité mode d’emploi Le producteur décline toute responsabilité pour les dommages éventuels dus à une Avant d’installer et d’utiliser cet appareil, utilisation non appropriée des appareils veuillez lire attentivement ce mode d’emploi. mentionnés dans ce manuel. On réserve Conservez-le à... -
Page 32: Identification
Identification Préparation du produit en vue de l’utilisation Description et désignation du produit Toute modification non approuvée expressément par le fabricant entraînera Construits en profilé d’aluminium et matériel l’annulation de la garantie. plastique, les caissons HEK sont dotés d’un système d’ouverture, permettant un accès facile à... -
Page 33: Installation Et Assemblage
Installation et 6.1.2 Installation de la camera Cette section explique comment installer la assemblage caméra à l’intérieur du caisson. A noter que l’alimentation peut être prélevée du circuit de L’installation et l’assemblage chauffage ou d’alimentation, s’ils sont présents, doivent exclusivement être effectués en vérifiant préalablement qu’elle est correcte. -
Page 34: Installation Du Ventilateur
Faites tourner le chariot interne afin de rendre IN 115/230Vac possible l’accès à sa partie inférieure. Fixez le PTC (01), au moyen de la plaquette fournie (02), sur l’extrémité inférieure du chariot interne. Faites passer les fils dans les coulisses (03). Camera OUT Heater OUT Fig. -
Page 35: Alimentation 12Vdc
6.1.4.1 Alimentation 12Vdc 6.1.5 Installation de Enlevez le corps comme décrit dans le l’alimentation pour camera paragraphe Ouverture du caisson. Cette section explique comment installer Fixer le ventilateur sur le fond (01) au moyen l’alimentation optionnelle à l’intérieur du caisson. des vis fournies (02) avec l’écoulement d’air L’alimentation a une tension d’entrée de 100- vers l’intérieur. -
Page 36: Entretien Et Nettoyage
Fenêtre en PMMA (BxH): Ø 72mm Élimination des déchets Surface intérieure utile (BxH): 82x62mm Longueur intérieure utile sans accessoires Ce symbole et le système de recyclage HEK26 260mm ne sont appliqués que dans les pays UE et non dans les autres pays du monde. HEK30 300mm Longueur intérieure utile avec chauffage et/ou... -
Page 37: Dessins Techniques
Dessins techniques Les valeurs sont entendues en millimètres. 260 / 300 73.7 77.7 124.6 403 / 443 Fig. 15... - Page 38 MNVCHEKB_0839_FR HEADQUARTERS ITALY FRANCE UK / IRELAND U.S.A. / CANADA ASIA PACIFIC VIDEOTEC S.p.A. VIDEOTEC FRANCE S.A.R.L. VIDEOTEC UK SALES VIDEOTEC SECURITY, Inc. VIDEOTEC (HK) Ltd Tel. +39 0445 697411 Tel. +33 2 32094900 Tel. +44 0113 815 0047 Tel. +1 973 5950788 Tel.
- Page 39 Gehäuse aus Aluminium und thermoplastischem Material Deutsch - Bedienungslanleitung...
- Page 41 Inhaltsverzeichnis DEUTSCH 1 Allgemeines ........................5 1.1 Schreibweisen ................................. 5 2 Anmerkungen zum Copyright und Informationen zu den Handelsmarken .... 5 3 Sichereitsnormen ......................5 4 Identifizierung ......................6 4.1 Beschreibung und Bezeichnung des Produktes ..................6 4.2 Kennzeichnung des Produkts ..........................6 5 Vorbereitung des Produktes auf den Gebrauch ............
-
Page 43: Allgemeines
Allgemeines Sichereitsnormen Lesen Sie bitte vor dem Installieren und Der Hersteller lehnt jede Haftung für dem Verwenden dieses Gerätes die eventuelle Schäden ab, die aufgrund Bedienungsanleitung sorgfältig durch. Bewahren unsachgemäßer Anwendung der in diesem Sie sie zum späteren Nachschlagen auf. Handbuch erwähnten Geräte entstanden ist. -
Page 44: Identifizierung
Identifizierung Vorbereitung des Produktes auf Beschreibung und den Gebrauch Bezeichnung des Produktes Das Gehäuse, das aus Fließpress- Aluminium Jede vom Hersteller nicht ausdrücklich und Kunststoff besteht, ist mit einem neuartigen genehmigte Veränderung führt zum Öffnungssystem ausgestattet, das einen bequemen Verfall der Gewährleistungsrechte. Zugriff auf das Innere ermöglicht: Korpus und Sonnenschutzdach gleiten nach vorne, bleiben Inhalt und Entfernen... -
Page 45: Installation Und Zusammenbau
Installation und 6.1.2 Installation der Kamera In diesem Abschnitt wird beschrieben, wie Zusammenbau die Kamera im Inneren des Schutzgehäuses installiert wird. Es wird daran erinnert, daß die Installation und Zusammenbau Stromversorgung dem Heizungs- oder dem sind Fachleuten vorbehalten. Versorgungsstromkreis entnommen werden kann, wo diese vorhanden sind. -
Page 46: Installation Des Lüfters
Den Innenschlitten drehen, so daß der IN 115/230Vac Zugang zum unteren Teil möglich wird. Mit Hilfe des dazugehörigen Plättchens (02) den PTC (01) am äußersten unteren Teil des Innenschlittens befestigen. Führen Sie den Heizungsdraht durch die vorgesehene Halterung ein (03). Camera OUT Heater OUT 115/230Vac... -
Page 47: Betriebsspannung 12Vdc
6.1.4.1 Betriebsspannung 12Vdc: 6.1.5 Installation der Der Körper herausziehen wie im Paragraph Netzteil für Kamera Öffnung des Schutzgehäuses beschrieben ist. Dieser Abschnitt befaßt sich mit der Installation Den Lüfter mit den mitgelieferten Schrauben des Zusatzspeisegerätes im Innern des Gehäuses. (02) mit nach innen gerichtetem Luftfluß am Die Netzteil weist eine Eingangsspannung von 100- Boden befestigen (01). -
Page 48: Wartung Und Reinigung
Müllentsorgungsstellen Fenster aus PMMA (BxH): Ø 72mm Innere Nutzabmessungen (BxH): 82x62mm Dieses Symbol und das entsprechende Innere Nutzlänge ohne Zubehör Recycling-System gelten nur für HEK26 260mm EULänder und finden in den anderen HEK30 300mm Ländern der Welt keine Anwendung. Innere Nutzlänge mit Heizung und/oder... -
Page 49: Technische Zeichnungen
Technische Zeichnungen Maßangabe in Millimeter. 260 / 300 73.7 77.7 124.6 403 / 443 Fig. 15... - Page 50 MNVCHEKB_0839_DE HEADQUARTERS ITALY FRANCE UK / IRELAND U.S.A. / CANADA ASIA PACIFIC VIDEOTEC S.p.A. VIDEOTEC FRANCE S.A.R.L. VIDEOTEC UK SALES VIDEOTEC SECURITY, Inc. VIDEOTEC (HK) Ltd Tel. +39 0445 697411 Tel. +33 2 32094900 Tel. +44 0113 815 0047 Tel. +1 973 5950788 Tel.
- Page 52 MNVCHEKB_0839 HEADQUARTERS ITALY FRANCE UK / IRELAND U.S.A. / CANADA ASIA PACIFIC VIDEOTEC S.p.A. VIDEOTEC FRANCE S.A.R.L. VIDEOTEC UK SALES VIDEOTEC SECURITY, Inc. VIDEOTEC (HK) Ltd Tel. +39 0445 697411 Tel. +33 2 32094900 Tel. +44 0113 815 0047 Tel. +1 973 5950788 Tel.
Need help?
Do you have a question about the HEK26 and is the answer not in the manual?
Questions and answers