Pioneer SC-82 Service Manual
Service manual rrv4547
Hide thumbs
Also See for SC-82:
- Service manual (174 pages) ,
- Operating instructions manual (127 pages) ,
- Reference manual (45 pages)
Table of Contents
Advertisement
Quick Links
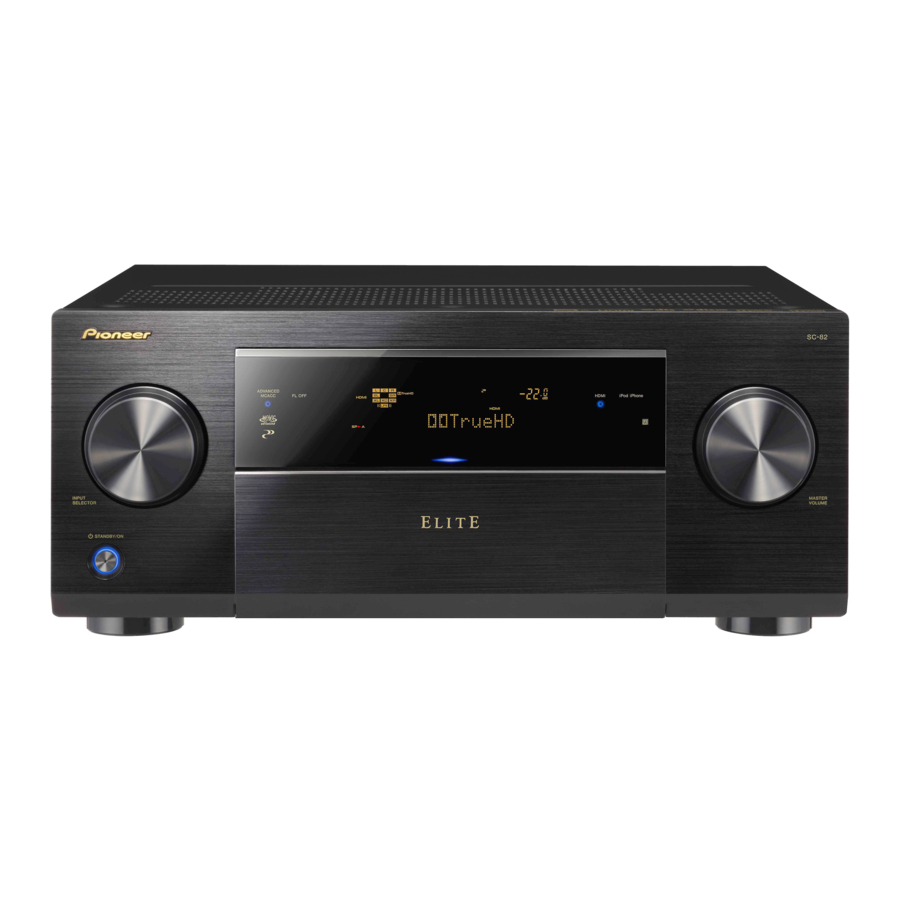
AV RECEIVER
SC-82
SC-81
THIS MANUAL IS APPLICABLE TO THE FOLLOWING MODEL(S) AND TYPE(S).
Model
SC-82
CUXJ
SC-81
CUXJ
THIS SERVICE MANUAL SHOULD BE USED TOGETHER WITH THE FOLLOWING MANUAL(S).
Model No.
SC-82, SC-81
PIONEER CORPORATION
PIONEER ELECTRONICS (USA) INC. P.O. Box 1760, Long Beach, CA 90801-1760, U.S.A.
PIONEER EUROPE NV Haven 1087, Keetberglaan 1, 9120 Melsele, Belgium
PIONEER ELECTRONICS ASIACENTRE PTE. LTD. 253 Alexandra Road, #04-01, Singapore 159936
Type
Power Requirement
AC 120V
AC 120V
Order No.
RRV4548
SCHEMATIC DIAGRAM, PCB CONNECTION DIAGRAM, PCB PARTS LIST
1-1, Shin-ogura, Saiwai-ku, Kawasaki-shi, Kanagawa 212-0031, Japan
SC-82
Remarks
K-FZV JUNE
ORDER NO.
RRV4547
Remarks
2014 Printed in Japan
Advertisement
Table of Contents

Related Manuals for Pioneer SC-82


Summary of Contents for Pioneer SC-82
- Page 1 PIONEER CORPORATION 1-1, Shin-ogura, Saiwai-ku, Kawasaki-shi, Kanagawa 212-0031, Japan PIONEER ELECTRONICS (USA) INC. P.O. Box 1760, Long Beach, CA 90801-1760, U.S.A. PIONEER EUROPE NV Haven 1087, Keetberglaan 1, 9120 Melsele, Belgium PIONEER ELECTRONICS ASIACENTRE PTE. LTD. 253 Alexandra Road, #04-01, Singapore 159936...
-
Page 2: Safety Information
PIONEER Service Manual. A subscription to, or additional copies of, Also test with plug reversed Earth PIONEER Service Manual may be obtained at a nominal (Using AC adapter ground charge from PIONEER. plug as required) -
Page 3: Table Of Contents
8.3 REGION WRITING ............................... 70 8.4 HOW TO UPDATE FIRMWARE............................ 71 9. EXPLODED VIEWS AND PARTS LIST..........................74 9.1 PACKING SECTION ..............................74 9.2 EXTERIOR SECTION ..............................76 9.3 REAR SECTION................................78 9.4 CHASSIS SECTION ..............................80 9.5 FRONT SECTION ................................ 82 SC-82... -
Page 4: Service Precautions
JA9604 HDMI Connector AKP7268-A-K JACK with Cu-through-hole & SMD type JA9605 JA9606 JA9620 Q4101 Q4102 Q4201 Q4202 Q4301 AWX1926 Q4302 (SC-82) D AMP_SS Q4401 IRF6775MPBFS1-TRB Pins are under the parts side ASSY Q4402 AWX1919 Q4501 (SC-81) Q4502 Q4601 Q4602 Q4701... -
Page 5: Caution
Accessory of Panel Base D AMP_SS ASSY Rear Panel • Front View If a screw at any of these points needs to be removed for service, be sure to check that the swarf is not on the screw before refastening. SC-82... -
Page 6: Specifications
2. SPECIFICATIONS 2.1 SPECIFICATIONS Amplifier section (SC-82) Continuous average power output* 8 Ω ..........................130 W** per channel 6 Ω ..........................170 W*** per channel * Measured pursuant to the Federal Trade Commission’s Trade Regulation rule on Power Output Claims for Amplifiers ** 1 kHz with no more than 0.08 %**** total harmonic distortion... - Page 7 Dimensions ................... 435 mm (W) x 185 mm (H) x 441 mm (D) (17.13 in. (W) x 7.28 in. (H) x 17.36 in. (D)) Weight (without package) SC-82 ............................. 14.6 kg (32.2 lb) SC-81 ............................. 14.3 kg (31.5 lb) Number of Furnished Parts MCACC Setup microphone ..........................
-
Page 8: Basic Items For Service
Check the appearance of the product. service. See the table below for the items to be checked regarding video and audio. Block noise Distortion Horizontal noise Noise Flicker Volume too low Disturbed image (video jumpiness) Volume too high Too dark Volume fluctuating Mottled color SC-82... -
Page 9: Pcb Locations
D-AUDIO BRIDGE ASSY DIGITAL MAIN_L ASSY PRIMARY ASSY COMPOSITE ASSY FILTER_S ASSY IR BUFFER_S ASSY OPT COAX_S ASSY COMPONENT ASSY BT ASSY BUFFER GND ASSY AUDIO ASSY D AMP_SS ASSY INTERFACE_S ASSY IR INTERFACE_S ASSY IR EDGE GUARD_S ASSY SC-82... - Page 10 Therefore, when replacing, be sure to use parts of identical designation. Mark No. Description Part No. Mark No. Description Part No. LIST OF ASSEMBLIES 1... D AMP_SS ASSY (SC-82) AWH7093 1...AUDIO COMPOSITE ASSY (SC-81) AWR7240 2..D AMP_SS ASSY AWX1926 2..AUDIO ASSY AWX1759 2..BT ASSY...
-
Page 11: Jigs List
Lubricants and Glues No. Remarks Silicone Grease GYA1001 Refer to “9.5 FRONT SECTION”. [3] Cleaning Before shipping out the product, be sure to clean the following positions by using the prescribed cleaning tools. Name Cleaning paper GED-008 Refer to “9.4 CHASSIS SECTION”. SC-82... -
Page 12: Block Diagram
FRONT HDMI USB ASSY 1.JOG_A MIC HP ASSY 5/60 (AWX1702) 4.XRESET 22.HOTPLUG 2.JOG_B 5.232CDET 23.CECIO 3.GNDD (AWX1799) 6.EV232TX5 24.EVREQI5 *1.00mm (SC-82 : AWX1724) 7.EV232RX5 25.EVREQO5 5.CEC_IO J0001 ADD7796- 8.232EV 26.NETWOL 4.XVDDERR 9.AMPTEMP 27.XFANERR 3.GNDD DISPLAY ASSY (SC-81 : AWX1727) 10.XSMUTE 28.XWUSBERR... - Page 13 APM7011- AXD7723- SC-1229-K (AWX1778) JA4501 JA4301 SC-2024-K SC-1224-K D AMP_SS ASSY SYXJ8 APM7011- AXD7723- SC-2024-S SC-1224-S SC-1224-K DLXJ APM7011- AXD7723- (SC-82: AWX1926) CN3870 CN3860 CN3850 CN3840 CN3830 CN3810 SC-1224-K AXJ5 APM7011- AXD7723- (SC-81: AWX1919) CN4700 CN4600 CN4500 CN4400 CN4300 CN4900...
-
Page 14: Block Diagram For Audio Block
BT ASSY Except Europe Model DownMix IC2701, IC2702 MIC HP ASSY MIC Amp IC3471 JA3471 IC2501 Selector / Volume / PRE Amp BD3473KS2 TUNER Module SAT/CBL JA2501 DVR/BDR JA2505 JA2505 IC3273 Selector / Volume / PRE Amp BD3473KS2 AUDIO ASSY SC-82... - Page 15 (HD ZONE) <<AUDIO ZONE OUT>> ZONE3 OUT JA3206 ZONE2 SW Amp IC6701 ZONE2 SW OUT JA6701 SC-81, SC-1224 only ZONE2 OUT JA6701 SC-82, SC-2024 only SC-82, SC-2024 only IC6703 DownMix ZONE2 JA6702 SELECTOR ZONE2 OUT C2701, IC2702 SC-81, SC-1224 only IC6702...
-
Page 16: Block Diagram For Digital Main Video Block
24 MHz BT ASSY 36.864 MHz 25 MHz IC9204 Media Processor MICROCHIP IC603 IC9203 "DM860AS1" Gate Array LAN PHY ETHERNET SEIKO EPSON MICROCHIP "LAN8700C" "PE7008A" IC9206 IC9205 iPod FLASH ROM Authentication APPLE (RENESAS) "H337S3959" IC9209 IC9201 SDRAM-166 SDRAM-166 256Mb(32Mx8) 256Mb(32Mx8) SC-82... - Page 17 FRONT HDMI USB ASSY USB(FRONT) COMPOSITE ASSY uCOM COMPOSITE IC101 "EMMA2LL" COMPONENT ASSY COMPONENT-Y COMPONENT-Pb IC102 IC103 COMPONENT-Pr SDRAM Nor FLASH 64Mb 128Mb 22.5792 MHz 24.576 MHz 24 MHz IC9002 D808K013DPTP456 IC9004 IC9001 SeriFlash SDRAM-166 16Mb 64Mb(8Mx16) POWER SUPPLY BLOCK Diagram (DCDC,LDO) SC-82...
-
Page 18: Block Diagram For Digital Main Audio Block
P1_HFDT/DSDFL CH0ASD0 P1_BCK ACLKR1 AXR0[7]D P1_CDTI/DSDLFE P1_LRCK/DSDSL CH0ASD1 AFSR1 AXR0[8]D P1_SDTI/DSDC P1_HFDT/DSDFL CH0ASD2 AXR0[9]D AXR1[0] P1_BDTI/DSDSR P1_SDTI/DSDC AXR0[10]D1B CH0ASD3 AXR1[1] P1_SPDIF/DSDFR P1_CDTI/DSDLFE CH0ASPDIF AXR1[2] AND(VHC08) P1_BDTI/DSDSR IC1601 AXR1[3] P1_LRCK/DSDSL AXR1[4] P1_SPDIF/DSDFR AXR1[5] D1BCK CH1ABCLK D1LRCK CH1ALRCLK D1FDT CH1ASD0 27.0MHz SC-82... - Page 19 L : DSP ROUTE DSPPASS SEL(VHC157) IC1501 DABCK DIRBCK D1BCK DIRLRCK DALRCK D1LRCK DADATF D1FDT DADATC D1CDT 24.0 MHz IC9002 D808K013 DPTP456 AHCLKX1 AHCLKX0 D1BCK ACLKX0 SEL(VHC157) D1LRCK AFSX0 IC1503 D1FDT AXR0[7]D1FDT D1CDT AXR0[8]D1CDT D1SDT D1SDT(SR) AXR0[9]D1SDT D1BWDT AXR0[10]D1BWDT D1BWDT (SRB/HEIGH) SC-82...
-
Page 20: Block Diagram For Video Block
DIGITAL MAIN_L ASSY VDEC EMMA COMPONENT ASSY COMPONENT OUTPUT CDET C C OMPONENT INPUT MONITOR OUT IN 1 (DVD) IN 2 (DVR/BDR) COMPOSITE INPUT COMPOSITE OUTPUT COMPOSITE ASSY SAT/CBL COMPOSITE ASSY DVR/BDR OUT DVR/BDR MONITOR OUT IC8301 VIDEO SW NJW1327FU1 SC-82... - Page 21 SC-82...
-
Page 22: Block Diagram For Power Block (1)
4.6 BLOCK DIAGRAM FOR POWER BLOCK (1) SC-82... - Page 23 SC-82...
-
Page 24: Block Diagram For Power Block (2)
4.7 BLOCK DIAGRAM FOR POWER BLOCK (2) SC-82... - Page 25 SC-82...
-
Page 26: Diagnosis
Check the circuits around RY71 or replace PRIMARY ASSY when press power key ? Check DIGITAL MAIN_L ASSY Check the signal path of DVCPOW DISPLAY ASSY V-REG_S ASSY CN601-16pin (DVCPOW) DIGITAL MAIN_L ASSY LH when press power key Diagnose or replace DIGITAL MAIN_L ASSY SC-82... - Page 27 6 pin +5.0V (XFLRST) Check DISPLAY ASSY Replace X6002, IC6003 X6002 oscillating or DISPLAY ASSY (5MHz) Check DISPLAY ASSY Replace IC6003 Diagnose around IC6003 V6001(FL Display) or DISPLAY ASSY damage No Problem Replace V6001 Replace V6001(FL Display) (FL Display) or DISPLAY ASSY SC-82...
- Page 28 Bad connection of cables and connectors should be also considered.) Check the path of the relevant channel The signal of the relevant channel exists in OPT COAX_S ASSY. in OPT COAX_S ASSY. Check the path of the relevant signal in DIGITAL MAIN_L ASSY. SC-82...
- Page 29 The signal of the relevant channel does not exist in in FILTER_S ASSY. D-FILTER BRIDGE_S ASSY. Check the path of the relevant signal in DIGITAL MAIN_L ASSY. Check the path of the relevant signal in FRONT HDMI USB ASSY. SC-82...
- Page 30 BT POW in FILTER_S ASSY is “H” ? BT POW. Is there 5V (V+3R3_BT, V+5_BT) in FILTER_S ASSY. Reliace Q2012. (V+3R3_BT is associated with 3.3V, however, take note that it is actually 5V. ) Check the signal path of V+5_D in DIGITAL MAIN_L ASSY. SC-82...
- Page 31 Is there signal in the IC1818-1, 2, 3, 4pin of Check the path from IC1602. DIGITAL MAIN_L ASSY ? Is there signal in the CN1801-25, 26pin of Check the path from IC1818. DIGITAL MAIN_L ASSY ? Check the VOL IC(IC2501, IC3273) peripheral circuit of DIGITAL MAIN_L ASSY ? SC-82...
- Page 32 Check the signal path between signal is transmitted to 1, 2, 3, 4pin. CN3902 and CN2861. Check the signal path form CN3902 to IC2501. No sound only from DVR/BDR OUT Check the path and circuit between IC2501 and JA2504. SC-82...
- Page 33 When MOSFET temperature is suddenly increased Failure in MOSFET (Q4101, Q4102) TEMPERR Check Power Supply on Temperature Detection Circuit (around R4181 and Q4117) Check XBERR Line Conductivity BERR Conductivity from Failure Detection D AMP_SS ASSY CN4000-6pin to (CERR) DISPLAY ASSY CN6001-31pin. SC-82...
- Page 34 4:2:0 – Select this setting when connecting to a 4K/60p 4:2:0 24 bit compatible TV using HDMI. When you’re finished, press RETURN. Press STANDBY/ON to switch on the receiver and your TV. Make sure that the TV’s video input is set to this receiver. SC-82...
- Page 35 IR-IN INTERFACE_S ASSY V-REG_S ASSY DISPLAY ASSY or replace INTERFACE_S ASSY Check the signal path of Repair or replace NG point DISPLAY ASSY No Problem Diagnose DISPLAY ASSY (RMC signal path, around U6001,IC6001) or replace DISPLAY ASSY SC-82...
-
Page 36: Circuit Description
"L". (IC6001 28pin) detection when controling the Fan rotation more than 3 seconds. [How to Enter Release Mode] During Standby mode, simultaneously press and hold the "TUNE [] " and "ZONE2 ON/OFF" keys for 5 seconds. SC-82... - Page 37 2SA1576A(QRS) 2SA1514K(RS) *R4910 R4170 R4167 Q4117 R4310 Q4108 2SC4081(QRS) 1k 1% 2SC4081(QRS) R4110 R4510 (AWX1922, AWX1923, AWX1924, AWX1925 only ) GND_TP2 GND_TP GND_TP2 GND_TP DISPLAY ASSY INTERFACE_S ASSY V-REG_S ASSY CN6001 CN7903 CN7661 CN7012 CN7006 XTEMSD5 AMPTEMP UCOM IC6001 SC-82...
- Page 38 DRAIN3 2125 9.1k SOURCE1 DRAIN4 IC4301 IC4501 IC4901 IC4902 ! IC4302 IC4502 GNDS V-5V_CSD V-5VFILT2 VSS+12V R4104 R4140 (AWX1922, AWX1923, AWX1924, AWX1925 only ) R4109 DISPLAY ASSY INTERFACE_S ASSY V-REG_S ASSY CN6001 CN7903 CN7661 CN7012 CN7006 XDCERR UCOM IC6001 SC-82...
- Page 39 SOURCE2 DRAIN3 2125 9.1k SOURCE1 DRAIN4 IC4301 IC4501 IC4901 IC4302 IC4502 IC4902 V-5V_CSD V-5VFILT2 GNDS VSS+12V R4104 R4140 (AWX1922, AWX1923, AWX1924, AWX1925 only ) R4109 DISPLAY ASSY INTERFACE_S ASSY V-REG_S ASSY CN7903 CN7661 CN7012 CN7006 CN6001 XOLERR UCOM IC6001 SC-82...
- Page 40 DZ2J270M0 Vceo120V DZ2J240M0 GND_B GND_B D4021 R5023 R5039 V+5V_S 2125 2125 2.2k DZ2J180M0 Q4025 C4051 2SC4081(QRS) R5021 2125 100k R5013 2125 220k V-64V 2SA1576A(QRS) Q4030 GND_B DISPLAY ASSY V-REG_S ASSY INTERFACE_S ASSY CN7012 CN6001 CN7903 CN7661 CN7006 UCOM IC6001 SC-82...
- Page 41 INTERFACE_S ASSY DIGITAL MAIN_L ASSY CONNECT_S ASSY CN603 CN7952 CN7954 CN7004 CN7009 R691 100 R805 10 FANCTLH FANCTLL R688 100 R804 10 UCOM IC603 GND D DISPLAY ASSY V-REG_S ASSY V+5V_VDD CN6001 CN7903 CN7661 CN7012 R6092 XFANERR UCOM IC6001 SC-82...
- Page 42 Power ON detection XVDDERR port is set to "L". (IC6001 22pin) XVDDERR Circuit FRONT HDMI USB ASSY V+5_USB_DC DISPLAY ASSY V+5_HD CN8002 CN6003 UCOM IC6001 R6214 R6222 R6087 Q8004 2SC4081(QRS) GNDD GNDCH SC-82...
- Page 43 XMHLPERR port is MHL equipment is set to "L". acknowledged after second power-on. XMHLPERR Circuit DIGITAL MAIN _L ASSY IC9603 R9644 R263 BD82065FVJ XMHLPERR UCOM IC101 R9626 MHLPOW V+5_MHL R9606 0 (2125) R9609 0 (2125) GNDD SC-82...
- Page 44 [4] Error Indications SC-82...
- Page 45 SC-82...
-
Page 46: Service Mode
Digital Power abnormality is detected. [ ↑ ] [↓] Display number of times B REG power supply B E R R failure is detected. [ ↑ ] [↓] Display number of times B REG conductivity C E R R failure is detected. SC-82... - Page 47 1 kHz square wave. If the square wave is output, ↓ 5-15 sec the CEC line is considered to be normal. Power OFF (All zone OFF) FAN TEST : The function for making the FAN to be forced to rotate. SC-82...
-
Page 48: Disassembly
Before turning the unit ON, be sure to ground the marked points with the Chassis /65. Or, you may short-circuit the ground points on the solder surface, using pieces of wire. Screws for Rear Panel BBZ30P080FTB BMZ30P040FTB BPZ30P100FTC ABA7078 SC-82 only SC-82 only SC-82... - Page 49 15P FFC of the blue arrow and then fix the Binder. ∗6 ∗4 7P cable (ADX7776) V-REG_S ASSY ∗6 2P cable (ADX7760) MIC HP GUARD ASSY 39P FFC V-REG_S ASSY ∗3 ∗7 Front ∗5 FRONT HDMI USB ASSY Front SC-82...
- Page 50 D-AUDIO BRIDGE ASSY ∗8 Front 7P cable (ADX7776) ∗12 MIC HP GUARD ASSY (8) Remove the four screws. SC-82: BBZ30P060FCC SC-81: BBZ30P080FCC 31P FFC (9) Cut the two Binders. (10) Disconnect the connector. 7P Housing ∗13 Notes on assembling ∗12: Bind the HDMI Cable (ADX7777), 7P Housing (ADX7814) and 7P cable (ADX7776) as numerical order of blue numbers.
- Page 51 (11) Remove the two screws. (BBZ30P080FTB) (12) SC-82: Remove the four screws. (ABA1193) SC-81: Remove the two screws. (BBZ30P080FTB) (13) Remove the three screws. SC-82: BBT30P080FCC SC-82 only • Bottom View SC-81: BBZ30P080FCC (14) Unhook the two hooks. Front Section (15) Remove the Front Section.
- Page 52 ∗19: 15P FFC (ADD7790) pass to the slit of the AUDIO ASSY BINDFAN CABLE_S ASSY, so that it doesn’t touch to the other cables and Heat CN2503 Sink. CN7554 15P FFC 15P FFC PF05PG-S20 ∗19 V-REG_S ASSY ∗19 A-REG_S ASSY CN7502 BINDFAN CABLE_S ASSY Heat Sink Front SC-82...
- Page 53 (15) Remove the Insulating Sheet /63 (with the x 23 seven Cushion Circle 14Bs). (16) Remove the five screws. (BPZ30P100FTC) (17) Remove the 23 screws. (BBZ30P080FTB) (18) Remove the AC Inlet. (19) Unhook the hook. DIGITAL MAIN_L ASSY Right Angle 85 (MTL) Front SC-82...
- Page 54 (6) Connect the 4P PH Housing ASSY extension CN601 jig cable. (GGD1809) (V-REG_S CN7554 <-> COMPONENT PF04PG-S10) 4P PH Housing ASSY extension jig cable (GGD1809) 31P FFC 15P FFC 15P FFC extension jig cable (GGD1680) CN7010 CN7010 INTERFACE_S ASSY INTERFACE_S ASSY SC-82...
- Page 55 (12) Connect the Rear Panel to the Chassis /65 Rear Panel Ground and GND point of the D AMP_SS ASSY. (Refer to the “Ground Points” for the GND point of the D AMP_SS ASSY.) Chassis /65 D AMP_SS ASSY SC-82...
- Page 56 (11) Remove the Cover /IR. Note on assembling : Cover /IR To attach the Cover /IR and the IR BUFFER_S ASSY in the correct position, refer to the “[2] Attach the Cover /IR and IR BUFFER_S ASSY” of “Assembling of Digital Amplifier Block”. SC-82...
- Page 57 (with the IR BUFFER_S ASSY) to the Rear Panel, using the screw. (BBZ30P080FTB) (2) Attach the PRE BRIDGE_S ASSY. BUFFER GND ASSY IR BUFFER_S ASSY PRE BRIDGE_S ASSY Front (3) Attach the PRIMARY ASSY, using the two screws. (BSZ30P060FCC) PRIMARY ASSY Angle /PRI Front SC-82...
- Page 58 (Refer to the step (5) to (3) of “[3-2] Diagnosis”.) Front IR INTERFACE_S ASSY CN4003 (2) Remove the IR INTERFACE_S ASSY. CN4002 (3) Disconnect the five connectors. (4) PuII out the cables from the holes. CN4001 D AMP_SS ASSY 19P FFC INTERFACE_S ASSY CN7006 Front SC-82...
- Page 59 D AMP_SS ASSY. (11) Remove the four Heat Sink Spacer (PLS)s. Note on assembling : To attach the D AMP_SS ASSY in the correct position, refer to the “[1] Attach the D AMP_SS ASSY” of “Assembling of Digital Amplifier Block”. SC-82...
- Page 60 ∗28: PCB binders tilt in the direction of the blue arrow. ∗29: Bind the HDMI Cable (ADX7777) and 7P Housing (ADX7814) as numerical order of ∗30 HDMI Cable blue numbers. Front ∗30: This PCB binder press only 31P FFC (ADD7786). SC-82...
- Page 61 DIGITAL MAIN_L ASSY (with the OPT Front COAX_S ASSY). CN901 DIGITAL MAIN_L ASSY [4-2] Diagnosis DIGITAL MAIN_L ASSY (1) Arrange the DIGITAL MAIN_L ASSY (with the OPT COAX_S ASSY) as shown in the photo. (2) Insert the Insulation Sheet. OPT COAX_S ASSY Insulation Sheet SC-82...
- Page 62 DIGITAL MAIN_L ASSY Screwdriver Front FILTER_S ASSY [5] FILTER_S ASSY AUDIO ASSY Remove the Bonnet 65 by removing the 18 screws. D-FILTER BRIDGE_S ASSY ----------------------------------------------------------------- [5-1] FILTER_S ASSY Front (1) Remove the D-FILTER BRIDGE_S ASSY. (2) Remove the A-DAC BRIDGE ASSY. SC-82...
- Page 63 27P board to board extension jig cable (GGD1873) 15P board to board extension jig cable (GGD1876) 20P board to board extension jig cable (GGD1868) CN7184 CN3791 28P board to board extension CN7183 CN3793 jig cable (GGD1867) D-FILTER BRIDGE_S ASSY A-DAC BRIDGE ASSY SC-82...
- Page 64 (BBZ30P080FTB) (4) Attach the D AMP_SS ASSY, using the five screws. (BBZ30P060FCC) Front D AMP_SS ASSY (5) Remove the five screws temporarily fixed in accordance with step (2) and (3). (BBZ30P080FTB) (6) Remove the Rear Panel (with other ASSY). SC-82...
- Page 65 (1) Allocate the Cover /IR. Don’t fix it with screws. (2) Allocate the IR BUFFER_S ASSY (with the BUFFER GND ASSY) and connect the two connectors. Don’t fix it with screws. IR BUFFER_S ASSY Cover /IR BUFFER GND ASSY SC-82...
- Page 66 Note: Secure the screws for fixing the Cover /IR without using the electric screwdriver, but manually. IR BUFFER_S ASSY (11) Attach the screw. (BPZ30P080FNI) Cover /IR Refer to the step (6) to (1) of “[3-1] Remove the Cover /IR” of “Disassembly” henceforth. SC-82...
- Page 67 (Power Transformer <-> PRIMARY ASSY). cable P WIRE GUARD_S ASSY Power Transformer PRIMARY ASSY ∗4 Front Direction of Insulator (1) Align the mark at under surface of the Insulator with the direction of photo. Insulator mark • Bottom view SC-82...
-
Page 68: Each Setting And Adjustment
• Q4301,4302 ( IRF6775MPBFS1-TRB IRF6775MPBFS1-TRB • Q4401,4402 ( • Q4501,4502 ( IRF6775MPBFS1-TRB • Q4601,4602 ( IRF6775MPBFS1-TRB • Q4701,4702 ( IRF6775MPBFS1-TRB DISPLAY ASSY After replacing IC6001(R5F100MHAFA-K), perform "8.3 REGION WRITING" and then, update to the latest firmware. Other assemblies No adjustment required SC-82... -
Page 69: How To Save And Load The Setting Using Backup Function With Usb Memory
No setting file Mismatching between the setting file and the specification of the A/V RECEIVER type to be loaded back Error due to Checksum, Signature Check, and Size Check Ejecting of USB device (during reading of the setting file) SC-82... -
Page 70: Region Writing
Region Writing finished 5. Pull out the AC cord. S C - 8 1 / C U X J [Cautions] Writing of destination is not completed until the BridgeCo software starts. It takes about 35 seconds before the BridgeCo software starts. SC-82... -
Page 71: How To Update Firmware
3. Connect the USB Memory to the USB terminal (A type) of the front panel. [Procedures] 1. While holding down "TUNE↑" key on the front panel, press "STANDBY ON/OFF" key and moves to the UPDATE PANEL mode. 2. The updating process is as follows. SC-82... - Page 72 Update Confirmation U P D A T E [PRESET ← ] [←] [→] Update Confirmation U P D A T E Y E S [ENTER] File searching A c c e s s i n g UPDATE FILE searching completed SC-82...
- Page 73 Time required for updating varies, because only the programs that require updating will be updated. [Confirmation] Enter UPDATE PANEL mode and check that the programs have been updated. [Cautions] You cannot perform an update until the BridgeCo software starts. It takes about 35 seconds before the BridgeCo software starts. SC-82...
-
Page 74: Exploded Views And Parts List
Screws adjacent to b mark on product are used for disassembly. For the applying amount of lubricants or glue, follow the instructions in this manual. (In the case of no amount instructions, apply as you think it appropriate.) 9.1 PACKING SECTION SC-82... - Page 75 9 Caution Sheet /UPDATE INF ARM7171 20 Caution Card /HDMI EB ARM7175 10 CD-ROM /SLU ARU7067 (2) CONTRAST TABLE SC-82 and SC-81 are constructed the same except for the following: SC-82 SC-81 Mark No. Symbol and Description 17 Packing Case AHD8853...
-
Page 76: Exterior Section
FRONT HDMI USB ASSY CONPONENT FRONT HDMI F´ CN8001 ASSY JP8402 USB ASSY Refer to JA8003 “9.5 FRONT SECTION” SC-82 MIC HP ASSY CN3472 only Double side tape 10 x 110mm INTERFACE_S DISPLAY ASSY ASSY CN7012 JP6001 DISPLAY ASSY CN6001... - Page 77 NSP 17 Panel Stay 85 (MTL) ANG7684 18 Insulator AMR7198 19 Cushion /T12 AEB7441 20 Push Rivet AEC7071 (2) CONTRAST TABLE SC-82 and SC-81 are constructed the same except for the following: Mark No. Symbol and Description SC-82 SC-81 26 Screw ABA1193 BBZ30P080FTB 28 Screw...
-
Page 78: Rear Section
9.3 REAR SECTION FRONT HDMI USB ASSY CN8001 Case of SC-81 A-REG_S ASSY CN7502 Acetate Tape V-REG_S ASSY CN7554 Power Transformer Refer to “9.4 CHASSIS SECTION” SC-82 only SC-82... - Page 79 39 Hex Head Screw 2.85 X 7 ABA7078 19 Fuse (FU4 : 2A) REK1139 > 20 Fuse (FU1 : 10A) REK1154 (2) CONTRAST TABLE SC-82 and SC-81 are constructed the same except for the following: SC-82 SC-81 Mark No. Symbol and Description AUDIO ASSY AWX1756 AWX1759...
-
Page 80: Chassis Section
9.4 CHASSIS SECTION Tape Tape Accessory of Panel Base Cleaning paper GED-008 IR REG_S ASSY JP7291 IR REG_S ASSY CN7401 IR REG_S ASSY CN7251 IR REG_S ASSY CN7271 IR REG_S ASSY CN7241 SC-82... - Page 81 ANG7746 40 Screw IBZ30P150FCC 20 PCB Mold (PP) AMR2533 41 Binder (BK-1) ZCA-BK1 (2) CONTRAST TABLE SC-82 and SC-81 are constructed the same except for the following: SC-82 SC-81 Mark No. Symbol and Description INTERFACE_S ASSY AWX1871 AWX1974 D AMP_SS ASSY...
-
Page 82: Front Section
CN7553 V-REG_S ASSY CN7903 V-REG_S ASSY DIGITAL MAIN_L ASSY CN7663 CN9202, CN9502 DIGITAL MAIN_L ASSY ∗1 JA9620 Accessory of SC-82 only Panel Base Double side tape 15mm Accessory of Panel Base Double side Double side tape tape 20mm ∗2 USB RECT_S ASSY CN3652 ∗2... - Page 83 18 Door Base 85 (PLS) AMR7565 19 Door Plate LX55 (MTL) ANG7682 20 Damper ASSY (240) LX AXA7156 (2) CONTRAST TABLE SC-82 and SC-81 are constructed the same except for the following: SC-82 SC-81 Mark No. Symbol and Description MIC HP ASSY AWX1724...
Need help?
Do you have a question about the SC-82 and is the answer not in the manual?
Questions and answers