Chapters
Table of Contents

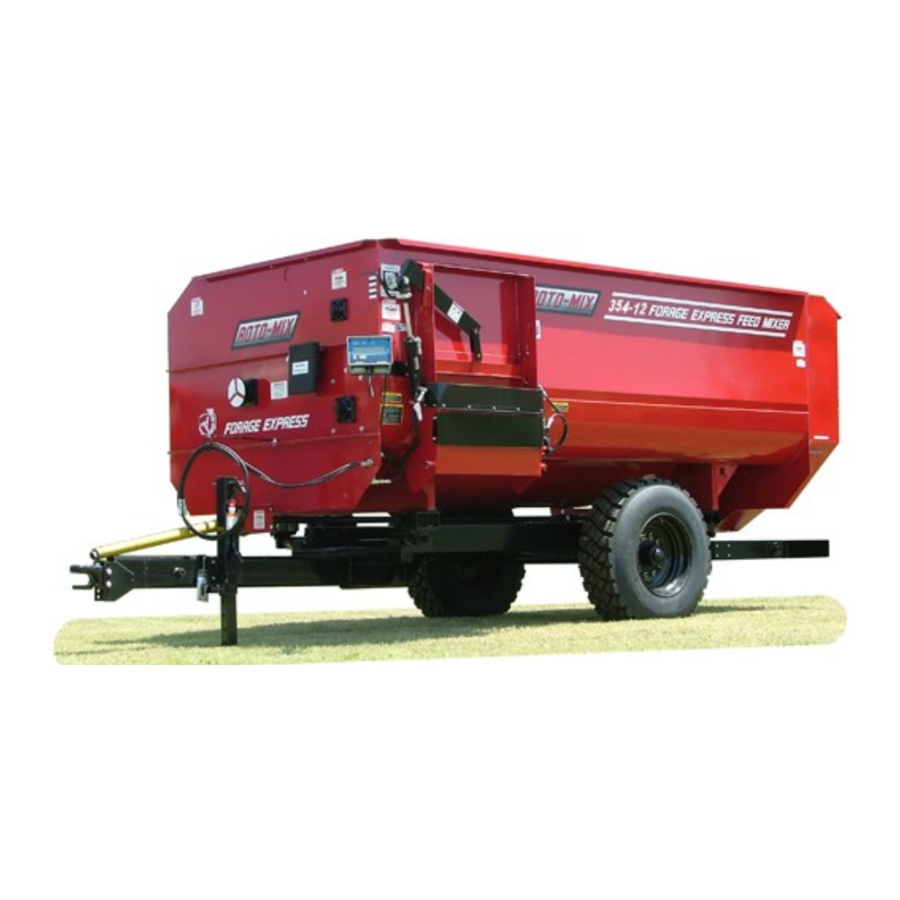
Related Manuals for Roto-Mix 354-12


Summary of Contents for Roto-Mix 354-12
- Page 1 354-12, 354-12B FEED MIXER OPERATION AND PARTS MANUAL ROTO-MIX P.O. BOX 1724 2205 E. Wyatt Earp Blvd. Dodge City, Kansas 67801 (620) 225-1142 © ROTO-MIX 2006 SERIAL NUMBER ____________ 441904 06/2021 Printed in U.S.A.
-
Page 2: Table Of Contents
354-12 SPECIFICATIONS ........................25 PTO CHART ............................26 354-12 STATIONARY DIMENSIONS ..................... 27 354-12 TRAILER DIMENSIONS ......................28 354-12 TRAILER DIMENSIONS (W / CONVEYOR) ................29 354-12 TRUCK DIMENSIONS ........................ 30 354-12 MOUNTING DIMENSIONS ......................31 TRUCK HYDRAULIC SHCEMATIC ......................32 JOYSTICK ASSEMBLY .......................... -
Page 3: Warranty
ROTO-MIX and that it be returned to ROTO-MIX within 10 days of purchase and be re- corded in ROTO-MIX’s owner file for this warranty to be valid. In the event an owner’s card is not on file at the ROTO-MIX office, the warranty period will extend only from date equipment was picked up or shipped from the ROTO-MIX plant. -
Page 4: Scales Warranty & Service Policy
- ROTO-MIX is not responsible and will not be liable for damage caused to persons or property, commercial loss, loss of time or production, loss of use by reason of the installation or use of ROTO-MIX products or their mechanical failure. -
Page 5: Operator Qualifications
OPERATOR QUALIFICATIONS Operation Of this mixer/feeder shall be limited to competent and experienced persons. In addition, anyone who will operate or work around a mixer/feeder must use good common sense. In order to be qualified, he or she must also know and meet all other qualifications, such as: 1. - Page 6 SAFETY TAKE NOTE! THIS SAFETY ALERT SYMBOL FOUND THROUGHOUT THIS MANUAL IS USED TO CALL YOUR ATTENTION TO INSTRUCTIONS INVOLVING YOUR PERSONAL SAFETY AND THE SAFETY OF OTHERS. F AILURE TO FOLLOW THESE INSTRUCTIONS CAN RESULT IN INJURY OR DEATH. THIS SYMBOL MEANS -ATTENTION! -BECOME ALERT!
- Page 7 SAFETY FIRST REMEMBER: The careful operator is the best operator. Most accidents are caused by human error. Certain precautions must be observed to prevent the possibility of injury or death. DO NOT ALLOW PERSONNEL OTHER THAN THE QUALIFIED OPERATOR NEAR THE MACHINE. NEVER START MACHINE UNTIL ALL GUARDS AND SAFETY SHIELDS ARE IN PLACE.
- Page 8 EQUIPMENT SAFETY GUIDELINES Safety of the operator is one of the main concerns in designing and developing a new piece of equipment. Designers and manufactures build in as many safety features as possible. However , every year many accidents occur which could have been avoided by a few seconds of thought and a more careful approach to handling equipment.
- Page 9 KEEP ALL SHIELDS IN PLACE Do not operate mixer/feeder without safety shields in place. Rotating parts can crush or dism ember causing personal injury or death. Disconnect PTO driveline before removing shields for adjustment or service. OPERATE MIXER/FEEDER SAFELY Rotating parts can ent angle or stri ke people, resulting in personal injury or death.
- Page 10 STAY CLEAR OF ROTATING DRIVELINES Entanglement in rotating driveline can cause serious injury or death. Keep tractor m aster shield and dr iveline shields in place at all times. Make sure rotating shields turn freely. Wear close f itting clothing. St op the engine and be sure PT driveline is stopped bef ore making adjustments, connections, or cleaning out PTO driven equipment .
- Page 11 PREPARING TRACTOR FOR TRAILER MIXER POSITIONING DRAWBAR IMPORTANT: Drive components can be damaged from excessive speed. Under no circumstances should a feed mixer equipped with 540 RPM be operated by a tractor with 1000 RPM PTO. Feed mixers are available with either 540 or 1000 RPM driveline.
- Page 12 SAFETY SIGNS (C) #440819 (A) #440827 (D) #440818 (E) #440826 (B) #4408321...
- Page 13 SAFETY SIGNS (A) #440828 (C) #440826 (B) #440831...
- Page 15 Replace safety decals and signs that are missing or have become illegible. Replaced parts that displayed a safety sign should also display the current sign. Safety decals or signs are available from your dealer or the ROTO-MIX manufacturing plant. How to Install Safety Decals: Be sure that the installation area is clean and dry .
- Page 16 Your best assurance against accidents is a careful and responsible operator . If there is any portion of this manual or function you do not understand, contact your dealer or the ROTO-MIX plant. BEFORE OPERATION: Carefully study and understand this manual.
- Page 17 DURING OPERATION: Beware of bystanders, particularly children! Always look around to make sure that it is safe to start the engine of the towing vehicle or move the unit. This is particularly important with higher noise levels and quiet cabs, as you may not hear people shouting. NO PASSENGERS ALLOWED - Do not carry passengers anywhere on, or in, the tractor or equipment, except as required for operation.
- Page 18 DURING OPERATION (CONT.) Never leave running mixer/feeder unattended. As a precaution, always recheck the hardware on mixer/feeder following every 100 hours of operation. Correct all problems. Follow the maintenance safety procedures. FOLLOWING OPERATION: Following operation, or when unhitching, stop the tractor or towing vehicle, set the brakes, disengage the PTO and all power drives, shut off the engine and remove the ignition keys.
- Page 19 HIGHWAY AND TRANSPORT OPERATIONS (CONT.): Comply with state and local laws governing highway safety and movement of farm machinery on public roads. Use approved accessory lighting flags and necessary warning devices to protect operators of other vehicles on the highway during daylight and nighttime transport. The use of flashing amber lights is acceptable in most localities.
- Page 20 If equipment has been altered in any way from original design, ROTO-MIX does not accept any liability for injury or warranty .
- Page 21 READ THE FOLLOWING BEFORE WELDING ON THIS MIXER/FEEDER When welding on your mixer/feeder , do not allow the current to flow through the ball bearings or the roller chains. Ground directly to the item being welded. Always disconnect the scale instrumentation from the weigh bars or load cells and the power source. Be sure the current does not pass through weigh bars or load cells or scale indicator .
-
Page 22: Operation
ALWAYS USE DRY HAY Drain rain water out of mixer before use. 1” of rain in a 354-12 equals (54 gal) 440 lbs. of water which will increase the moisture in 1000 lbs. of dry hay (12%) to 38% moisture or 500 lbs. of dry hay to 53% moisture. - Page 23 LOADING INSTRUCTIONS FOR HA Y PROCESSOR Load all commodities except liquids on the discharge (auger) side with the hay pan in the raised position. The raised hay pan does not affect the mixing action 1. If molasses and/or liquid protein is used, load on the rotor side of the mixer first with the mixer not running.
-
Page 24: Lubrication Chart
LUBRICATION CHART DISENGAGE PTO & SHUT OFF POWER BEFORE LUBRICA TING THE MACHINE. LOOSE OR FLOPPY CLOTHING SHOULD NOT BE WORN BY THE OPERATOR. OIL BATH: Fill the oil bath with 30 weight motor oil to sight plug level. GREASE BANK: Grease every 100 hours. FRONT END BEARINGS: Grease every 100 hours. -
Page 25: 354-12 Specifications
354-12 SPECIFICATIONS Capacity (Cu. ft.)............350 Struck level capacity (Cu. ft.)......... 400 Top Auger Bearing (Front) ..........1-3/4” 4-Bolt Top Auger Bearing (Rear) ..........2-1/2” 4-Bolt Bottom Auger Bearing (Front)........2-3/16” 4-Bolt Bottom Auger Bearing (Rear)......... 3” 4-Bolt Rotor Bearing (Front) ............ 2-7/16” 4-Bolt Rotor Bearing (Rear) ............. -
Page 26: Pto Chart
PTO CHART 354-12 INPUT JACKSHAFT (% ENGINE SPEED) SPROCKET SPROCKET 17 Tooth 42 Tooth STANDARD 15 Tooth 42 Tooth TRANS 17 Tooth 54 Tooth 15 Tooth 54 Tooth AUTOMATIC 2:1 Gearbox 16 Tooth 42 Tooth TRANS 18 Tooth 42 Tooth... -
Page 27: 354-12 Stationary Dimensions
OPTIONAL HAY PROCESSOR 53 1/2" 64 1/2" 78" 2" 24 1/2" 13 1/2" APPROX. WEIGHT, LESS MOT OR 354-12 STATIONARY - 7,100 LB. 24" 47 1/2" 20 1/2" WITH HAY PROCESSOR - 7,700 LB 146 1/2" 2 1/2" 144" 17"... -
Page 28: 354-12 Trailer Dimensions
354-12 TRAILER DIMENSIONS 102 1/2" OVERALL SPOUT UP HEIGHT DIMENSIONS BASED 100 1/2" ON 44” OD TIRE 92" APPROXIMATE WEIGHT 354-12 ON TRAILER - 8,200 LBs 22 1/2" OPTIONAL HAY PROCESSOR W / HAY PROCESSOR - 8,800 LBs 2" 40"... - Page 29 354-12 TRAILER DIMENSIONS (WITH CONVEYOR) 118 3/4" 116" 98 1/2" 92" OPTIONAL HAY 40" 22 1/2" PROCESSOR 2" CONVEYOR WEIGHT 24”..330 LB’s 36”..415 LB’s 48”..500 LB’s 42" 30" 31" 29" 55" 49" 43" 39" - 41" 46"...
-
Page 30: 354-12 Truck Dimensions
18” 10” 15” HEIGHT DIMENSIONS BASED 106" ON 36” TRUCK FRAME WITH 17” SPOUT 52" APPROXIMATE WEIGHT 354-12 ON TRUCK - 7,000 LBs W / HAY PROCESSOR - 8,100 LBs 96" 161 1/2" 2" 2 1/2" 144" 4 3/4" 105"... -
Page 31: 354-12 Mounting Dimensions
354-12 MOUNTING DIMENSIONS AUGER SIDE OF PEDESTAL 46" TRAILER 11" 34" TRUCK 15" All Dimensions & Specifications are Approximate and Subject to Change Without Notice. - Page 32 PARTS PAGES TABLE OF CONTENTS DESCRIPTION PAGE # TRUCK HYDRAULIC SCHEMATIC -------------------------------------------------------------------------- 33 JOYSTICK ASSEMBLY ------------------------------------------------------------------------------------------ 34 WIRING SCHEMATIC FOR DISCHARGE DOOR -------------------------------------------------------- 35 SPOUT ASSEMBLY -------------------------------------------------------------------------------------------- 36-37 CHAIN CONVEYOR ASSEMBLY --------------------------------------------------------------------------- 38-39 CHAIN CONVEYOR HYDRAULIC ASSEMBLY ----------------------------------------------------------- 40 STAGGERED ROTOR ASSEMBLY -------------------------------------------------------------------------- 41 3 ARM ROTOR ASSEMBLY ---------------------------------------------------------------------------------- 42-43 5 ARM ROTOR ASSEMBLY ---------------------------------------------------------------------------------- 44-45 TOP &...
-
Page 33: Truck Hydraulic Shcematic
TRUCK HYDRAULIC SCHEMATIC NOTE “A” NOTE “B” NOTE “C” NOTE “D” NOTE A - CONNECT TO DOOR CYL. BASE NOTE B - CONNECT TO DOOR CYL. ROD END NOTE C - CONNECT TO SPOUT CYL. BASE NOTE D - CONNECT TO SPOUT CYL. ROD END ITEM# PART# DESCRIPTION... -
Page 34: Joystick Assembly
JOYSTICK ASSEMBLY TOP SIDE BOTTOM SIDE TO 12 VOLT GREEN WIRE RED WIRE RED WIRE YELLOW WIRE YELLOW WIRE BROWN WIRE BROWN WIRE REF # PART # DESCRIPTION QTY. 185575 JOYSTICK BRACKET 357705 JOYSTICK SWITCH 781056 SWITCH WIRE ASSEMBLY... -
Page 35: Wiring Schematic For Discharge Door
WIRING SCHEMATIC FOR DISCHARGE DOOR TO 12 VOLT BROWN GREEN YELLOW GREEN YELLOW HYDRAULIC VALVES STARTER TO BATTERY BROWN HYDRAULIC VALVES ITEM# PART# DESCRIPTION QTY. 780081 JOYSTICK SWITCH PANEL ASSEMBLY 362152 HYDRAULIC POWER UNIT VALVE, 12V DC 90 DEG. 1/4”MP x 1/4”FPSW - 1/8” ORIFICE 368010 781247 HYDRAULIC UNIT WIRE ASSEMBLY, 12V DC... -
Page 36: 17" Spout Assembly
17" SPOUT ASSEMBLY 9 11 9 11 9 11... - Page 37 17" SPOUT ASSEMBLY ITEM # PART # DESCRIPTION QTY. 150150 SPOUT RUBBER END PLT 150299 SPOUT MAGNET GUARD 8" x 51-3/4" 150159 SPOUT MAGNET GUARD 8" x 39-1/2" 150383 SPOUT PIVOT TUBE 52-3/4" 150160 SPOUT PIVOT TUBE 40-3/4" 150384 SPOUT RUBBER, 6" x 57 1/2" 150161 SPOUT RUBBER, 6"...
-
Page 38: Chain Conveyor Assembly
CHAIN CONVEYOR ASSEMBLY... - Page 39 CHAIN CONVEYOR ASSEMBLY #781411 ....24”L x 36”W CONVEYOR ASSEMBLY #781410 ....36”L x 36”W CONVEYOR ASSEMBLY #781412 ....48”L x 36”W CONVEYOR ASSEMBLY ITEM# PART# DESCRIPTION QTY. 8 TOOTH #55 SPROCKET x 1”ID 160025 36”W CONVEYOR DRIVE SHAFT 188412 36”W CONVEYOR IDLER SHAFT 188413 RCJC 1”...
-
Page 40: Chain Conveyor Hydraulic Assembly
CHAIN CONVEYOR HYDRAULIC ASSEMBLY TO MOTOR PORT A TO CONV FRONT TRACTOR DOWN TRACTOR END SHEET TO MOTOR PORT B TO CONV UP CONVEYOR CYLINDER ITEM# PART# DESCRIPTION QTY. 160025 CONVEYOR MOTOR PLATE WELDMENT 3/8” X 125” HYD. HOSE ASSY. (3/8”MP ENDS) 188412 1/2”... -
Page 41: Staggered Rotor Assembly
354-12B STAGGERED ROTOR ASSEMBLY ITEM # PART # DESCRIPTION QTY. 190473P PLASTIC WIPER 190474 WIPER CHANNEL 10-3/16"x27-3/4" 400908 HEX CROWN LOCNUT 1/2"-13 #9 400914 HHCS CROWN LOCK 7/8"-9 GRD 5 PLTD 401106 HEX NUT, 3/8"-16 NYLOC #5 PLTD 402408 WASHER, FLAT 1/2" MED PLTD 402806 FLAT WASHER 3/8"... -
Page 42: Arm Rotor Assembly
354-12B 3 ARM ROTOR ASSEMBLY AFTER SERIAL #890473440 ITEM # PART # DESCRIPTION QTY. 150013 WIPER STRAP 90 1/2" 150014 END WIPER STRAP 19 1/4"19.250 150015 PLASTIC WIPER 2-1/2" x 94-1/2" 150016 END PLASTIC WIPER 2-1/2" x 22-1/2" 400910 HEX CROWN LOCNUT 5/8"-11 #9 PLTD 400914 HEX CROWN LOCK 7/8"-9 GRD 5 PLTD 401106... - Page 43 354-12 3 ARM ROTOR ASSEMBLY BEFORE SERIAL #890473440 END WIPER ASSY. #750093 CTR WIPER ASSY. #750150 ITEM# PART# DESCRIPTION QTY. 150013 CENTER WIPER STRAP 150014 END WIPER STRAP 150015 CENTER PLASTIC WIPER 150016 END PLASTIC WIPER 150025 ROTOR DRIVESHAFT 150031...
- Page 44 HHCS 5/8/11 x 5-1/2" #5 PLTD 406502 HHCS 7/8"-9 x 3" GRD 8 410005 SPRING, COMPRESSION, 2 1/2" x 24" x .41" 750004 354-12 WIPER ASSEMBLY (Includes Items 1,2,3,4,7,8 & 14) 850006 354 WIPER TUBE WELDMENT 850006 12 FT WIPER WA 850007...
- Page 45 354-12 5 ARM ROTOR ASSEMBLY BEFORE SERIAL #890473440 CTR WIPER ASSY. #750004 ITEM# PART# DESCRIPTION QTY. 150013 CENTER WIPER STRAP 150014 END WIPER STRAP 150015 CENTER PLASTIC WIPER 150016 END PLASTIC WIPER 150025 ROTOR DRIVESHAFT 150031 ROTOR HUB SPACER SLEEVE KEY, RECTANGULAR, 5/8”...
- Page 46 354-12 STANDARD TOP & BOTTOM AUGER ASSEMBLY FROM SERIAL #890473440 REF. NO PART NO. DESCRIPTION QTY. 850257 TOP AUGER W.A............1 A. 382024 20” OD x 6-5/8” ID x 1/4” RH 14” PITCH FLT....6 B. 382026 20” OD x 6-5/8” ID x 3/8” RH 14” PITCH F ....2 C.
- Page 47 354-12 ST ANDARD T OP & BOTT OM 354-12 ST ANDARD T OP & BOTT OM AUGER ASSEMBLY AUGER ASSEMBLY BEFORE SERIAL #890473440 REF. NO PART NO. DESCRIPTION QTY. 850257 TOP AUGER W.A..............1 382024 20” OD x 6-5/8” ID x 1/4” RH 14” PITCH FL T......6 382026 20”...
- Page 48 354-12 OPTIONAL TOP & BOTTOM AUGER ASSEMBLY REF. NO PART NO. DESCRIPTION QTY. 850096 TOP AUGER 3/8” FLIGHT W.A........1 382026 FLIGHT RH 20” OD x 6-5/8” ID x 3/8” x 14” PITCH ..8 150126 TOP AUGER PADDLE ............ 3 850257B TOP AUGER DOUBLE FLIGHT W.A.
-
Page 49: Scale Indicator Assembly
354-12B SCALE INDICATOR ASSEMBLY ITEM# PART# DESCRIPTION QTY. 184283 TRAILER HOSE CARRIER CABLE CLAMP 3/8” 402205 850048 SCALE INDICATOR ARM WELDMENT HHCS 3/8”-16 X 3” 405661 NYLOCK HEX NUT 3/8”-16 401106 SCALE HINGE WASHER 185493 850047 SCALE INDICATOR PLATE WELDMENT... -
Page 50: Oil Bath Door Assembly
354-12B OIL BATH DOOR ASSEMBLY 19 2 11 13 13 15 11 13 14 ITEM # PART # DESCRIPTION QTY. 189503 CAM ROD SPACER 351056 RUBBER BULB SEAL 5/32" 370316 CAM LOCK TOP PLATE 370317 CAM LOCK BOTTOM PLATE 370319 CAM LOCK HANDLE 370320 HANDLES CAM LOCK... -
Page 51: Discharge Door Assembly
354-12B DISCHARGE DOOR ASSEMBLY ITEM# PART# DESCRIPTION QTY. 150049 DOOR ARM 150385 DOOR MARKER BAR (TRAILER) 184259 DOOR CYLINDER MARKER PLATE (TRUCK) 184267 DOOR CYLINDER MARKER CLAMP FLAT WASHER 3/4” SAE 402512 COTTER PIN 5/32” X 1 1/4” 404003 CLEVIS PIN 3/4” X 2” 404350 HYDRAULIC CYLINDER 2”... -
Page 52: Hand Wheel Assembly
354-12 HAND WHEEL ASSEMBLY ITEM# PART# DESCRIPTION QTY. GEAR S1020 X 1” BORE 1185114 150244 HAND WHEEL BEARING BLOCK UHMW 150387 HAND WHEEL SHAFT 189105 BEARING BRAKE BLOCK UHMW 189106 HAND KNOB BOLT SUPPORT 189112 BRAKE ARM FLANGE BEARING VCJT 1” 2-BOLT 340216 CARRIAGE BOLT 3/8”-16 X 3”... -
Page 53: Lower Auger Float Assembly
354-12B LOWER AUGER FLOAT ASSEMBLY ITEM# PART# DESCRIPTION QTY. 150418 BEARING SLIDER PLASTIC 150764 FLOATING AUGER SHIELD 400206 HEX NUT 3/8"-16 #5 PLTD 400210 HEX NUT 5/8"-11 #5 PLTD 400610 HEX JAM NUT # 5 PLTD 5/8"-11 402006 SPRING LOCK WASHER 3/8" MED PLTD 402010 SPRING LOCK WASHER 5/8"... - Page 54 354-12B FRONT END ASSEMBLY FROM SERIAL #890473440 TO CURRENT ITEM # PART # DESCRIPTION QTY. 185258 ROTOR PLATE INDICATOR, 15/16" OD 340427 1 3/4" - 4 BOLT FLANGE BRG F3W228U 340436 BEARING 2 3/16" FAFNIR 340437 FAFNIR 2 7/16" BEARING 400208 HEX NUT 1/2"-13 #5 PLTD 400210...
-
Page 55: Front End Assembly
354-12 FRONT END ASSEMBLY BEFORE SERIAL #890473440 ITEM# PART# DESCRIPTION QTY. FLANGE BEARING VCJ 1 3/4” 4-BOLT 340428 FLANGE BEARING RCJ 2 3/16” 4-BOLT 340435 FLANGE BEARING RCJ 2 7/16” 4-BOLT 340438... - Page 56 354-12B TRUCK LOAD CELL SCALE KIT 7 7 10 10 14 ITEM # PART # DESCRIPTION QTY. 182881 SCALE MOUNT MIXER PLATE 182915 LOAD CELL CAGE PLATE 182998 BRACKET, TRUCK FRAME, 8 185997 SCALE PAD 190075 DIGI-STAR LOAD CELL SUPPORT PT 400210 HEX NUT 5/8"-11 #5 PLTD 400212...
-
Page 57: Trailer Weigh Bar
354-12 TRAILER WEIGH BAR SCALE FRAME ASSEMBLY REF. NO PART NO. DESCRIPTION QTY. 872169 WEIGH BAR MOUNT – 2 1/8” ......... 4 850070 WEIGH BAR RISER BLOCK (OPTIONAL) ...... 4 185609 WEIGH BAR MOUNTING PAD ........4... -
Page 58: Trailer Frame Assembly
TRAILER FRAME ASSEMBLY REF NO. PART NO. DESCRIPTION QTY. 651024 PERFECT HITCH KIT (INCLUDES BOTH PARTS) .... 1 374100 CAT. –3 BASE HITCH BODY..........1 374101 CAT. – 3 CLEVIS INSERT ............1 374002 JACK 5,000 LB ................. 1 JACK 9,000 LB DROP LEG TYPE (OPTIONAL) ....1 780904 850578 TRAILER TONGUE W.A. - Page 59 354-12B STATIONARY LOAD CELL SCALE FRAME ASSEMBLY ITEM# PART# DESCRIPTION QTY. 872019 STATIONARY SCALE FRAME LOAD CELL W.A. 870519 MIXER SCALE CHECK 182915 LOAD CELL CAGE PLATE 185124 RUBBER SCALE PAD 182881 SCALE MOUNT MIXER PLATE SCALE CHECK ROD W.A. 19 1/2” 870501 SCALE CHECK ROD W.A.
- Page 60 354-12B TRAILER, 12K HUB ASSEMBLY #372209A INCLUDES THESE PARTS AS AN ASSEMBLY ITEM # PART # DESCRIPTION QTY. 150117 SPINDLE, 3" DIA, 12,000 LB x 20" 342209 INNER BEARING 2-1/2" BORE 342210 BEARING, 1.75 BORE Tim #460 342211 INNER BEARING RACE 4-7/16"OD 342212 OUTER BEARING RACE 4-1/4"...
-
Page 61: Trailer Driveline
TRAILER DRIVELINE REF. NO PART NO. DESCRIPTION QTY. 338230 W2300 1 1/2” x 1 1/2” U-JOINT............2 185480 3/8” SQ. KEY x 2” LONG..............5 150644 DRIVELINE ..................1 185299 CARRIER BEARING ANGLE ............1 341024 1 1/2” PABCO BLOCK BEARING ............ 1 340225 1 1/2”... -
Page 62: Truck Driveline Assembly (Standard Transmission)
TRUCK DRIVELINE ASSEMBLY (STD. TRANSMISSION) TRUCK - OPPOSITE ENGINE ROT ATION PTO NO GEARBOX IS REQUIRED AT THESE PTO SPEEDS : GAS ENGINE 45% - 50% OF ENGINE SPEED DIESEL ENGINE 50% - 75% OF ENGINE SPEED IF ENGINE ROT ATION PTO IS USED. A GEARBOX IS REQUIRED TO CHANGE ROTATION 2 TO 1 GEARBOX - GAS ENGINE 85% OF ENGINE SPEED... -
Page 63: Truck Driveline Assembly (Automatic Transmission)
TRUCK DRIVELINE ASSEMBLY (AUTO TRANSMISSION) TRUCK - ENGINE ROT ATION PTO. A GEARBOX IS REQUIRED TO CHANGE ROTATION. 2 TO 1 GEARBOX - GAS ENGINE 85% OF ENGINE SPEED 2 TO 1 GEARBOX - DIESEL ENGINE 85% OF ENGINE SPEED REF. - Page 64 414-14 HUB CITY GEARBOX 2:1 #344022 SECTION A-A ITEM # PART # DESCRIPTION 310710 PIPE BUSHING, 1/2" x 1/8" GALV 310718 BREATHER PLUG, 1/8" PIPE 310798 PIPE PLUG, 1/2" INTERNAL HEX 344209 GEARBOX SEAL 1-3/4" CR 18039 344210 BEARING CONE 1-13/16" ID 18690 344211 BEARING CUP 3-1/8"...
-
Page 65: Lubrication Assembly
354-12 LUBRICATION ASSEMBLY REF. NO PART NO. DESCRIPTION QTY. 356001 1/8” NPTF X 3/16” COMP 90° ......... 14 310750 1/8” FPT GREASE ZERK ..........7 185045 3/16” COPPER GREASE LINE X 36” ......2 REAR JACKSHAFT BEARING FRONT JACKSHAFT BEARING 185547 3/16”... - Page 67 REF. NO PART NO. DESCRIPTION QTY. 330654 #60 B 54 RC SPROCKET........330607 #60 B 17H RC SPROCKET (20 & 25 HP)....1 330610 #60 B 15H RC SPROCKET (15 HP)....... 1 340228 VCJT 1-3/4” 2-BOLT FLANGE BEARING ....150716 ELECTRIC MOTOR INPUT SHAFT.......
- Page 68 ELECTRIC MOTOR SHAFT ELECTRIC MOTOR SHAFT...
- Page 69 REF. NO PART NO. DESCRIPTION QTY. 150716 ELECTRIC MOTOR INPUT SHAFT....... 150229 ELECTRIC MOTOR PIVOT PIPE......850200 MOTOR BASE WELDMENT (213T-254T)....1 850318 LEFT MOTOR BASE WELDMENT (213T-254T)..1 850311 ELECTRIC EXT. BELT SHIELD WELDMENT..750098 ELECTRIC EXT. BELT SHIELD DOOR ASSY..324004 5V-2 GROOVE 4.90”...
-
Page 71: 354 Drive Assembly (Before Serial #890473440)
354 DRIVE ASSEMBLY... -
Page 73: 354 Drive Assembly (From Serial #890473440)
354 DRIVE ASSEMBLY REF. NO PART NO. DESCRIPTION 342048 REX MB2300 4-BOLT FLANGE BEARING ......1 850508 #100 B 45 RC SPROCKET WELDMENT ......... 1 3” SHAFT SPACER 1/32” ............1 150033 1-3/4” SHAFT SPACER x 1/4” ..........2 150276 189723 #100 B 13H RC SPROCKET ............ -
Page 74: 354 Trailer Driveshaft
354-12 TRAILER DRIVESHAFT ASSEMBLY #338023 ITEM # PART # DESCRIPTION QTY. 338441 CROSS KIT 2300 338452 INBOARD YOKE I W2300 041318 338455 YOKE 1-3/8"-6 W2300 ASGE 338456 YOKE W2300 1-1/2" RB 338461 INNER PROFILE Ov W2300 013377 338462 OUTER PROFILE I W2300 050184... -
Page 75: 354-12 Truck Driveline (Front & Rear)
354-12 TRUCK DRIVELINE - REAR #338042 AUTOMATIC TRANSMISSION 1 3/4" 24 3/16" 25 3/16" 1 3/4" ITEM # PART # DESCRIPTION QTY. 338443 CROSS KIT 32mm x 76mm W2400 312410 338448 INNER PROFILE W2400 1B-021467 338449 Yoke 1-3/4"RD, W2400, 3/8"-16 Shear Bolt, 385559 - 383397... - Page 76 354-12 TRUCK DRIVELINE – REAR #780494 (STANDARD TRANSMISSION) REF. NO PART NO. DESCRIPTION QTY. 338053 DRIVESHAFT SPLINE TUBE ASSY. (SPICER) .....1 338422 YOKE 1 3/8” (SPICER) ..............2 338435 CROSS KIT (SPICER) ..............2 354-12 TRUCK DRIVELINE – FRONT #780486 (AUTO & STANDARD) TRANSMISSION) REF.
-
Page 77: Roto-Hay Processor Assembly
ROTO-HAY PROCESSOR ASSEMBLY REF. NO PART NO. DESCRIPTION QTY. 850058 HAY PAN FRONT BEARING WELDMENT……….. 1 850237 HAY PAN TUBE WELDMENT………………………. 1 850063 HAY PAN WELDMENT……………………………… 1 150198 BAFFLE PLUNGER UHMW………………………….1 850300 CROSS BAR WELDMENT………………………….. 1 850057 HAY PAN CENTER BEARING WELDMENT……… 1 872354 HAY PAN REAR BEARING WELDMENT…………. -
Page 78: Roto-Hay Processor (Cable Option)
ROTO-HAY PROCESSOR (CABLE OPTION) REF. NO PART NO. DESCRIPTION QTY. 850090 HAY PAN CABLE ARM WELDMENT……………… 1 150188 CABLE BAR……………………………………………2 150189 SLEEVE 1”OD x 13/16”……………………………… 1 412204 1/4” CABLE CLAMP………………………………… 2 150669 CABLE………………………………………………….1 850066 CABLE PULLEY BRACKET WELDMENT………… 1 850067 CABLE WINCH MOUNT PLA TE WELDMENT……. -
Page 79: Roto-Hay Processor (Hydraulic Option)
ROTO-HAY PROCESSOR (HYDRAULIC OPTION) REF. NO PART NO. DESCRIPTION QTY. 188226 FEEDER ELECTRIC CONTROL BRACKET……… 1 357702 PUSH BUTTON SWITCH 12V-2 POLE……………. 1 362207 SLD ADD ON VALVE VX-13D (TRUCK)…………... 1 780109 2” x 8” STRAIGHT DOOR CYLINDER ASSY……... 1 368007 3/8”MP x 3/8”FPSW 90°... - Page 80 354-12 FENDERS, FENDER MOUNT & MUD FLAPS ITEM # PART # DESCRIPTION QTY. 183087 MUD FLAP STRAP 354391 POLY FENDER 354392 POLY FENDER TUBING MOUNT KIT (2 per kit) 354393 POLY FENDER TAPER BRACKET KIT (2 per kit) 370200 ROTO-MIX MUD FLAP 24" x 30"...
- Page 81 FORAGE EXPRESS LADDER ASSY #950020 ITEM # PART # DESCRIPTION QTY. 150389 LADDER MOUNT ANGLE 5" 150390 LADDER MOUNT BRACKET 6 7/8" 190979 LADDER, FORMED 7 RUNG 400114 HEX NUT, 1/2-13 SERRATED FLANGE #5 400208 HEX NUT 1/2"-13 #5 PLTD 402008 SPRING LOCK WASHER 1/2"...
-
Page 82: Truck Cab Scale Indicator Frame Parts
TRUCK CAB SCALE INDICATOR FRAME PARTS 7 12 7 12 ITEM # PART # DESCRIPTION QTY. 185930 ARM REST PAD 12" 192578 ARM REST SLIDE BAR 192585 BRACKET, PASSENGER CAB SEAT 192587 SPACER, TRUCK CAB DRIVER'S SEAT 192593 PLATE, TRUCK CAB MOUNT SETTING 400107 HEX NUT, 3/8"-16 SERRATED FLANGE #5 400606... - Page 83 REAR BUMPER, 10", RECT. LIGHT HOLES #780948 ITEM # PART # DESCRIPTION QTY. 185600 TAIL LIGHT BRKT 192219 PLATE, FLR 10" RR BMPR ROTO-MIX 400107 HEX NUT, 3/8"-16 SERRATED FLANGE #5 400115 FLANGE NUT, 5/8-11 SERRATED 407040 CHCS 3/8"-16 x 1" #5 PLTD 407121 CHCS 5/8"-11 x 2"...
- Page 84 REAR BUMPER, 10", ROUND LIGHT HOLES #780949 ITEM # PART # DESCRIPTION QTY. 192219 PLATE, FLR 10" RR BMPR ROTO-MIX 400107 HEX NUT, 3/8"-16 SERRATED FLANGE #5 400115 FLANGE NUT, 5/8-11 SERRATED 407040 CHCS 3/8"-16 x 1" #5 PLTD 407121 CHCS 5/8"-11 x 2"...
- Page 85 This Page intentionally left blank.
Need help?
Do you have a question about the 354-12 and is the answer not in the manual?
Questions and answers