
Related Manuals for RADWAG PMV


Summary of Contents for RADWAG PMV
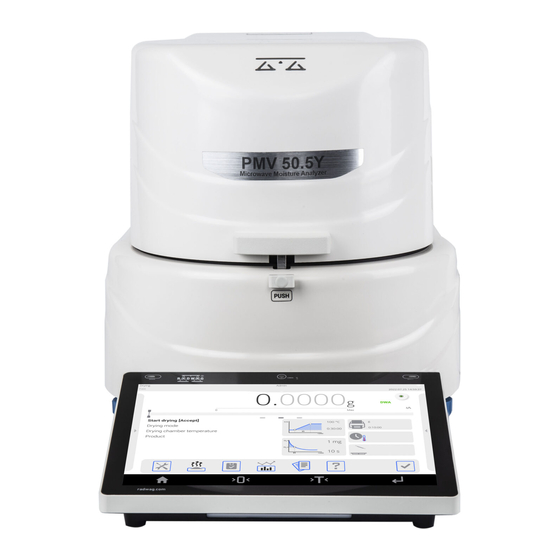
- Page 1 IMMB-13-02-06-22-EN-PL Start up Guide Szybki start Microwave Moisture Analyzer Wagosuszarka Mikrofalowa • PMV...
- Page 2 To view a complete User Manual go to the website or scan QR code: Aby wyświetlić pełną instrukcję obsługi, przejdź do strony internetowej lub zeskanuj kod QR: radwag.com/en/manuals/13807...
- Page 3 1. CONTENT ZAWARTOŚĆ Moisture analyzer Disposable pan Cross-shaped holder Power cord* Wagosuszarka Szalka jednorazowa Krzyżak szalki Kabel zasilający* *The plug type may vary by country. *Rodzaj wtyczki może się różnić w zależności od kraju. 2. UNPACKING ROZPAKOWANIE Keep the packaging should a warranty claim or service be required.
-
Page 4: Recommendations And Warnings
3. RECOMMENDATIONS AND WARNINGS ZALECENIA I OSTRZEŻENIA Operate the device in a room where the temperature ranges between 10–40 °C (50–104 °F) and where the relative humidity is below 80%. +40 °C +104°F Place the moisture analyzer on a solid surface to ensure stability. To obtain sta- ble and repeatable weighing results, an anti-vibration table is recommended. -
Page 5: Components Assembly
4. COMPONENTS ASSEMBLY MONTAŻ ELEMENTÓW WAGI 5. PREPARING FOR WORK PRZYGOTOWANIE DO PRACY Place the device at the workstation, wait until it reaches room temperature. Ustaw urządzenie w miejscu jego użytkowania i pozostaw je do osiągnięcia temperatury pokojowej. 5.1. Temperature stabilization Stabilizacja temperatury wagi up to 8 h Prior to switching the device on let it... -
Page 6: Switching The Device On
5.2. Switching the device on Włączenie wagi Press the switch located next to the power supply socket To switch the device on, press ON / OFF key. at the back of the housing to switch on the device. Aby włączyć urządzenie, naciśnij przycisk ON / OFF. W celu włączenia zasilania wagosuszarki należy nacisnąć... -
Page 7: Panel Keys
The moisture analyzer is ready to use! Twoja wagosuszarka jest gotowa do użycia! Before using WEIGHING mode, carry out instrument adjustment: refer to section 7.1. (adjustment is not required for DRYING mode). Przed korzystaniem z trybu WAŻENIA, wskazane jest wykonanie adiustacji urządzenia: patrz punkt 7.1. (dla procesu SUSZENIA adiustacja nie jest wymagana). -
Page 8: Home Screen
Wzorzec masy [g] mass standard. You are recommended to use mass PMV 50 standard of class F1 or F2. View the table and select the mass standard you need. Caution! Make sure that the disposable weighing pan has been installed (read point 4.). - Page 9 Drying 2017.10.03 Admin 0.0000 Parameters Home 100% Drying mode Product Adjustment Profiles Operators Adjustment Auto 1 mg 120°C 60 s 0:00:30 Start drying [Accept] Database Communication Peripherals Press “Parameters” button. Press “Adjustment” button. Naciśnij przycisk “Parametry”. Naciśnij przycisk „Adiustacja”. Adjustment External adjustment External adjustment Adjustment...
- Page 10 Adjustment Adjustment Zeroing Completed Zeroing in progress. Wait for zeroing Adjustment completed. Press button completion. for confi rmation. Trwa zerowanie. Poczekaj na zakończenie Adiustacja zakończona. naciśnij przycisk procesu zerowania. by zatwierdzić. 7.2. Zeroing Zerowanie Drying 2017.10.03 Admin 0.0000 Home 100% Drying mode Product Auto...
- Page 11 7.4. Drying profi les / drying process fi nish modes Profi le suszenia / tryby zakończenia procesu suszenia Prior to drying profi les / drying process fi nish modes setup, log in as Administrator (point 8.1.). Przed wybraniem profi lu suszenia/trybu zakończenia zaloguj się jako Administrator (patrz punkt 8.1.). Drying 2017.10.03 Admin...
- Page 12 8. SETTINGS USTAWIENIA Some balance settings are accessible for Administrator exclusively. Prior to balance parameters setup, log in as the Administrator. Niektóre ustawienia wagi są dostępne wyłącznie dla Administratora. Przed ustawieniem parametrów wagi zaloguj się jako Administrator. 8.1. Administrator’s logging in Logowanie administratora Log in Log in...
-
Page 13: User Settings
8.2. User settings Konfi guracja użytkowników Prior to balance users setup, log in as Administrator (point 8.1.). Przed konfi guracją użytkowników zaloguj się jako Administrator (patrz punkt 8.1.). Drying 2017.10.03 Admin 0.0000 Parameters Home 100% Drying mode Product Adjustment Profiles Operators Operators Auto... - Page 14 Following the above procedure, set remaining parameters: Postępując zgodnie z powyższą procedurą, ustaw pozostałe parametry: Edit record Code: Enter user ID Name John Smith Kod: wpisz unikalny identyfi kator użytkownika Code Password: Enter user password Password ******* Hasło: nadaj użytkownikowi hasło Name and Surname First and last name: Enter user’s fi...
-
Page 15: Preparing Samples
Buttons Buttons Soft key 7 Tare Soft key 7 Tare Right proximity sensor Button F1 Working mode Button F1 Working mode None Button F2 Profile Button F2 Profile Drying mode Button F3 Adjustment Button F3 Adjustment Measurements chart Left profimity sensor None Sample description Left profimity sensor... - Page 16 9.2. Handling hazardous samples Postępowanie z próbkami niebezpiecznymi Some sample types require particular caution! They may pose risk for people and objects. It is the moisture analyzer operator who is responsible for potential loss being a result of such samples use. Niektóre rodzaje próbek wymagają...
- Page 17 10. PERIPHERAL DEVICES CONNECTORS PODŁĄCZENIE URZĄDZEŃ PERYFERYJNYCH Barcode Computer Computer Printer PLC controller Stack-light scanner Komputer Komputer Drukarka Kontroler PLC Kolumna Skaner kodów świetlna kreskowych DB15 RFID transponder Barcode card reader scanner Czytnik kart Skaner kodów RFID transponder Barcode Computer Printer RFID kreskowych...
-
Page 18: Device Cleaning
11. DEVICE CLEANING CZYSZCZENIE I KONSERWACJA 11.1. General recommendations Zalecenia i ostrzeżenia Prior to cleaning it is necessary Use soft cloths made of microfi ber, Apply the cleanser onto the cloth to disconnect the device from the natural fi ber or man-made fi ber. fi... - Page 19 • Dry sample leftovers can be removed using either brush or handheld vacuum cleaner. • Clean components can be dried using soft cloth or dust-free paper towel, with this the remaining moist will be absorbed. • Install all the components providing they are completely dry. •...
- Page 20 www.radwag.com...
Need help?
Do you have a question about the PMV and is the answer not in the manual?
Questions and answers