Table of Contents
Advertisement
Quick Links
OPERATING MANUAL
Machines for Meat Processing
Fleischwolf - Serie FL-N
FL-200128-Rev007-UM-en
ADE Germany GmbH & Co. KG
Hammer Steindamm 27 – 29
22089 Hamburg / GERMANY
+49 40 432 776-0
Fax
+49 40 432 776-10
E-Mail: info@ade-germany.de
READ CAREFULLY BEFORE USE
AND KEEP FOR FUTURE REFERENCE
IMPORTANT
Advertisement
Table of Contents

Related Manuals for ADE FL-N Series


Summary of Contents for ADE FL-N Series
- Page 1 OPERATING MANUAL Machines for Meat Processing Fleischwolf - Serie FL-N FL-200128-Rev007-UM-en ADE Germany GmbH & Co. KG Hammer Steindamm 27 – 29 22089 Hamburg / GERMANY +49 40 432 776-0 +49 40 432 776-10 E-Mail: info@ade-germany.de IMPORTANT READ CAREFULLY BEFORE USE...
-
Page 2: Table Of Contents
Inhaltsverzeichnis Inhaltsverzeichnis ........................... 1 Safety information ........................... 2 General safety instructions ......................2 Personal safety ........................... 2 Safety of the device ........................3 Work area safety ......................... 3 Safety in maintenance ........................ 4 Residual risks ..........................4 Intended use ........................... 4 Exclusion of use: ......................... -
Page 3: Safety Information
Safety information ADE shall not assume any responsibility for personal injury and material damage resulting from non-compliance with this operating manual and its safety instructions! General safety instructions Read this operation and maintenance manual carefully before operating the meat mincer. -
Page 4: Safety Of The Device
Safety of the device Thoughtfully inspect the device before operation and carry out regular inspections of the protection and safety devices. In the event of damage to protective equipment, the machine must be taken out of operation immediately and handed over to your customer service for renewal or replacement. ALWAYS close the protective covers properly before turning on the device. -
Page 5: Safety In Maintenance
Only coded cutting sets may be used! Intended use Your ADE meat mincer is a quality product and is intended for use in canteens and large kitchens. It is a meat mincer used to process meat products, which must not be frozen and must be boneless. -
Page 6: Installing And Setting Up The Meat Mincer
Installing and setting up the meat mincer Check the scope of delivery for completeness immediately after receipt of the machine. Carefully remove the machine and accessories from the packaging and remove all packaging materials. The scope of delivery includes: Inspecting the contents of the box ... -
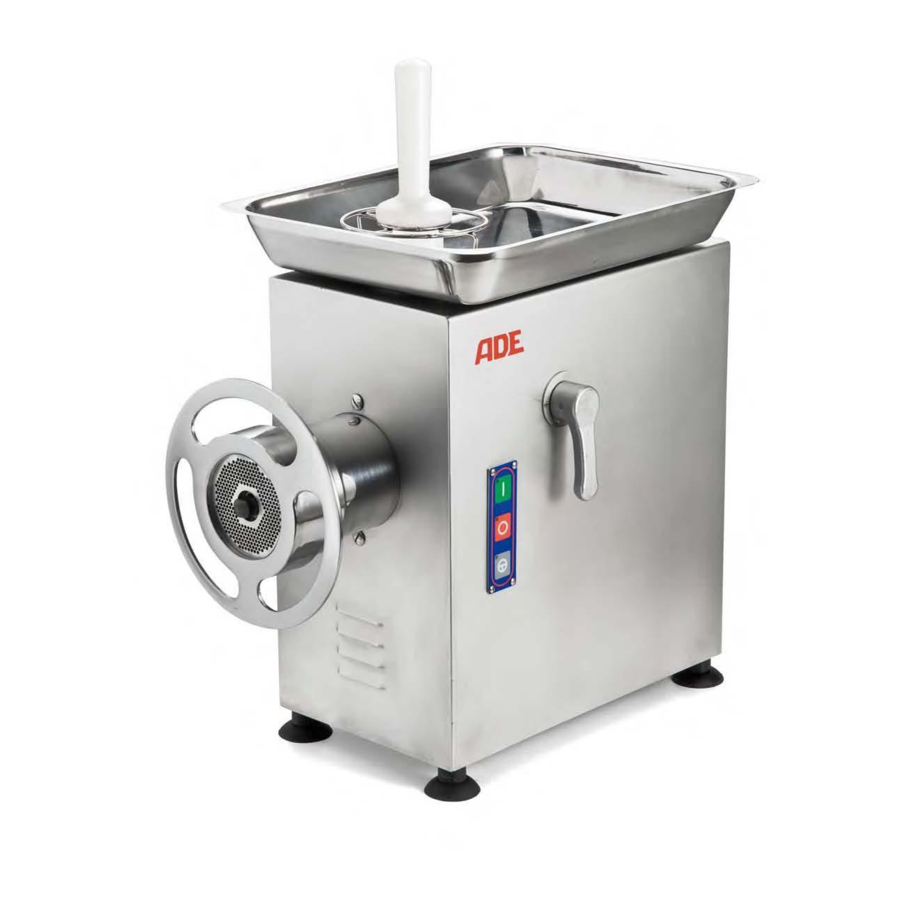
Page 7: Operating The Meat Mincer
Operating the meat mincer Power On and Off Symbol Bezeichnung Funktion Arrow-Up- Press this button to start operation of the worm. Button The worm now starts to turn counter-clockwise. „Forward“ OFF-Button Press this button to stop the worm. Arrow-Down- To Reverse the worm (in case of a jam in the worm Pushbutton section) press this pushbutton. -
Page 8: Dis- And Reassembling The Cutting Set
Dis- and Reassembling the cutting set Disassembling the cutting set The filling tray can be removed upwards without tools. The hand wheel can be unscrewed by turning it to the left. A withdrawing hook is included for easier removal of the cutting set and worm. -
Page 9: Reassembling The Cutting Set
Now, the worm housing (28) is removed by simply pulling it out. After turning the locking lever (7) above the switch from bottom to top (clockwise), it can be removed forwards (without tilting sideways). Reassembling the cutting set Reassembly is done in reverse order. First insert the worm housing (28). -
Page 10: Changing The Cutting Set
Changing the cutting set Individual perforated discs enable versatile use, depending on the desired cutting effect. In any case, the enclosed coded spacer ring (6) must be used and attached as the last part in front of the hand wheel (33). Care has to be taken that the sequence of assembly of the cutting set takes place in accordance with the exploded view. -
Page 11: Troubleshooting
Warranty ADE will repair or replace this product if it has failed within 1 year from the date of purchase (proof of purchase is required) due to poor workmanship or defective material. All moving parts, such as cables, cross blades, perforated discs, etc., are excluded from this warranty. -
Page 12: Ce Marking And Declaration Of Conformity
The declaration will be void if a change that was not agreed with us has been made on the machine. Hamburg, January 2020 ADE Germany GmbH & Co. KG Hammer Steindamm 27 – 29 D-22089 Hamburg FL-200128-Rev007-UM-en... -
Page 13: Technical Data
64/67 db (A) to VDI directive 2058: measured at a distance of 1 m and a height of 1.70 m Manufacturer: ADE Germany GmbH & Co. KG Hammer Steindamm 27 – 29 D 22089 Hamburg +49 40 432 776-0 +49 40 432 776-10 E-Mail: info@ade-germany.de... -
Page 14: Exploded View
Exploded view FL-200128-Rev007-UM-en... - Page 15 Number Description Ball bearing 6005ZZ Basin Worm screw puller Gear Worm housing mounting pin Coded Unger spacer ring Locking lever Ventilation cover O-Ring 117 Darner Spacer washer Rubber foot Sensor Magnet Spacer Drive shaft Plastic washer Oil seal Ball bearing 51206 Locking ring 30 x 47 x 7 Plug 4 x 35 Base plate...
-
Page 16: Spare Parts List
Guide tube for filling tray Filling tray Pre-cutter Cross blade Perforated disc, 8 mm hole diameter, coded Perforated disc, 3 mm hole diameter, coded Spare parts list Spare part number No.: Description FL 98 N FL 82 N Hand wheel H4306-0081 H4305-0241 Locking lever, incl.:... -
Page 17: Block Diagram
Block diagram FL-200128-Rev007-UM-en... - Page 18 FL-200128-Rev007-UM-en...
- Page 19 FL-200128-Rev007-UM-en...
- Page 20 Dealer: FL-200128-Rev007-UM-en...
Need help?
Do you have a question about the FL-N Series and is the answer not in the manual?
Questions and answers