Table of Contents
Advertisement
Quick Links
Advertisement
Table of Contents

Subscribe to Our Youtube Channel
Related Manuals for FCC BBQ Performer 4.1S


Summary of Contents for FCC BBQ Performer 4.1S
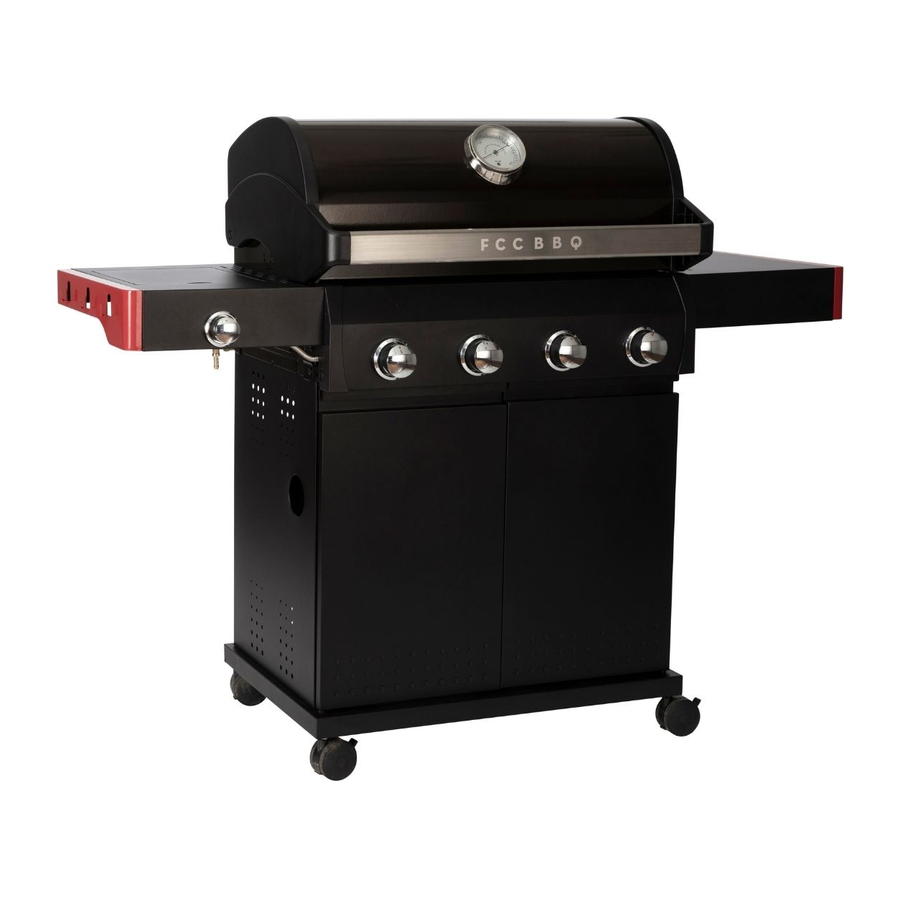
- Page 1 MANUAL Installation, use, maintenance and safety FCC-G-202113-41 /GD4843S-AC OUTDOOR USE ONLY READ THE MANUAL, FOLLOW THE ASSEMBLY INSTRUCTIONS STEP BY STEP. GET TO KNOW YOUR GRILL AND THE SAFETY INSTRUCTIONS fccbbq.com BEFORE USING THE APPLIANCE!
-
Page 2: Table Of Contents
Contents Warnings ..........................3 Technical Data ........................4 Read before assembly ..................5 Parts list .............................6 Exploded Drawing .......................7 Hardware ..........................7 Assembly instructions ......................8 Connecting gas .........................18 Gas leak test .........................19 Last check ..........................20 Lighting instructions ......................21 Maintenance ........................22 Advice, tips and safety ....................24 Troubleshooting ........................25 Consumer Contact ......................28... -
Page 3: Warnings
WARNINGS! WARNINGS! ● ACCESSIBLE PARTS OF THE GRILL BECOME VERY HOT DURING USE. KEEP CHILDREN AND OTHERS WHO NEED SUPERVISION AT A SAFE DISTANCE. ● THE GRILL IS INTENDED FOR OUTDOOR USE ONLY IN WELL- VENTILATED AREAS. ● LEAK TESTS (SEE PAGE ) MUST ALWAYS BE CARRIED OUT BEFORE THE GRILL IS USED AND WHEN REPLACING THE GAS CONTAINER. -
Page 4: Technical Data
Technical information Width: 146 cm Total Heat input: 17.2 kW (main burner 14 kW + side burner 3.2 kW). Gas consumption: 1253 gram/ hour (main burner: 1020 g/h + side burner: 233 g/h) Gascylinder (not included): Use standard cylinder approved for use in the Nordic Region. -
Page 5: Read Before Assembly
Read before assenbly FOLLOW THESE INSTRUCTIONS CAREFULLY TO AVOID SERIOUS DAMAGE TO YOUR GRILL AND AVOID CAUSING INJURY. Make sure that all parts and screws are in the box before mounting the product, please note that some parts may be placed in the styrofoam in the side walls of the packaging. -
Page 6: Parts List
Parts List CODE DESCRIPTION BODY ASSEMBLY FLAME TAMER WARMING RACK CAST IRON GRILL MULTIFUNCTION CAST IRON COOKING GRILL MULTIFUNCTION CAST IRON ROUND COOKING GRILL SIDE BURNER WELD ASSEMBLY IDE BURNER DECORATION BOARD DECORATION RING SIDE BURNER SIDE BURNER VALVE ASSEMBLY SIDE BURNER BRACKET KNOBS ASSEMBLY LEFT SIDE PANEL... -
Page 7: Exploded Drawing
Exploded drawing fccbbq.com... -
Page 8: Assembly Instructions
Assembly 1. To assemble 4 castors (number 30 & 29, 2 with break and 2 without) on the bottom panel, please tighten up the screws. 4PCS 2PCS 2. Use screw A to assemble left side panel (16) and right side panel (32) to the bottom panel(27), and assembly the pivot(B) assembly on the bottom as well. - Page 9 Assembly 5PCS 3. Use screw (A) to assemble back panel (24) to left side panel (16) and right side panel (32) and bottom panel (27) 6PCS 4. Firstly use the screw (A) to fix the door girder to the left side side panel (16) and right side panel (32), then use screw (A) to fix the left stator of oil tray (19) on the left side panel (16), use screw (A) to fix the right stator of oil tray (21) to the right side panel (32), shown in the illustration above.
- Page 10 Assembly 4PCS 5. Use screw A to assemble the cabinet stiffening board (23) upper to the door girder (22) and left side weld assembly (16); use the screw to assemble the cabinet stiffening board (23) upper to the door girder (22) and right side weld assembly (32). 8PCS 6.
- Page 11 Assembly 4PCS 7. Use Screw (A) to fix the main burner assembly (01) upper to the left side shelf assembly (16) and right side shelf assembly (32), shown as below picture. 8PCS 8. Use screw D to assemble the right shelf decoration board (35) on the right shelf (34), use screw D to assemble the left shelf decoration board (10).
- Page 12 Assembly Screws are Pre-installed Screws are pre-installed 3pcs M6x16 3 pcs M6x16 2PCS 2PCS 9. Use the screw (A) to assemble the foldable right shelf weld assembly to the main burner assembly (01), shown as n the illustration above. Screws are Pre-installed Screws are pre-installed 2PCS 2PCS...
- Page 13 Assembly 2PCS 11. Use screw D to assemble the side burner valve assembly (13) and decoration ring (11) to the left side burner assembly, and assemble the knobs (15). 2PCS 12. Firstly insert the side burner assembly (12) to the side burner valve assembly (13), and then use the screw D to fix it to the side burner assembly.
- Page 14 Assembly 13. Put the pot support (14) into the holes of left side burner table. 14. Lay the Flame Tamer (02) into the body.
- Page 15 Assembly 15. Please put the cast iron grill (04) and multifunction cast iron grill (05) into the firebox, and then the multifunction round cast iron grill (06) into the round opening of the multifunctional cast iron grill (05). 16. Insert warming rack (03) making sure that the tabs on the warming rack fit into the predrilled holes in the firebox.
- Page 16 Assembly 18. Assemble the two sets of the door assembly (28) to the cabinet, please note that must insert the holes under the door to the pin, and press the spring catch, then to insert the hole from the door assemble to the spring catch. 19.
- Page 17 Assembly 20. Install the magnet (36) for the doors on the base plate. plug in connection 21. Connect the correct flexible hose to the gas inlet connection. Plug the hose into the nozzle on the gas inlet and fix it with a clamp firmly. Check up the gas tightness after connection.
-
Page 18: Connecting Gas
Connecting gas FOLLOW THESE INSTRUCTIONS CAREFULLY TO AVOID SERIOUS DAMAGE TO YOUR BBQ AND CAUSE PERSONAL INJURY. HOSE • Connect the gas hose to the gas inlet on the grill. Tighten well. • Install the regulator and hose. Follow the installation instructions that came with the controller set. -
Page 19: Gas Leak Test
BARBECUE. 7. If detected leakage cannot be rectified, do not attempt to cure leakage but consult your dealer or FCC BBQ Products support at support@fccproducts.no for help in solving the problem. ● LEAK TEST MUST BE DONE REGULARLY AND EVERY TIME THE GAS CYLINDER, REGULATOR OR HOSE IS REPLACED. -
Page 20: Last Check
Last Check PLACEMENT OF THE BBQ • Ensure that the grill is placed at least 150cm in all directions from house walls, trees, plants and other flammable materials or liquids when in use. • Do not place the grill under a roof or overhang. •... -
Page 21: Lighting Instructions
Lighting Instructions LIGHTING INSTRUCTIONS 1. Open the lid. The lid must always be open when the grill is lit. 2. Check that all controls are in the "OFF" position. Open valve control on gas cylinder. 3. Push and turn the knob to the left to the “ MAX ” position . The burner will be ignited . -
Page 22: Maintenance
Maintenance KEEP THE FIREBOX, FLAME TAMERS, COOKING GRATE AND ACCESSORIES CLEAN TO AVOID GREASE FIRES. IF A GREASE FIRE OCCUR close the gas supply as soon as possible if there In case of grease fire, if possible close the gas is a sign of a grease fire. - Page 23 Maintenance layer of acid-free oil once or twice a year. CLEANING For barbecues that are placed in coastal All cleaning and maintenance must be areas, we recommend that you treat the grill performed when the barbecue is cold. Make more often. sure that the gas upply is switched OFF and the regulator is disconnected from the gas COOKING GRATE OG FLAME TAMERS...
-
Page 24: Advice, Tips And Safety
Water from snow, ice and rain that enters the grill can overfill the grease collection system and cause leakage to the surface. • We recommend the use of FCC BBQ original covers for the best possible protection against rain, pollen and pollution. Remember that the grill must be completely dry and cold before applying the coating. -
Page 25: Troubleshooting
Trouble Shooting PROBLEM POSSIBLE CAUSE SOLUTION GAS CYLINDER IS EMPTY REPLACE GAS CYLINDER CHECK/REPLACE THE DAMAGED REGULATOR REGULATOR BURNER IS BLOCKED CLEAN THE BURNER CLEAN GAS VENTURY GAS SUPPLY IS BLOCKED OR HOSE BURNER WILL NOT ELECTRODE IS BROKEN OR LIGHT CLEAN THE ELECTRODE DIRTY... - Page 26 Notes...
- Page 27 Notes fccbbq.com...
-
Page 28: Consumer Contact
Consumer contact This product is covered by a warranty in accordance with consumer legislation. It has undergone strict quality controls and testing at the factory. If there are any parts missing or the product has been damaged, please contact your dealer or the consumer contact below for help. In the event of damage to the product, we ask for pictures of the damage and damage to the product’s packaging is attached to the complaint.
Need help?
Do you have a question about the Performer 4.1S and is the answer not in the manual?
Questions and answers