Table of Contents

Subscribe to Our Youtube Channel
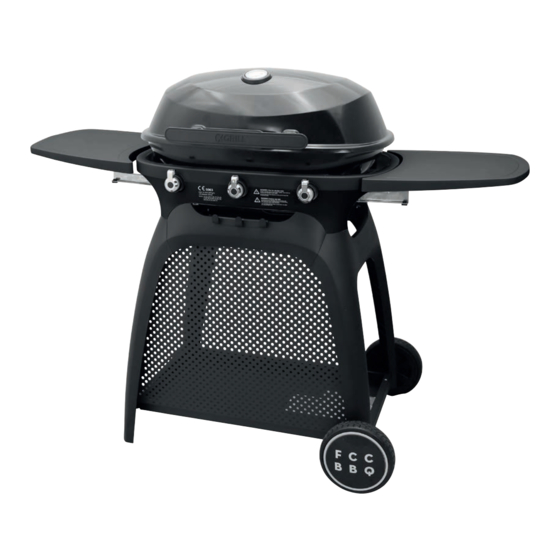
Related Manuals for FCC BBQ XGRILL MASTER


Summary of Contents for FCC BBQ XGRILL MASTER
- Page 1 MANUAL Installation, use, maintenance and safety FCC-XG-19620-3 / BG03-300A OUTDOOR USE ONLY READ THE MANUAL, FOLLOW THE ASSEMBLY INSTRUCTIONS STEP BY STEP. GET TO KNOW YOUR GRILL AND THE SAFETY INSTRUCTIONS BEFORE USING THE APPLIANCE!
-
Page 2: Table Of Contents
Contents Warnings ............................3 Technical Data ..........................4 Read before assembly ......................5 Parts list ............................6 Exploded Drawing ........................7 Hardware ............................7 Assembly instructions ......................8 Moving the grill ........................15 Regulator and hose - Connecting the gas ..............16 Check for leaks before using the barbecue ............17 Last check .............................18 Lighting instructions ........................19 Maintenance ..........................20... -
Page 3: Warnings
WARNINGS! WARNINGS! ● ACCESSIBLE PARTS OF THE GRILL BECOME VERY HOT DURING USE. KEEP CHILDREN AND OTHERS WHO NEED SUPERVISION AT A SAFE DISTANCE. ● THE GRILL IS INTENDED FOR OUTDOOR USE ONLY IN WELL- VENTILATED AREAS. ● LEAK TESTS (SEE PAGE ) MUST ALWAYS BE CARRIED OUT BEFORE THE GRILL IS USED AND WHEN REPLACING THE GAS CYLINDER. -
Page 4: Technical Data
Technical Data Tekniske data Total Heat input: 8.2 kW Gassforbruk: 547 gram/hour Gascylinder (not included): Use standard cylinder approved for use in the Nordic Region. Even though butane and propane gas can be used, we recommend propane for use in the Nordic Region. -
Page 5: Read Before Assembly
Read before assenbly FOLLOW THESE INSTRUCTIONS CAREFULLY TO AVOID SERIOUS DAMAGE TO YOUR GRILL AND AVOID CAUSING INJURY. Make sure that all parts and screws are in the box before mounting the product, please note that some parts may be placed in the styrofoam in the side walls of the packaging. -
Page 6: Parts List
Parts List CODE DESCRIPTION HANDLE BAKELITE HEAT SHIELD THERMOMETER THERMOMETER BASE RIGHT GRILL LEFT GRILL MIDDLE GRILL LEFT BURNER MID BURNER THE FIRE TANK RIGHT BURNER COLLECTOR BOX RIGHT SUPPORT SIDE TABLE LEFT SUPPORT SIDE TABLE FURNACE BODY SIDE TABLE CONNECTING PLATE ASSEMBLY KNOB BASE VALVE PIPE ASSEMBLY... -
Page 7: Exploded Drawing
Exploded Drawing HARDWARE CODE DESCRIPTION CODE DESCRIPTION ST4.2x10 Screw M6 Butterfly Nut M6 Washer M4x8 Screw M5x65 Screw M8 Locking Nut M5 Spring Washer M8 Washer Hinge Hexagonal Wrench M5 Washer Allen Wrench M6x25 Screw fccbbq.com... -
Page 8: Assembly Instructions
ASSEMBLY INSTRUCTIONS Assembly BG03-300A PLEASE READ THE INSTRUCTIONS CAREFULLY AND FOLLOW STEP BY STEP. Step 1: 将车架左右侧板(25) (27)用螺丝 A 分别固定在车架底板(26)左右两侧. 1. Fix the left and right side panels (25) (27) of the frame to the left and right sides of the frame bottom plate (26) with screws A. Step 2: 按图示用螺丝... - Page 9 Assembly 按图示用螺丝 A 将车架前板 (28) 固定在车架左右侧板和车架前横梁上, 用螺丝 A 将工具挂钩 (24) Step 3: 固定在车架前横梁上. 3. Fix the front panel (28) of the frame to the left and right side panels with screws A, and fix the tool hook (24) to the front cross of the frame also with screws A.
- Page 10 Assembly Step 5: 将车轮轴(30)穿过车轮(31)和车架右侧板,用 K,J 将其固定.(按图示用外六角扳手 M1 在卡槽 处将车轮轴固定,用 M2 卡住 J 顺时针转动将其锁紧) 5. Pass the wheel axle (30) through the wheel (31) and the right side of the frame, and fix it with K, J. (As shown in the figure, use the hex wrench M1 to fix the wheel axle at the card slot and clamp it with M2.
- Page 11 Assembly Step 7: 按图示将车架组件(15)放在车架上,用 B.G.H 将其固定. NOTE! TWO PERSONS IS RECOMMENDED WHEN LIFTING THE STOVE BODY. 7. Place the frame assembly (15) on the frame as shown and secure it with B,G and H. 按图示用螺丝 A 将边台板支架(13)(14)固定在边台板(16)上,用螺丝 I 将边台板连接板(17) Step 8: 固定在(13)...
- Page 12 Assembly 用螺丝 E 将边台板组件固定在炉体组件左右两侧(用内六角扳手 L 顺时针将 E 锁紧). Step 9: 9. Use the screw E to fix the side plate assembly to the left and right sides of the furnace assembly (use the Allen key L to lock the E clockwise). Step 10: 按图示用...
- Page 13 Assembly 按图示将左烤网(6)中烤网(7)右烤网(5)平放在炉体上 Step 11: NOTE! The pattern on the grill surface may vary and does not necessarily match the drawings. 11. Place the grilling net (7) in the left grilling net (6) on the right grilling net (5) on the furnace body as shown in the figure. Step 12: 将接油盒(20)平放在炉体下面.
- Page 14 Assembly 13. Use screw (A) to fix the bracket that secures the gas intake connector..
-
Page 15: Moving The Grill
Moving the grill IMPORTANT! NEVER MOVE THE GRILL BY HOLDING THE SIDE TABLE! To move the grill correctly, do the following: Gently lift the edge of the side table 45 degrees. Gently pull the side table to the edge about 20mm. Gently lower the side table and attach it to the side panel of the frame Grasp the joint between the front and rear plates of the furnace body with both hands and lift it up to push the grill. -
Page 16: Regulator And Hose - Connecting The Gas
Connecting gas FOLLOW THESE INSTRUCTIONS CAREFULLY TO AVOID SERIOUS DAMAGE TO YOUR BBQ AND CAUSE PERSONAL INJURY. HOSE • Connect the gas hose to the gas inlet on the grill. Tighten well. • Install the regulator and hose. Follow the installation instructions that came with the controller set. -
Page 17: Check For Leaks Before Using The Barbecue
BARBECUE. 7. If detected leakage cannot be rectified, do not attempt to cure leakage but consult your dealer or FCC BBQ Products support at support@fccbbq.com for help in solving the problem. ● LEAK TEST MUST BE DONE REGULARLY AND EVERY TIME THE GAS CYLINDER, REGULATOR OR HOSE IS REPLACED. -
Page 18: Last Check
Last Check PLACEMENT OF THE BBQ • Ensure that the grill is placed at least 150cm in all directions from house walls, trees, plants and other flammable materials or liquids when in use. • Do not place the grill under a roof or overhang. •... -
Page 19: Lighting Instructions
Lighting Instructions LIGHTING INSTRUCTIONS 1. Make sure all switches are in the ”OFF” position (red line points upwards). 2. Open the lid. The lid must always be open when the grill is lit. 3. Open the gas from the gas cylinder with the regulator. 4. -
Page 20: Maintenance
Maintenance KEEP THE FIREBOX, COOKING GRATE AND ACCESSORIES CLEAN TO AVOID GREASE FIRES. IF A GREASE FIRE OCCUR much fat or oil, pay extra attention. Feel free In case of grease fire, if possible close the gas to use trays in aluminum foil to prevent large amounts from running down on the grease cup. - Page 21 Maintenance CLEANING COOKING GRATE All cleaning and maintenance must be Grill grate and are brushed regularly with performed when the barbecue is cold. Make a grill brush for rough cleaning. The grill sure that the gas upply is switched OFF and grate can be soaked in mild soapy water.
-
Page 22: Advice, Tips And Safety
Water from snow, ice and rain that enters the grill can overfill the grease collection system and cause leakage to the surface. • We recommend the use of FCC BBQ original covers for the best possible protection against rain, pollen and pollution. Remember that the grill must be completely dry and cold before applying the coating. -
Page 23: Troubleshooting
Troubleshooting PROBLEM POSSIBLE CAUSE SOLUTION Empty gas cylinder Replace gas cylinder Damaged regulator Check/replace the regulator Burner is blocked Clean the burner Gas supply is blocked Clean gas ventury or hose BURNER WILL NOT LIGHT Electrode is broken or dirty Clean the electrode Place the BBQ in a less Windy conditions... -
Page 24: Consumer Contact
Consumer Contact This product is covered by a warranty in accordance with consumer legislation. It has undergone strict quality controls and testing at the factory. If there are any parts missing or the product has been damaged, please contact your dealer or the consumer contact below for help. In the event of damage to the product, we ask for pictures of the damage and damage to the product’s packaging is attached to the complaint.
Need help?
Do you have a question about the XGRILL MASTER and is the answer not in the manual?
Questions and answers