Table of Contents
Advertisement
=
Application Note
How to use phyCAM camera modules with phyCORE-i.MX 8M Mini SBC on phyBOARD Polis
Revision History
Version
Changes
A0
Initial Release
A1
Insert chapter 1 and 2
Content
1
Introduction ......................................................................................................................................................................................................................................... 2
2
SBC Kit Start-Up ................................................................................................................................................................................................................................. 2
2.1
Connecting and Starting the Camera .......................................................................................................................................................................................... 2
3
Overview ............................................................................................................................................................................................................................................. 3
4
Camera Connectors on the Polis - Carrier Boards ............................................................................................................................................................................. 6
4.1
Connecting the phyCAM-M Camera ............................................................................................................................................................................................ 7
5
Supported camera boards (YOCTO Linux PD21.1.0 and higher) ...................................................................................................................................................... 8
5.1
Supported camera types in standard vision image (phytec-vision-image-phyboard-polis-imx8mm-3) ....................................................................................... 8
5.2
Change the camera types in standard vision image (phytec-vision-image-phyboard-polis-imx8mm-3) ..................................................................................... 9
6
Demo scripts ..................................................................................................................................................................................................................................... 11
6.1
GStreamer scripts ...................................................................................................................................................................................................................... 11
6.2
Scripts to call C/C++ files based on v4l2 interface .................................................................................................................................................................... 13
6.3
OpenCV scripts .......................................................................................................................................................................................................................... 13
7
8
Configuration of camera features ...................................................................................................................................................................................................... 17
8.1
Configuration with v4l2-ctl .......................................................................................................................................................................................................... 17
8.2
Configuration camera register direct ......................................................................................................................................................................................... 17
9
De-Bayering (demosaicking) with NEON CoProcessor .................................................................................................................................................................... 17
=
«=mevqb`=jÉëëíÉÅÜåáâ=dãÄe=OMOM=
pìééçêí=eçíäáåÉ=bìêçéÉWW=HQV=ESNPNF=VOONJ
PN==ÜííéWLLïïïKéÜóíÉÅKÇÉ=
pìééçêí=eçíäáåÉ=kçêíÜ=^ãÉêáÅ~W==NJUMMJOTUJ
VVNP==ÜííéWLLïïïKéÜóíÉÅKÅçã=
=
●
●
Author
Date
H. Fendrich
02.03.2021
H. Fendrich
31.03.2021
N=L=NU=
mevqb`=jÉëëíÉÅÜåáâ=dãÄe=
Advertisement
Table of Contents

Subscribe to Our Youtube Channel
Related Manuals for Phytec phyCAM


Summary of Contents for Phytec phyCAM
-
Page 1: Table Of Contents
Application Note How to use phyCAM camera modules with phyCORE-i.MX 8M Mini SBC on phyBOARD Polis Revision History Version Changes Author Date Initial Release H. Fendrich 02.03.2021 Insert chapter 1 and 2 H. Fendrich 31.03.2021 Content Introduction ................................................. 2 SBC Kit Start-Up .............................................. -
Page 2: Introduction
Introduction The SBC kits (Single-Board-Computer) from PHYTEC represent an ideal basis for testing and the first design steps with phyCAM camera modules. The kit forms the starting point for your development project. The kit can be used to develop and test application software before your own adapted hardware is available. It is also an optimal platform for testing special hardware extensions before you create a complex application board. -
Page 3: Overview
As a rule, both the extension of an existing kit by one camera and the extension of an existing video kit by additional cameras is possible without problems with an existing phyCAM interface. Before connecting and starting up the camera, carry out the first steps of the "Quick Start Instructions" of the respective kit. To start the scripts on the module, follow the steps to establish a serial connection with the module. - Page 4 2: CAM_1 (CSI1) present on connector X3 On the PHYTEC or customer carrier boards can the interfaces are led out as phyCAM-M. For more information to phyCAM-M see the phyCAM-Manuals on PHYTEC Homepage. On the phyBOARD-Polis baseboard is the camera interfaces led out as phyCAM-M (MIPI CSI-2) interfaces (see figure 3). Here you can connect different phyCAM-M camera modules.
- Page 5 3: Block Diagram of phyCAM-M Camera Interfaces of phyCORE-i.MX 8M Mini (Quad) and the go out on the phyBOARD-Polis-i.MX 8M Mini - SBC The BSP shipped with the Kit includes already the software drivers for the supported phyCAM-M camera modules. The drivers are compatible with v4l2. Also GStreamer scripts are included for the evaluation of the camera modules.
-
Page 6: Camera Connectors On The Polis - Carrier Boards
4: Camera Interfaces on phyBOARD-Polis up PCB Version PL1532.1 for the phyCORE-i.MX 8M Mini SOM Note: If you use the phyCAM-M interface, use an FFC cable that is especially suitable for FH41 connectors (e.g. Phytec WF271). Standard FFC cables can cause a short circuit. -
Page 7: Connecting The Phycam-M Camera
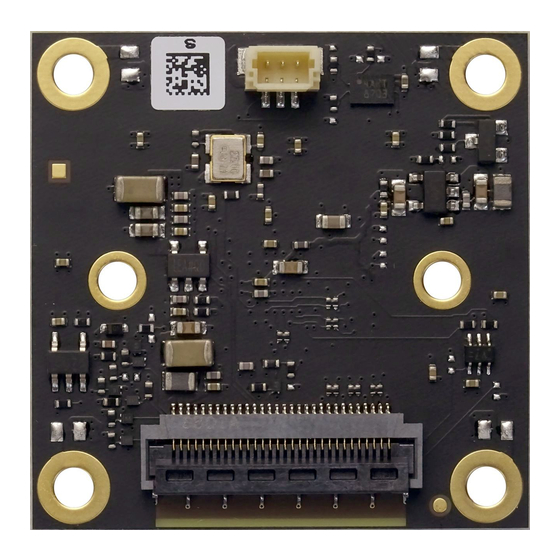
The position of the camera socket on the baseboard can be found in the hardware manual of the kit. Parallel to the connector designation (e.g. X100), some basic boards also have "CAM" printed on the board. The phyCAM-M interface is a 30-pin FFC socket, which can be installed standing or lying on the board. -
Page 8: Supported Camera Boards (Yocto Linux Pd21.1.0 And Higher)
The device tree of the camera VM-016 (sensor AR0144) is preselected in PD21.1.0. To use other cameras (e.g. VM-017/117) the device tree must be changed. See chapter 0 5.1 Supported camera types in standard vision image (phytec-vision-image-phyboard-polis-imx8mm-3) Per default are following Kameratyps are supported in the image: VM-016-BW-M series (VM-016-BW-M, VM-016-BW-M-M12, VM-016-BW-M-H, …) based on camera sensor “AR0144”... -
Page 9: Change The Camera Types In Standard Vision Image (Phytec-Vision-Image-Phyboard-Polis-Imx8Mm-3)
5.2 Change the camera types in standard vision image (phytec-vision-image-phyboard-polis-imx8mm-3) The following camera types are interchangeable in the image: VM-017-BW-M series (VM-017-BW-M, VM-017-BW-M-M12, VM-017-BW-M-H, …) based on camera sensor “AR052x” • VM-017-COL-M series (VM-017-COL-M, VM-017-COL-M-M12, VM-017-COL-M-H, …) based on camera sensor “AR052x”... - Page 10 mevqb`=jÉëëíÉÅÜåáâ=dãÄe= figure 6: output after load VM-017/117 driver AR052x Now the VM-0x17 driver (AR052x) is ready for use. Now you can start working with the demo-scripts. (see chapter 6.1) «=mevqb`=jÉëëíÉÅÜåáâ=dãÄe=OMOM= NM=L=NU= pìééçêí=eçíäáåÉ=bìêçéÉWW=HQV=ESNPNF=VOONJ PN==ÜííéWLLïïïKéÜóíÉÅKÇÉ= ● pìééçêí=eçíäáåÉ=kçêíÜ=^ãÉêáÅ~W==NJUMMJOTUJ VVNP==ÜííéWLLïïïKéÜóíÉÅKÅçã= ●...
-
Page 11: Demo Scripts
VM-017/117 camera series (v4l-ctrl_ar052x.txt, list the v4l2-controls for this camera) vpu_enc_dec_scripts: contain scripts how use the vpu-encoder (e.g networkstreaming or save H.264 streams) tools: contain scripts to get and set the camera register direct via i2c access phytec_usb_cam: scripts for use the Phytec USB-cameras «=mevqb`=jÉëëíÉÅÜåáâ=dãÄe=OMOM= NN=L=NU= pìééçêí=eçíäáåÉ=bìêçéÉWW=HQV=ESNPNF=VOONJ... - Page 12 mevqb`=jÉëëíÉÅÜåáâ=dãÄe= figure 7: call of “colcam-fbdev_1280x720.sh” for VM-016-COL (AR0144) series (A live image should show on the display) All camera/video components get a separate "/dev/video[x]" or "dev/v4l-subdev[x]" device. The v4l2 - capabilities are showed if you type: "v4l2-ctl -d [device] -L" e.g. "v4l2-ctl -d /dev/video0 -L". For the first use, the camera and controller-camera interface must be configured with the tool v4l2-ctl.
-
Page 13: Scripts To Call C/C++ Files Based On V4L2 Interface
For the first use, the camera and controller-camera interface must be configured with the tool v4l2-ctl. See chapter 7. 6.3 OpenCV scripts PHYTEC i.MX 8M Mini BSP PD21.1.0 includes OpenCV4.4. For use OpenCV with image output we use window manager Wayland. PHYTEC tested openCV with PYTHON programming language. Examples of scripts can be found in the path “opencv-examples”: /opencv-examples/python/python3 phycam_video_v4l2.py: show the live image from the camera... - Page 14 mevqb`=jÉëëíÉÅÜåáâ=dãÄe= Media controller devices expose entities to the media controller framework. Each entity has one or more source pads and one or more sink pads. You use the media controller kernel API (ie via media-ctl) to query entities, link source pads to sink pads, and set formats of pads. We use media-ctl to set: the desired resolution and color format of the camera sensor the fitting resolution and color format in the CSI interface (controller-camera-interface)
- Page 15 mevqb`=jÉëëíÉÅÜåáâ=dãÄe= media-ctl -r media-ctl -l "'ar0144 3-0010':0->'imx7-mipi-csis.0':0[1]" media-ctl -l "'imx7-mipi-csis.0':1->'csi':0[1]" media-ctl -l "'csi':1->'csi capture':0[1]" Camera -> imx7_mipi_csis.0 -> CSI -> CSI capture (/dev/videoX) figure 8: video path VM-016 (AR0144) video path VM-017 (AR052x) Then we formats the hardware blocks: media-ctl -V "'ar0144 3-0010':0 [fmt:SGRBG8_1X8/1280x800 (0,4)/1280x800]" media-ctl -V "'imx7-mipi-csis.0':1 [fmt:SGRBG8_1X8/1280x800]"...
- Page 16 mevqb`=jÉëëíÉÅÜåáâ=dãÄe= figure 9: Output “media-ctl –p”: Now the Camera is present at “dev/video0” device. The camera is ready for access. «=mevqb`=jÉëëíÉÅÜåáâ=dãÄe=OMOM= NS=L=NU= pìééçêí=eçíäáåÉ=bìêçéÉWW=HQV=ESNPNF=VOONJ PN==ÜííéWLLïïïKéÜóíÉÅKÇÉ= ● pìééçêí=eçíäáåÉ=kçêíÜ=^ãÉêáÅ~W==NJUMMJOTUJ VVNP==ÜííéWLLïïïKéÜóíÉÅKÅçã= ●...
-
Page 17: Configuration Of Camera Features
mevqb`=jÉëëíÉÅÜåáâ=dãÄe= Configuration of camera features 8.1 Configuration with v4l2-ctl To set the various camera functions (e.g. exposure, gain, ...) use please the v4l2-ctl functions. You can get an overview of the existing functions by entering the commands: for example: v4l2-ctl -d /dev/video0 –all (list all) for example: v4l2-ctl -d /dev/video0 -L (list all detail) With this control are many features usable. - Page 18 If the microprocessor does not include debayering hardware, have to do the converting via software. For this you need additional processing power and the framerate goes down. It is better to use the NEON coprocessor of the i.MX 8M Mini. For this support PHYTEC a special function.
Need help?
Do you have a question about the phyCAM and is the answer not in the manual?
Questions and answers