Table of Contents
Advertisement
Quick Links
Congratulations on your choice of EDISION agrus vip3 Magicvision receiver.
Please note that all the information included in this leaflet are valid at the date of printing the document.
Currently updated information and comprehensive manual are available at: www.edision.gr
Open package
360mm
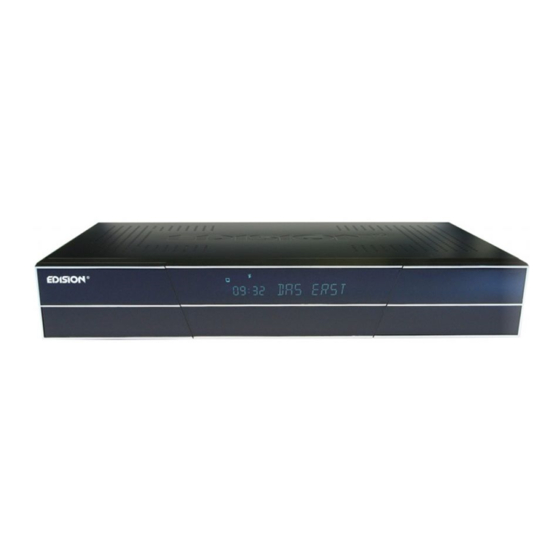
Argus vip3 Magicvision receiver
Note:
The front cover may be covered by a transparent plastic film from the factory, that can be easily peeled off.
The package may include accessories that are not mentioned in the respective section.
Connection
Note: For trouble-free TV signal reception,
the installation and calibration should be carried
out by a qualified professional.
Connect the receiver to your TV set
through the HDMI port, using a HDMI cable.
Connect the coaxial cable from the LNB,
to the "LNB IN" input on the back of the receiver,
using an F-type plug
Connect the receiver to the mains socket.
Install the batteries in the remote control,
paying attention to the correct polarity.
Activation:
Activate the receiver by pressing the ON/OFF switch in the back, to the "ON" position. The receiver goes into "BOOT" mode and after a few moments it is ready for use.
In case it does not BOOT, please press "POWER" on the remote control. When the BOOT procedure is finished, you can press MENU on the remote control
to access the following functions and adjustments:
Main Menu:
System
setup
Signal
setup
System Information
User
preferences
Games
Internet
Access system
USB/PVR
access*
* Active only when a compatible external USB memory device is plugged in.
By pressing the "INFO" button during the TV/Radio mode, the info window appears. If available, information
on TV/Radio, program recording storage option, currently displayed channel, program & favorites list,
current & next program, will appear in this window.
Teletext (optional)
EDIVISION (optional)
Subtitle (optional)
Program locked
IR remote control with 2x AAA batteries
LNB IN:
Connection for the coaxial
cable from the LNB
Note: Please respect the battery polarity during the installtion in the remote control. If the remote control is left unused
for a long period of time, please remove the batteries in order to avoid damage to the device.
Please recycle the used batteries for enviromental purposes and do not dispose of them along with domestic garbage.
Functions and Adjustments (valid on the date of printing this document)
Channel edit (channel list), Favorites setup (Favorites list), Miscellaneous setup
(Channel list indication, subtitle display, StandBy mode options, remote control channel memory, Loop control), OSD menu options.
Satellite signal setup (for DVB-S2), Automatic setup, Satellite guide, Terrestrial signal (DVB-T) setup.
Language and Menu setup, EDIVISION and Teletext, Subtitles, Parental Control/Program safety, Receiver Lock, Password, Clock setup,
Time, Time Zone, Summer Time adjustment, Date, Timer control, Audio & Video setup ( display function, visual angle,
Video output control, Digital Audio control)
Software info, Factory default values, USB/HDD update, external USB/HDD backup (software, channel lists)
Tetris, Snake, Othello
Network setup (Wired/WiFi, DHCP, IP address, Subnet Mask, Port, DNS), HTTP update (manual, auto), FTP,
weather forecast, RSS news.
Smart Card
File lists (recording, MP3, JPG images, software), memory info (format HDD, DVR setup), PVR setup,
USB/HDD Speed Test, Safely Remove USB device.
Program scrambled
Channel in Favorites list
Information
100
95
Congratulations on your choice of EDISION agrus vip3 Magicvision receiver.
75
Please note that all the information included in this leaflet are valid at the date of printing the document.
Currently updated information and comprehensive manual are available at: www.edision.gr
25
5
Open package
IR remote control with 2x AAA batteries
0
360mm
Argus vip3 Magicvision receiver
Note:
The front cover may be covered by a transparent plastic film from the factory, that can be easily peeled off.
The package may include accessories that are not mentioned in the respective section.
Connection
Note: For trouble-free TV signal reception,
the installation and calibration should be carried
out by a qualified professional.
LNB IN:
Connection for the coaxial
Connect the receiver to your TV set
cable from the LNB
through the HDMI port, using a HDMI cable.
Connect the coaxial cable from the LNB,
to the "LNB IN" input on the back of the receiver,
using an F-type plug
Connect the receiver to the mains socket.
Install the batteries in the remote control,
paying attention to the correct polarity.
HDMI: HDMI audio/video
output for connection
to the TV set,
using a HDMI cable
Note: Please respect the battery polarity during the installtion in the remote control. If the remote control is left unused
for a long period of time, please remove the batteries in order to avoid damage to the device.
Please recycle the used batteries for enviromental purposes and do not dispose of them along with domestic garbage.
Activation:
Activate the receiver by pressing the ON/OFF switch in the back, to the "ON" position. The receiver goes into "BOOT" mode and after a few moments it is ready for use.
In case it does not BOOT, please press "POWER" on the remote control. When the BOOT procedure is finished, you can press MENU on the remote control
to access the following functions and adjustments:
Main Menu:
Functions and Adjustments (valid on the date of printing this document)
System
Channel edit (channel list), Favorites setup (Favorites list), Miscellaneous setup
setup
(Channel list indication, subtitle display, StandBy mode options, remote control channel memory, Loop control), OSD menu options.
Signal
Satellite signal setup (for DVB-S2), Automatic setup, Satellite guide, Terrestrial signal (DVB-T) setup.
setup
Language and Menu setup, EDIVISION and Teletext, Subtitles, Parental Control/Program safety, Receiver Lock, Password, Clock setup,
Time, Time Zone, Summer Time adjustment, Date, Timer control, Audio & Video setup ( display function, visual angle,
System Information
Video output control, Digital Audio control)
User
Software info, Factory default values, USB/HDD update, external USB/HDD backup (software, channel lists)
preferences
Tetris, Snake, Othello
Games
Network setup (Wired/WiFi, DHCP, IP address, Subnet Mask, Port, DNS), HTTP update (manual, auto), FTP,
Internet
weather forecast, RSS news.
100
Access system
Smart Card
95
USB/PVR
File lists (recording, MP3, JPG images, software), memory info (format HDD, DVR setup), PVR setup,
access*
USB/HDD Speed Test, Safely Remove USB device.
75
* Active only when a compatible external USB memory device is plugged in.
By pressing the "INFO" button during the TV/Radio mode, the info window appears. If available, information
25
on TV/Radio, program recording storage option, currently displayed channel, program & favorites list,
current & next program, will appear in this window.
5
Teletext (optional)
EDIVISION (optional)
Program scrambled
0
Subtitle (optional)
Program locked
Channel in Favorites list
HDMI: HDMI audio/video
100/250V~
output for connection
50/60 Hz
to the TV set,
to mains power supply
using a HDMI cable
in the wall socket.
Service information
100
95
75
In case
25
Information
Service information
5
0
of technical
In case
of technical
support,
please refer
to your
EDISION
-
dealer
support,
for professional
support.
please refer
Table Device Connection TV
Use one HDMI
to your
100/250V~
50/60 Hz
EDISION
to mains power supply
in the wall socket.
dealer
-
for professional
support.
100
95
75
25
5
0
Table Device Connection TV
Use one HDMI
Advertisement
Table of Contents

Related Manuals for Edision agrus vip3 Magicvision


Summary of Contents for Edision agrus vip3 Magicvision
- Page 1 Congratulations on your choice of EDISION agrus vip3 Magicvision receiver. Please note that all the information included in this leaflet are valid at the date of printing the document. Currently updated information and comprehensive manual are available at: www.edision.gr Open package...
- Page 2 Moves to multiple image function (optional) Rear side For more information, please visit: www.edision.gr ETHERNET (RJ45): for connection with LAN/INTERNET, for home use LNB IN: for connecting the coaxial cable from the LNB, using the proper plug 0/12V 50mA: Voltage supply output for connecting external devices that require power...
Need help?
Do you have a question about the agrus vip3 Magicvision and is the answer not in the manual?
Questions and answers