
Related Manuals for Texi Tronic 1 NEO


Summary of Contents for Texi Tronic 1 NEO
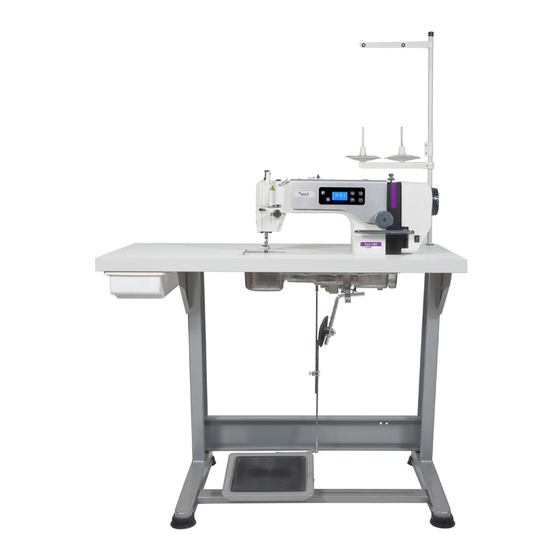
- Page 1 Operation manual for high speed direct drive lockstitch machine with built-in energy saving motor Tronic 1 NEO...
- Page 2 TEXI Tronic 1 NEO - Operation manual...
-
Page 3: Table Of Contents
TEXI Tronic 1 NEO - Operation manual CONTENTS Safety precautions User's manual 1. Before starting work 2. Mounting the machine 3. Lubrication of machine 4. Mounting the thread stand 5. Mounting the needle 6. Mounting the bobbin 7. Installation of bobbin case 8. -
Page 4: Safety Precautions
TEXI Tronic 1 NEO - Operation manual SAFETY PRECAUTION This instruction manual contains important guidelines regarding correct, safe and economical method of use of the machine. Following recommendations contained in this manual will decrease work down-time, increase machine reliability and durability, and will make work safer. -
Page 5: User's Manual
TEXI Tronic 1 NEO - Operation manual USER’S MANUAL The lockstitch machine TEXI Tronic 1 NEO is a high speed sewing machines, designed for sewing knitted materials or other textiles. Attention! The machine is not to be used for other materials than those for which it has been designed. -
Page 6: Mounting The Machine
TEXI Tronic 1 NEO - Operation manual 2. Mounting the machine 1. Fixing oil tray 1) Put the oil tray ② on the four groove corners on the sewing table. 2) Fix two arm cushion ① to the A side of oil tray ② (facing the operator). Fix the two stand bases ③ to the B side of oil tray ②... -
Page 7: Mounting The Thread Stand
TEXI Tronic 1 NEO - Operation manual 4. Mounting the thread stand 1. As shown in right-hand figure, mount the thread stand component onto the mounting hole for thread stand on the sewing machine table. 2. Screw down retaining nut ① for lower segment of thread stand lever to fix the thread stand. -
Page 8: Installation Of Bobbin Case
TEXI Tronic 1 NEO - Operation manual 7. Installation of bobbin case 1. Turn the machine pulley to raise the needle until it is above the needle plate. 2. Hold the bobbin case ① (with bobbin) with one hand, then install the bobbin case into the hook. -
Page 9: Threading
TEXI Tronic 1 NEO - Operation manual ⑦ ⑧ ⑦ ⑥ ① ③ ⑦ ④ ② Fig.12 ⑤ Fig.11 9. Threading the needle thread When threading the upper thread, turn the handwheel first to raise the thread take-up to the highest position, then draw the thread from the wire rack according to the sequence number shown in the figure below. -
Page 10: Lifting Of Presser Foot
TEXI Tronic 1 NEO - Operation manual 10. Lifting the presser foot 1. Lift presser foot controlled by hands 1) Shut down the machine, turn presser foot lever ① in direction A to uplift the presser foot (for about 5.5 mm). -
Page 11: Operating The Treadle
TEXI Tronic 1 NEO - Operation manual 13. Operating the treadle The treadle has 4 operation levels: 1) The machine runs at low sewing speed when you lightly depress the front part of the pedal. (as shown in the picture B) 2) The machine runs at high sewing speed when you further depress the front part of the pedal. -
Page 12: Oil Mass Adjustment Of Rotating Hook
TEXI Tronic 1 NEO - Operation manual 3. Adjustment of stepping return strength 1) Loosen nut ⑥ and turn bolt ⑦ to adjust stepping return strength : tighten bolt ⑦, the strength increases; loosen bolt ⑦, the strength decreases. 2) Tighten nut ⑥ after adjusting stepping return strength. -
Page 13: Adjusting The Presser Foot Pressure
TEXI Tronic 1 NEO - Operation manual 3. Guide sample of oil mass adequacy 1) The guide sample shown in the right-hand figure(see Fig. 24) may be finely adjusted Spattered oil (increased or reduced) as per different sewing Too much... -
Page 14: Adjustment Of The Knee Lift Height
TEXI Tronic 1 NEO - Operation manual 18. Adjustment of the knee lift height 1. Turn the machine pulley so that the feed dog is below the top of the needle plate. 2. Lower the presser foot by using the lifting lever. -
Page 15: Adjusting The Take-Up Amount Of Take-Up Lever
TEXI Tronic 1 NEO - Operation manual 20. Adjusting the take-up amount of take-up lever 1. Loosen the screw ①. 2. Move the right thread hook ② to adjust: the thread amount of thread take-up lever will increase if turned... -
Page 16: Adjusting The Take-Up Spring
TEXI Tronic 1 NEO - Operation manual 22. Adjusting the take-up spring ① ① ④ ③ ⑤ ※The tension of take-up spring ※The take-up spring keeps ② is too high, so needle thread is ③ on functioning till the end drawn out of place B in process of the action. -
Page 17: Adjust The Synchronization Of The Needle And Feed
TEXI Tronic 1 NEO - Operation manual 0~0.05mm ② ③ ② ④ DB×1 DA×1 DP×5 ① Fig.33 24. Adjust the synchronization of the needle and feed ① ② Needle timing is advanced ③ Standard Needle timing is delayed Fig.34 1. Remove the rubber plug ①. -
Page 18: Adjustment Of The Height Of Feed Dog
TEXI Tronic 1 NEO - Operation manual 25. Adjustment of the height of feed dog 1. Turn the pulley until the feed dog rises to the highest position. ② ① 2. Turn over the sewing machine head on the supporting bar. -
Page 19: Maintenance
TEXI Tronic 1 NEO - Operation manual 27. Maintenance 1. Raise the presser foot. ① 2. Remove the two screws ,and then ① remove the needle plate ②. ② 3. Remove dust adhered to feed dog ③ and thread trimmer unit with a soft brush or cloth. -
Page 20: Carrying And Placing Of The Sewing Machine
TEXI Tronic 1 NEO - Operation manual 28. Carrying and placing of the sewing machine 1. Carrying of the machine It needs to hold tight frame body of the sewing machine by two people as the picture shows. Fig.40 2. Attention for placing Must be put in the plain site. -
Page 21: Ask Your Supplier About
TEXI Tronic 1 NEO - Operation manual 32. Ask your supplier about: Machine needle with tip adjusted to sewed material: R - round, standard tip for most fabrics SPI - very slim, acute tip, for a precise piercing of densely woven materials... -
Page 22: Ce Declaration Of Conformity
TEXI Tronic 1 NEO - Operation manual CE DECLARATION OF CONFORMITY Distributor: Strima Sp. z o.o. Swadzim, st. Poznańska 54 62-080 Tarnowo Podgórne, Polska We declare, that the following product: Lockstitch machine Texi Tronic 1 NEO (ZJ-A6000-G/02) which this declaration relates, complies with the following directives:... - Page 23 TEXI Tronic 1 NEO - Operation manual NOTES...
- Page 24 Dealer:...
Need help?
Do you have a question about the Tronic 1 NEO and is the answer not in the manual?
Questions and answers