Table of Contents
Advertisement
Quick Links
Advertisement
Table of Contents

Related Manuals for Texi X


Summary of Contents for Texi X
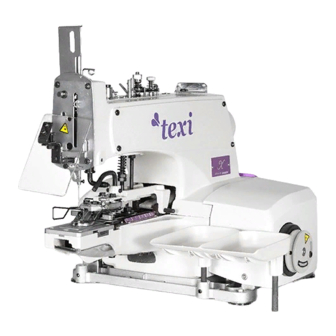
- Page 1 Opera on manual Computer controlled direct drive b on sewing machine Texi X...
-
Page 5: Table Of Contents
CONTENTS GENERAL SAFETY PRECAUTIONS……………………………………………………………………… TECHNICAL SPECIFICATIONS……………………………………………………………………………. INSTALLATION OF MACHINE HEAD …………………………………………………………………….. LUBRICATION ……………………………………………………………………………………………….. INSERTING THE NEEDLE …………………………………………………………………………………. ATTACHING THE NEEDLE BAR GUARD…………………………………………………………………. ATTACHING THE BUTTON TRAY ASSEMBLY…………………………………………………………... THREADING THE MACHINE………………………………………………………………………………... THREAD TENSION ADJUSTMENT…………………………………………………………………………. ADJUSTMENT OF THE THREAD PULL-OFF LEVER…………………………………………………….. NEEDLE-TO-LOOPER RELATION…………………………………………………………………………... ADJUSTMENT OF THE NIPPER…………………………………………………………………………….. -
Page 6: General Safety Precautions
TEXI X operation manual IMPORTANT! This instruction manual contains important guidelines regarding correct, safe and economical method of use of the machine. Following recommendations contained in this manual will decrease work down-time, increase machine reliability and durability, and will make work safer. - Page 7 TEXI X operation manual USER’S MANUAL The computer controlled direct drive button sewing machine TEXI, model X, is a high speed sewing machine, designed for sew- ing woven or knitted materials or other textiles. The machine is equipped with a closed oil circulation system, thanks to which the amount of used oil has been reduced to the necessary minimum.
-
Page 8: Technical Specifications
TEXI Silence Matic Dry operation manual TECHNICAL SPECIFICATIONS TEXI X Max. 1,600 rpm (Normal Sewing speed 1,500 rpm) 8, 16 and 32 stitches Number of stitches (6, 12 and 24 by changing the cam) Feed amount Lateral feed 2.5 to 6.5 mm Longitudinal feed 0, 2.5 to 6.5 mm... -
Page 9: Inserting The Needle
TEXI X operation manual INSERTING THE NEEDLE Loosen screw (1) Insert needle (2) as far as possible. Tighten screw (1). ATTACHING THE NEEDLE BAR GUARD Loosen screw (2) and remove the thread guide. Place needle guard under the thread guide. -
Page 10: Threading The Machine
TEXI Silence Matic Dry operation manual THREADING THE MACHINE For threading the machine please check below drawing (thread the machine in order from 1-18). THREAD TENSION ADJUSTMENT Tension post No.1 is used to adjust the thread tension to sew on the button and a relatively low tension will be enough. -
Page 11: Needle-To-Looper Relation
TEXI X operation manual NEEDLE-TO-LOOPER RELATION Adjust the needle-to-looper relation as follows: 1. Depress the pedal fully forward, turn the needle driving pulley in the normal sewing direction to bring down the needle bar to the lowest point and loosen screw (1) . -
Page 12: Position Of The Needle Guide
TEXI Silence Matic Dry operation manual POSITION OF THE NEEDLE GUIDE Loosen screw (2) and provide a 0.05 to 0.1 mm clearance be- tween the needle guide (1) and the needle, by moving the nee- dle guide (1) to the left or the right when the needle is in the lowest position. -
Page 13: Timing Of Thread Tension Release
TEXI X operation manual TIMING OF THREAD TENSION RELEASE Tum the needle driving pulley as you draw the thread in the direction of the arrow as illustrated and you will find a point at which the tension disc on the tension post No. 2 release the thread. At this moment, the standard distance from the top end of the needle bar to the top end of the needle bar bushing (upper) is 44 to 47 mm. -
Page 14: Stitches Models
TEXI Silence Matic Dry operation manual Height of the moving knife thread separation nail There must be a 0.5 to 0.7 mm clearance between looper blade point (2) and thread separation nail (1). If nail (1) does not provide the necessary clearance, bend the nail slightly and adjust the clearance. - Page 15 TEXI X operation manual TROUBLES CAUSES CORRECTIVE MEASURES The yoke slide does not move in the cor- Adjust the timing of the motion of the yoke rect way. slide at each end. The thread tension post No. 2 fails to rele-...
-
Page 16: Parts Book
TEXI X parts book Parts Book BUTTON CLAMP MECHANISM COMPONENTS... - Page 17 TEXI X parts book code DESCRIPTION PICK-UP DEVICE ASM. 40902001 BUTTON CLAMP LIFTING HOOK 402S14006 SCREW 15/64-28 L=9 409S12001 SCREW 3/16-32 L=13.5 40928001 WASHER 5×10.5×1 300145 BUTTON CLAMP HOULDER 409S11002 SCREW 9/64-40 L=3.5 4091600100 BUTTON CLAMP 40912002 JAW LEVER HOLDER 409S20002 HINGE SCREW D=5.5 H=1.8...
-
Page 18: Arm & Miscellaneous Covers Components
TEXI X parts book ARM & MISCELLANEOUS COVERS COMPONENTS... - Page 19 TEXI X parts book ARM & MISCELLANEOUS COVERS COMPONENTS DESCRIPTION 4091206200 FACE PLATE COMPL 406S11009 SCREW 40927004 TENSION SPRING 40902003 NIPPER RELEASING STOP 409S11003 SCREW 40913002 THREAD GUIDE NO.4 4091301400 THREAD TENSION NO.3 ASM. 40913015 TENSION ADJUSTING BASE NO.3 40913016...
- Page 20 TEXI X parts book 402S20032 HINGE SCREW D=6 H=2.5 40128001 SPRING 40912020 SAFETY PLATE INSTALLING BASE 401S16004 NUT SM15/64-28 40901028 MORTOR BASE 413S13012 SCREW M5 L=20 40901032 FIXED SEAT 409S11003 SCREW SM3/16-28 406S11009 SCREW SM11/64-40 40911009 MOTOR COVER 409S11003 SCREW SM3/16-28...
-
Page 21: Looper Shaft Mechanism Components
TEXI X parts book LOOPER SHAFT MECHANISM COMPONENTS... - Page 22 TEXI X parts book DESCRIPTION THRUST COLLAR .ASM 40908002 THRUST COLLAR D=7.94 W=7 409S11012 SCREW 9/64-40 L=6.1 409S11010 SCREW 40912021 NEEDLE GUARD 40909001 POSITONGNING FINGER YOKE SLIDE 409S17001 SCREW SM11/64-40 L=9 40909002 YOKE SLIDE INSERT 40912022 YOKE SLIDE 4090500100 ASSY LOOP POSITIONING FINGER L...
- Page 23 TEXI X parts book 409S14003 SCREW 1/4-40 L=7 40925001 CAM SHAFT ASM. 409S14003 SCREW 1/4-40 L=6 40917001 LOOPER 409S11009 SCREW M11/64-40 L=9...
-
Page 24: Nipper & Thread Tension Parts Components
TEXI X parts book NIPPER & THREAD TENSION PARTS COMPONENTS... - Page 25 TEXI X parts book DESCRIPTION 409S11013 SCREW SM15/64-28 L=12 40912024 NEEDLE BAR GUARD 409S20010 SHOULDER SCREW 409S16005 409S16006 4091202500 NIPPER COMPL 409S20011 LOOPER SHAFT BUSHING REAR 40927007 NIPPER BAR BLOCK SPRING 409S30004 NIPPER BAR BLOCK SPRING SCREW 409S20012 HINGE SCREW D=4 H=20...
- Page 26 TEXI X parts book 40913007 THREAD RENSION DISK NO.1 409S30007 THREAD RENSION POST NO.2 40913009 THREAD GUIDE 40913010 THREAD GUIDE NO.1 409S16010 409S11013 SCREW 40912100 NIPPER BAR BEARING BLOCK 409S30008 ADJUSTING SCREW 40928005 WASHER 5.5×10×0.8 409S11015 SCREW 409S11016 SCREW 40927011...
-
Page 27: Feed Plate Components
TEXI X parts book FEED PLATE COMPONENTS... - Page 28 TEXI X parts book DESCRIPTION 40915001 FEED PLATE SMALL BUTTON 409S12003 SCREW 3/16-28 L=6 40909004 LNDICATOR PIN BEARING BLOCK 40912036 CROSSWISE FEED INDICATOR 40903010 CROSSWISE FEED INDICATOR PIN 409S16012 NUT M=6 400110 SLIDE PLATE CONNNECTING LINK 409S20015 HING SCREW D=6.35 H=4.8...
- Page 29 TEXI X parts book 40903015 CAM SHAFT BUSHING LEFT 40910006 LATERAL FEED CAM 40910004 LONGITUDINAL FEED CAM 409S20015 SHOULDER SCREW D=6.35 H=4.8 401S14001 SCREW 9/32-28 L=13.5 40903013 CAM SHAFT BUSHING RIGHT 401S14001 SCREW 9/32-28 L=13.5 409S11005 SCREW M5 L=8 40923014...
-
Page 30: Button Clamp Lifter Components
TEXI X parts book BUTTON CLAMP LIFTER COMPONENTS... - Page 31 TEXI X parts book DESCRIPTION 40901033 LIFTING LEVER 40903016 BUSHING 40902009 NDDELE BAR LEVER 40928014 WASHER 8.5×18.0×1.2 40922001 CUSHION 40927012 SPRING 40927013 SPRING 40912074 BUTTON CLAMP LIFTING ROD A 40912042 CONNECTING LINK FRONT 40903032 L TYPE LIFTING BAR ROLLER 40928021...
- Page 32 TEXI X parts book 409S16018 NUT M5 40901034 THREAD TRIMMING LEVER BASE 4091210000 CRANK ROD 40128034 WASHER 40911010 ECTROMAGNET COVER 403S11027 SCREW M4 L=7.5 S05035 SCREW M5 L=25...
-
Page 33: Needle Driving Pulley Shaft Components
TEXI X parts book NEEDLE DRIVING PULLEY SHAFT COMPONENTS... - Page 34 TEXI X parts book DESCRIPTION 40903034 PULLEY SHAFT BUSHING LEFT 40603020 THRUST COLLAR 403S14004 SCREW M6 40925004 DRIVING GEAR(A) ASM. 409S14001 SCREW 1/4-40 L=6 40902024 NEEDLE DRIVING PULLEY SHAFT 40903024 PULLEY SHAFT BUSHING RIGHT SPACE 401S14001 SCREW 15/64-28 40901030 MAIN SHAFT CONNECTOR...
- Page 35 TEXI X parts book NEEDLE BAR DRIVING MECHANISM COMPONENTS...
- Page 36 TEXI X parts book...
-
Page 37: Ce Declaration Of Conformity
TEXI O operation manual CE DECLARATION OF CONFORMITY Distributor: Strima Sp. z o.o. Swadzim, st. Poznańska 54 62-080 Tarnowo Podgórne, Polska We declare, that the following product: Industrial button sewing machine Texi X (JM-2377D) which this declaration relates, complies with the following directives:... - Page 40 Dealer:...
Need help?
Do you have a question about the X and is the answer not in the manual?
Questions and answers
Ce este eroare e023