Table of Contents
Advertisement
Advertisement
Table of Contents

Subscribe to Our Youtube Channel
Related Manuals for Wood-mizer EG200


Summary of Contents for Wood-mizer EG200
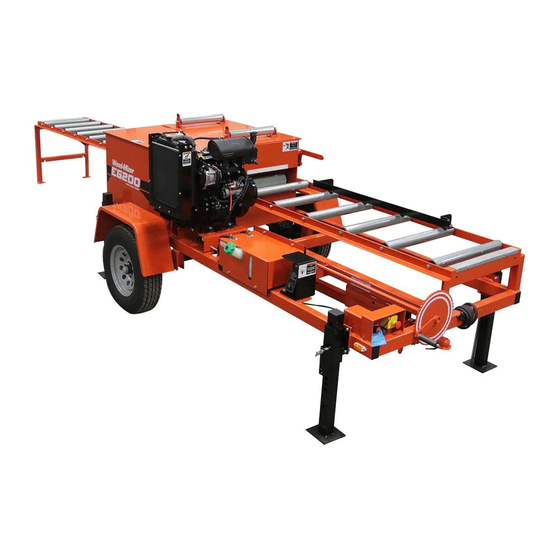
- Page 1 Twin Blade Edger Safety, Operation& Maintenance Manual EG200G26 rev. B2.03 EG200D24 rev. B2.03 EG200EC15 rev. B2.03 Safety is our #1 concern! Read and understand all safety information and instructions before oper- ating, setting up or maintaining this machine. Form #904...
- Page 2 Printed in the United States of America, all rights reserved. No part of this manual may be reproduced in any form by any photographic, electronic, mechanical or other means or used in any information storage and retrieval system without written permission from Wood-Mizer 8180 West 10th Street Indianapolis, Indiana 46214...
- Page 3 Table of Contents Section-Page Table of Contents EGdoc072519...
-
Page 4: Table Of Contents
Table of Contents Section-Page ABOUT THIS MANUAL SECTION 1 SAFETY Safety Symbols..................1-1 Safety Instructions ..................1-2 SECTION 2 SERVICING THE EDGER If You Need To Order Parts ..............2-1 Customer and Edger Identification............2-2 If You Need Service ................2-4 SECTION 3 EDGER SETUP Setting Up the Edger ................3-1 Electrical Installation (EE15 Only) ............3-3 Pre-Operation Check ................3-4... -
Page 5: About This Manual
Wood-Mizer ® EG200 Twin Blade Edger. All future mailings will be an addition to or a revi- sion of individual sections of this manual as we obtain new information. The information and instructions given in this manual do not amend or extend the limited warranties for the equipment given at the time of purchase. -
Page 6: Safety
Safety Safety Symbols SECTION 1 SAFETY Safety Symbols The following symbols and signal words call your attention to instructions concerning your personal safety. Be sure to observe and follow these instructions. DANGER! indicates an imminently hazardous situation which, if not avoided, will result in death or serious injury. WARNING! suggests a potentially hazardous situation which, if not avoided, could result in death or serious injury. -
Page 7: Safety Instructions
Wood-Mizer Edger. Wood-Mizer owners are encour- aged to become thoroughly familiar with these applicable laws and comply with them fully while using or towing the Edger. WEAR SAFETY CLOTHING... - Page 8 Servicing The Edger Safety Instructions WARNING! Always wear eye, ear, respiration, and foot protection when operating or servicing the Edger. DISPOSE OF SAWING BY-PRODUCTS PROPERLY WARNING! Maintain a clean and clear path for all necessary movement around the Edger and lumber stacking areas. Failure to do so will result in serious injury.
- Page 9 Servicing The Edger Safety Instructions induce a fire or explosion. WARNING! Store gasoline away from saw- dust and other flammable materials. Failure to do so may result in serious injury. CHECK EDGER BEFORE OPERATION OR TOW- DANGER! Make sure all guards and covers are in place and secured before operating or tow- ing the Edger.
- Page 10 Servicing The Edger Safety Instructions DANGER! Engine components can become very hot during opera- tion. Avoid contact with any part of a hot engine. The exhaust com- ponents of your engine are especially hot during and following operation. Contact with hot engine components can cause serious burns.
- Page 11 Servicing The Edger Safety Instructions WARNING! Coastdown Required. Always shut off the engine and allow all moving parts to come to a complete stop before removing any guards or covers. Do NOT operate with any guards or covers removed. WARNING! Kickback Hazard.
- Page 12 Servicing The Edger Safety Instructions WARNING! Never assume or take the word of another person that the power is off; check it out and lock it out. WARNING! Do not wear rings, watches, or other jewelry while working around an open electrical circuit. WARNING! Before performing service near moving parts such as blades, pul-...
- Page 13 Servicing The Edger Safety Instructions To control maintenance dangers: Lockout procedures must be followed (see ANSI Standard Z244.1-1982 and OSHA regulation 1910.147). Never rely on machine stop control for maintenance safety (emer- gency stops, on/off buttons, interlocks). Do not reach into moving blades or feed systems. Allow all coast- ing parts to come to a complete stop.
- Page 14 Owner’s Responsibility The procedures listed in this manual may not include all ANSI, OSHA, or locally required safety procedures. It is the owner/operator’s responsibility and not Wood-Mizer Products to ensure all operators are properly trained and informed of all safety protocols.
-
Page 15: Servicing The Edger
If You Need To Order Parts SECTION 2 SERVICING THE EDGER Wood-Mizer is committed to providing you with the latest technology, best quality and strongest customer service available on the market today. We continually evaluate our customers’ needs to ensure we’re meeting current wood-processing demands. Your com- ments and suggestions are welcome. -
Page 16: Customer And Edger Identification
Customer and Edger Identification Customer and Edger Identification Each Wood-Mizer edger has a 17-digit Vehicle Identification Number (VIN). In addition, when you pick up your edger, you will receive a customer number. These three numbers will help expedite our service to you. Please locate them now and write them below so you have quick, easy access to them. - Page 17 Servicing The Edger Customer and Edger Identification See below for a description of the V.I.N. A1 017 A1 .01 V.I.N. DESCRIPTION. Servicing The Edger EGdoc072519...
-
Page 18: If You Need Service
Servicing The Edger If You Need Service If You Need Service From the continental U.S., call us toll-free at 1-800-525-8100. Ask to speak with a Cus- tomer Service Representative. Please have your vehicle identification number and your customer number ready when you call. The Service Representative can help you with questions about the operation and maintenance of your edger. -
Page 19: Edger Setup
Servicing The Edger Setting Up the Edger SECTION 3 EDGER SETUP Setting Up the Edger 1. Lower and set the front two outriggers. To lower, use the provided jack handle to lift the weight from the locking pin. If necessary, rotate the locking pin counterclockwise so that the inner roll pin is free from the outrigger channel notch, then pull the locking pin out to release the outrigger. - Page 20 Servicing The Edger Setting Up the Edger 2. Unhitch the Edger from the vehicle. See Figure 3-2. When towing, the hitch can be used in the upper or lower hitch receiver tube. For storage, however, the hitch must be in the lower hitch receiver tube. To store, move the hitch safety pin to the upper receiver tube.
-
Page 21: Electrical Installation (Ee15 Only)
Servicing The Edger Electrical Installation (EE15 Only) Electrical Installation (EE15 Only) DANGER! Make sure all electrical installation, service and/or maintenance work is performed by a qualified elec- trician and is in accordance with applicable electrical codes. DANGER! Hazardous voltage inside the electric disconnect box, starter box, and at the motor can cause shock, burns, or death. -
Page 22: Pre-Operation Check
Servicing The Edger Pre-Operation Check Pre-Operation Check Prior to operating the Edger; always perform these basic checks: 1. Make sure the Edger has been properly set up. 2. Make sure the engine drive belt is tensioned properly. See Section 4.2 for more informa- tion. - Page 23 Servicing The Edger Pre-Operation Check 4. Be sure all guards and covers are in place and secured. DANGER! Make sure all guards and covers are in place and secured before operating or towing the Edger. Failure to do so may result in serious injury. 5.
-
Page 24: Edging Lumber
Servicing The Edger Edging Lumber Edging Lumber DANGER! Make sure all guards and covers are in place and secured before operating or towing the Edger. Failure to do so may result in serious injury. DANGER! Keep all persons out of the path of moving equipment and boards when operating the Edger or loading boards. - Page 25 Servicing The Edger Edging Lumber 1. Set the setworks dial indicator for the desired size of boards to be cut. See Figure 3-5. The setworks dial adjusts the movable saw blade closer to or farther away from the fixed saw blade, thus setting the width of the cut to be made. To set, press the lock release, turn the setworks handle as necessary, and release the lock release into the appropriate labeled hole, from 3"...
- Page 26 Servicing The Edger Edging Lumber 2. Set the front fence. See Figure 3-6. The front fence of the infeed table can be left in place and used as a guide or pivoted up, out of the way. Front Fence in UP Position TB0009 FIG.
- Page 27 Servicing The Edger Edging Lumber See Figure 3-7. Emergency Stop Twist to release TB0007 FIG. 3-7 5. To start D21/D26 diesel Edgers, insert the key into the key switch and turn to the pre- heat (#3) position. Wait the recommended glow plug on time then turn the key to the start (#2) position.
- Page 28 Servicing The Edger Edging Lumber See Figure 3-8. Indicator Lights Water Glow Battery Temp Plug Pressure Hourmeter Keyswitch TB0040 FIG. 3-8 6. Gently push the board through the anti-kickback fingers into the blade until the board begins to feed itself. 7.
-
Page 29: Preparing The Edger For Towing
Servicing The Edger Preparing the Edger for Towing Preparing the Edger for Towing IMPORTANT! Your vehicle should be equipped with a Class 2 hitch with a solid 2” ball (not two-piece) and rated for at least 3500 pounds (1588 kg). The hitch should be correctly mounted to the towing vehicle so that it will be able to pull this type of load. - Page 30 Servicing The Edger Preparing the Edger for Towing around the ball. Secure the locking handle with the safety pin. DANGER! Make sure hitch bracket is securely fastened around ball before towing the edger. Ball should be com- pletely engaged by the hitch bracket and securely locked in place.
-
Page 31: Maintenance
Servicing The Edger Changing the Blades SECTION 4 MAINTENANCE Refer to the engine manufacturer’s manual for maintenance intervals and procedures regarding the power supply unless otherwise instructed in this manual. Follow the manu- facturer’s recommendations for dusty conditions. IMPORTANT! This manual only provides information about additional procedures or procedures to be performed at dif- ferent time intervals than found in the manufacturer's manu- als. - Page 32 Servicing The Edger Changing the Blades 3. Remove the blade shaft bearing plate assembly from the Edger. To remove, first unbolt and remove the blade shaft end guard. Loosen the blade bearing retaining bolt. Remove the three lock washers and hex nuts on the bearing plate and pry the plate from the Edger.
- Page 33 Servicing The Edger Changing the Blades 5. Unscrew and remove the adjustable blade locking nut. Slide the movable blade from the shaft. See Figure 4-2. Movable Blade Arbor Fixed Blade Blade Locking Nut FIG. 4-2 6. Apply an anti-seize lubricant to the face of the arbor and to the face and threads of the blade locking nut.
- Page 34 Servicing The Edger Changing the Blades EGdoc072519 Servicing The Edger...
-
Page 35: Tensioning The Belts
Servicing The Edger Tensioning the Belts Tensioning the Belts DANGER! Always shut off the engine and allow all moving parts to come to a complete stop before removing any guards or covers. Failure to do so will result in serious injury. - Page 36 Servicing The Edger Tensioning the Belts Retighten the engine mounting bolts. Retighten the belt guard mounting bolts. Drive Belt Guard Mounting Bolts (2) TB0012 Motor Mount Bolts (4) Adjustment Bolts (2) FIG. 4-3 EGdoc072519 Servicing The Edger...
- Page 37 Servicing The Edger Tensioning the Belts 2. Check the idler belt for wear every 8 hours of operation. Tension or replace as necessary. Tension should be 1/8" deflection with 9 lbs of force for new belts or 1/8" deflection with 6 lbs of force for used belts.
-
Page 38: Tensioning The Chains
Servicing The Edger Tensioning the Chains Tensioning the Chains Check the drive chains for tension every 40 hours of operation and tension as necessary. The chains should have approximately 1/2" of slack. NOTE: The smaller idler chains have no adjustment. See Figure 4-5. -
Page 39: Checking The Rollers
Servicing The Edger Checking the Rollers Checking the Rollers 1. Check the feed rollers every 8 hours of operation. Remove any dirt or debris from the roll- ers. Make sure they spin freely, without much play. Replace the spring-loaded feed rollers as needed. -
Page 40: Lubrication
Servicing The Edger Lubrication Lubrication 1. Clean any debris from the blade drive shaft and every 8 hours of operation. Use a soft cloth to apply a dry graphite daily to ensure resistance-free motion and to prevent surface corrosion. Also, clean debris from the rack and pinion every 8 hours of operation. Lubricate with dry graphite. -
Page 41: Feed Rate
Servicing The Edger Feed Rate Feed Rate The feed rate can be adjusted. Operating the Edger with the larger sheave in the top posi- tion will result in a feed rate of 50-60 feet per minute. Operating with the smaller sheave on top will result in a feed rate of 70-80 feet per minute. -
Page 42: Maintaining And Sharpening Anti-Kickback Fingers
Servicing The Edger Maintaining and Sharpening Anti-Kickback Fingers Maintaining and Sharpening Anti-Kickback Fingers This machine has the potential for kick-backs. Kick-backs can cause the board to be sud- denly and uncontrollably hurled towards the operator. Such action can result in severe injury or death. -
Page 43: Alignment
Servicing The Edger Alignment Alignment WARNING! Before performing service near moving parts such as blades, pulleys, motors, belts and chains, first turn the engine key switch to the OFF (#0) position and remove the key. If the key is turned on and moving parts activated, serious injury may result. - Page 44 Servicing The Edger Alignment Align Blade to String Align String to Fixed Scale TB0027 Fence Adjustment FIG 4-7 4. Next, use the front fence adjustment bolt to adjust the front fence parallel with the string. 5. To position the adjustable blade, set the setworks dial at 3". Measure from the inside of the fixed blade to the inside of the movable blade.
-
Page 45: Troubleshooting
Servicing The Edger Boards Are Not Self-Feeding SECTION 5 TROUBLESHOOTING Boards Are Not Self-Feeding DANGER! Always shut off the engine and allow all moving parts to come to a complete stop before removing any guards or covers. 1. If boards are not self-feeding, increase the tension on the top press rollers. 2. -
Page 46: Jammed Boards
Servicing The Edger Jammed Boards Jammed Boards DANGER! Always shut off the engine and allow all moving parts to come to a complete stop before removing any guards or covers. 1. If a board becomes jammed, temporarily remove press roller tension to release the board. 2. -
Page 47: Index
INDEX maintenance alignment 4-13 anti-kickback fingers 4-12 changing blades feed rate adjustment 4-11 feed rollers lubrication 4-10 tensioning belts tensioning chains operation edger setup edging lumber electrical installation pre-operation checks preparing for towing 3-11 safety instructions symbols service requirements troubleshooting feed problems jammed boards Index...
Need help?
Do you have a question about the EG200 and is the answer not in the manual?
Questions and answers