Table of Contents
Advertisement
Quick Links
Advertisement
Table of Contents

Related Manuals for Xylem Lowara Scuba Dry Series


Summary of Contents for Xylem Lowara Scuba Dry Series
- Page 1 Additional Installation, Operation and Maintenance Instructions SCUBA DRY Series...
-
Page 2: Table Of Contents
en – Original Instructions Table of Contents Introduction and Safety ............................4 Introduction ..............................4 Safety ................................4 Danger levels and safety symbols ....................... 4 1.2.1 User safety ..............................5 1.2.2 Protection of the environment ........................6 1.2.3 Sites exposed to ionizing radiations......................6 1.2.4 Handling and Storage ............................... - Page 3 en – Original Instructions Submerged unit ............................26 5.2.2 Rotation sense check (three-phase motors) ....................26 Wrong rotation direction ........................... 26 5.3.1 Stopping ................................. 26 Maintenance ................................27 Precautions ..............................27 Surface unit maintenance ..........................27 Submerged unit maintenance ........................28 Long periods of inactivity ..........................
-
Page 4: Introduction And Safety
The instructions and warnings of this manual apply to the standard unit as described in the sale documentation. Special version pumps may be supplied with supplementary instruction manuals. For situations not considered in the manual or in the sales document, contact Xylem or the Authorised Distributor. -
Page 5: User Safety
en – Original Instructions Complementary symbols Symbol Description Electrical hazard Hot surface hazard Danger, system pressurized Do not use flammable liquids Do not use corrosive liquids Protect against freezing Read the instruction manual 1.2.2 User safety Strictly comply with current health and safety regulations. WARNING: This unit must be used only by qualified users. -
Page 6: Protection Of The Environment
en – Original Instructions 1.2.3 Protection of the environment Disposal of packaging and product Comply with the current regulations on sorted waste disposal. Leaking of fluid The unit contains a small quantity of lubricant oil: always put in place the necessary measures to ensure that any spilled lubricant does not disperse in the environment. -
Page 7: Handling And Storage
• Accept the goods with reserve, indicating any findings on the transport document, or • Reject the goods, indicating the reason on the transport document. In both cases, promptly contact Xylem or the Authorised Distributor from whom the product was purchased. -
Page 8: Unit Handling
en – Original Instructions 2.3 Unit handling Lift the unit by attaching a rope to the lifting ring. DANGER: Electrical hazard Holding the unit by the power supply cord or the float switch is strictly forbidden. WARNING: Use cranes, ropes, lifting straps, hooks and clasps that comply with current regulations and that are suitable for the specific use. - Page 9 3. Close the plug. 4. Follow the same instructions for the storage of the packed unit. For further information about preparation for long-term storage, please contact Xylem or the Authorised Distributor. SCUBA DRY – Additional Installation, Operation and Maintenance Instructions...
-
Page 10: Technical Description
en – Original Instructions 3 Technical Description 3.1 Designation Multistage close-coupled pump unit with threaded port. 3.2 Denomination of the models Model Description Surface pump unit SCDS Surface and submersible pump unit 3.3 Data plate SCUBA DRY – Additional Installation, Operation and Maintenance Instructions... -
Page 11: Identification Code
en – Original Instructions 1. Pump unit type 2. Product code 3. Flow 4. Head 5. Minimum head 6. Rated output 7. Motor characteristics 8. Weight 9. Speed 10. Maximum liquid temperature 11. Maximum ambient temperature 12. Maximum operating pressure 13. -
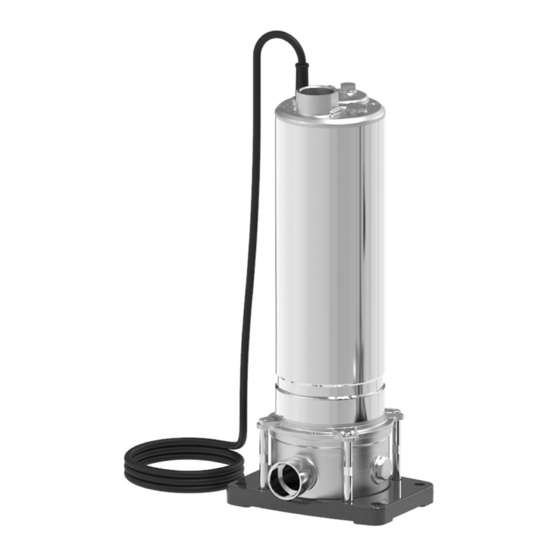
Page 12: Names Of The Main Components
en – Original Instructions 3.5 Names of the main components 1. Power supply cord 2. Discharge port 1 11 3. Upper head 4. Upper bearing support 1 12 5. Shaft and bearings 6. Stator casing 7. Lower bearing support 1 13 8. -
Page 13: Intended Use
en – Original Instructions 3.6 Intended use • Water supply from collection tanks for domestic use • Irrigation • Pressure boosting systems • Rain water collection tanks • Vehicle washing systems • Systems subjected to water jet • Craft pressure boosting systems •... -
Page 14: Use In Water Distribution Networks For Human Consumption
en – Original Instructions 3.8 Use in water distribution networks for human consumption If the unit is intended for water supply to people and/or animals: WARNING: It is prohibited to pump drinking water after use with other fluids. WARNING: Take appropriate measures during transport, installation and storage to prevent contamination from external substances. -
Page 15: Installation
en – Original Instructions 4 Installation 4.1 Precautions Before starting the works, make sure that the instructions shown in Introduction and Safety on page 4 have been fully read and understood. DANGER: All the hydraulic and electrical connections must be completed by a technician possessing the technical-professional requirements outlined in the current regulations. -
Page 16: Permitted Positions
en – Original Instructions 4.2.1 Permitted positions 4.3 Hydraulic connection DANGER: All the hydraulic and electrical connections must be completed by a technician possessing the technical-professional requirements outlined in the current regulations. DANGER: Electrical hazard Holding the unit by the power supply cord or the float switch is strictly forbidden. WARNING: Piping must be sized to ensure safety at the maximum operating pressure. - Page 17 en – Original Instructions 3. Support the pipes independently to prevent them from weighing on the unit. 4. Install appropriate seals between the unit and the piping system connections. 5. Check the piping system for perfect tightness. Suction pipe 1. Suction pipes exceeding 10 m in length (33 ft) must have a larger diameter than the suction port.
- Page 18 en – Original Instructions Figure 1: Surface unit, example of suction lift installation 1. Diaphragm tank 2. Bleed valve 3. Start and stop device 4. Control panel 5. Pressure gauge 6. Check valve 7. Fill plug 8. Electric power supply cord 9.
- Page 19 en – Original Instructions Figure 2: Surface unit, example of positive suction head installation 1. Diaphragm tank 2. Bleed valve 3. Start and stop device 4. Control panel 5. Pressure gauge 6. Check valve 7. Fill plug 8. Electric power supply cord 9.
-
Page 20: Connecting Submerged Units
en – Original Instructions 4.3.2 Connecting submerged units Preliminary operations 1. Check that the tank or the basin are of appropriate size for housing the unit, with an even perimeter without obstacles. 2. Check that the sizes of the tank/basin do not hinder the free movement of the float switch and the float suction filter, if present. - Page 21 en – Original Instructions Figure 3: Submerged unit, installation example 1. Check valve 2. Maximum level 3. Nylon tie 4. Nylon tie 5. Float suction filter (optional) 6. Unit 7. Electric power supply cord 8. Lifting rope 9. Float switch (optional) NOTICE: In the operating position, the unit, the piping system, the electric power supply cord and the lifting rope must never be in contact with the walls of the tank/basin.
-
Page 22: Electrical Connection
en – Original Instructions Float switch adjustment If present, the float switch controls the automatic start and stop of the unit. To change its action: 1. Loosen the floater adjustment clip screw. 2. Adjust the length of the float switch cable based on the desired minimum and maximum levels: •... -
Page 23: Guidelines For Electrical Connection
en – Original Instructions DANGER: Electrical hazard Check that the external protection conductor (ground) is longer than the phase conductors; In case of accidental disconnection of the unit from the phase conductors, the protection conductor must be the last one to detach itself from the terminal. DANGER: Electrical hazard Install suitable systems for protection against indirect contact, in order to prevent lethal electric shocks. -
Page 24: Guidelines For The Electrical Control Panel
en – Original Instructions 4.4.3 Guidelines for the electrical control panel NOTICE: The electric panel must match the ratings on the data plate. Improper combinations could damage the motor. • Install appropriate devices for protecting the motor from overloads and short circuits: Motor Safety features Single-phase... -
Page 25: Use And Operation
en – Original Instructions 5 Use and operation 5.1 Precautions DANGER: Electrical hazard Do not use the unit in swimming pools or similar places when people are inside. WARNING: Make sure that the drained liquid cannot cause damage or injuries. WARNING: Electrical hazard Check that the unit is properly connected to the mains power supply. -
Page 26: Initial Start-Up
en – Original Instructions 5.2 Initial start-up 5.2.1 Surface unit 1. Shut the on-off valve located on the discharge line. 2. Open the on-off valve on the suction line, if present. 3. Using the filling plug, fill the suction lift unit, or vent the positive suction head unit. 4. -
Page 27: Maintenance
Xylem or the Authorised Distributor for its replacement. 2. Check the pressure at zero flow rate and compare it with the pressure recorded during first start up; if the difference between the two values exceeds 10-15%, contact Xylem or the Authorised distributor. -
Page 28: Submerged Unit Maintenance
2. Check the pressure at zero flow rate and compare it with the pressure recorded during first start up; if the difference between the two values exceeds 10-15%, contact Xylem or the Authorised distributor. 3. Carefully clean the unit and the filters. -
Page 29: Troubleshooting
WARNING: Observe the safety requirements in the chapters on Use and Operation and Maintenance. WARNING: If a fault cannot be corrected or is not mentioned, contact Xylem or the Authorised Distributor. 7.2 The unit does not start Cause Solution... -
Page 30: There Is Little Or No Flow Rate And Pressure
Liquid leaks from the gaskets of the piping system or the unit • Replace the gaskets • Check that the installation complies with the intended use limits and/or • Contact Xylem or the Authorised Distributor Low rotation speed Check the calibration of the frequency converter, if installed Undersized unit Contact Xylem or the Authorised Distributor 7.4 The unit starts too frequently (automatic start/stop) -
Page 31: The Unit Never Stops (Automatic Start/Stop)
Check the type of differential Low insulation unit Contact Xylem or the Authorised Distributor for the replacement 7.7 The unit stops and starts cyclically, single-phase version The unit with single-phase motor stops and starts cyclically, without the intervention of the float switch or the starter. -
Page 32: The Motor Protector In The Panel Has Tripped, Three-Phase Version
The unit does not turn freely due to a mechanical fault Check and repair the unit Power supply cord is damaged Contact Xylem or the Authorised Distributor for the replacement Wrong power supply voltage Check the power supply voltage Pumped liquid too thick... -
Page 33: Technical Information
Non-aggressive, non-explosive atmosphere, and not subjected to frost. Temperature of pumped liquid 0 to 40°C (32 to 104°F). NOTICE: If the temperature exceeds the stated limits, contact Xylem or the Authorised Distributor. Suspended impurities Model Maximum diameter, mm (in) 1SCD(S) ≤... -
Page 34: Maximum Operating Pressure Pn
en – Original Instructions 60 Hz Model Head, m (ft) Model Head, m (ft) Model Head, m (ft) 1SCD3/05/6C 46 (151) 5SCD3/11/6C 51 (167) 3SCD4/09/6T 67 (219) 1SCD4/07/6C 61 (200) 5SCD4/15/6C 69 (226) 3SCD6/15/6T 100 (328) 1SCD5/09/6C 73 (238) 8SCD2/11/6C 32 (103) 5SCD2/07/6T 35 (115) -
Page 35: Electrical Specifications
en – Original Instructions 8.6 Electrical specifications Speed Frequency Hz Speed, min 2900 3500 Permitted tolerances for the supply voltage Frequency Hz Phase ~ No. of conductors + earth UN, V ± % 2 + 1 220-240 ± 6 3 + 1 230/400 ±... -
Page 36: Disposal
Producer of EEE as per Directive 2012/19/EU: (IE) Xylem Water Solutions Ireland Ltd - 50 Broomhill Close - Airton Road - D24 Tallaght - Dublin 24 (MT) (GB) Xylem Water Solutions UK Ltd - Millwey Rise Industrial Estate – Axminster - Devon EX13 5HU... -
Page 37: Declarations
– Original Instructions 10 Declarations 10.1 EC Declaration of Conformity (Original) Xylem Service Italia S.r.l., with headquarters at Via Vittorio Lombardi 14 - 36075 Montecchio Maggiore VI - Italy, hereby declares that the product: Close-coupled pump unit (see rating plate) fulfils the relevant provisions of the following European Directives: •... -
Page 38: Eu Declaration Of Conformity (N. 36)
Signed for and on behalf of: Xylem Service Italia S.r.l. Montecchio Maggiore, 07/01/2020 Amedeo Valente (Director of Engineering and R&D) rev.00 Lowara is a trademark of Xylem Inc. or one of its subsidiaries. SCUBA DRY – Additional Installation, Operation and Maintenance Instructions... -
Page 39: Warranty
en – Original Instructions 11 Warranty 11.1 Information For information on the warranty refer to the documentation of the sale contract. SCUBA DRY – Additional Installation, Operation and Maintenance Instructions... - Page 40 For more information on how Xylem can help you, go to www.xyleminc.com Xylem Service Italia S.r.l. Via Vittorio Lombardi 14 36075 –...
Need help?
Do you have a question about the Lowara Scuba Dry Series and is the answer not in the manual?
Questions and answers