
Related Manuals for Planet NMC-360V-12


Summary of Contents for Planet NMC-360V-12
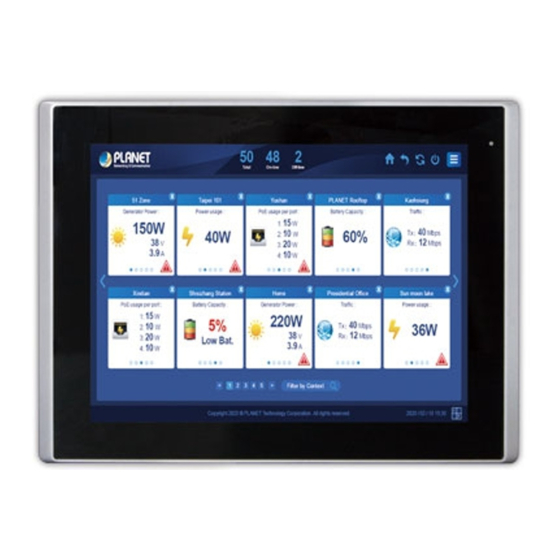
- Page 1 Renewable Energy Management Controller with LCD Touch Screen NMS-360V Quick Installation Guide...
-
Page 2: Table Of Contents
Table of Contents 1. Package Contents ..................3 2. Hardware Description .................. 4 2.1 Physical Specifications ................5 2.2 Product Features ................. 7 2.3 Specifications ..................8 3. Deployed Devices Monitored via NMS-360V Controller ........10 4. Wired Network Configuration ..............12 5. Entering into the Web Management .............13 6. -
Page 3: Package Contents
1. Package Contents Thank you for purchasing PLANET Universal Network Management Controller. PLANET NMS-360V comes in two sizes as described below: NMS-360V-12 Renewable Energy Management Controller with 12" LCD Touch Screen NMS-360V-10 Renewable Energy Management Controller with 10" LCD Touch... -
Page 4: Hardware Description
2. Hardware Description Audio Line Out USB Port COM 1 COM 2 HDMI LAN Port 9-36V DC IN Power Indicator... -
Page 5: Physical Specifications
2.1 Physical Specifications Model NMS-360V-10 NMS-360V-12 Dimensions (W x D x H) 285 x 49 x 189 mm 319 x 51.7 x 245 mm Weight 2 kg 2.9 kg NMS-360V-10 (10” Panel) NMS-360V-12 (12” Panel) - Page 6 VESA Mounting The NMS-360V series is designed to be VESA-mounted as shown in the picture. Just carefully place the LCD stand on the back of the controller and tighten the given screws to secure the mounting. Panel Mounting There are eight holes located along the four sides of the NMS-360V. Insert the clamp from the four sides and tighten them with the nuts provided.
-
Page 7: Product Features
Maximum Scalability 1 site map, 512 nodes, 2048 managed IP cameras. Network Management Characteristics z Built-in DHCP Server z Built-in RADIUS Server z SSL secure access z Web-based GUI management interface z SNMP v1, v2c, and v3 management z Supports PLANET DDNS/Easy DDNS... -
Page 8: Specifications
2.3 Specifications NMS-360V-10 NMS-360V-12 Product Renewable Energy Management Controller with LCD Touch Screen Platform Form Factor Panel Mount, VESA 100 x 100 Physical Specifications 2 10/100/1000BASE-T Gigabit Ethernet RJ45 ports 2 USB 3.0 ports (They cannot be used at the same time.) 1 Audio Line Out (reserved) I/O Interface 1 HDMI interface... - Page 9 Built-in DHCP Server for auto IP assignment to APs Network Console; Telnet; SSL;Web browser (Chrome is Management recommended); SNMP v1, v2c, v3 Discovery Supports SNMP, ONVIF and PLANET Smart Discovery Backup System backup and restore to local or USB HDD Provides system reboot manually or automatically Maintenance Reboot...
-
Page 10: Deployed Devices Monitored Via Nms-360V Controller
The NMS-360V incorporated in a workstation or PC can monitor the BSP-360s compliant with the MQTT Protocol, SNMP Protocol, ONVIF Protocol and PLANET Smart Discovery utility. Follow the steps below to set up the NMS-360V and BSP-360(V2) accordingly. Step 1. Connect the devices, NMS-360V Controller and your computer, to the same network. - Page 11 ...
-
Page 12: Wired Network Configuration
4. Wired Network Configuration A computer with wired Ethernet connection is required for the first-time configuration of the NMS-360V Controller. RJ45/UTP Cable NMS-360V PC / Workstation with Web Browser 192.168.1.x IP Address: 192.168.1.100 1. Go to “Control Panel-> Network and Sharing Center-> Change Adapter Settings”. 2. Double-click “Local Area Connection”. 3. Select “Internet Protocol version 4 (TCP/IPv4)” and click “Properties”. 4. -
Page 13: Entering Into The Web Management
IP address “https://192.168.1.100:8888”. Then, enter the default username and password shown above to log on to the system. The secure login with SSL (HTTPS) prefix is required. After logging on, connect the NMS-360V Controller to the managed network to centrally control PLANET managed devices. -
Page 14: Setup Wizard
6. Setup Wizard 1. Account Modification: Set a new account and password for security. 2. IP Configuration Setting: Set the NMS-360V’s IP into the same local network segment. - Page 15 3. Devices Discovery: Search the managed devices and add to list. (Finish Wizard) 4. If added devices are successful, you can see them in Device List / Management page.
-
Page 16: Further Information
If you have further questions, please contact the local dealer or distributor where you purchased this product. Copyright © PLANET Technology Corp. 2020. Contents are subject to revision without prior notice. PLANET is a registered trademark of PLANET Technology Corp. All other trademarks belong to their respective owners.
Need help?
Do you have a question about the NMC-360V-12 and is the answer not in the manual?
Questions and answers