
Related Manuals for Ramsey Winch Sierra H8


Summary of Contents for Ramsey Winch Sierra H8
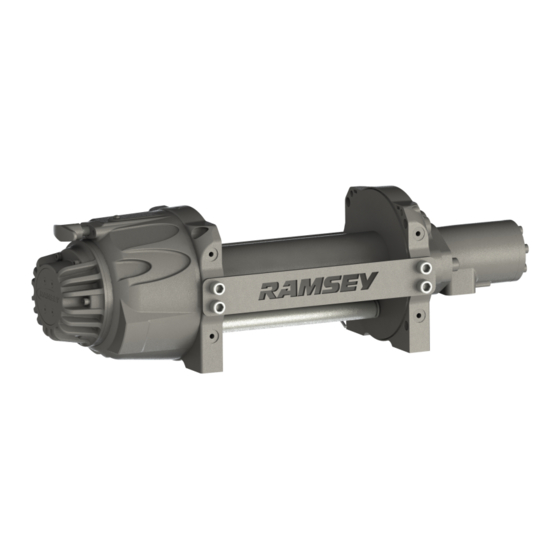
- Page 1 Operation, Service and Maintenance Manual Sierra H8 Hydraulic Winch Ramsey Winch Company P.O. Box 58151 - Tulsa, OK, 74158-1510 USA Phone 1-800-777-2760 - Fax (918) 438-6688 http://www.ramsey.com...
- Page 2 - This page intentionally left blank - 914281 - 1016 - A...
- Page 3 Table of Contents Introduction Pictogram Definitions Sierra H8 Specifications Winch Mounting Cable Installation - Set Screw Sierra Hydraulic Winch Operation Sierra Troubleshooting Guide Overhaul Section - Disassembly Overhaul Section - Assembly Assemblies and BOMs Dimensional Drawing - Manual Shift Dimensional Drawing - Air Shift...
- Page 4 Refer to the last page for information on the Ramsey Winch limited warranty. At the time of publishing, this manual is accurate to the best of our knowledge. Ramsey Winch reserves the right to change any or all items, components and parts, necessary for any reason. This right does not obligate Ramsey Winch to immediately update the manual.
- Page 5 Pictogram Definitions Read and understand this entire manual before using the winch. Clutch must be fully engaged during winching operations. Do not disengage clutch under load. Keep all personnel out from under and away from raised loads. Do not use the winch to lift, support, or otherwise transport people. Do not exceed maximum line pull ratings shown in specifications.
- Page 6 Do not use the winch in hoisting applications due to the required hoist safety factors and features. Do not try to guide the rope during winching operations. Always wear the appropriate personal protection equipment during winching operations. Illustrates the engaged and disengaged positions for the clutch handle on winches with a manual clutch. Illustrates the engaged and disengaged positions for the clutch handle on winches with a semi-automatic clutch.
- Page 7 Illustrates the engaged and disengaged positions on winches with electric shift. Illustrates the engaged and disengaged positions on winches with air shift. The winch is intended to be used for vehicle recovery and pulling loads. This image illustrates the minimum number of wraps of rope for the particular winch. The blanks on these images will have printed data specific to the particular winch.
- Page 8 Sierra H8 Specifications Performance Table SIERRA H8 lbs. 8000 RATED LINE PULL 3620 GEAR REDUCTION WEIGHT (WITHOUT CABLE) 90 lbs. LAYER OF CABLE lbs. 8000 6700 5700 5000 4500 *RATED LINE PULL PER LAYER 3620 3040 2585 2270 2040 CABLE CAPACITY 16.7 27.4 39.6 LINE SPEED (AT 17 GPM) 14.5 17.0 19.4 22.1 24.6 *These specifications are based on recommended 3/8"...
- Page 9 Hydraulic System Layout 914281 - 1016 - A...
- Page 10 Winch Mounting It is important to mount the winch securely so the three major sections (the motor end, the cable drum, and the gear housing end) are properly aligned. Excessive bushing wear and difficulty freespooling are usually symptoms of misalignment. If the winch is mid-mounted, attach at least one tie-plate to the mounting feet at the bottom of the winch to maintain alignment.
- Page 11 Cable Installation - Set Screw An "A" or "B" decal on the motor end bearing indicates the spooling direction of the cable. If the decal is damaged or unreadable, contact Customer Service for addition information. 1. Unwind the cable by rolling it out along the ground to prevent kinking. Securely wrap the end of the cable opposite of the hook with plastic or similar tape to prevent fraying.
- Page 12 Sierra Hydraulic Winch Operation Familiarize yourself with winch by making test runs before the first pull. Plan your test in advance. You hear your winch as see it operate; learn to recognize the sounds of a light steady pull, a heavy pull, and sounds caused by load jerking or shifting.
- Page 13 Sierra Troubleshooting Guide CONDITIONS POSSIBLE CAUSE CORRECTION DRUM WILL NOT ROTATE WITH 1. Winch not mounted squarely causing 1. Check the mounting. Verify it's end bearings to bind the drum. square. NO LOAD 2. Brake damaged. 2. Inspect and replace brake. 3. Gears damaged. 3. Inspect and replace damaged gears.
- Page 14 Overhaul Section - Disassembly Tie Bar Removal 1. Remove the capscrews (#9) to remove the tie plates (#7). 914281 - 1016 - A...
- Page 15 Motor Assembly Removal 1. Carefully remove the spring retention plate (#8) by removing the capscrews (#11). Remove the washers (#12). Remove the spacers (#6) from the spring tensionser assembly (#3) and remove the spring tensioner assembly. Remove the motor assembly (#2) from the winch. 2.
- Page 16 Drum Removal 1. Pull the input coupling (#14) out of the drum (#15). Drive the roll pin (#16) out of the coupling (#14). 2. Pull the shaft (#5) out of the drum. Remove the O-ring (#20) from the shaft (#5). 3. Lift the drum (#15) off of the gear housing assembly and remove the dowel pins (#17). 914281 - 1016 - A...
- Page 17 Removing the Brake Cover 1. Set the gearbox assembly with the output side down. 2. Remove the brake housing (#103) by removing the capscrews (#111) and sealing washers (#119). The dowel pins (#124) will be loose when the brake housing is removed. 3.
- Page 18 Removing the Brakes 1. Remove the wave washers (#121), stator plate (#104), the brake disc (#114), two separator plates (#105), the brake disc, the stator plate, the brake disc, and the cam (#107). 914281 - 1016 - A...
- Page 19 Removing the Brake Hub 1. Remove the O-ring (#117) from the brake spacer (#108). Remove the brake spacer and cam pilot (#109). 2. Carefully press the cam pilot (#109) from the brake spacer (#108). 3. Remove the brake actuator (#115) and thrust washer (#123) from the brake hub (#112). 4.
- Page 20 Removing the End Bearing 1. Remove the end bearing (#203) by removing the capscrews (#208, #207). Remove the O-ring (#216). 914281 - 1016 - A...
- Page 21 Removing the Output Carrier Assembly 1. Remove the output carrier assembly (#201), output ring gear (#212), output sun gear (#214), and carrier spacer (#206). 2. Remove the input carrier assembly (#202), input ring gear (#213), and input sun gear (#215). Remove the O-ring (#217) and carrier spacer (#206) from the input sun gear.
- Page 22 Removing the O-ring Adapter 1. Press the O-ring adapter (#204) from the gear housing. Remove the O-ring (#218) from the O-ring adapter. 914281 - 1016 - A...
- Page 23 Manual Shift 1. Remove the jam nut (#227) and the detent screw (#226). 2. Remove the handle (#106) by driving out the roll pin (#118). Slide the shifter shaft assembly (#225) from the hous- ing (#224). 914281 - 1016 - A...
- Page 24 Air Shift 1. Remove the plunger (#210) by removing the shoulder bolt (#209). Remove the roll pins (#219) from the plunger. Slide the clutch springs (#224) out of the gear housing (#205). 2. Remove the plug (#221) from the gear housing. Remove the air cylinder (#211) from the gear housing. Remove the shims (#222), if present, and the shifter shaft (#223) from the air cylinder (#211) by driving out the roll pin (#220).
- Page 25 Overhaul Section - Assembly Pre-assembly Preparation 1. Spray the inside of the gear housing, outside of the output ring gear, ring gear pilot in the end bearing, shifter shaft and plunger with water resistant WD40. Let dry completely before assembling the winch. Air Shift 1.
- Page 26 Manual Shift 1. Slide the clutch springs (#224) into the gear housing. Lightly coat the shifter shaft assembly with 75w90 syn- thetic gear oil. Slide the shifter shaft assembly (#225) into the gear housing. Slide the clutch handle (#106) on the shifter shaft assembly and lock in place with the roll pin (#118).
- Page 27 Gear Housing 1. Lightly lubricate the O-ring (#218) with MOBILITH SHC 007 grease and place on the O-ring adapter (#204). Press the O-ring adapter into the gear housing. 914281 - 1016 - A...
- Page 28 Installing the Gear Sets 1. Place the O-ring (#217) and carrier spacer (#206) onto the input sun gear (#215). Slide the input sun gear into the into the gear housing. Generously apply MOBILITH SHC 007 grease to the sun gear teeth. 2. Install the input ring gear (#213) into the gear housing. Generously apply MOBILITH SHC 007 grease to the input ring gear's teeth.
- Page 29 End Bearing Assembly 1. Lubricate the O-ring (#216) with grease and place in the channel in the gear housing. 2. Align the end bearing (#203) on the output carrier assembly. Orient the end bearing as necessary. Use the capscrews (#207, #208) to attach the end bearing to the gear housing. 914281 - 1016 - A...
- Page 30 Assembling the Brake 1. Install the springs (#122) in the gear housing. Place the brake disc (#113) and cam plate (#107) on the springs. Place the long leg of the preload spring (#120) into the hole in the input sun gear. Install the brake hub (#112) where the short leg of the spring is in the hole of the brake hub and the brake hub is piloted on the input sun gear.
- Page 31 4. Place the cam (#107) on the brake hub. Align the cam to hit the corner of the cam surface in the relaxed position per cam alignment picture. Ensure the cams can rotate so they are fully collapsed. Install the brake discs (#114), the stator plates (#104), separator plates (#105) and wave washers (#121) in the order shown.
- Page 32 5. Place the dowel pins (#124) in the slots of the stator plates. Wrap a string around the outside of the dowel pins to prevent them from falling over. Lower the brake housing (#103) and align with all the dowel pins. Once the brake housing is on the dowel pins, remove the string and use a 5/8" hex shaft to rotate the brake actuator to close the brake.
- Page 33 Drum Assembly 1. Place a little MOBILITH SHC 007 grease on each of the dowel pins (#17) to hold them in place in the output car- rier. Lower the drum (#15) onto the dowel pins ensuring they are properly lined up. Lightly grease the O-ring (#20) and slide onto the shaft (#5).
- Page 34 Motor Installation 1. Install the thrust disc (#19), spring (#18), and the drag brake (#4) into the motor assembly (#2). Start sliding the motor assembly into the coupler. 2. Slide a spring tensioner spacer (#6) onto each end of the shaft of the spring tensioner. Place the spring tensioner assembly (#3) into the detent in the gear housing assembly.
- Page 35 Tie Bar Installation 1. Install the tie bars (#7) with the capscrews (#9). 914281 - 1016 - A...
- Page 36 Assemblies and BOMs Main Winch 914281 - 1016 - A...
- Page 37 Main Winch BOM ITEM # QTY. PART NUMBER DESCRIPTION 297084 GEAR SIDE ASSEMBLY- B Rotation, Manual Shift 297093 GEAR SIDE ASSEMBLY- B Rotation, Air Shift 297095 GEAR SIDE ASSEMBLY- A Rotation, Manual Shift 297094 GEAR SIDE ASSEMBLY- A Rotation, Air Shift 297086 MOTOR ASSEMBLY 297088...
- Page 38 Brake Assembly Manual Shift 914281 - 1016 - A...
- Page 39 Brake Assembly Manual Shift BOM ITEM # QTY. PART NUMBER DESCRIPTION 297085 GEAR BOX ASSEMBLY 297104 BRAKE COVER 328196 BRAKE HOUSING 330024 BRAKE STATOR 330025 SEPARATOR PLATE 336010 HANDLE 340083 CAM PLATE-DRIVEN 362348 BRAKE SPACER 412177 CAM PILOT 415402 SCREW - M5X0.8X10mm FLAT HEAD 415412 CAPSCREW - M6 X 1.0 X 30mm LONG 431057...
- Page 40 Gear Box Assembly Manual Shift 914281 - 1016 - A...
- Page 41 Gear Box Assembly Manual Shift BOM ITEM # QTY. PART NUMBER DESCRIPTION 247045 OUTPUT CARRIER ASSEMBLY 247049 INPUT CARRIER ASSEMBLY 297102 END BEARING ASSEMBLY 300077 ORING ADAPTER 328188 GEAR COVER 362347 SPACER 415405 CAPSCREW - M8X1.25X35mm BUTTON HEAD SOCKET 415413 M8 X 1.25 X 40mm FLAT HEAD SOCKET CAPSCREW 444120 OUTPUT RING GEAR 444126...
- Page 42 Brake Assembly Air Shift 914281 - 1016 - A...
- Page 43 Brake Assembly Air Shift BOM ITEM # QTY. PART NUMBER DESCRIPTION 297092 GEAR BOX ASSEMBLY 297104 BRAKE COVER 328196 BRAKE HOUSING 330024 BRAKE STATOR 330025 SEPARATOR PLATE 340083 CAM PLATE-DRIVEN 362348 BRAKE SPACER 412177 CAM PILOT 415402 SCREW - M5X0.8X10mm FLAT HEAD 415412 CAPSCREW - M6 X 1.0 X 30mm LONG 431057...
- Page 44 Gear Box Assembly Air Shift 914281 - 1016 - A...
- Page 45 Gear Box Assembly Air Shift BOM ITEM # QTY. PART NUMBER DESCRIPTION 247045 OUTPUT CARRIER ASSEMBLY 247049 INPUT CARRIER ASSEMBLY 297102 END BEARING ASSEMBLY 300077 ORING ADAPTER 328197 GEAR COVER 362347 SPACER 415405 CAPSCREW - M8X1.25X35mm BUTTON HEAD SOCKET 415413 M8 X 1.25 X 40mm FLAT HEAD SOCKET CAPSCREW 418549 SHOULDER BOLT...
- Page 46 Roller Tensioner Assembly Roller Tensioner Assembly BOM ITEM # QTY. PART NUMBER DESCRIPTION 346071 ROLLER SHAFT 346072 TENSIONER BAR 350775 350776 LEVER ARM 354065 ROLLER 412108 BUSHING 414819 CAPSCREW-.250-20UNC X .50 LG. 418223 WASHER-1/2 FLAT 490079 RETAINING RING 494145 SPRING-TORSION 494146 SPRING-TORSION 914281 - 1016 - A...
- Page 47 Motor Assembly Motor Assembly BOM ITEM # QTY. PART NUMBER DESCRIPTION 297103 END BEARING ASSEMBLY 458050 MOTOR 415409 CAPSCREW - M12X1.75X25mm SOCKET HEAD 914281 - 1016 - A...
- Page 48 Dimensional Drawing - Manual Shift 914281 - 1016 - A...
- Page 49 Dimensional Drawing - Air Shift 914281 - 1016 - A...
- Page 50 - This page intentionally left blank - 914281 - 1016 - A...
- Page 51 If field service at the request of the Buyer is rendered and the fault is found not to be with RAMSEY WINCH’s product, the Buyer shall pay the time and expense to the field representative. Bills for service, labor or other expenses that have been incurred by the Buyer without approval or authorization by RAMSEY WINCH will not be accepted.
- Page 52 Ramsey Winch Company P.O. Box 58151 - Tulsa, OK, 74158-1510 USA Phone 1-800-777-2760 - Fax (918) 438-6688 http://www.ramsey.com...
Need help?
Do you have a question about the Sierra H8 and is the answer not in the manual?
Questions and answers
The hand popped out, it looks like there is a pin broken, how to take it off and change if
To remove and replace a broken pin on a Ramsey Winch Sierra H8, follow these steps:
1. Identify the pin to be replaced. For example, dowel pins (#17, #124), or roll pin (#118).
2. Disassemble the relevant components to access the pin:
- Remove the drum (#15) to access dowel pins (#17).
- Remove the brake housing (#103) and brake cover (#102) to access dowel pins (#124).
- For the roll pin (#118), drive it out to remove the handle (#106).
3. Remove the broken pin carefully using appropriate tools (e.g., punch and hammer or pin extractor).
4. Insert the new pin in the correct position.
5. Reassemble all components in reverse order of disassembly.
Ensure correct alignment and secure all fasteners properly during reassembly.
This answer is automatically generated
how do you check the oil sierra h8 wench