Table of Contents
Advertisement
Quick Links
CAUTION !
Read all precautions and instructions in this manual before using this equipment. Keep this manual
for future reference.
Improper assembly, maintenance or use can void the warranty terms.
Version 1.0 2013 IC-MXIC3B-01 Copyright by Indoorcycling Group GmbH 2013
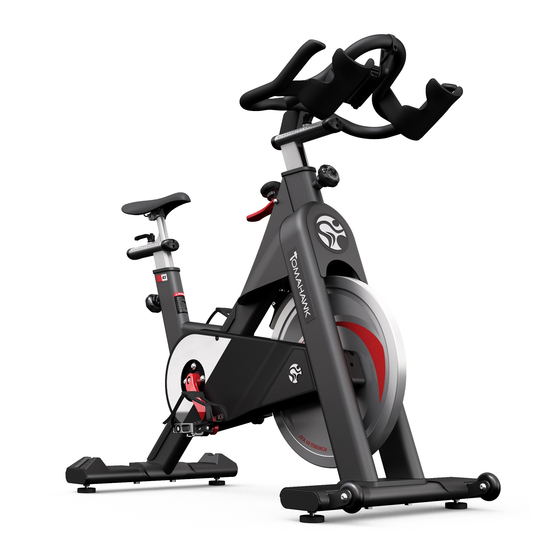
Matrix IC3
model no.:
IC-MXIC3B-01
Manufactured by:
Indoorcycling Group GmbH
Happurger Str. 86
90482 Nuremberg | Germany
www.indoorcycling.com
info@indoorcycling.com
MATRIX Fitness Systems Corp.
1610 Landmark Drive
Cottage Grove, WI 53527
Toll-free: 866.693.4863
Local: 608.839.8686
|
www.indoorcycling.com
ENG 1
Advertisement
Table of Contents

Subscribe to Our Youtube Channel
Related Manuals for Matrix IC3


Summary of Contents for Matrix IC3
- Page 1 Manufactured by: Indoorcycling Group GmbH Happurger Str. 86 90482 Nuremberg | Germany www.indoorcycling.com info@indoorcycling.com MATRIX Fitness Systems Corp. 1610 Landmark Drive Cottage Grove, WI 53527 Toll-free: 866.693.4863 Local: 608.839.8686 CAUTION ! Read all precautions and instructions in this manual before using this equipment. Keep this manual for future reference.
-
Page 2: Table Of Contents
24-28 Limited warranty page 29 The Matrix IC3 Bike is, according to EN 957, a Class S product for professional and / or commercial use. Such training equipment is intended for use in training areas Foot print: 52 x 120 cm / 20.5 x 47.2 inch... -
Page 3: Important Precautions
To reduce the risk of serious injury, read the following important precautions and information before operating the Matrix IC3 Indoor Cycle. It is the responsibility of the owner to ensure that all users of the Matrix IC3 Indoor Cycle are informed of all warnings and precautions. -
Page 4: Before You Begin
BEFORE YOU BEGIN Dear Customer, Congratulations on selecting the Matrix IC3 Indoor Cycle. The Matrix IC3 Indoor Cycle offers an impressive array of features designed to are beginners or experienced athletes, the Matrix IC3 Indoor Cycle offers workouts that Indoor Cycle. -
Page 5: How To Assemble The Matrix Ic3 Indoor Cycle
HOW TO ASSEMBLE Matrix IC3 Indoor Cycle SW 17mm 15mm Pedal hand tight SW 13mm Wrench STOP mark STOP mark Seat clamp must be tightened securely from both sides to minimize loosening during use. Version 1.0 2013 IC-MXIC3B-01 Copyright by Indoorcycling Group GmbH 2013 www.indoorcycling.com... - Page 6 HOW TO ASSEMBLE Matrix IC3 Indoor Cycle SW 17mm 15mm Pedal hand tight SW 13mm Wrench Version 1.0 2013 IC-MXIC3B-01 Copyright by Indoorcycling Group GmbH 2013 www.indoorcycling.com ENG 6...
- Page 7 HOW TO ASSEMBLE Matrix IC3 Indoor Cycle SW 17mm 15mm Pedal hand tight SW 13mm Wrench 13 mm Seat clamp must be tightened securely from both sides to minimize loosening during use. Pedal marked R installed on right crank (clockwise), Pedal marked L installed on left crank (counterclockwise).
-
Page 8: Initial Install Checks
INITIAL INSTALL CHECKS The cycle tune-up must be performed at initial installation of the indoor cycle for optimal performance and longevity. Please read and follow all instructions below. If the indoor cycle is not installed and tuned as described, components may wear excessively and the indoor cycle may become damaged. If you have questions about the installation, please contact (for example, BRUNOX) -
Page 9: How To Adjust The Matrix Ic3 Indoor Cycle
HOW TO ADJUST THE Matrix IC3 Indoor Cycle The Matrix IC3 Indoor Cycle can be adjusted for maximum comfort and exercise effec- tiveness. The instructions below describe one approach to adjusting the Matrix IC3 Indoor Cycle to ensure optimal user comfort and ideal body positioning. - Page 10 Matrix IC3 Indoor Cycle. Next, loosen the rear lever handle, slide the saddle forward or backward as required, and then retighten the lever handle.
- Page 11 . If your knees touch the handlebars, or if you experience back discomfort while pedaling for extended periods of time, the height of the handlebars can be adjusted. First, dismount the Matrix IC3 Indoor Cycle. Next, turn the front adjustment knob counterclockwise, slide the handlebar post up or down, and retighten the adjustment knob.
- Page 12 Due to the weight of the Matrix IC3 Indoor Cycle, it is recommended that two people move it. While one person lifts the back of the Matrix IC3 Indoor Cycle, the second person wheels. Carefully move the Indoor Cycle to the desired location and then lower it.
-
Page 13: Preventative Maintenance
1. Make sure that the Matrix IC3 Indoor Cycle is level. If the Matrix IC3 Indoor Cycle rocks motion is eliminated (see „How to move the Matrix IC3 Indoor Cycle“ on page 12). - Page 14 PREVENTATIVE MAINTENANCE 1. The Matrix IC3 Indoor Cycle should not be used if the emergency brake system is not working pro- perly. While sitting on the saddle and pedaling, test the brake by pulling upward on the emergency brake complete stop.
- Page 15 PREVENTATIVE MAINTENANCE 3. To maintain the easy adjustability of the hand- lebar post, the handlebar post should be cleaned and lubricated. First, turn the front adjustment knob counterclockwise and slide the handlebar post out of the frame. Apply a small amount of lubricant spray to a lint-free cloth, and clean the handlebar post Next, reinsert the handlebar post into the frame...
- Page 16 Turn resistance knob counterclockwise until it stops. 3. Some parts of the Matrix IC3 Indoor Cycle may become loose as a result of repeated use. Check pedals, toe clips and pedal straps, and make sure that they are properly tightened. Next, check all ex- posed screws, bolts, and nuts.
-
Page 17: Weekly Maintenance
MAINTENANCE ACTIVITY AND REQUIRED SCHEDULE Activity Rotation Details found on Feet leveling, disinfection and cleaning of the bike daily page 13 Servicing brake pads, detailed cleaning of the entire bike weekly page 13 Check emergency brake function bi-weekly page 14+16 Clean and lubricate saddle and handlebar sliders / posts bi-weekly page 14-15... -
Page 18: Bi-Weekly Maintenance
MAINTENANCE ACTIVITY AND REQUIRED SCHEDULE Bi-Weekly maintenance Checklist Bike No. Production code Observations Action Taken Result Name / date Monthly maintenance Checklist Bike No. Production code Observations Action Taken Result Name / date Version 1.0 2013 IC-MXIC3B-01 Copyright by Indoorcycling Group GmbH 2013 www.indoorcycling.com ENG 18... - Page 19 SPARE PARTS Drive Gear Parts Brake parts 130 01 00001 01 130 03 00001 01 130 01 00003 01 130 01 00004 01 130 01 00007 01 130 01 00008 01 130 01 00005 01 Version 1.0 2013 IC-MXIC3B-01 Copyright by Indoorcycling Group GmbH 2013 www.indoorcycling.com ENG 19...
- Page 20 SPARE PARTS Flywheel 150 01 00031 01 150 01 00010 01 150 03 00016 01 900 06 00002 01 100 01 00005 01 150 01 00033 01 150 01 00009 01 150 01 00032 01 Handlebar 150 03 00048 01 150 03 00048 01 Version 1.0 2013 IC-MXIC3B-01 Copyright by Indoorcycling Group GmbH 2013 www.indoorcycling.com...
- Page 21 SPARE PARTS Chain Guard Frame Version 1.0 2013 IC-MXIC3B-01 Copyright by Indoorcycling Group GmbH 2013 www.indoorcycling.com ENG 21...
- Page 22 SPARE PARTS Saddle Support Pedals 150 03 00048 01 150 01 00005 01 Version 1.0 2013 IC-MXIC3B-01 Copyright by Indoorcycling Group GmbH 2013 www.indoorcycling.com ENG 22...
- Page 23 SPARE PARTS Rear Stabilizer Front Stabilizer Version 1.0 2013 IC-MXIC3B-01 Copyright by Indoorcycling Group GmbH 2013 www.indoorcycling.com ENG 23...
- Page 24 Spare Part No. Description BRAKE ADJUSTMENT KNOB 1x NUT, M10 x 1.5P, ss304 STAINLESS STEEL, DIN934/ ISO4032 1x BRAKE ROD 1x ADJUSTMENT BALL 1x BRAKE ADJUSTMENT KNOB BRAKE ROD FRAME FITTING 1x WASHER, 22mm x 10mm x 2mm, ss304 STAINLESS STEEL, DIN125 / ISO 7090 1x COMPRESSION SPRING, 16mm x 30mm x 1.5mm, LOWER BRAKE ROD 1x...
- Page 25 Spare Part No. Description Chain Guard RUBBER GASKET OUTER CHAIN GUARD 1x OUTER CHAIN GUARD 1x OUTER CHAIN GUARD DECAL 1x OUTER CHAIN GUARD FRONT COVER 1x ALLEN BOLT, M4 x10 x 0.7P, ss304 STAINLESS STEEL, DIN912/ ISO4762 6x Drive Gear Rubber Cover For M20 Locking Nut 1x LOCKING NUT, M20 x 1.0P, 8.9 Steel, DIN982/ISO10512 1x BB BEARING DISTANCE SPACER, 24mm x 20mm x 12mm 1x...
- Page 26 DECAL MX - FRONT FORK BADGE 2x DECAL TRIBAL - FRONT COVER - TRANSFER BADGE 1x DECAL IC3 - SEAT POST TUBE - ALUMINIUM BADGE (LEFT) 1x DECAL IC3 - SEAT POST TUBE - ALUMINIUM BADGE (RIGHT) 1x POP PIN ADJUSTMENT KNOB Version 1.0 2013 IC-MXIC3B-01 Copyright by Indoorcycling Group GmbH 2013...
- Page 27 Spare Part No. Description Handle Bar UPPER HANDLEBAR ASSEMBLY UPPER HANDLEBAR WELDMENT 1x COUNTER SUNK HEX SOCKET BOLT, M8 x 25 x 1.0P, 9.8 STEEL, DIN7991/ ISO10642 2x ADJUSTMENT LEVER ASSEMBLY 1x HB SLIDER WELDMENT 1x PLASTIC END CAP UPPER HB + SB SLIDER 2x ALLEN BOLT, M4 x10 x 0.7P, ss304 STAINLESS STEEL, DIN912/ ISO4762 2x UPPER HANDLEBAR WELDMENT 1x...
- Page 28 Spare Part No. Description Seat Post SP SLIDER WELDMENT 1x ADJUSTMENT LEVER ASSEMBLY 1x PLASTIC END CAP UPPER HB + SP SLIDER 2x ALLEN BOLT, M4 x10 x 0.7P, ss304 STAINLESS STEEL, DIN912/ ISO4762 2x ALLEN BOLT, M4 x10 x 0.7P, ss304 STAINLESS STEEL, DIN912/ ISO4762 2x WASHER, 5.3mm x 10mm x 1.0mm, ss304 STAINLESS STEEL, DIN 125 / ISO 7090 2x...
-
Page 29: Limited Warranty
WARRANTY TERMS Matrix Fitness System Corp. warrants that all new equipment will be free of manufacturing defects in workmanship and materials, effective on the date of original installati- on. Parts repaired or replaced under the terms of this warranty will be warranted for the remainder of the original warranty period only.
Need help?
Do you have a question about the IC3 and is the answer not in the manual?
Questions and answers