
Subscribe to Our Youtube Channel
Related Manuals for Tork EWZ101C


Summary of Contents for Tork EWZ101C
- Page 1 INSTRUCTION MANUAL EWZ101C EWZ201C DIGITIAL TIME SWITCH CLOCK OPERATED SWITCH 469D FOR TECHNICAL SUPPORT: 888.500.4598 • techsupport@nsiindustries.com Programming videos at nsiindustries.com MLI-225 (A)
-
Page 2: Table Of Contents
TABLE OF CONTENTS Section Page Capabilities ........1 Planning Your Program. -
Page 3: Capabilities
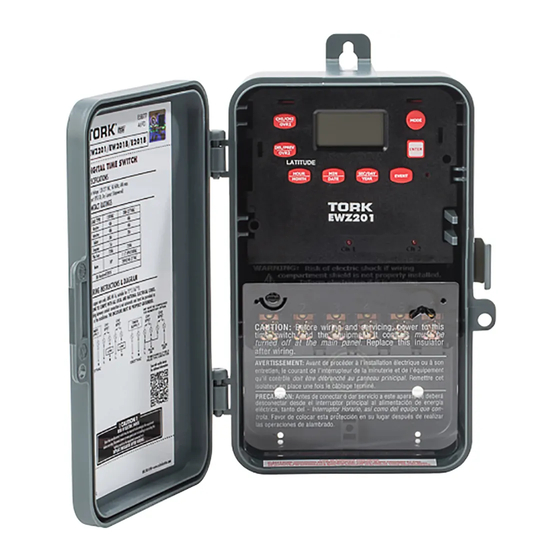
7 DAY TIME SWITCH CAPABILITIES: • 7 Day scheduling. • 32 set points. • EWZ101C may be wired as SPST or SPDT. • EWZ201C field convertible for 2 channel, 1 channel DPST or Momentary. • 20 Block Holidays. • Astronomic Option. For automatic ON at sunset, OFF at sunrise for outdoor lighting. -
Page 4: Planning Your Holiday Schedule
1. Sunset ON and Sunrise OFF 7 days a week: After setting CLK (clock), DATE, and DST (daylight saving time), go to the ASTRO mode section 7.0 to enter latitude and enter sunset and sunrise days. 2. Sunset ON and 10:00pm OFF 7 days a week: After set- ting CLK (clock), DATE, and DST (daylight saving time), go to SCH (schedule) mode section 6.0 to enter the 10:00pm OFF time. -
Page 5: Installation
READ INSTRUCTIONS CAREFULLY BEFORE ATTEMPTING TO INSTALL TIME SWITCH. SEE WARNING ON FRONT PANEL – Failure to comply with instructions could result in personal injury and/or property damage. INSTALLATION: UNIT IS TO BE INSTALLED BY A LICENSED ELECTRICIAN 1. To remove unit from enclosure: Push the tab on right outward and lift up on the mechanism on the right side. -
Page 6: Programming
PROGRAMMING YOUR EWZ101C STARTS WITH STEP 2.0 PROGRAMMING YOUR EWZ201C STARTS WITH STEP 1.0 NOTE: AFTER MAKING ANY CHANGES TO THE PROGRAM, PRESS MODE TO GO TO RUN MODE AND THEN PRESS EVENT TO UPDATE THE LOAD STATUS. 1.0 TWO CHANNEL / ONE CHANNEL SELECTION. -
Page 7: Set Date
Press HOUR and MIN to advance to today’s time. Check AM/PM, and press ENTER. DATE 3.0 TO SET DATE. If you are setting for the first time, display will show a default date: Press MONTH, DATE, and YEAR key to advance to today’s date then press ENTER. -
Page 8: Holiday Mode
4.2 TO MODIFY STANDARD USA DAYLIGHT SAVINGS DATES. For dates other than standard USA dates, consult factory. Techsupport@nsiindustries.com 5.0 HOLIDAY MODE. Holiday screen will show HdAY00 if no holidays are entered. 5.1 TO SET HOLIDAY START DATE. Press the ENTER. The screen shows: Press the MONTH, and DATE keys to set the desired start date (ON). -
Page 9: Schedule Set Mode
6.0 SCHEDULE SET MODE. Press MODE until display shows: EWZ201C in optional 1 channel or momentary mode or EWZ101C allows only 1 channel for programming. For EWZ201C in 2 channel mode, press CH1/CH2 to select channel 1 or 2 for programming. -
Page 10: Astronomic Mode
NOTE: The holiday indication with all days flashing will only show if a holiday date has been entered in section 5.0 Press ENTER. The display will show: At the next blank screen press CH1/CH2 EWZ201C to select desired channel and proceed with the steps above to set more schedule entries. -
Page 11: Selecting Astro Days
7.2 SELECTING ASTRO DAYS ON. The display will show: ASTRO Press DAY to show the Sunset time for today. All days are filled in on the screen. To change the day groups to MO – FR, as an example, continue to press the DAY button. NOTE: Sunset Time is based on Date and Latitude entered. - Page 12 7.4 SELECTING ASTRO DAYS OFF. The display will show: MO TU WE TH FR SA SU ASTRO Press DAY to show the Sunrise time for today. All days are filled in on the screen. No changes can be made to the day selection.
- Page 13 8.0 REVIEW, MODIFY AND DELETE. Press MODE to advance to any of the following MODES: 1. CLOCK MODE: Press HOUR and MIN to modify existing settings. Press ENTER. 2. DATE MODE: Press MONTH, DATE and YEAR to modify existing settings. Press ENTER. DAY is automatically adjusted. 3.
-
Page 14: Use As Momentary Unit
9.0 OVERRIDE. OVR (Override) is effective in the AUTO mode and the MAN (manual) mode. OVR in the AUTO mode is effective until the next event. OVR on the manual mode is effective indefinitely. 10.0 EVENT. The EVENT button in the RUN mode is used to update the load status. -
Page 15: Notes
1. Upon removing the jumper and pressing the RESET key, the unit will be configured as a 1 channel momentary ON and OFF. ONLY CH1 will need to be programmed. CH2 can still be viewed and programmed but will not take effect. 2. - Page 16 4. Upon powering up your EWZ201 the display will show at what frequency the unit is operating, 50 will determine 50Hz or 60 for 60Hz. 5. While in the AUTO mode, if AC power is absent, the dis- play will show a PF (power failure) instead of the seconds scrolling up.
-
Page 21: Wiring Diagrams
WIRING DIAGRAMS FOR EWZ101C... - Page 22 WIRING DIAGRAMS FOR EWZ201C TIMER SPST SPST SUPPLY LOAD LOAD 120/277VAC UNIT MUST BE CONFIGURED FOR MOMENTARY OPTION TIMER SPST SPST SUPPLY PULSE PULSE 120/277VAC TO MECHANICALLY HELD PULSE TYPE CONTACTOR...
- Page 24 888.500.4598 www.nsiindustries.com 06.02...
Need help?
Do you have a question about the EWZ101C and is the answer not in the manual?
Questions and answers
what type of battery and where does it go