
Subscribe to Our Youtube Channel
Related Manuals for KERN PNJ


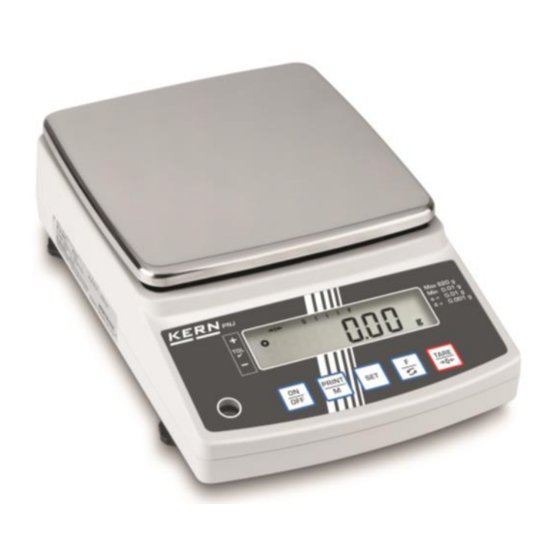
Summary of Contents for KERN PNJ
- Page 1 KERN & Sohn GmbH Ziegelei 1 Tel: +49-[0]7433- 9933-0 D-72336 Balingen Fax: +49-[0]7433-9933-149 E-Mail: info@kern-sohn.com Internet: www.kern-sohn.com Servicemanual Precision balances KERN PNJ/PNS Version 1.1 03/2020...
-
Page 2: Table Of Contents
Inspection of electrical section (AJDP circuit board) ........ - 11 - Adjustment ....................- 12 - Adjustment with internal weight (only models PNJ) ............- 12 - Adjustment with external weight (only models PNS) ............- 13 - CALIBRATION OF BUILT-IN WEIGHT (REF CAL) .............. - 15 - Resetting address data and linearity calibration .............. -
Page 3: Basic Information
After successful repair the balance will have to be reverified before it can be used again in a statutorily regulated field. 2 Introdution This service manual covers the PNJ/PNS series and is edited for the authorized servicing personnel. Note all rights are reserved. Copying any part of this manual is prohibited without our permission. - 3 -... -
Page 4: Keyboard Overview
3 Keyboard overview Button Function Turn on/off Transfer weighing data via interface Exit menu / back to weighing mode. Save settings/back to weighing mode Switch-over weighing unit Menu access (longer pressing of the button) ... -
Page 5: Overview Of Display
3.1 Overview of display Display Description Weighing unit “gram” Zero indicator Display net weight values Display of stable values The balance is in stand-by mode Illuminated during data transfer Application icon for piece counting Application icon for percentage determination Tolerance mark during check weighing Weighing unit „Momme“... -
Page 6: Removing The Case
3.2 Removing the case Remove the weighing pan and the pan base. Circle pa n (for capacity of 620 g or less) Square pan (for ca pacity of 1200 gra ms or more) Remove the hexagon head bolts attached in two locations and then remove the protector and dust cover. -
Page 7: Attaching The Case
Remove the tapping screws attached in two locations and then remove the case. case Tabs (inside Notches Tapping Screw 4 mm x 10 mm long 3.3 Attaching the case Attach the case by performing the reverse of the procedure in “3.2.1 Removing the case.” - 7 - PNJ_PNS-SH-e-2011... -
Page 8: Trouble Shooting Table
4 Trouble shooting table Symptom Cause and troubleshooting Nothing appears 1. AJDP circuit board failure 1. Replace the AJDP on display. 2. AC adapter failure circuit board. 3. Poor cable connection in scale 2. Replace the AC 4. Uncharged battery adapter. -
Page 9: Initial Inspection
1. Replace the Corner error 1. Mechanism failure mechanical unit. 2. The weighing pan (pan base) is is too much 2. Check binding on something. installation of the weighing pan (pan base). 1. AJDP circuit board failure 1. Replace the AJDP Display disappears circuit board. -
Page 10: Troubleschooting Procedure
5 Troubleschooting procedure START „88" appears on display Perform initial inspection Is AC Adaptor Display shows connected? 0- er r / u- er r Weight Display weight Connect AC Adaptor. Is display stable? Check memory content Connectors ar Is capacity display inserte? Check stopper type FAULTY... -
Page 11: Inspection Of Electrical Section (Ajdp Circuit Board)
6 Inspection of electrical section (AJDP circuit board) During inspection of the electrical section, remove the AJDP board and circuit check the board and check at CN1, CN4, TP4, and TP6. 1. Check the supply voltage of TP0-CN1: +5.7 to +6.3 V 2. -
Page 12: Adjustment
7 Adjustment 7.1 Adjustment with internal weight (only models PNJ) The internal adjustment weight is available at all times for starting adjustment via keyboard stroke. Press the F-key and keep pressed until „Aut.CAL“ is displayed. With pressed TARE key, press the F-key, then release both keys at the same time. -
Page 13: Adjustment With External Weight (Only Models Pns)
7.2 Adjustment with external weight (only models PNS) Carry out adjustment as near as possible to the balance’s maximum weight (recommended adjustment weight see chap. 1).Info about adjustment weights can be found in the manual for the scale chapter 1 Press the F-key and keep pressed until „CAL“... - Page 14 When the PRINT-key is pressed during the adjusting procedure, [STOP] will be displayed and adjustment interrupted. The balance returns to weighing mode. At the models with internal adjustment weight (KERN PNJ) the adjustment with external weight is not possible. ...
-
Page 15: Calibration Of Built-In Weight (Ref Cal)
7.3 CALIBRATION OF BUILT-IN WEIGHT (REF CAL) - AJ(H)-CE TYPE - • Following does not describe the procedure of ordinary span adjustment. • This is the procedure of Calibration of the built-in weight AJH-CE scales. • lt is necessary to adjust the linearity of the scale beforehand. - Page 16 PNJ_PNS-SH-e-2011 - 16 -...
-
Page 17: Resetting Address Data And Linearity Calibration
7.4 Resetting address data and linearity calibration Procedure for address data correction Coefficient memories (address data) have changed Coefficient memories (address data) have changed by noises or static electricity by noises or static electricity Entry of address data (see the data attached on the Entry of address data (see the data attached on the reverse side of the scale) reverse side of the scale) -
Page 18: Resetting Address Data (Coefficients)
Address from the left: 3C to 45 Address from the left: 46 to 4F Address from the left: 50 to 59 Address from the left: 5A to 5E Changing the entered data only at KERN possible. PNJ_PNS-SH-e-2011 - 18 -... -
Page 19: Linearity Calibration
7.6 Linearity calibration To enter the service mode (verified scale) you have to slide the switch on the PCB in the On position. No. Action Result / display While holding down , press ON to turn on the display. Release the keys Calibration mode When the scale after a brief wait shifts to weighing mode, FUNC... -
Page 20: Corner Error Adjustment
7.7 Corner Error Adjustment Remove the case and remove the boarder holder assy Reattach the weighing pan and the pan base and then use the adjuster to make them level. PNJ_PNS-SH-e-2011 - 20 -... - Page 21 Turn the adjusting bolts to adjust the corner error referring to following illustrations. (After adjustment, apply screw locking glue to the adjusting bolts.) Describtion - 21 - PNJ_PNS-SH-e-2011...
-
Page 22: Overload Adjustment
7.8 Overload adjustment 1. Remove the case and the board holder assy Set the scale to factory adjustment mode. until “CAL 2” is displayed. 2. Hold down the 3. While pressing the key, press the and then release both keys. The display changes from “on 0”... -
Page 23: Replacing The Ajdp Circuit Board
8 Replacing the AJDP circuit board Only at KERN possible. AJDP circuit board failure Removal of AJDP circuit board (Use a board that has undergone settings for the scale) Resetting original address Span calibration Performance check 8.1 How to remove the AJDP circuit board ... - Page 24 Remove the tuning fork cable soldered onto the AJDP circuit board AJDP circuit board White wire Shield wire Black wire Tuning fork cable Remove the two tapping screws and then remove the AJDP circuit board from the board holder.
-
Page 25: Install The Ajdp Circuit Board
8.2 Install the AJDP circuit board Install the AJDP circuit board in the board holder. Board holder assy Tapping screw 3 mm x 8 AJDO board assy Projections ... - Page 26 1. Flip the board holder assy over (During this task be careful not to damage the liquid crystal surface of the display board.) 2. Solder the tuning fork assy cable onto the AJDP circuit board. 3. Connect the cables to CN1 and CN4 on the AJDP circuit board. 4.
-
Page 27: Removing The Mechanism Unit
9 Removing the mechanism unit 1. Remove the case and then remove the AJDP circuit board 2. Remove M4 conical nuts attached at four locations and then remove the mechanism unit assy from the mechanical unit base of the chassis assy. ...
Need help?
Do you have a question about the PNJ and is the answer not in the manual?
Questions and answers