KERN PCB Operating Instructions Manual
Precision balance
Hide thumbs
Also See for PCB:
- Operating manual (37 pages) ,
- Operating instructions manual (66 pages) ,
- Service manual (10 pages)
Table of Contents
Advertisement
Quick Links
Advertisement
Table of Contents

Related Manuals for KERN PCB


Summary of Contents for KERN PCB
- Page 1 KERN & Sohn GmbH www.kern-sohn.com Ziegelei 1 +0049-[0]7433-9933-0 72336 Balingen-Frommern +0049-[0]7433-9933-149 Germany info@kern-sohn.com Operating instructions Precision balance KERN PCB Type TPCB-A Version 1.3 2022-08 TPCB_A-BA-e-2213...
-
Page 2: Table Of Contents
KERN PCB Version 1.3 2022-08 Operating instructions Precision balance Content Technical data ...................... 4 Declaration of conformity ..................7 Appliance overview ....................8 Components ....................8 Operating elements ..................9 3.2.1 Keyboard overview ................... 9 3.2.2 Numeric entry ....................10 3.2.3 Overview of displays ..................10... - Page 3 Initial Commissioning ................... 17 Adjustment ....................17 External adjustment < CalExt > ..............18 7.9.1 External adjustment with user-defined adjustment weight < caleud > ..19 7.9.2 Gravitational constant adjustment location < graadj > ......21 7.9.3 Gravitational constant adjustment location < grause > ......22 7.9.4 Basic Operation ....................
- Page 4 Setup menu ....................50 13.3.1 Overview < setup> ..................50 Communication with peripheral devices via KUP connection ......54 14.1 KERN Communications Protocol (KERN Interface Protocol) ....55 14.2 Issue functions ..................56 Add-up mode < sum > ...................56 14.2.1 Data output after pressing the PRINT button < manual > ......58 14.2.2...
-
Page 5: Technical Data
1 Technical data KERN PCB 200-3 PCB 300-2 PCB 300-3 Item no./ Type TPCB 200-3-A TPCB 300-2-A TPCB 360-3-A Readability (d) 0.001 g 0.01 g 0.001 g Weighing range (max) 200 g 300 g 360 g Reproducibility 0.001 g 0.01 g 0.001 g... - Page 6 KERN PCB 1000-2 PCB 2000-1 PCB 3000-2 Item no./ Type TPCB 1200-2-A TPCB 2000-1-A TPCB 3600-2-A Readability (d) 0.01 g 0.1 g 0.01 g Weighing range (max) 1 200 g 2 000 g 3 600 g Reproducibility 0.01 g 0.1 g 0.01 g...
- Page 7 PCB 10000-1 KERN PCB 6000-0 PCB 6000-1 Item no./ Type TPCB 6000-0-A TPCB 6K-4-A TPCB 10K-4-A Readability (d) 0.1 g 0.1 g Weighing range (max) 6 000 g 6 000 g 10 000 g Reproducibility 0.1 g 0.1 g Linearity ±2 g...
-
Page 8: Declaration Of Conformity
** Smallest component part for part counting – under normal conditions: ➢ There are unsteady ambient conditions (draft, vibrations) ➢ The parts to be counted are being scattered Declaration of conformity The current EC/EU Conformity declaration can be found online in: www.kern-sohn.com/ce TPCB_A-BA-e-2213... -
Page 9: Appliance Overview
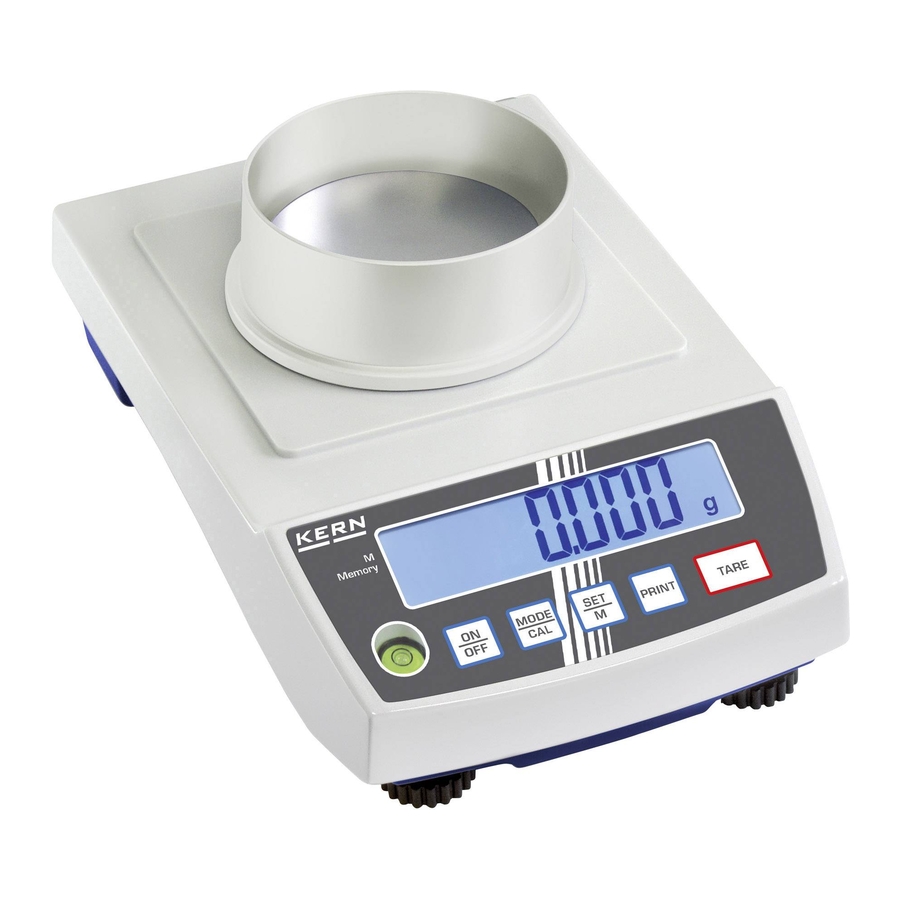
3 Appliance overview 3.1 Components Pos. Designation Designation Weighing pan Mains adapter connection Windshield KUP connection (KERN Universal Port) Display Footscrews Keyboard Underfloor weighing device Bubble level Transport lock (position depends on model) Connection anti-theft device Battery compartment (Kensington lock) -
Page 10: Operating Elements
3.2 Operating elements 3.2.1 Keyboard overview Button Name Function in Operating Function in Menu mode ➢ Turn on/off ➢ Navigation key ➢ Background illumination ➢ Menu level back ON/OFF- button of the display on/off ➢ Exit menu / back to weighing mode. -
Page 11: Numeric Entry
3.2.2 Numeric entry Button Designation Function Select cipher Confirm entry. Press button repeatedly for every Navigation key ➔ digit. Wait until the numeric input window extinguishes. Navigation key Reduce flashing cipher (0 – 9) Increase flashing cipher (0 – 9) Navigation key ... -
Page 12: Basic Information (General)
The balance may only be used according to the described conditions. Other areas of use must be released by KERN in writing. 4.3 Warranty Warranty claims shall be voided in case: •... -
Page 13: Monitoring Of Test Resources
Information is available on KERN’s home page (www.kern-sohn.com) with regard to the monitoring of balance test substances and the test weights required for this. In KERN's accredited DKD calibration laboratory test weights and balances may be calibrated (return to the national standard) fast and at moderate cost. -
Page 14: Unpacking, Installation And Commissioning
7 Unpacking, Installation and Commissioning 7.1 Installation Site, Location of Use The balances are designed in a way that reliable weighing results are achieved in common conditions of use. You will work accurately and fast, if you select the right location for your balance. Therefore, observe the following for the installation site: •... -
Page 15: Unpacking And Checking
Check, whether the voltage acceptance on the scales is set correctly. Do not connect the scales to the power mains unless the information on the scales (sticker) matches the local mains voltage. Only use KERN original mains adapter. Using other makes requires consent by KERN. Important: ➢... -
Page 16: Battery Operation (Optional)
7.5 Battery operation (optional) When the batteries are exhausted, in the display will appear <Lo Bat>. Rotate the balance carefully in a way that the bottom of the balance is freely accessible. Open the battery compartment and exchange the batteries. Ensure correct polarisation. -
Page 17: Rechargeable Battery Operation (Optional)
7.6 Rechargeable battery operation (optional) ATTENTION The rechargeable battery and the battery match with each other. Only use the delivered mains adapter. Do not use the balance during the loading process. The rechargeable can only be replaced by the same or by a type recommended by the manufacturer. -
Page 18: Connection Of Peripheral Devices
Before connecting or disconnecting of additional devices (printer, PC) to the data interface, always disconnect the balance from the power supply. With your balance, only use accessories and peripheral devices by KERN, as they are ideally tuned to your balance. -
Page 19: External Adjustment < Calext
7.9.1 External adjustment < CalExt > Press and hold the TARE and ON/OFF buttons simultaneously to enter the setup menu. Wait until the first menu item <Cal > is displayed. Confirm by ➔ button, < CalExt > will be displayed. ... -
Page 20: External Adjustment With User-Defined Adjustment Weight < Caleud
Place the adjustment weight and confirm with ➔-button, < wait > followed by < > will be displayed. Once < reMvld > is displayed, remove the adjustment weight. After successful adjustment the balance automatically returns to weighing mode. In case of an adjustment error (e.g. - Page 21 Acknowledge selection by ➔-button.< Zero >,<Pt ld> followed by the weight value of the adjustment weight to be placed will be displayed. Place the adjustment weight and confirm with ➔-button, < wait > followed by < reMvld > will be displayed. ...
-
Page 22: Gravitational Constant Adjustment Location < Graadj
7.9.3 Gravitational constant adjustment location < graadj > Press and hold the TARE and ON/OFF buttons simultaneously to enter the setup menu. Wait until the first menu item <Cal > is displayed. Confirm by ➔ button, < CalExt > will be displayed. ... -
Page 23: Gravitational Constant Adjustment Location < Grause
7.9.4 Gravitational constant adjustment location < grause > Press and hold the TARE and ON/OFF buttons simultaneously to enter the setup menu. Wait until the first menu item <Cal > is displayed. Confirm by ➔ button, < CalExt > will be displayed. ... -
Page 24: Basic Operation
8 Basic Operation 8.1 Turn on/off Start-up: Press the ON/OFF button. The display lights up and the balance carries out a selftest. Wait until the weight display appears The scales are now ready to weigh using the last active application Switching off: ... -
Page 25: Zeroing
8.3 Zeroing In order to obtain optimal weighing results, reset to zero the balance before weighing. Zeroing is only possible in the range ± 2% Max. For values greater than ± 2% maximum the error message < zlimit > is displayed ... -
Page 26: Switch-Over Weighing Unit
8.5 Switch-over weighing unit Using button, it is possible to switch over between the enabled unit 1 and unit 2. (activate unit, see chap. 10.3.1.) When switching-on the balance, the unit in which the balance has been switched off, will be displayed. TPCB_A-BA-e-2213... -
Page 27: Underfloor Weighing
8.6 Underfloor weighing Objects unsuitable for placing on the weighing scale due to size or shape may be weighed with the help of the flush-mounted platform. Proceed as follows: Switch off the balance. Open closing cover at the balance bottom. ... -
Page 28: Operating Concept
9 Operating concept From factory the balance is delivered with various applications (normal weighing, check weighing, counting). After the first start-up the balance is in the <Weighing> application. In the application menu (see chap.13.2.) however, you can define, selecting an application, in which mode the balance after switching-on has to continue working. - Page 29 According to the selected application in the application menu just appear the application-specific settings, so that you reach the target quickly without deviation. • Information about the application-specific settings you will find in the description of the respective application. • All basic settings and parameters, which influence the whole operation of the balance, are resumed in the Setup Menu (see chap.13.3.).
-
Page 30: Application
10 Application <Weighing> How to carry out a simple weighing and taring, please refer to chap. 8.2 or 8.4. Further specific settings you will find in the following chapters. Shouldn’t the application <Weighing> already be enabled, select the menu setting < mode weig h >, see chap. 9 10.1 Application-specific settings Call up menu: ... -
Page 31: Description Of Individual Functions
10.2 Description of individual functions 10.2.1 Take over the placed weight as PRE-TARE value PtareactuAl < > Deposit weighing receptacles Invoke menu setting < Ptare > and confirm by ➔- button. To take over the placed weight as a PRE-TARE value, use the navigation keys ... -
Page 32: Enter The Known Tare Weight Numerically < Ptare Manual
10.2.2 Enter the known tare weight numerically < Ptare manuAl > Invoke menu setting < Ptare > and confirm by ➔- button. Use the navigation keys to select the setting <manuAl > and confirm with ➔ button. ... -
Page 33: Percent Weighing
10.2.4 Percent weighing The application <Percent weighing> allows to check the weight of a sample in percent, based on a reference weight. Select menu setting <unit>. Put a reference weight which corresponds to 100 %. Acknowledge by ➔-button. ... -
Page 34: Weighing With Multiplication Factor
10.2.5 Weighing with multiplication factor Here you determine with which factor the weighing result (in gram) will be multiplied. By that way, e.g. a known error factor in the weight determination can be immediately taken into account. Select menu setting < unit > and confirm on ➔ button. ... -
Page 35: Molar Weighing Mode
10.2.6 Molar weighing mode This function calculates the amount of a substance (in mol) based on the molar mass and the weight of the substance. Select menu setting <unit > and confirm on ➔ button. Use the navigation keys to select the setting < mol > and confirm on ➔... -
Page 36: Quick Change Key
10.3 Quick change key - The quick-change button can be allocated with a unit where, if needed, it is possible to switch over fast and conveniently into another enabled unit. 10.3.1 Weighing Units Enable unit: Press the button, wait until the display flashes. ... -
Page 37: Application Units
10.3.2 Application units When selecting an application unit (%, Pcs, mol, FFA), the required settings can be selected right after being invoked, using the button. Setting example „Percent weighing“: Press the button, wait until the display flashes. button to select the unit <%>. ... -
Page 38: Application
11 Application <Counting> Shouldn’t the application <Counting> already be enabled, select the menu setting < mode count >, see chap. 9 11.1 Application-specific settings Call up menu: Press the TARE key and hold it until <apcmen> is displayed. ... -
Page 39: Using The Application
11.2 Using the application 11.2.1 Piece counting Before the balance can count parts, it must know the average part weight (i.e. reference). Proceed by putting on a certain number of the parts to be counted. The balance determines the total weight and divides it by the number of parts, the so- called reference quantity. - Page 40 Reference piece quantity user-defined: If necessary, put on and tare the weighing container. Put on the desired quantity of reference pieces. Invoke menu setting < ref > and confirm by ➔ button. Use the navigation keys to select the setting < free> and confirm on ➔...
-
Page 41: Check Counting
11.2.2 Check counting The balance allows weighing of goods within set tolerances in keeping with a determined target quantity. With this function one can also check if the weighing good is within a defined tolerance range. Reaching the target value is indicated by an acoustic (if activated in menu) and an optic signal (tolerance marks Optical signal: The tolerance marks provide the following information:... - Page 42 Procedure: 1. Define target quantity and tolerances Make sure that the scale is in counting mode and that an average piece weight has been defined (see chap. 11.2). If necessary, switch over with the key. Call up menu setting < ref >. ...
- Page 43 Use the navigation buttons to select setting < errlow >. Confirm on ➔ button, the numeric input window appears. The active digit is flashing. Enter the lower tolerance (for numerical entry, see chap. 3.2.2) and confirm the entry. ...
-
Page 44: Application
12 Application <Checkweighing> 12.1 Application-specific settings Shouldn’t the application <Checkweighing> already be enabled, select the menu setting < mode check >, see chap. 9 Call up menu: Press the TARE key and hold it until <apcmen > is displayed. ... -
Page 45: Using The Application
12.2 Using the application 12.2.1 Target weighing The application target weighing allows weighing of goods within set tolerance limits in keeping with a determined target weight. Reaching the target weight is indicated by an acoustic (if activated in menu) and an optic signal (tolerance marks). - Page 46 Procedure: 1. Define target weight and tolerances Use the navigation keys to select the setting < target > and confirm with ➔ button. < value > is displayed. Confirm on ➔ button, the numeric input window appears. The active digit is flashing.
- Page 47 Use the navigation buttons to select setting < errlow >. Confirm on ➔ button, the numeric input window appears. The active digit is flashing. Enter lower limit for weight deviation (numeric entry see chap. 3.2.2) and confirm the entry. ...
-
Page 48: Checkweighing
12.2.2 Checkweighing With the <Checkweighing> application you can check if the weighing good is within a predefined tolerance range. When limit values are exceeded below or above, an acoustic signal (if enabled in menu) will sound and an optical signal (tolerance marks) will be displayed Optical signal: The tolerance marks provide the following information: Weighed-in goods exceed predefined tolerance... - Page 49 Use the navigation keys to select setting < limlow >. Press ➔ button to confirm, the numeric input window for entering the lower limit value will appear. The active digit is flashing. Enter lower limit value (numerical input see chap. 3.2.2) and confirm the entry.
-
Page 50: Menu
13 Menu 13.1 Navigation in the menu Call up menu: Application menu Setup menu Press the TARE button and keep it Press the TARE and ON/OFF button at pressed until the first menu item will be the same time and keep them pressed displayed until the first menu item will be displayed Select and adjust parameter:... -
Page 51: Setup Menu
13.3 Setup menu In the setup menu you have the possibility to adapt the behaviour of the balance to your requirements (e.g. environmental conditions, especial weighing processes). These settings are global and do not depend on the selected application. 13.3.1 Overview < setup> Level 3 Level 4 / Description Level 1... - Page 52 Print intfce Rs232 RS 232 interface * Data USB interface* USB-d output *only in connection with KUP interface Switch on / off add-up mode, see chap. 14.2.1 On, off prmode trig manual Data output by pressing the PRINT button (see chap. 14.2.2) auto On, off Automatic data output with stable and...
- Page 53 BEEPER Keys Switch on / off acoustic signal by pressing button Acoustic signal Check Acoustic signal off Slow Slow ch-ok Standard Fast Fast Cont. Continuous Acoustic signal off Slow Slow ch-low Standard Fast Fast Cont. Continuous Acoustic signal off Slow Slow ch-high Standard...
- Page 54 Buttons Not documented Allocate function Blight mode Background lighting of display is always switched on permanently Display background The background illumination is illumination automatically switched-off according to the time without load change or timer without operation defined in menu item < Time > Display background illumination No bl always switched off...
-
Page 55: Communication With Peripheral Devices Via Kup Connection
Issue may be made to a printer, PC or check displays. In reverse order, control orders and data inputs may be made via the connected devices. The balances of the PCB series are equipped with a KUP connection (KERN Universal Port) as per standard. -
Page 56: Kern Communications Protocol (Kern Interface Protocol)
14.1 KERN Communications Protocol (KERN Interface Protocol) KCP is a standardized set of interface orders for KERN balances, which allows many parameters and device functions to be called up and controlled. KERN devices that have KCP can use it to connect easily to computers, industrial control systems and other digital systems. -
Page 57: Issue Functions
14.2 Issue functions 14.2.1 Add-up mode < sum > With this function the individual weighing values are added into the summation memory by pressing a button and edited, when an optional printer is connected. Activate function: In Setup menu invoke the menu setting <Print sum> and confirm with button ➔. - Page 58 Sample log (KERN YKB-01N): Menu setting prmode weight GNTPRT on & format short First weighing Second weighing Third weighing Number of weightings/ Total Sample log (KERN YKB-01N): Menu setting prmode weight SGLPRT on...
-
Page 59: Data Output After Pressing The Print Button < Manual
14.2.2 Data output after pressing the PRINT button < manual > Activate function: In Setup menu invoke the menu setting <Print PrMode trig> and confirm with ➔ button. For a manual data output select the menu setting < manual > with the navigation keys ... -
Page 60: Automatic Data Output < Auto
14.2.3 Automatic data output < auto > Data output happens automatically without having to press the PRINT-key as soon as the corresponding output condition has been met, dependent on the setting in the menu. Enable function and set the output condition: ... -
Page 61: Data Format
Sample log (KERN YKB-01N): 14.3 Data format In the setup menu call up the menu setting <Print PrMode weight GNTPRt> and confirm with key ➔. Use the navigation keys to select the menu setting < format > and confirm on ➔... -
Page 62: Servicing, Maintenance, Disposal
Spilled weighing goods must be removed immediately. 15.2 Servicing, maintenance The appliance may only be opened by trained service technicians who are authorized by KERN. Before opening, disconnect from power supply. 15.3 Disposal Disposal of packaging and appliance must be carried out by operator according to valid national or regional law of the location where the appliance is used. -
Page 63: Instant Help For Troubleshooting
16 Instant help for troubleshooting In case of an error in the program process, briefly turn off the balance and disconnect from power supply. The weighing process must then be restarted from the beginning. Fault Possible cause • The balance is not switched on. The weight display does not glow. -
Page 64: Error Messages
17 Error messages Error message Explication zlimit Zero setting range exceeded UnderZ Zero setting range not achieved instab Load instable wrong Adjustment error Underload Overload Lo Bat Capacity of batteries / rechargeable batteries exhausted TPCB_A-BA-e-2213...
Need help?
Do you have a question about the PCB and is the answer not in the manual?
Questions and answers