Table of Contents
Advertisement
Advertisement
Table of Contents

Related Manuals for Innova CarScan RepairSolutions 2


Summary of Contents for Innova CarScan RepairSolutions 2
- Page 2 Table of Contents SAFETY PRECAUTIONS SAFETY FIRST! ............... SCAN TOOL CONTROLS CONTROLS AND INDICATORS ..........DISPLAY FUNCTIONS ............BATTERY REPLACEMENT ............. USING THE SCAN TOOL CODE RETRIEVAL PROCEDURE .......... THE SYSTEM MENU..............VIEWING OEM ENHANCED DTCs (except Ford/Mazda) ..VIEWING OEM ENHANCED DTCs (Ford/Mazda only) ... VIEWING ABS DTCs ...............
- Page 3 Safety Precautions SAFETY FIRST! SAFETY FIRST! This manual describes common test procedures used by experienced service technicians. Many test procedures require precautions to avoid accidents that can result in personal injury, and/or damage to your vehicle or test equipment. Always read your vehicle's service manual and follow its safety precautions before and during any test or service procedure.
- Page 4 Scan Tool Controls CONTROLS AND INDICATORS CONTROLS AND INDICATORS Figure 1. Controls and Indicators See Figure 1 for the locations of items 1 through 22, below. ERASE button - Erases Diagnostic Trouble Codes (DTCs), and “Freeze Frame” data from the vehicle’s computer, and resets Monitor status.
- Page 5 Scan Tool Controls CONTROLS AND INDICATORS 10. Left Soft Key - selects the associated option shown on the display (Yes/No, Previous/Next, etc). 11. Right Soft Key - selects the associated option shown on the display (Yes/No, Previous/Next, etc). 12. GREEN LED - Indicates that all engine systems are running normally (all Monitors on the vehicle are active and performing their diagnostic testing, and no DTCs are present).
- Page 6 Scan Tool Controls DISPLAY FUNCTIONS DISPLAY FUNCTIONS Figure 2. Display Functions See Figure 2 for the locations of items 1 through 15, below. 1. I/M MONITOR STATUS field - Identifies the I/M Monitor status area. 2. Monitor icons - Indicate which Monitors are supported by the vehicle under test, and whether or not the associated Monitor has run its diagnostic testing (Monitor status).
- Page 7 Harmful and damaging to essential system components. Bluetooth icon – Indicates communication status with a compat- ible Innova mobile application A solid blue icon indicates an active Bluetooth connection has been established. Wi-Fi icon – Indicates Wi-Fi communication status. When ON, indicates the scan tool is linked to a Wi-Fi network.
- Page 8 Scan Tool Controls BATTERY REPLACEMENT 3. Replace batteries with three AA-size batteries (for longer life, use Alkaline-type batteries). 4. Reinstall the battery cover on the back of the Scan Tool. Adjustments After Battery Installation The first time the Scan Tool is turned on, you must select the desired display language (English, French or Spanish) and unit of measurement (Standard or metric) as follows: 1.
- Page 9 Using the Scan Tool CODE RETRIEVAL PROCEDURE CODE RETRIEVAL PROCEDURE Retrieving and using Diagnostic Trouble Codes (DTCs) for troubleshooting vehicle operation is only one part of an overall diagnostic strategy. Never replace a part based only on the DTC definition. Each DTC has a set of testing procedures, instructions and flow charts that must be followed to confirm the location of the problem.
- Page 10 Using the Scan Tool CODE RETRIEVAL PROCEDURE A PROTOCOL is a set of rules and procedures for regulating data transmission between computers, and between testing equipment and computers. As of this writing, five different types of protocols (ISO 9141, Keyword 2000, J1850 PWM, J1850 VPW and CAN) are in use by vehicle manufacturers.
- Page 11 Using the Scan Tool CODE RETRIEVAL PROCEDURE 9. When New Vehicle is chosen from the Select Vehicle screen, the Select Year screen displays. Select the desired vehicle model year, then press ENTER The Select Make screen displays. Select the desired vehicle make, then press ENTER The Select Model screen displays.
- Page 12 Using the Scan Tool CODE RETRIEVAL PROCEDURE Green LED – Indicates that all engine systems are “OK” and operating normally. All monitors supported by the vehicle have run and performed their diagnostic testing, and no trouble codes are present. All Monitor icons will be solid.
- Page 13 Using the Scan Tool CODE RETRIEVAL PROCEDURE Each time DTC/FF is pressed and released, the Scan Tool will scroll and display the next DTC in sequence until all DTCs in its memory have displayed. Freeze Frame Data (if available) will display after DTC #1. OBD2 systems, when...
- Page 14 Using the Scan Tool THE SYSTEM MENU – VIEWING OEM ENHANCED DTCs (EXCEPT Ford/Mazda) THE SYSTEM MENU The System Menu provides the ability to retrieve “enhanced” DTCs, Anti- Lock Brake System (ABS), Supplemental Restraint System (SRS) DTCs and Tire Pressure Monitoring System (TPMS) DTCs for most BMW, Chrysler/Jeep, Ford/Mazda, GM/Isuzu, Honda/Acura, Hyundai, Mercedes Benz, Nissan, Toyota/Lexus, Volkswagen and Volvo vehicles.
- Page 15 Using the Scan Tool VIEWING OEM ENHANCED DTCs (Ford/Mazda only) - Turn the ignition off, and disconnect the Scan Tool. - Contact Technical Support for assistance. 2. Refer to DISPLAY FUNCTIONS on page 4 for a description of LCD display elements.
- Page 16 Using the Scan Tool VIEWING OEM ENHANCED DTCs (Ford/Mazda only) Turn the ignition OFF, then back ON. Choose Continue. Proceed to step 3. 3. A “One moment please” message displays while the test is in progress. If the Scan Tool fails to link to the vehicle’s computer, a “Communication Error”...
- Page 17 Using the Scan Tool VIEWING ABS DTCs In the case of long code definitions, a small arrow is shown in the upper/ lower right-hand corner of the code display area to indicate the presence of additional information. If no codes are present, a “System Pass”...
- Page 18 Using the Scan Tool VIEWING SRS DTCs - Choose Relink to try again, or, choose System Menu to return to the System Menu. If the Scan Tool cannot link to the vehicle’s computer after three attempts, the message “Contact Technical Support” displays. - Choose System Menu to return to the System Menu.
- Page 19 Using the Scan Tool VIEWING TPMS DTCs If the Scan Tool fails to link to the vehicle’s computer, a "Communication Error" message shows. - Ensure your vehicle is OBD2 compliant. - Verify the connection at the DLC, and verify the ignition is ON. - Turn the ignition OFF, wait 5 seconds, then back ON to reset the computer.
- Page 20 Using the Scan Tool VIEWING TPMS DTCs Reading TPMS DTCs 1. When TPMS DTCs is chosen from the System Menu, a "One moment please" message displays while the Scan Tool retrieves the selected DTCs. If TPMS functionality is not supported, an advisory message shows.
- Page 21 Using the Scan Tool NETWORK TEST NETWORK TEST The Network Test lets you perform a scan of all vehicle modules, or of a single selected module, to retrieve DTCs associated with the module(s). To scan all modules: 1. Select Scan All Modules from the System Menu, then press ENTER A “One moment please”...
- Page 22 Using the Scan Tool NETWORK TEST 4. If more than one code was retrieved press DTC/FF to display additional codes one at a time. Whenever the Scroll function is used, the Scan Tool’s communication link with the vehicle’s computer disconnects. To re-establish communication, press POWER/LINK again.
- Page 23 Using the Scan Tool ERASING DIAGNOSTIC TROUBLE CODES (DTCs) If the definition for the currently displayed code is not available, an advisory message shows. I/M MONITOR STATUS icons are not displayed when using the Network Test function. In the case of long code definitions, a small arrow is shown in the upper/lower right-hand corner of the code display area to indicate the presence of additional information.
- Page 24 Using the Scan Tool ABOUT REPAIRSOLUTIONS 2® To erase enhanced, ABS, SRS, TPMS or Network DTCs: Press SYSTEM MENU to display the System Menu. Select the desired option, then press ENTER . Perform the appropriate Code Retrieval procedure and then proceed to step 3.
- Page 25 Technical Service Bulletins – Research known problems reported by vehicle manufacturers. Safety Recalls – Research known safety concerns applicable to a vehicle. And much more. Please visit www.innova.com for additional information. Hardware Requirements: Innova Scan Tool with Bluetooth/WiFi Android or iOS Smart Device Accessing RepairSolutions 2®...
- Page 26 Using the Scan Tool CONNECTING TO BLUETOOTH / WIFI 3. Follow the on-screen prompts to connect to an available WiFi network. You can automatically connect to the network your Smart Device is currently connected to, or you can manually connect to another available network.
- Page 27 Live Data Mode LIVE DATA PLAYBACK The Scan Tool lets you view and/or record "real-time" Live Data. This information includes values (volts, rpm, temperature, speed etc.) and system status information (open loop, closed loop, fuel system status, etc.) generated by the various vehicle sensors, switches and actuators. These are the same signal values generated by the sensors, actuators, switches and/or vehicle system status information used by the vehicle's computer when calculating and conducting system adjustments and...
- Page 28 Live Data Mode CUSTOMIZING LIVE DATA (PIDs) If communication with the vehicle is lost while viewing Live Data, an advisory message displays. 5. Choose Graph to view the currently selected PID in “graph” mode. Choose Text View to return to the PID list. With one PID displayed in “graph”...
- Page 29 Live Data Mode RECORDING (CAPTURING) LIVE DATA - Press POWER/LINK to continue. If Live Data is not supported by the vehicle under test, an advisory message displays. Choose Relink to try again, or, choose System Menu to return to the System Menu. If custom Live Data was previously configured, the Select PIDs to Use screen displays.
- Page 30 Live Data Mode RECORDING (CAPTURING) LIVE DATA Record by Manual Trigger If POWER/LINK is pressed at any time while in Live Data mode, any recorded Live Data will be erased from the Scan Tool’s memory. Record by DTC Trigger This function automatically records Live Data information when a DTC sets and saves it in the Scan Tool’s memory.
- Page 31 Live Data Mode RECORDING (CAPTURING) LIVE DATA - To exit the record function, Choose Back to return to the Record Live Data menu. When the Erase process is complete, the Record Live Data screen displays the message “Ready to record Waiting for DTCs.”...
- Page 32 Live Data Mode LIVE DATA PLAYBACK - Ensure your vehicle is OBD2 compliant. - Verify the connection at the DLC, and verify the ignition is ON. - Turn the ignition OFF, wait 5 seconds, then back ON to reset the computer. - Press POWER/LINK to continue.
- Page 33 Live Data Mode LIVE DATA PLAYBACK 1. With the Scan Tool not connected to a vehicle, press POWER/LINK The "To Link" screen displays. 2. Press and hold LD until the Live Data Menu displays. 3. Select Playback Live Data, then press ENTER The Playback Live Data menu displays.
- Page 34 Additional Tests THE MAIN MENU THE MAIN MENU You can use the Scan Tool to perform additional diagnostic tests, view diagnostic and vehicle information stored in the vehicle's on-board computer, and configure the Scan Tool for your particular needs. These functions are accessed through the Main Menu.
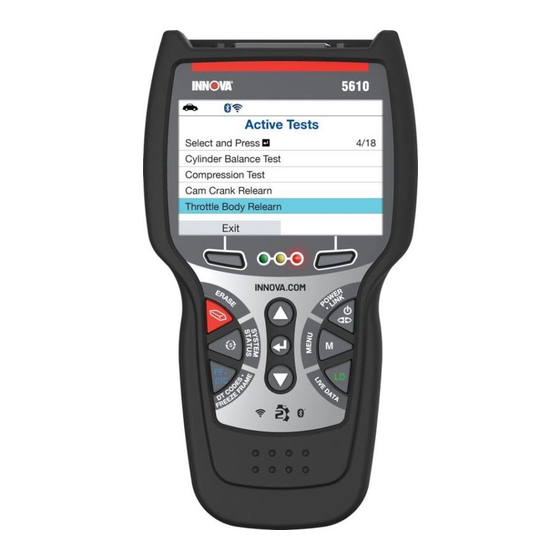
- Page 35 Additional Tests SYSTEM/ACTUATOR TESTS SYSTEM/ACTUATOR TESTS System/Actuator Tests let you perform active tests for various vehicle actuators and systems. The specific tests available depend on the vehicle make and model. Chrysler System & Actuator Tests Depending on the vehicle under test, the Special Functions menu provides access to one or more of the following tests: Set Throttle Blade Position...
- Page 36 Additional Tests SYSTEM/ACTUATOR TESTS If an error occurs while performing any function, an “advisory” message displays. Choose Exit to return to the Special Functions menu. Set Throttle Blade Position 1. Select Set Throttle Blade Position in the Special Functions menu, then press ENTER An “instructional”...
- Page 37 Additional Tests SYSTEM/ACTUATOR TESTS - Release the accelerator pedal. A “results” screen displays when the learn procedure has completed. 4. Choose Finish to return to the Special Functions menu. EGR Mass Flow Rate Test Routine Start The EGR Mass Flow Rate Test Routine Start function lets you initiate the Exhaust Gas Recirculation (EGR) mass flow rate test.
- Page 38 Additional Tests SYSTEM/ACTUATOR TESTS - Start and run the engine until engine coolant temperature is greater than 70°C (158°F). A “results” screen displays when the learn procedure has completed. 4. Choose Finish to return to the Special Functions menu. Idle Up Feature Enable The Idle Up Feature Enable function lets you enable or disable the idle up feature.
- Page 39 Additional Tests SYSTEM/ACTUATOR TESTS An “instructional” screen displays. Prepare the vehicle for test as directed: - Turn the ignition on. DO NOT start the engine. 2. Choose Yes to continue. A “status” screen displays while a vehicle status check is performed. 3.
- Page 40 Additional Tests SYSTEM/ACTUATOR TESTS An “instructional” screen displays. Prepare the vehicle for test as directed: - Start and idle the engine. 2. Choose Yes to continue. A “status” screen displays while a vehicle status check is performed. 3. A “confirmation” screen displays when the test routine begins.
- Page 41 Additional Tests SYSTEM/ACTUATOR TESTS An “instructional” screen displays. Prepare the vehicle for test as directed: - Start and idle the engine. - Place the transmission in PARK. 2. Choose Yes to continue. A “status” screen displays while a vehicle status check is performed.
- Page 42 Additional Tests SYSTEM/ACTUATOR TESTS 5. Choose Finish to return to the Special Functions menu. ESIM Forced Monitor Test The ESIM Forced Monitor Test lets you perform an Evaporative System Integrity Monitor (ESIM) forced monitor test. 1. Select ESIM Forced Monitor Test in the Special Functions menu, then press ENTER An “instructional”...
- Page 43 Additional Tests SYSTEM/ACTUATOR TESTS The Test Results screen displays. The screen shows the current values for APP 1 Volts, APP 2 Volts, TPS 1 Volts, TPS 2 Volts and Throttle Blade 1 Position. 4. If desired, choose Reselect to return to the Select Position screen, and repeat step 3 to select a new throttle position.
- Page 44 Additional Tests SYSTEM/ACTUATOR TESTS An “instructional” screen displays. Prepare the vehicle for test as directed: - Turn the ignition on. DO NOT start the engine. 2. Choose Yes to continue. A “status” screen displays while a vehicle status check is performed.
- Page 45 Additional Tests SYSTEM/ACTUATOR TESTS An “instructional” screen displays. Prepare the vehicle for test as directed: - Start and idle the engine. 2. Choose Yes to continue. A “status” screen displays while a vehicle status check is performed. 3. A “confirmation” screen displays when the test routine begins. A “results”...
- Page 46 Additional Tests SYSTEM/ACTUATOR TESTS Set Engine RPM The Set Engine RPM function lets you set engine speed to a specified value. 1. Select Set Engine RPM in the Special Functions menu, then press ENTER An “instructional” screen displays. Prepare the vehicle for test as directed: - Start and idle the engine.
- Page 47 Additional Tests SYSTEM/ACTUATOR TESTS The screen shows the current Target Idle Speed, Engine Speed, MAP Vacuum, Throttle Blade Position, Spark Advance and Engine Coolant Temperature. 4. If desired, choose Reselect to return to the Select RPM screen, and repeat step 3 to select a new engine speed. 5.
- Page 48 Additional Tests SYSTEM/ACTUATOR TESTS A “status” screen displays while a vehicle status check is performed. The Select Test Mode screen displays. 3. Select Pump, Vent PS1 or Hold PS1, as desired, then press ENTER The Test Results screen displays. The screen shows the current LDP Pump Test mode, LDP State, Engine Speed, MAP Vacuum, LDP Switch and Purge Adaptive Duty...
- Page 49 Additional Tests SYSTEM/ACTUATOR TESTS 1. Select Injector Kill System Test in the Special Functions menu, then press ENTER An “instructional” screen displays. Prepare the vehicle for test as directed. - Start and idle the engine. - Make sure engine coolant temperature is 83°C (180°F) before proceeding.
- Page 50 Additional Tests SYSTEM/ACTUATOR TESTS 4. If desired, choose Reselect to return to the Select Injector screen, and repeat step 3 to select a new fuel injector. 5. Choose Finish to return to the Special Functions menu. Injector Kill System Test (004) The Injector Kill System Test function lets you perform a test of the injector kill system for a selected fuel injector.
- Page 51 Additional Tests SYSTEM/ACTUATOR TESTS Reverse Brake Torque Test 1. Select Reverse Brake Torque Test in the Special Functions menu, then press ENTER An “instructional” screen displays. Prepare the vehicle for test as directed: - Start and idle the engine. - Make sure transmission fluid temperature is 27°C (80°F) minimum - Set the parking brake.
- Page 52 Additional Tests SYSTEM/ACTUATOR TESTS 5. Enter the desired RPM value (from 900 to 2000), then choose Next to continue. 6. A “confirmation” screen displays when the test routine begins. A “results” screen displays when the routine has completed. 7. Choose Finish to return to the Special Functions menu. Minimum Airflow Test Routine Start The Minimum Airflow Test Routine Start function lets you reset the Mass Airflow (MAF) sensor values.
- Page 53 Additional Tests SYSTEM/ACTUATOR TESTS 1. Select Switched Max Operating Speed Enable in the Special Functions menu, then press ENTER An “instructional” screen displays. Prepare the vehicle for test as directed: - Turn the ignition on. DO NOT start the engine. 2.
- Page 54 Additional Tests SYSTEM/ACTUATOR TESTS Spark Advance The Spark Advance function lets you increase or decrease spark advance. 1. Select Spark Advance in the Active Test menu, then press ENTER An “instructional” screen displays. Prepare the vehicle for test as directed: - Place the transmission in PARK.
- Page 55 Additional Tests SYSTEM/ACTUATOR TESTS 1. Select One-Touch Start Status in the Active Test menu, then press ENTER An “instructional” screen displays. Prepare the vehicle for test as directed: - Turn the ignition on. DO NOT start the engine. 2. Press ENTER to continue.
- Page 56 Additional Tests SYSTEM/ACTUATOR TESTS - Turn the ignition on. DO NOT start the engine. 2. Press ENTER to continue. The Output State Control of Torque Converter screen displays. 3. Select Trans Control, Unlock or Lock, as desired, then press ENTER The screen refreshes to show the Result.
- Page 57 Additional Tests SYSTEM/ACTUATOR TESTS The screen refreshes to show the Result. 4. Repeat step 3 as desired. 5. Choose Exit to return to the Active Test menu. Injector Disable The Injector Disable functions let you disable a selected fuel injector. 1.
- Page 58 Additional Tests SYSTEM/ACTUATOR TESTS 1. Select Engine Speed Control in the ECM Special Functions menu, then press ENTER An “instructional” screen displays. Prepare the vehicle for test as directed: - Set the parking brake. - Block all drive wheels. - Start and idle the engine. 2.
- Page 59 Additional Tests SYSTEM/ACTUATOR TESTS 1. Select Throttle Sweep in the ECM Special Functions menu, then press ENTER An “instructional” screen displays. Prepare the vehicle for test as directed: - Turn the ignition on. DO NOT start the engine. 2. Choose Next to continue. The Throttle Sweep test screen displays.
- Page 60 Additional Tests SYSTEM/ACTUATOR TESTS 1. Select EGR Solenoid in the ECM Special Functions menu, then press ENTER An “instructional” screen displays. Prepare the vehicle for test as directed: - Turn the ignition on. DO NOT start the engine. 2. Choose Continue to continue. A “status”...
- Page 61 Additional Tests SYSTEM/ACTUATOR TESTS The Injector Pressure Drop screen displays. 4. Note and record the fuel pressure drop for the selected injector, then choose Continue to return to the Select Injector screen. Repeat steps 2 through 4 for additional injectors, as desired. 5.
- Page 62 Additional Tests SYSTEM/ACTUATOR TESTS 1. Select Misfire Graphic in the ECM Special Functions menu, then press ENTER The Misfire Graphic screen displays. screen shows Accumulated Current Counters for Cyl. 1 through Cyl. 8, Cycles of Misfire Data and Engine Load. 2.
- Page 63 Additional Tests SYSTEM/ACTUATOR TESTS - Block all drive wheels. - Set the parking brake. (DO NOT apply the brake pedal at this time.) - Turn the ignition on. DO NOT start the engine at this time. - Press and hold the brake pedal. - Start and idle the engine.
- Page 64 Additional Tests SYSTEM/ACTUATOR TESTS A “status” screen displays the Commanded State as Reset while the reset is in progress. 3. When the reset is complete, the Commanded State returns to None. Repeat step 2 to reset additional oxygen sensors. 4. Choose Exit to return to the ECM Special Functions menu.
- Page 65 Additional Tests SYSTEM/ACTUATOR TESTS An “instructional” screen displays. Perform the following: - Press and hold the accelerator to maintain engine speed between 2000-3000 RPM. - Hold the accelerator steady for 5 seconds. 5. A “status” screen displays while the test is in progress.
- Page 66 Additional Tests SYSTEM/ACTUATOR TESTS - If the EGR system fails test phase 1, an “advisory” message displays. Choose Back to return to the Active Test menu. If the EGR system passes test phase 1, an “instructional” screen displays. Prepare the vehicle for test as directed: - Warm the engine to normal operating temperature.
- Page 67 Additional Tests SYSTEM/ACTUATOR TESTS - Place the transmission in neutral. 2. Choose Continue to proceed. If DTCs are present in the vehicle’s computer, an “advisory” screen displays. Clear DTCs before proceeding. An “instructional” screen displays. Perform the following: - Press and hold the accelerator to maintain engine speed between 3500-4000 RPM.
- Page 68 Additional Tests SYSTEM/ACTUATOR TESTS - Make sure the steering wheel is in the center position, and DO NOT move during testing. 2. Choose Continue to proceed. An “instructional” screen displays. 3. Start and idle the engine. A “status” screen displays while Stage 1 of the test is in progress.
- Page 69 Additional Tests SYSTEM/ACTUATOR TESTS To perform the SINGLE SOLENOID test: 1. Select SINGLE SOLENOID in the EVAP TEST menu, then press ENTER An “instructional” screen displays. Prepare the vehicle for test as directed: - Make sure the battery is fully charged. - Turn the ignition on.
- Page 70 Additional Tests SYSTEM/ACTUATOR TESTS 4. Choose Back to exit the test. A “Test is complete” message displays. 5. Choose Exit to return to the EVAP TEST menu. To perform the FUNCTION TEST: 1. Select FUNCTION TEST in the EVAP TEST menu, then press ENTER An “instructional”...
- Page 71 Additional Tests SYSTEM/ACTUATOR TESTS - If a possible failure is detected or a DTC is registered, an “advisory” message displays. Choose Back to return to the EVAP TEST menu. 6. When all stages of the test are complete, a final “confirmation” screen displays.
- Page 72 Additional Tests SYSTEM/ACTUATOR TESTS - Place the transmission in PARK. 2. Choose Continue to proceed. The Control EGR Cut VSV screen displays. 3. Choose On to activate the EGR Cut VSV. Choose Off to deactivate the EGR Cut VSV. The display refreshes to show the results.
- Page 73 Additional Tests SYSTEM/ACTUATOR TESTS - Turn the ignition on. DO NOT start the engine. - Verify the Ready Light is OFF. 2. Choose Next to continue. The Select Inspection Mode screen displays. 3. Select the desired inspection mode; 2WD for cutting TRC, 2WD for measuring Exhaust Gas, 4WD for cutting TRC or 4WD for measuring Exhaust Gas.
- Page 74 Additional Tests SYSTEM/ACTUATOR TESTS An “instructional” screen displays. Prepare the vehicle for test as directed: - Turn the ignition on. DO NOT start the engine. - Place the transmission in PARK. - Verify the Ready Light is OFF. 2. Choose Continue to proceed. The Control PWM Output screen displays.
- Page 75 Additional Tests SYSTEM/ACTUATOR TESTS 1. Select OFF Ave Cg Relay in the PCM Actuator Test and Special Function Menu, then press ENTER An “instructional” screen displays. Prepare the vehicle for test as directed: - Place the transmission in NEUTRAL. - Verify the Ready Light is ON. 2.
- Page 76 Additional Tests SYSTEM/ACTUATOR TESTS 1. Select D-4S Fuel Cut in the PCM Actuator Test and Special Function Menu, then press ENTER An “instructional” screen displays. Prepare the vehicle for test as directed: - Start and run the engine at 3000 RPM maximum. - Place the transmission in PARK.
- Page 77 Additional Tests SYSTEM/ACTUATOR TESTS 4. Choose Decrease to decrease injection volume. Choose Increase to increase injection volume. The display refreshes to show the results. Repeat as desired. 5. Press Enter to return to the PCM Actuator Test and Special Function Menu.
- Page 78 Additional Tests SYSTEM/ACTUATOR TESTS - Start and run the engine. - Place the transmission in PARK. 3. Choose Continue to proceed. The vehicle’s computer performs an initial vapor pressure sensor check to determine if a leak may be present. A “results” screen displays when the check is complete.
- Page 79 Additional Tests SYSTEM/ACTUATOR TESTS 4. Choose Next Step as needed to scroll to the next stage of the test. When the test is completed, a “confirmation” screen displays. 5. Choose Exit to return to the PCM Actuator Test and Special Function Menu.
- Page 80 Additional Tests SYSTEM/ACTUATOR TESTS An “instructional” screen displays. Prepare the vehicle for test as directed: - Make sure fuel level is less than 9/10. - Make sure fuel temperature is below 35°C. - Turn the ignition on. DO NOT start the engine. - Place the transmission in PARK.
- Page 81 Additional Tests PERFORMING SERVICE RESETS - Make sure the air/fuel sensor outputs the correct air/fuel ratio after idling the engine for 10 minutes minimum. 4. Choose Continue to proceed. A “Warning” screen displays. BE SURE to observe all precautions to prevent damaging system components. 5.
- Page 82 Additional Tests PERFORMING SERVICE RESETS An “instructional” dialog displays, showing the manual procedures for resetting the indicator light. When finished viewing the instructions, press the M button to return to the Main Menu. 5. To perform oil reset by command, choose Perform Command.
- Page 83 Additional Tests PERFORMING SERVICE RESETS If battery reset procedures are not available, an advisory message shows. Choose Exit to return to the Main Menu. 4. Choose the procedure you wish to view, then press ENTER The selected procedure displays. 5. When you have finished viewing the retrieved information, choose Back to return to the Battery Reset Procedures menu.
- Page 84 Additional Tests PERFORMING SERVICE RESETS The Main Menu displays. 2. Select Battery Reset, then press ENTER The Battery Reset menu displays. 3. Select Battery Reset OBD Service, then press ENTER An “informational” screen displays. 4. Choose Next to continue. A series of “instructional” screens display, directing you to enter reference information for the battery (part number, manufacturer, serial number).
- Page 85 Additional Tests PERFORMING SERVICE RESETS For some vehicles, a submenu displays. Select the desired option, then press ENTER . Proceed to step 2. If SAS calibration is not supported by the vehicle under test, an “advisory” message displays. Choose Exit to return to the Main Menu.
- Page 86 Additional Tests PERFORMING SERVICE RESETS 4. Choose Exit to return to the Main Menu. Diesel Particulate Filter Reset (except Chrysler, General Motors, Nissan or Volkswagen) If the vehicle under test is not a diesel vehicle, an “advisory” message displays. Choose Back to return to the Service Reset menu.
- Page 87 Additional Tests PERFORMING SERVICE RESETS Diesel Particulate Filter Reset (General Motors) 1. Select Diesel Particulate Filter Reset in the Service Reset menu, then press ENTER A “One moment” message displays, followed by the Diesel Particulate Filter Reset menu. 2. Select the desired option, then press ENTER One or more “informational/instructional”...
- Page 88 Additional Tests PERFORMING SERVICE RESETS If the selected function is not supported by the vehicle under test, an “advisory” message may display. Choose End to return to the Diesel Particulate Filter Reset menu. 3. Choose Next, Continue, or Start, as appropriate, to continue. One or more “status”...
- Page 89 Additional Tests SERVICE CHECK - HYBRID BATTERY CHECK, BATTERY ALTERNATOR PERFORMING A SERVICE CHECK The Service Check function lets you check brake pad status, current oil level and oil life, and transmission fluid temperature. 1. While linked to the vehicle, press M. The Main Menu displays.
- Page 90 Additional Tests SYSTEM TEST MENU SYSTEM TEST MENU Additional tests are accessed through the System Tests menu. The following functions are available: O2 Sensor Test - Retrieves and displays O2 sensor monitor test results from your vehicle's on-board computer. OBD Monitor Test - Retrieves and displays test results for emission-related powertrain components and systems that are not continuously monitored.
- Page 91 Additional Tests SYSTEM TEST MENU If O2 sensor tests are not supported by the vehicle under test, an advisory message displays. Choose Back (to return to the System Tests menu) or Main Menu, as desired. 3. Select the O2 sensor for which you wish to view test results, then press ENTER to display the test results.
- Page 92 Additional Tests SYSTEM TEST MENU Component ID number Min or Max test limit (Only one test limit, either Min or Max, is shown for any given test) Test Value and status Status is calculated by the Scan Tool by comparing the Test Value against the displayed test limit (either Min or Max).
- Page 93 Additional Tests BATTERY/ALTERNATOR MONITOR 1. From the System Test menu, select I/M Monitor Test, then press ENTER 2. A “One moment please. . .” message displays, followed by the Select Monitor screen. The Select Monitor screen lists all Monitors supported by the vehicle. 3.
- Page 94 Additional Tests BATTERY/ALTERNATOR MONITOR An “instructional” message displays, showing the procedures to prepare the vehicle for the battery check. 4. Prepare the vehicle for the battery check: Turn the engine off. Place the transmission in PARK or NEUTRAL, and set the parking brake.
- Page 95 Additional Tests BATTERY/ALTERNATOR MONITOR Green = Good Yellow = Normal Red = Warning/Bad 10. Choose Main Menu to return to the Main Menu. To perform a charging system check: When Hybrid Battery Check, Battery/Alternator Test is selected from the Main Menu and the vehicle is not an electric or hybrid vehicle, the Battery/Alternator Monitor menu displays.
- Page 96 Additional Tests VIEWING DRIVE CYCLE PROCEDURES Red = Excessive over charging or under charging If the alternator voltage is less than 9 V, the red, yellow and green SYSTEM STATUS LEDs will flash on and off. 8. Choose Main Menu to return to the Main Menu. VIEWING DRIVE CYCLE PROCEDURES A Drive Cycle for a Monitor requires that the vehicle is driven in such a way that all the required “Enabling Criteria”...
- Page 97 Additional Tests USING THE DLC LOCATOR - VIEWING VEHICLE INFORMATION 6. The Drive Cycle Procedure screen shows the specific set of operating procedures that ensure the vehicle is driven in such a way that all the required “Enabling Criteria” for the Monitor complete diagnostic testing are met.
- Page 98 Additional Tests VIEWING VEHICLE INFORMATION The Scan Tool can retrieve a list of information (provided by the vehicle manufacturer), unique to the vehicle under test, from the vehicle's on- board computer. This information may include: The vehicle's VIN number The control module identification number The vehicle's calibration ID(s).
- Page 99 Additional Tests VIEWING THE FIRMWARE VERSION - THE TOOL LIBRARY Viewing In-use Performance Tracking (IPT) The Scan Tool can retrieve In-use Performance Tracking (IPT) statistics for monitors supported by the vehicle under test. Two values are returned for each monitor; the number of times that all conditions necessary for a specific monitor to detect a malfunction have been encountered (XXXCOND), and the number of times that the vehicle has been operated under the specific conditions for the monitor (XXXCOMP).
- Page 100 Additional Tests THE TOOL LIBRARY Icon Meaning – Shows the full names for the I/M MONITOR STATUS icons shown and descriptions of informational icons on the Scan Tool’s display. DTC Library – Provides access to libraries of OBD1 and OBD2 DTC definitions.
- Page 101 Additional Tests THE TOOL LIBRARY The Select Manufacturer screen displays. 3. Select the desired vehicle manufacturer, then press ENTER A confirmation message shows. - If the correct manufacturer is not shown, choose No to return to the list of vehicle manufacturers. - If the correct manufacturer is shown, choose Yes.
- Page 102 Additional Tests THE TOOL LIBRARY 4. The Enter DTC screen displays. screen shows code “P0001,” with the “P” highlighted. Press UP or DOWN , as necessary, to scroll to the desired type (P=Powertrain, U=Network, B=Body, C=Chassis), then choose Next Digit. The selected character displays solid, and the next character is highlighted.
- Page 103 Additional Tests TOOL SETTINGS TOOL SETTINGS The Scan Tool lets you make several adjustments and settings to configure the tool to your particular needs. The following functions can be performed: Adjust Brightness: Adjusts the brightness of the display screen. Audible Tone: Turns the Scan Tool’s audible tone “on” and “off.” When turned “on,”...
- Page 104 Additional Tests TOOL SETTINGS To return to the Tool Settings menu without making changes, choose Back. Enabling/Disabling Live data Descriptions 1. Select Live data Descriptions in the Tool Settings menu, then press ENTER Footer Messages screen displays. 2. Select On of Off as desired, then choose Save to save your changes.
- Page 105 Using Scan Tool Memory VIEWING DATA IN MEMORY When you retrieve DTCs from a vehicle, the data is saved to the Scan Tool’s memory. The Scan Tool stores data for the three most recent vehicle’s tested. Each time you retrieve DTCs from a new vehicle, existing data for the oldest vehicle in the Scan Tool's memory is overwritten with the new data.
- Page 106 Notes...
- Page 107 UPDATES and OPTIONAL ACCESSORIES, please contact your local store, distributor or the Service Center. USA & Canada: (800) 544-4124 (6:00 AM-6:00 PM PST, Monday through Saturday) All others: (714) 241-6802 (6:00 AM-6:00 PM PST, Monday through Saturday) FAX: (714) 241-3979 (24 hr.) Web: www.innova.com...
Need help?
Do you have a question about the CarScan RepairSolutions 2 and is the answer not in the manual?
Questions and answers
How do I perform ABS bleed process on 2003 Ford F150 with the tool? It just refers to instructions in the manual but I can’t find it.
The ABS Bleeding function in the Innova CarScan RepairSolutions 2 is only available for Chrysler, GM, Hyundai/Kia, Mazda, and Toyota vehicles. Since a 2003 Ford F-150 is not listed among the supported makes, the ABS Bleeding process cannot be performed using this tool.
This answer is automatically generated
Have option for live data but doesn’t work
The live data option may not work on the Innova CarScan RepairSolutions 2 for the following reasons:
1. Vehicle Incompatibility: The vehicle may not support live data (PID) functionality, as some vehicles do not provide this capability.
2. Communication Error: The Scan Tool may fail to establish communication with the vehicle. To resolve this:
- Ensure the vehicle is OBD2 compliant.
- Verify the connection at the DLC (Data Link Connector) and ensure the ignition is ON.
- Turn the ignition OFF, wait 5 seconds, then turn it back ON to reset the computer.
3. Advisory Message: If live data is not supported by the vehicle, an advisory message will display stating that live data is unavailable.
4. Hardware or Setup Issue: There could be issues with the Scan Tool's connection or setup, such as an improper pairing process or hardware malfunction.
This answer is automatically generated
Jamesssssssss