Table of Contents
Advertisement
Advertisement
Table of Contents

Subscribe to Our Youtube Channel
Related Manuals for Innova CarScan


Summary of Contents for Innova CarScan
-
Page 2: Table Of Contents
Table of Contents ABOUT THE SCAN TOOL SAFETY FIRST! ............... CONTROLS AND INDICATORS ..........DISPLAY FUNCTIONS ............INITIAL ADJUSTMENTS ............USING THE SCAN TOOL CODE RETRIEVAL PROCEDURE .......... ERASING DIAGNOSTIC TROUBLE CODES (DTCs) ....ABOUT REPAIRSOLUTIONS 2® ..........CONNECTING TO BLUETOOTH / WIFI ......... ADDITIONAL FUNCTIONS VIEWING VEHICLE INFORMATION ........ -
Page 3: About The Scan Tool
About the Scan Tool SAFETY FIRST SAFETY FIRST! This manual describes common test procedures used by experienced service technicians. Many test procedures require precautions to avoid accidents that can result in personal injury, and/or damage to your vehicle or test equipment. Always read your vehicle's service manual and follow its safety precautions before and during any test or service procedure. -
Page 4: Controls And Indicators
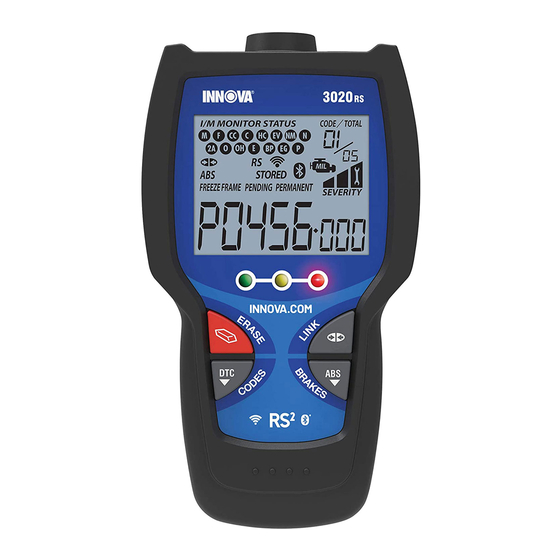
About the Scan Tool CONTROLS AND INDICATORS CONTROLS AND INDICATORS Figure 1. Controls and Indicators See Figure 1 for the locations of items 1 through 9, below. ERASE button - Erases Diagnostic Trouble Codes (DTCs) and "Freeze Frame" data from your vehicle's computer, and resets Monitor status. -
Page 5: Display Functions
About the Scan Tool DISPLAY FUNCTIONS 7. RED LED - Indicates there is a problem in one or more of the vehicle's systems. The red LED is also used to show that DTC(s) are present. DTCs are shown on the Scan Tool’s LCD display. In this case, the Malfunction Indicator (“Check Engine”) lamp on the vehicle's instrument panel will light steady on. - Page 6 (please visit www.innova.com/apps for more information). A solid blue icon indicates an active Bluetooth connection has been established. A solid grey icon indicates Bluetooth is not connected. WiFi icon – Indicates WiFi communication status. When ON, indicates the scan tool is linked to a WiFi network. When OFF,...
-
Page 7: Initial Adjustments
About the Scan Tool INITIAL ADJUSTMENTS INITIAL ADJUSTMENTS The first time the unit is connected to a vehicle, you must select the desired display language (English, French or Spanish) and unit of measurement (USA or Metric) as follows: 1. Select the desired display language, then press ENTER The Select Unit screen displays. -
Page 8: Using The Scan Tool
Using the Scan Tool CODE RETRIEVAL PROCEDURE CODE RETRIEVAL PROCEDURE Retrieving and using Diagnostic Trouble Codes (DTCs) for troubleshooting vehicle operation is only one part of an overall diagnostic strategy. Never replace a part based only on the DTC definition. Each DTC has a set of testing procedures, instructions and flow charts that must be followed to confirm the location of the problem. - Page 9 Using the Scan Tool CODE RETRIEVAL PROCEDURE 6. The Scan Tool automatically starts a check of the vehicle’s computer to determine which type of communication protocol it is using. When the Scan Tool identifies the computer’s communication protocol, a communication link is established. A PROTOCOL is a set of rules and procedures for regulating data transmission between computers, and between testing equipment and computers.
- Page 10 Using the Scan Tool CODE RETRIEVAL PROCEDURE If the information shown is not correct for the vehicle under test, or if you wish to reselect the vehicle, select No, then press ENTER to return to the Select Make screen. 9. After approximately 10~60 seconds, the Scan Tool will retrieve and display any Diagnostic Trouble Codes, Monitor Status and Freeze Frame Data retrieved from the vehicle’s computer memory.
- Page 11 Using the Scan Tool CODE RETRIEVAL PROCEDURE B. MONITOR NOT RUN STATUS – If the display shows a zero (indicating there are no DTC’s present in the vehicle’s computer memory), but the yellow LED is illuminated, it may be an indication that some of the Monitors supported by the vehicle have not yet run and completed their diagnostic testing.
-
Page 12: Erasing Diagnostic Trouble Codes (Dtcs)
Using the Scan Tool ERASING DIAGNOSTIC TROUBLE CODES (DTCs) If more than one malfunction is present that causes more than one DTC to be set, only the code with the highest priority will contain Freeze Frame data. The code designated “01” on the Scan Tool display is referred to as the PRIORITY code, and Freeze Frame data always refers to this code. -
Page 13: About Repairsolutions 2
Using the Scan Tool ABOUT REPAIRSOLUTIONS 2® If you are sure you want to proceed, select YES, then press ENTER If you do not want to proceed, select NO, then press ENTER cancel the erase procedure. If you chose to erase DTCs, a “One moment please…”... -
Page 14: Connecting To Bluetooth / Wifi
Technical Service Bulletins – Research known problems reported by vehicle manufacturers. Safety Recalls – Research known safety concerns applicable to a vehicle. And much more. Please visit www.innova.com for additional information. Hardware Requirements: Innova Scan Tool with Bluetooth/WiFi Android or iOS Smart Device Accessing RepairSolutions 2®... - Page 15 Using the Scan Tool CONNECTING TO BLUETOOTH / WIFI Note that only 2.4GHz networks are supported. If you do not wish to connect to a WiFi network at this time, tap SKIP. 4. When WiFi pairing is complete, a confirmation screen displays. Click Continue to view the “Setup Complete”...
-
Page 16: Additional Functions
Additional Functions VIEWING VEHICLE INFORMATION In addition to retrieving Diagnostic Trouble Codes (DTCs), you can use the scan tool to perform additional diagnostic tests, to view diagnostic and vehicle information stored in your vehicle's on-board computer, and to configure the scan tool for your particular needs. Additional tests and related functions are accessed through the Main Menu. - Page 17 Additional Functions VIEWING VEHICLE INFORMATION The vehicle's VIN number The control module identification number The vehicle's calibration ID(s). These IDs uniquely identify the software version(s) for the vehicle's control module(s). The Vehicle's Calibration Verification Number(s) (CVNs) required by ODB2 regulations. CVNs are used to determine if emission-related calibrations for the vehicle under test have been changed.
-
Page 18: Evap Test
Additional Functions EVAP TEST- VIEWING MONITOR ICON DESCRIPTIONS 1. Select Vehicle Information from the Main Menu, then press ENTER Vehicle Information menu displays. 2. Select IPT, then press ENTER 3. When the retrieval process is completed, In-use Performance Tracking statistics for the vehicle under test display. -
Page 19: Viewing Led Definitions
Additional Functions LED DEFINITIONS - DISPLAY LANGUAGE - DISPLAY BRIGHTNESS 1. From the Main Menu, select Monitor Icons, then press ENTER The Monitor Icons screen displays. The screen shows a list of the 15 Monitor icons, along with the full name for each icon. -
Page 20: Enabling/Disabling The Audible Tone
Additional Functions AUDIBLE TONE - NAVIGATIONAL FOOTERS - HOTKEY LEGEND 3. Repeat steps 1 and 2 as needed until the desired brightness is obtained. To return to the Main Menu without making changes, press and hold ENTER ENABLING/DISABLING THE AUDIBLE TONE 1. -
Page 21: Setting The Unit Of Measurement
Additional Functions SETTING THE UNIT OF MEASUREMENT SETTING THE UNIT OF MEASUREMENT 1. Select Unit of Measurement in the Main Menu, then press ENTER The Unit of Measurement screen displays. 2. Select the desired unit of measurement, then press ENTER to save your changes. - Page 22 Notes...
-
Page 23: Warranty And Servicing
UPDATES and OPTIONAL ACCESSORIES, please contact your local store, distributor or the Service Center. USA & Canada: (800) 544-4124 (6:00 AM-6:00 PM, Monday through Saturday) All others: (714) 241-6802 (6:00 AM-6:00 PM, Monday through Saturday) FAX: (714) 241-3979 (24 hr.) Web: www.innova.com...
Need help?
Do you have a question about the CarScan and is the answer not in the manual?
Questions and answers