Table of Contents
Advertisement
Quick Links
Advertisement
Table of Contents

Related Manuals for Cornelius Ribbon


Summary of Contents for Cornelius Ribbon
- Page 1 Installation and service manual Postmix tower Ribbon...
- Page 2 All rights reserved with regard to filing for/registering patents, utility models or design patents. www.cornelius-emea.com Cornelius Deutschland GmbH Phone:+49 (0) 21 73 / 79 3 – 0 Carl-Leverkus-Str. 15 Fax: +49 (0) 21 73 / 77 4 – 38 40764 Langenfeld Email: info@cornelius.com...
-
Page 3: Table Of Contents
Installing the unit ......................25 Installing the drain set ....................27 Removing the unit ....................... 29 Removing the E-Box ....................30 Removing the drain set ....................31 Cornelius Deutschland GmbH Installation and service manual: Postmix tower Document no. TD0000100 Ribbon Version: 06/11/2017, Index 0... - Page 4 Calling up the “Critica_Aws” menu................73 8.2.15 Checking and configuring settings in the “Wifi” menu ..........76 8.2.16 Checking and configuring settings in the “Ethernet” menu ......... 78 Cornelius Deutschland GmbH Installation and service manual: Postmix tower Document no. TD0000100 Ribbon Version: 06/11/2017, Index 0...
- Page 5 Errors and malfunctions................... 91 Troubleshooting table....................92 Applicable documents....................96 Drill template ....................... 97 Flowchart........................98 Tower cable diagram....................99 E-Box cable diagram ....................100 Cornelius Deutschland GmbH Installation and service manual: Postmix tower Document no. TD0000100 Ribbon Version: 06/11/2017, Index 0...
-
Page 6: Safety
Improper use Improper use of the unit, and unauthorised modifications to the unit and its components may cause personal injury and equipment damage for which Cornelius assumes no liability. Im- proper use of the unit is prohibited. You can find further information about the improper use of the unit – and the meaning of im- proper use –... -
Page 7: Safety Instructions
Make sure that the cable markers are not removed from the cables and/or mark or label the cables such that they can be correctly assigned during installation. Cornelius Deutschland GmbH Installation and service manual: Postmix tower Document no. TD0000100 Ribbon... - Page 8 When installing cables, be mindful of any bending radiuses that the manufacturer may have specified. • To fix cables in place using cable ties, use the mounting bases pro- vided. Installation and service manual: Postmix tower Cornelius Deutschland GmbH Ribbon Document no. TD0000100 Version: 06/11/2017, Index 0...
-
Page 9: Transport And Packaging
Choose a suitable packaging when returning the unit itself or one of its components to Cornelius Deutschland GmbH, e.g. for repairs. In particular, make sure that the unit and any components are protected from shock/impact, moisture, dirt and electrostatic discharge (ESD). -
Page 10: Disposal
Such fuels or lubricants must always be prevented from seeping into the ground, the sewage system and any bodies of water, and must always be prevented from entering the at- mosphere. Installation and service manual: Postmix tower Cornelius Deutschland GmbH Ribbon Document no. TD0000100 Version: 06/11/2017, Index 0... -
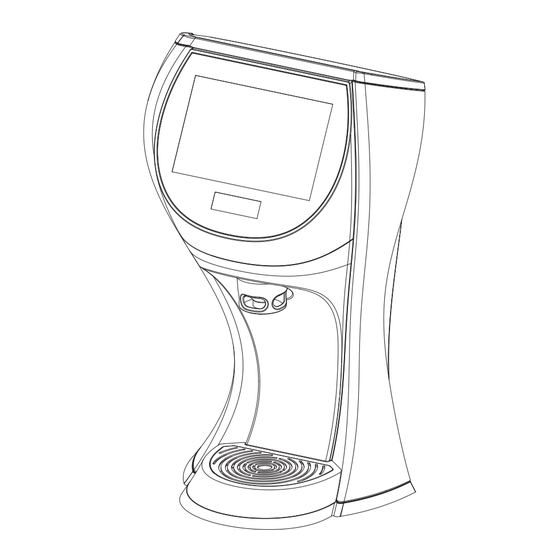
Page 11: Description
4 Plug cable no. 141647504 EU 10 Panel 5 Ferrit 11 Dispensing nozzle with nozzle inlay and 6 Plug cable no. 220046667 diffusor Cornelius Deutschland GmbH Installation and service manual: Postmix tower Document no. TD0000100 Ribbon Version: 06/11/2017, Index 0... - Page 12 If you lift and remove the touchscreen you will gain access to the valve assembly (Figure 4/1) that is kept in place inside the valve assembly mount (Figure 4/2). Figure 4 Installation and service manual: Postmix tower Cornelius Deutschland GmbH Ribbon Document no. TD0000100 Version: 06/11/2017, Index 0...
-
Page 13: Functions Within The Dispensing System
The beverage components flowing from the valves are supplied to the diffusor, where they are mixed. From there, they are poured into the cup via the dispensing nozzle. Cornelius Deutschland GmbH Installation and service manual: Postmix tower Document no. TD0000100... -
Page 14: Touchscreen/Software
“HMI Status” (user interface status) “Software & UI Update” (software & user interface update) “Critica_Aws” “Wi-Fi” “Ethernet” “Drink Counter” “System Log” Figure 7 Installation and service manual: Postmix tower Cornelius Deutschland GmbH Ribbon Document no. TD0000100 Version: 06/11/2017, Index 0... - Page 15 “UI Template Scheduler” “Date & Time Setting” “Language” “Machine Configuration” “Disable Touch for Cleaning” “Exit Maintenance Page” “Reboot Machine Setting” 10. “User Management” Figure 8 Cornelius Deutschland GmbH Installation and service manual: Postmix tower Document no. TD0000100 Ribbon Version: 06/11/2017, Index 0...
-
Page 16: Technical Data
Key switch Wi-Fi 80 b/g/n 100/3.9 mm/in. Min. side clearances sides 100/3.9 mm/in. required Rear 100/3.9 mm/in. Installation and service manual: Postmix tower Cornelius Deutschland GmbH Ribbon Document no. TD0000100 Version: 06/11/2017, Index 0... -
Page 17: E-Box
Flavour shot inlets diameter Drain set 1 inch inside diameter Cable 220046667 Tower mains/power supply via E-Box Cable 141647504 EU E-Box mains/power supply Cornelius Deutschland GmbH Installation and service manual: Postmix tower Document no. TD0000100 Ribbon Version: 06/11/2017, Index 0... - Page 18 Cable 220046667 and ADA keyboard (optional) DC 24 V output (still water control) for still Cable 220046670 water only in the undercounter cooler Installation and service manual: Postmix tower Cornelius Deutschland GmbH Ribbon Document no. TD0000100 Version: 06/11/2017, Index 0...
-
Page 19: Preparing The Unit
If the unit still carries a voltage after you have disconnected it from power, this indicates a defect. Resolve this defect before continuing the checks/in- spections or any work. Cornelius Deutschland GmbH Installation and service manual: Postmix tower Document no. TD0000100... -
Page 20: Disconnecting The Unit From Power
Disconnect the plug (cable no. 220046667) (Figure 10/3) from the E-Box (Figure 10/1), see chapter A.3, page 99. Wait 1 minute before continuing your work on the unit. Figure 10 Installation and service manual: Postmix tower Cornelius Deutschland GmbH Ribbon Document no. TD0000100 Version: 06/11/2017, Index 0... -
Page 21: Moving The Touchscreen Into The Service Position
Pull the touchscreen assembly out of the unit. Figure 12 Raise and then mount the touchscreen (Figure 13/1) to the unit using the touchscreen mount (Figure 13/2). Figure 13 Cornelius Deutschland GmbH Installation and service manual: Postmix tower Document no. TD0000100 Ribbon Version: 06/11/2017, Index 0... -
Page 22: Installation/Removal
Non-compliance with these laws, regulations and guidelines may result in death, seri- ous injury or equipment damage. Installation and service manual: Postmix tower Cornelius Deutschland GmbH Ribbon Document no. TD0000100 Version: 06/11/2017, Index 0... -
Page 23: Installation Location
All connections and outlets/drains must comply with the applicable local and/or national and international regulations. If the unit is to be operated by non-instructed persons, the site of installation is to be chosen to allow trained staff to supervise. Cornelius Deutschland GmbH Installation and service manual: Postmix tower Document no. TD0000100 Ribbon... -
Page 24: Preparing The Installation Location
Saw the opening for the tubes and cables into the supporting structure as indicated on the drill template. Remove any dirt or dust from the supporting structure. Installation and service manual: Postmix tower Cornelius Deutschland GmbH Ribbon Document no. TD0000100 Version: 06/11/2017, Index 0... -
Page 25: Installing The E-Box
When installing units, assemblies and components, be mindful of the correct installation position. Notice! Install the E-Box in close proximity to the tower. The length of cable no. 220046667 is 1,800 mm Cornelius Deutschland GmbH Installation and service manual: Postmix tower Document no. TD0000100 Ribbon Version: 06/11/2017, Index 0... - Page 26 Observe the installation/mounting direction (Figure 14/ Figure 14 Connect the plug (cable no. 141647504 EU (Figure 15/2) to the E-Box (Figure 15/1). Figure 15 Installation and service manual: Postmix tower Cornelius Deutschland GmbH Ribbon Document no. TD0000100 Version: 06/11/2017, Index 0...
-
Page 27: Installing The Unit
Place the unit with the seal onto the prepared supporting structure. Cornelius Deutschland GmbH Installation and service manual: Postmix tower Document no. TD0000100... - Page 28 Attach the panel (Figure 19/1), see chapter 7.4, page 43. 10. Attach the drip tray (Figure 19/3) with grill, see chapter 7.6, page 45. Figure 19 Installation and service manual: Postmix tower Cornelius Deutschland GmbH Ribbon Document no. TD0000100 Version: 06/11/2017, Index 0...
-
Page 29: Installing The Drain Set
3 and step 4 are only to be performed if the drain set is not pre-mount- If the drain set is already pre-mounted on the unit, proceed step 5, page 28. Cornelius Deutschland GmbH Installation and service manual: Postmix tower Document no. - Page 30 Attach the tube (Figure 24/3) to the drain fitting (Figure 24/1) using a tubing clamp (Figure 24/2). Insulate the tube (Figure 24/3) properly. Figure 24 Installation and service manual: Postmix tower Cornelius Deutschland GmbH Ribbon Document no. TD0000100 Version: 06/11/2017, Index 0...
-
Page 31: Removing The Unit
Remove threaded bolts (Figure 26/3), nuts (Figure 26/1) and washers (Figure 26/2) used to attach the unit to the supporting structure. Figure 26 Cornelius Deutschland GmbH Installation and service manual: Postmix tower Document no. TD0000100 Ribbon Version: 06/11/2017, Index 0... -
Page 32: Removing The E-Box
Remove the fastening screws (Figure 28/1) used to keep the E-Box (Figure 28/2) in place. Pack the E-Box as described in chapter 2, page 7. Figure 28 Installation and service manual: Postmix tower Cornelius Deutschland GmbH Ribbon Document no. TD0000100 Version: 06/11/2017, Index 0... -
Page 33: Removing The Drain Set
Pull out the drain fitting (Figure 31/1) with the O-ring through the opening (Figure 31/2) of the base plate (Figure 31/3) in an upward motion. Figure 31 Cornelius Deutschland GmbH Installation and service manual: Postmix tower Document no. TD0000100 Ribbon... -
Page 34: Maintenance
Non-compliance with these laws, regulations and guidelines may result in death, seri- ous injury or equipment damage. Installation and service manual: Postmix tower Cornelius Deutschland GmbH Ribbon Document no. TD0000100 Version: 06/11/2017, Index 0... -
Page 35: Maintenance Table
Perform visual inspection, see Every 3 months Nozzle inlay O-ring chapter 6.3, page 37. Lubricate, see chapter 6.4, page Every 3 months Nozzle inlay O-ring Cornelius Deutschland GmbH Installation and service manual: Postmix tower Document no. TD0000100 Ribbon Version: 06/11/2017, Index 0... -
Page 36: Cleaning The Tubes And Valves
You can only continue to the next step if and when all tubes have been rinsed with water. Installation and service manual: Postmix tower Cornelius Deutschland GmbH Ribbon Document no. TD0000100 Version: 06/11/2017, Index 0... - Page 37 16. Connect all basic ingredient/beverage tubes to the undercounter cooler; see the docu- ment “Undercounter cooler installation and service manual”. 17. Return to the service menu by pressing the “Exit” button. Figure 34 Cornelius Deutschland GmbH Installation and service manual: Postmix tower Document no. TD0000100 Ribbon...
- Page 38 19. Confirm the window message by pressing “OK”. 20. Select each product until the beverage is dispensed. See the document “Tower operator manual”, document no. TD0000000. Figure 36 Installation and service manual: Postmix tower Cornelius Deutschland GmbH Ribbon Document no. TD0000100 Version: 06/11/2017, Index 0...
-
Page 39: Visually Inspecting The Seals
Check the diffusor seal for damage and elasticity. Replace any damaged diffusor seals, see chapter 7.3, page 42. Figure 37 Check the nozzle seal (Figure 38/1) for damage. Figure 38 Cornelius Deutschland GmbH Installation and service manual: Postmix tower Document no. TD0000100 Ribbon Version: 06/11/2017, Index 0... -
Page 40: Lubricating The Nozzle Seal
Reference Lubricating grease Compliant with food law Relubricate the nozzle seal (Figure 39/1) by applying sufficient lubricating grease to the circumference. Figure 39 Installation and service manual: Postmix tower Cornelius Deutschland GmbH Ribbon Document no. TD0000100 Version: 06/11/2017, Index 0... -
Page 41: Repairs
All wiring and plumbing must be carried out in compliance with national and local laws, regulations and guidelines. Non-compliance with these laws, regulations and guidelines may result in death, seri- ous injury or equipment damage. Cornelius Deutschland GmbH Installation and service manual: Postmix tower Document no. TD0000100 Ribbon... -
Page 42: Replacing The Nozzle Housing
Lock the nozzle housing into the unit by turning. Make sure that the dispensing nozzle is inserted cor- rectly as otherwise the correct beverage cannot be dis- Figure 41 pensed. Installation and service manual: Postmix tower Cornelius Deutschland GmbH Ribbon Document no. TD0000100 Version: 06/11/2017, Index 0... -
Page 43: Replacing The Diffusor
Position the new diffusor within the unit. Push the diffusor up into the unit. Finishing tasks Install the nozzle carrier, see chapter 7.1, page 40. Figure 43 Cornelius Deutschland GmbH Installation and service manual: Postmix tower Document no. TD0000100 Ribbon Version: 06/11/2017, Index 0... -
Page 44: Replacing The Diffusor Seal
Ensure correct positioning (coding) of the diffusor seal within the diffusor. Finishing tasks Install the diffusor, see chapter 7.2, page 41. Figure 45 Installation and service manual: Postmix tower Cornelius Deutschland GmbH Ribbon Document no. TD0000100 Version: 06/11/2017, Index 0... -
Page 45: Replacing The Panel
Remove the panel from the unit. Figure 46 Attach the new panel. Finishing tasks Install the diffusor, see chapter 7.2, page 41. Figure 47 Cornelius Deutschland GmbH Installation and service manual: Postmix tower Document no. TD0000100 Ribbon Version: 06/11/2017, Index 0... -
Page 46: Replacing The Drain Set
Remove the drain set; see chapter 5.8, page 31. Install the new drain set; see chapter 5.5, page 27. Finishing tasks Install the grill, see chapter 7.6, page 45. Figure 48 Installation and service manual: Postmix tower Cornelius Deutschland GmbH Ribbon Document no. TD0000100 Version: 06/11/2017, Index 0... -
Page 47: Replacing The Drip Tray And The Grill
Attach the new drip tray. Insert the grill in the drip tray. Finishing tasks Install the panel, see chapter 7.4, page 43. Figure 50 Cornelius Deutschland GmbH Installation and service manual: Postmix tower Document no. TD0000100 Ribbon Version: 06/11/2017, Index 0... -
Page 48: Replacing The Touchscreen, Unit Controller Board, And Touchscreen Panel
Undo the fastening screws (Figure 51/1) on the touch- screen to the end stop. Figure 51 Pull the touchscreen assembly out of the unit. Figure 52 Installation and service manual: Postmix tower Cornelius Deutschland GmbH Ribbon Document no. TD0000100 Version: 06/11/2017, Index 0... - Page 49 15. Insert all disconnected cables and plugs through the opening of the touchscreen cover (Figure 55/1). 16. Position the touchscreen cover (Figure 55/1) on the Figure 56 touchscreen (Figure 56/2). Cornelius Deutschland GmbH Installation and service manual: Postmix tower Document no. TD0000100 Ribbon Version: 06/11/2017, Index 0...
-
Page 50: Replacing The Cover
Attach the cover with the fastening screws (Figure 57/1 and 2). Finishing tasks Figure 57 Install the touchscreen, see chapter 7.7, page 46. Installation and service manual: Postmix tower Cornelius Deutschland GmbH Ribbon Document no. TD0000100 Version: 06/11/2017, Index 0... -
Page 51: Replacing The Side Sections
Attach the side sections (Figure 58/1) using the fastening screws (Figure 58/2). Finishing tasks Mount the cover; see chapter 7.8, page 48. Figure 58 Cornelius Deutschland GmbH Installation and service manual: Postmix tower Document no. TD0000100 Ribbon Version: 06/11/2017, Index 0... -
Page 52: Replacing The Valve Controller Board
Attach the valve controller board cover (Figure 59/1) using the fastening screws (Figure 59/2). Finishing tasks Install the housing, see chapter 7.11, page 51. Installation and service manual: Postmix tower Cornelius Deutschland GmbH Ribbon Document no. TD0000100 Version: 06/11/2017, Index 0... -
Page 53: Replacing The Housing
Attach the housing (Figure 61/2) using fastening screws (Figure 61/1 and 3). Finishing tasks Install the edge sections; see chapter 7.8, page 48. Figure 61 Cornelius Deutschland GmbH Installation and service manual: Postmix tower Document no. TD0000100 Ribbon Version: 06/11/2017, Index 0... -
Page 54: Replacing The Valve Assembly
(Figure 63/2). Press the closing pistons (Figure 63/4) and the closing plate (Figure 63/3) up until the locking mechanism becomes visible. Figure 63 Installation and service manual: Postmix tower Cornelius Deutschland GmbH Ribbon Document no. TD0000100 Version: 06/11/2017, Index 0... - Page 55 Connect all necessary plugs and cables to the valve assembly (Figure 62/1). Finishing tasks Install the touchscreen, see chapter 7.7, page 46. Figure 66 Cornelius Deutschland GmbH Installation and service manual: Postmix tower Document no. TD0000100 Ribbon Version: 06/11/2017, Index 0...
-
Page 56: Replacing The Valves
Remove the valve mount (Figure 67/2). Figure 67 Lift and remove the valve (Figure 68/1) from the valve assembly (Figure 68/2) in an upward motion. Figure 68 Installation and service manual: Postmix tower Cornelius Deutschland GmbH Ribbon Document no. TD0000100 Version: 06/11/2017, Index 0... - Page 57 10. Attach the valve mount (Figure 71/2). 11. Attach the panel (Figure 71/1). Finishing tasks Install the valve assembly, see chapter 7.12, page 52. Figure 71 Cornelius Deutschland GmbH Installation and service manual: Postmix tower Document no. TD0000100 Ribbon Version: 06/11/2017, Index 0...
-
Page 58: Replacing The Automatic Circuit Breakers
(Figure 72/2) of the E-Box (Figure 72/3) in place. Figure 72 Disconnect all necessary plugs and cables from the automatic circuit breakers (Figure 73/1). Figure 73 Installation and service manual: Postmix tower Cornelius Deutschland GmbH Ribbon Document no. TD0000100 Version: 06/11/2017, Index 0... - Page 59 (Figure 72/1). Finishing tasks Inspect the unit in accordance with VDE 0701-0702. Install/assemble the unit, see chapter 5.3, page 23. Figure 75 Cornelius Deutschland GmbH Installation and service manual: Postmix tower Document no. TD0000100 Ribbon Version: 06/11/2017, Index 0...
-
Page 60: Commissioning/Shutdown
Non-compliance with these laws, regulations and guidelines may result in death, seri- ous injury or equipment damage. Installation and service manual: Postmix tower Cornelius Deutschland GmbH Ribbon Document no. TD0000100 Version: 06/11/2017, Index 0... -
Page 61: Commissioning
Document no: various 1 tor manual Document no. Tower operator manual TD0000000 Notice! Maximum operating pressure of the valves is 100 PSI (689.48 kPa). Cornelius Deutschland GmbH Installation and service manual: Postmix tower Document no. TD0000100 Ribbon Version: 06/11/2017, Index 0... - Page 62 Clean the outside of the unit; see the document “Tower operator manual”, document no. TD0000000. Carry out the configuration settings, see chapter 8.2, page 61. Figure 77 Installation and service manual: Postmix tower Cornelius Deutschland GmbH Ribbon Document no. TD0000100 Version: 06/11/2017, Index 0...
-
Page 63: Configuration
Changes to the unit's software and use of applications not provided by Cornelius Deutschland GmbH will void the warranty! The costs of shipping and repair caused by the use of software and appli- cations not provided by Cornelius Deutschland GmbH will be borne by you. 8.2.1... -
Page 64: Checking Settings In The "Current Version" Menu
The touchscreen is in service position. see chapter 4.2, page 19. Qty/ Required tools/materials Comment Reference amount 4 GB to 32 GB with FAT32 USB stick formatting Installation and service manual: Postmix tower Cornelius Deutschland GmbH Ribbon Document no. TD0000100 Version: 06/11/2017, Index 0... - Page 65 Figure 82 pressing “Cancel”. See also Chapter 9.1, page 92. After updating the data, confirm the window message by pressing “OK”. Figure 83 Cornelius Deutschland GmbH Installation and service manual: Postmix tower Document no. TD0000100 Ribbon Version: 06/11/2017, Index 0...
- Page 66 The system will compare the system status with the update files. If they are the same, the system update will not be activated. Figure 86 Installation and service manual: Postmix tower Cornelius Deutschland GmbH Ribbon Document no. TD0000100 Version: 06/11/2017, Index 0...
-
Page 67: Calling Up The "Update Schedule" Menu
TD0000000. Return to the service menu by pressing the “Exit” button and then continue with the next step Chapter 8.2.6, page Figure 88 Cornelius Deutschland GmbH Installation and service manual: Postmix tower Document no. TD0000100 Ribbon Version: 06/11/2017, Index 0... -
Page 68: Calling Up The "Sanitization" Menu
If the settings are not correct, proceed as follows: Notice! Settings are made by means of relevant updates and should only be made in exceptional cases. Installation and service manual: Postmix tower Cornelius Deutschland GmbH Ribbon Document no. TD0000100 Version: 06/11/2017, Index 0... -
Page 69: Checking The Valves
If the values are correct, return to the service menu and continue with the next step, Chapter 8.2.10, page 68. – If the values are not correct, adjust the valves; see chapter 8.2.29, page 88. Cornelius Deutschland GmbH Installation and service manual: Postmix tower Document no. TD0000100 Ribbon... -
Page 70: Checking And Configuring Settings In The "Recipe" Menu
If the settings are not correct, you can set the mixing ratio to the dispensing time as follows: Increase or reduce the dispensing time using “+” or “-”. Figure 95 Installation and service manual: Postmix tower Cornelius Deutschland GmbH Ribbon Document no. TD0000100 Version: 06/11/2017, Index 0... - Page 71 Time” (Figure 96/3) and “2nd Top Up Time” (Figure 96/4). Figure 96 Save your settings by pressing “Save”. Figure 97 Return to the service menu by pressing the “Exit” button. Figure 98 Cornelius Deutschland GmbH Installation and service manual: Postmix tower Document no. TD0000100 Ribbon Version: 06/11/2017, Index 0...
-
Page 72: Checking And Configuring Settings In The "Commissioning" Menu
Confirm the selection by pressing “Save”. – If the values are not correct for the individual prod- ucts, proceed as follows: Figure 100 Installation and service manual: Postmix tower Cornelius Deutschland GmbH Ribbon Document no. TD0000100 Version: 06/11/2017, Index 0... - Page 73 (Figure 101/2). Confirm the selection by pressing “Save”. Figure 101 – Return to the service menu by pressing the “Exit” button. Figure 102 Cornelius Deutschland GmbH Installation and service manual: Postmix tower Document no. TD0000100 Ribbon Version: 06/11/2017, Index 0...
-
Page 74: Checking And Configuring Settings In The "Bib Dashboard" Menu
Return to the service menu by pressing the “Exit” button and then continue with the next step Chapter 8.2.14, page 73. Figure 105 Installation and service manual: Postmix tower Cornelius Deutschland GmbH Ribbon Document no. TD0000100 Version: 06/11/2017, Index 0... -
Page 75: Calling Up The "Critica_Aws" Menu
“Calling up the “Message Queue Server” Figure 108 menu”, page 75. • “Log Message”; see chapter: “Activating/ deactivating the “Log Message” menu”, page 75. Cornelius Deutschland GmbH Installation and service manual: Postmix tower Document no. TD0000100 Ribbon Version: 06/11/2017, Index 0... - Page 76 Figure 112 Confirm the window message by pressing “OK”. Figure 113 Press “Unregister This Machine”. The unit is no longer registered. Figure 114 Installation and service manual: Postmix tower Cornelius Deutschland GmbH Ribbon Document no. TD0000100 Version: 06/11/2017, Index 0...
- Page 77 Call up the “Critica Aws” menu; see chapter 8.2.14, page 73. Press “Remote Update”. The menu opens. You can select either “UI APP BSP” or “Firmware”. Figure 118 Cornelius Deutschland GmbH Installation and service manual: Postmix tower Document no. TD0000100 Ribbon Version: 06/11/2017, Index 0...
-
Page 78: Checking And Configuring Settings In The "Wifi" Menu
8.2.15 Checking and configuring settings in the “Wifi” menu Call up the service menu; see the document “Tower operator manual”, document no. TD0000000. Installation and service manual: Postmix tower Cornelius Deutschland GmbH Ribbon Document no. TD0000100 Version: 06/11/2017, Index 0... - Page 79 Confirm your input by pressing “Connect”. The unit dials into the network. Proceed with the next step Chapter 8.2.16, page 78. Figure 125 Cornelius Deutschland GmbH Installation and service manual: Postmix tower Document no. TD0000100 Ribbon Version: 06/11/2017, Index 0...
-
Page 80: Checking And Configuring Settings In The "Ethernet" Menu
In the “Drink Counter” menu, the dispensed quantity of individual products can be checked. You can find further information about the menu in the tower operator manual, document no. TD0000000. Installation and service manual: Postmix tower Cornelius Deutschland GmbH Ribbon Document no. TD0000100 Version: 06/11/2017, Index 0... -
Page 81: Calling Up And Checking The "System Log" Menu
In the "Product Price" menu, the price of the respective product can be checked and adjusted. You can find further information about the menu in the tower operator manual, document no. TD0000000. Cornelius Deutschland GmbH Installation and service manual: Postmix tower Document no. TD0000100... -
Page 82: Checking And Configuring The "Enable/Disable Product" Menu
Select the required weekday by pressing the relevant option. To add a schedule to the previously selected weekday, press “+Add”. A new window opens. Figure 134 Installation and service manual: Postmix tower Cornelius Deutschland GmbH Ribbon Document no. TD0000100 Version: 06/11/2017, Index 0... - Page 83 15. To copy a schedule for the previously selected weekday to another weekday, press the required schedule. A new window opens. Figure 138 Cornelius Deutschland GmbH Installation and service manual: Postmix tower Document no. TD0000100 Ribbon Version: 06/11/2017, Index 0...
- Page 84 21. Press “Copy To Every Day”. 22. To delete all schedules for a weekday, press the required schedule. A new window opens. Figure 142 Installation and service manual: Postmix tower Cornelius Deutschland GmbH Ribbon Document no. TD0000100 Version: 06/11/2017, Index 0...
-
Page 85: Checking And Configuring The "Date & Time Setting" Menu
In the “Language” menu, the language can be checked and set. You can find further information about the menu in the tower operator manual, document no. TD0000000. Cornelius Deutschland GmbH Installation and service manual: Postmix tower Document no. TD0000100 Ribbon... -
Page 86: Calling Up And Configuring The "Machine Configuration" Menu
You can exit the maintenance page via the “Exit Maintenance Page” menu. You can find further information about the menu in the tower operator manual, document no. TD0000000. Installation and service manual: Postmix tower Cornelius Deutschland GmbH Ribbon Document no. TD0000100 Version: 06/11/2017, Index 0... -
Page 87: Calling Up The "Reboot Machine Setting" Menu
To set a daily reboot, switch the menu item “Daily Reboot” to “ON”. A new window opens. Figure 148 Select the required time. Confirm your input by pressing “OK”. Figure 149 Cornelius Deutschland GmbH Installation and service manual: Postmix tower Document no. TD0000100 Ribbon Version: 06/11/2017, Index 0... -
Page 88: Calling Up The "User Management" Menu
To edit the permissions of an existing user, press the rel- evant user. A new window opens. Figure 152 Press “Edit”. A new window opens. Figure 153 Installation and service manual: Postmix tower Cornelius Deutschland GmbH Ribbon Document no. TD0000100 Version: 06/11/2017, Index 0... - Page 89 12. Confirm the window message by pressing “OK”. Figure 157 13. To add a new user, press “Add User”. A new window opens. Figure 158 Cornelius Deutschland GmbH Installation and service manual: Postmix tower Document no. TD0000100 Ribbon Version: 06/11/2017, Index 0...
-
Page 90: Adjusting The Valves
(Figure 162/1) clockwise by a 1/4 turn and check the flow. Also set all syrup flow valves to the required flow rates. Figure 162 Installation and service manual: Postmix tower Cornelius Deutschland GmbH Ribbon Document no. TD0000100 Version: 06/11/2017, Index 0... -
Page 91: Shutdown
Clean the tubes and valves as described in Chapter 6.2, page 34, up to and including step 13, page 35. To close the maintenance page press “Exit Maintenance Page”. Figure 163 Confirm by pressing “OK”. Figure 164 Cornelius Deutschland GmbH Installation and service manual: Postmix tower Document no. TD0000100 Ribbon Version: 06/11/2017, Index 0... - Page 92 Clean the outside of the unit; see the document “Tower operator manual”, document no. TD0000000. Disconnect the unit from power, see chapter 4.1, page 18. Installation and service manual: Postmix tower Cornelius Deutschland GmbH Ribbon Document no. TD0000100 Version: 06/11/2017, Index 0...
-
Page 93: Errors And Malfunctions
All wiring and plumbing must be carried out in compliance with national and local laws, regulations and guidelines. Non-compliance with these laws, regulations and guidelines may result in death, seri- ous injury or equipment damage. Cornelius Deutschland GmbH Installation and service manual: Postmix tower Document no. TD0000100 Ribbon... -
Page 94: Troubleshooting Table
See the document “Undercounter Fault or error on the undercounter warm and the com- cooler installation and service cooler pressor is running manual” Continued overleaf Installation and service manual: Postmix tower Cornelius Deutschland GmbH Ribbon Document no. TD0000100 Version: 06/11/2017, Index 0... - Page 95 Incorrectly set valve on the tower chapter 8.2.29, page 88 Replace the valve; see Defective valve on the tower chapter 7.13, page 54 Continued overleaf Cornelius Deutschland GmbH Installation and service manual: Postmix tower Document no. TD0000100 Ribbon Version: 06/11/2017, Index 0...
- Page 96 Fault or error on the undercounter cooler installation and service cooler manual” Clean the CO supply; see supply is contaminated chapter 6.2, page 34 Continued overleaf Installation and service manual: Postmix tower Cornelius Deutschland GmbH Ribbon Document no. TD0000100 Version: 06/11/2017, Index 0...
- Page 97 Crushed ice in the cup may also cause dispensing problems. When the finished beverage comes into contact with sharp-edged ice, CO2 is released from the dispensed drink. Cornelius Deutschland GmbH Installation and service manual: Postmix tower Document no. TD0000100 Ribbon...
-
Page 98: A Applicable Documents
A Applicable documents Applicable documents Installation and service manual: Postmix tower Cornelius Deutschland GmbH Ribbon Document no. TD0000100 Version: 06/11/2017, Index 0... -
Page 99: Drill Template
A Applicable documents Drill template Cornelius Deutschland GmbH Installation and service manual: Postmix tower Document no. TD0000100 Ribbon Version: 06/11/2017, Index 0... -
Page 100: Flowchart
A Applicable documents Flowchart S = syrup Cout = carbonated water output Still = still water F = flavour Cin = carbonated water input Installation and service manual: Postmix tower Cornelius Deutschland GmbH Ribbon Document no. TD0000100 Version: 06/11/2017, Index 0... -
Page 101: Tower Cable Diagram
A Applicable documents Tower cable diagram Cornelius Deutschland GmbH Installation and service manual: Postmix tower Document no. TD0000100 Ribbon Version: 06/11/2017, Index 0... -
Page 102: E-Box Cable Diagram
A Applicable documents E-Box cable diagram Installation and service manual: Postmix tower Cornelius Deutschland GmbH Ribbon Document no. TD0000100 Version: 06/11/2017, Index 0... - Page 103 Cornelius Deutschland GmbH Phone:+49 (0) 21 73 / 79 3 – 0 Carl-Leverkus-Str. 15 Fax: +49 (0) 21 73 / 77 4 – 38 40764 Langenfeld Email: info@cornelius.com Germany...
Need help?
Do you have a question about the Ribbon and is the answer not in the manual?
Questions and answers