
Related Manuals for YSI SonTek ADVField


Summary of Contents for YSI SonTek ADVField
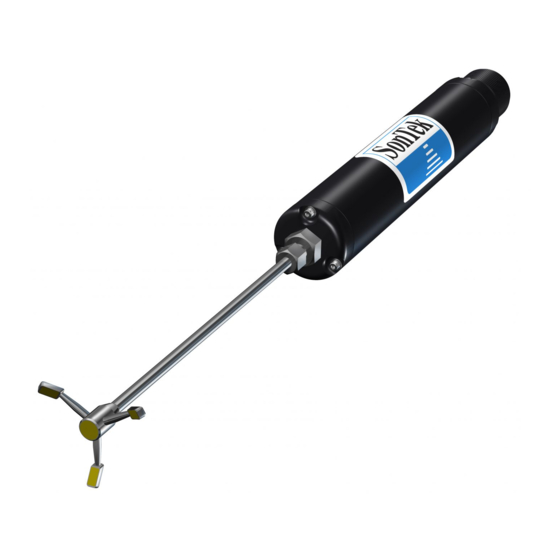
- Page 1 A YSI Environmental Company SonTek/YSI ADVField/Hydra Acoustic Doppler Velocimeter (Field) Technical Documentation...
- Page 3 A YSI Environmental Company Getting Started with the ADVField/Hydra System Thank you for purchasing a SonTek/YSI Acoustic Doppler Velocimeter (ADV). We are confi- dent you will find it powerful, accurate, reliable, and easy to use. If you have questions, com- ments, or suggestions, please let us know.
- Page 4 SonTek/YSI 3) ADVField System Interconnection • Refer to Sections 2 and 5 of the ADVField Operation Manual for details. • Connect the cable from the probe to the processor. • Connect the power and communications cables – use the DC power supply included with the system and connect the serial cable to COM1 of your computer.
- Page 5 (Firmware version 7.9 and later) Copyright 2002 by SonTek/YSI, Inc. All rights reserved. This document may not, in whole or in part, be copied, photocopied, reproduced, translated, or reduced to any electronic medium or machine-readable form without prior consent in writing from SonTek. Every effort has been made to ensure the accuracy of this manual.
- Page 6 SonTek/YSI RECORD OF CHANGES Effective Description 01 SEP 1999 Base document: ADVField firmware version 4.0 01 SEP 2001 ADVField firmware version 7.9 11 OCT 2001 CTD command and data output corrections ADVField/Hydra Operation Manual (September 1, 2001)
-
Page 7: Introduction
SonTek/YSI INTRODUCTION Thank you for purchasing a SonTek Acoustic Doppler Velocimeter (ADV). Your instrument was thoroughly tested at the factory and was found to be in excellent working condition. If the ship- ping crate appears to have been damaged in transit, or if the ADV is not operating properly, please contact us immediately. - Page 8 SonTek/YSI NOTES ADVField/Hydra Operation Manual (September 1, 2001)
-
Page 9: Table Of Contents
SonTek/YSI TABLE OF CONTENTS RECORD OF CHANGES ......................ii INTRODUCTION........................iii Section 1. ADV Components, Terminology, and Sampling ..........1 1.1. ADV Components ......................1 1.1.1. Signal Processing Hardware..................1 1.1.2. 16-MHz MicroADV Probe and 10-MHz ADV Probe ..........2 1.1.3. - Page 10 SonTek/YSI 3.11. Show Commands ......................45 3.12. Run Time Commands ....................46 Section 4. ADVField System Hardware................47 4.1. ADVField Processing Module Overview..............47 4.2. ADVField Hardware Switches and Jumpers............... 51 4.3. Input / Output Signals, Cables, and Connectors............53 4.3.1.
- Page 11 SonTek/YSI 5.3. Multiple System Operation Using RS485 ..............82 5.4. Analog Output Data ....................83 5.5. External Synchronization .................... 84 5.6. Mounting and Handling the Sensor................85 5.7. Optional Integrated Sensors ..................85 5.8. Seeding Requirements....................86 5.9. Anti-Fouling Protection....................86 5.10.
-
Page 13: Adv Components, Terminology, And Sampling
SonTek/YSI Section 1. ADV Components, Terminology, and Sampling 1.1. ADV Components SonTek Acoustic Doppler Velocimeter (ADV) systems can be of two types – “Field” systems or “Lab” systems. This manual applies only to our ADVField systems. Throughout this manual, the terms ADV and ADVField can be considered synonymous (unless specifically noted otherwise). -
Page 14: 16-Mhz Microadv Probe And 10-Mhz Adv Probe
SonTek/YSI • Splash-Proof Housing: The typical ADVField processor in this configuration consists of three printed circuit (PC) cards enclosed in a splash-proof container (22x11x7 cm; 8.5x4.5x2.8 in). The housing is safe from incidental water contact, but should not be submerged. There are... - Page 15 SonTek/YSI Table 1. ADVField Processing Comparison (based on acoustic frequency) Parameter 16-MHz MicroADV 10-MHz ADV 5-MHz ADVOcean Sampling rate (Hz) 0.1 to 50 0.1 to 25 0.1 to 25 Sampling volume (cc) 0.09 0.25 Distance to sampling volume (cm) 5 or 10 Resolution (cm/s) 0.01...
- Page 16 SonTek/YSI 16/10-MHz Probe Configuration with Optional Sensors: For field applications, the 16/10-MHz ADV probe can include up to three internal optional sensors (compass/tilt, pressure, temperature) mounted in a modified signal-processing module (Figure 4). The compass/tilt sensor allows the ADV to report velocity data in Earth coordinates (East-North-Up or ENU), regardless of instru- ment orientation.
-
Page 17: 5-Mhz Advocean Probe
SonTek/YSI • The optional pressure sensor is installed on the upper end cap of the conditioning module, near the underwater cable connector. Note that because the pressure sensor is mounted some distance from the sampling volume, this distance may need to be taken into account when processing the combined pressure and velocity data. - Page 18 SonTek/YSI • The sampling volume is the volume of water (≈2 cm ) in which the ADV makes velocity measurements. This volume is nominally located 18 cm from the acoustic transmitter. • The probe X-axis is defined by the direction of receiver #1, which is marked with a small in- dentation on the sensor head.
- Page 19 SonTek/YSI • The acoustic sensor head contains three acoustic receivers and one acoustic transmitter. The sensor head is mounted directly to the end of the signal-conditioning module. • The sampling volume is the volume of water (≈2 cm ) in which the ADV makes velocity measurements.
-
Page 20: Definitions And Terminology
SonTek/YSI 1.2. Definitions and Terminology This section defines terms commonly used with the SonTek ADV. • Ping - A single estimate of water velocity. • Sample - A sample refers to the collection of several pings to produce a mean estimate of the water velocity. - Page 21 SonTek/YSI • BREAK - A serial communication signal that causes a reset in the ADVField electronics and returns the system to command mode. A requires holding the transmit serial communi- BREAK cation lines high for a period of at least 300 ms. A...
-
Page 22: Adv Sampling Strategies
SonTek/YSI 1.3. ADV Sampling Strategies During data collection, the ADV pings as rapidly as possible and averages pings together to out- put velocity data at the user-specified sampling rate. Each sample is calculated as the block aver- age of pings during the sampling interval. No filtering or averaging is done on adjacent samples. - Page 23 SonTek/YSI Continuous Sampling - Real Time Data Collection Sample Sample Interval Time "Near" Continuous Sampling - Autonomous Deployment Burst Time Single Burst Sampling - Autonomous Deployment Burst Time Multiple Burst Sampling - Autonomous Deployment Burst 1 Burst 1 Burst 1...
- Page 24 SonTek/YSI ADV enters a low power standby mode when not collecting data). Using the above parameters, the ADV generates between 230 and 630 KB of data per day. Users are often interested in different aspects of the velocity field that require different sampling schemes.
-
Page 25: Getting Started - Installation/Configuration/Operation
SonTek/YSI Section 2. Getting Started – Installation/Configuration/Operation This section provides information for getting started and collecting data with the ADVField in real-time or autonomously. For details about commands, software, hardware, or deployment procedures, refer to the references provided in this section. -
Page 26: Advfield Real-Time Data Collection Setup
SonTek/YSI 2.3. ADVField Real-Time Data Collection Setup The ADVField (with 16-MHz MicroADV, 10-MHz ADV, or 5-MHz ADVOcean probe) uses a processing module that consists of three printed circuit boards. The processing module can be enclosed in a splash-proof housing or in an underwater canister. The two mechanical versions use different cables and connectors (see §4.3), but the basic operation is identical. -
Page 27: Real-Time Operation Using Sontek Software
SonTek/YSI 2.3.2. Real-Time Operation Using SonTek Software The simplest way to operate the ADVField is to use the data acquisition software ( ). The ADF.EXE following steps explain how to test the ADV and how to collect data in a DOS environment. See the ADVField Software Manual for details about all software associated with the ADV. -
Page 28: Advfield Autonomous Data Collection Setup
SonTek/YSI 2.4. ADVField Autonomous Data Collection Setup An autonomous (i.e., stand-alone or remote) deployment requires more forethought than a real- time deployment. For example, during real-time operation, you can change your data collection parameters “on-the-fly”, operate 24 hours per day, and collect a virtually unlimited amount of data. -
Page 29: Preparing The Advfield For Autonomous Operation
SonTek/YSI 1. Determine the number of bytes recorded per sample (§3.7). 2. Calculate the number of bytes to be recorded per burst (below). 3. Calculate the total file size based on expected number of bursts (below). Number of bytes per burst is calculated based on the bytes per sample (SAMP_SIZE) from Step 1 above, the number of samples per burst (N_SAMP), and whether burst statistics are re- corded. -
Page 30: Autonomous Operation Using Sontek Software
SonTek/YSI lishing communications (only applicable for RS-485 operation). is the probe con- A001.PRO figuration file included on the software diskette. Be sure the name of this file corresponds with the serial number of the probe connected to the ADV processor, and that the probe con- figuration file is in the ADV software directory and is for the most-recent calibration. -
Page 31: Operating The Advfield Using The Direct Command Interface
SonTek/YSI • PAROS CONT DRUCK CONT PAROSFREQ CONT • CTD CONT • ExtSensor CONT 9. Send to save all entered parameters. This is redundant as it is done automatically Save Setup by the command below, but gives you some assurance your settings have been saved. - Page 32 SonTek/YSI ADVField Operation Manual (September 1, 2001)
-
Page 33: Direct Command Interface For Advfield Systems
SonTek/YSI Section 3. Direct Command Interface for ADVField Systems The direct command interface refers to the command inputs and response / data outputs for communicating with the ADVField using its serial communication port. The command interface shown in this section is used for either RS232 or RS422 communication protocol. The interface used for RS485 protocol is not included in this manual. -
Page 34: Data Acquisition Mode
SonTek/YSI 3.1.2. Data Acquisition Mode Data acquisition mode indicates that the ADVField is involved in real-time data collection. Data acquisition mode is entered from the command mode with the command . In data acquisi- Start tion mode, the ADVField ignores all deployment parameters (§3.7) and proceeds with data col- lection based on the setup parameters (§3.6). - Page 35 SonTek/YSI • When turned on or off, many computers and data loggers send a signal out the serial port that can be interpreted as a . If the ADV is connected to the serial port, this can interrupt data BREAK collection or bring the ADV out of sleep mode.
-
Page 36: Command Syntax
SonTek/YSI 3.2. Command Syntax The following are rules needed for communicating between the ADV and an external dumb ter- minal or terminal emulator program (e.g., SONTERM • The ADV can be brought into the command mode from any other state by sending a BREAK (see §1.2 for definition) to the system. - Page 37 SonTek/YSI Table 4. Help Commands (§3.4) Command Short Function Help H or ? Information about available help categories Help System H/? System Information about general system commands Help Setup H/? Setup Information about real-time data collection commands Help Deploy H/? Deploy...
- Page 38 SonTek/YSI Table 6. Setup Commands (§3.6) Command Short Function Parameters Temp <temperature> Set default temperature (°C) Sal <salinity> Set default salinity (ppt) VelRange <range> Set ADV velocity range value (index) d <0 to 4> SampRate <rate> Set ADV sampling rate (Hz) CoordSystem<system>...
- Page 39 SonTek/YSI Table 9. Sensor Commands (§3.9) Command Short Function Sensor Show most recent temperature, pressure, and battery voltage Sensor CONT Show temperature, pressure, and battery voltage continuously PressScale Output scaling factor used to convert pressure counts to dBar PressOffset Output offset used to convert pressure counts to dBar Show most recent temperature (°C), conductivity (S/m), pressure...
-
Page 40: Help Commands
SonTek/YSI 3.4. Help Commands The ADVField direct-command interface contains several on-line help commands. These are de- signed such that, by starting with ), you are led through a series of menus that Help show all ADVField commands. The following help commands display all commands you would normally use for any aspect of ADVField operation. -
Page 41: System Commands
SonTek/YSI 3.5. System Commands System commands relate to general operation of the ADVField. • Starting data collection • Entering sleep mode • Displaying serial number and revision numbers • Setting the clock • Data output and storage Each command is shown with its full name, short name (if one exists), optional parameters (in brackets), and appropriate descriptions. - Page 42 SonTek/YSI Defaults or DEF • Sets all ADV parameters to their factory default values. • See the individual command descriptions for their default values. • Reports the version number of the ADV’s CPU firmware. DSPVer • Reports the version number of the ADV’s DSP firmware.
- Page 43 SonTek/YSI OutFormat or OF [BINARY|ASCII] • Default parameter: ASCII • When given without parameter: returns the current output format setting. • This setting determines the format of the data output through the serial port during real-time data collection (data acquisition mode; §3.1.2).
-
Page 44: Setup Commands
SonTek/YSI 3.6. Setup Commands Setup commands affect the real-time data collection parameters of the ADVField: ! Temperature ! Sampling rate (also a Deployment command; §3.7) ! Salinity ! Coordinate system ! Velocity range ! External synchronization Each command is shown with its full name, short name (if one exists), optional parameters (in brackets), and appropriate descriptions. - Page 45 SonTek/YSI SampRate or SR [d.d] • Default parameter: (Hz) 10.0 • Parameter range: (Hz) 50.0 • Without parameter: returns its current setting. • When used with a valid parameter, sets the sampling rate in Hz. This setting determines the rate at which data is output from the ADV.
- Page 46 SonTek/YSI SyncMode or SM [DISABLE|START|SAMPLE] • Default parameter: DISABLE • Without parameter: returns its current setting. • When used with a valid parameter, sets the external synchronization mode. The ADVField processing module includes a sync input line (SyncIn) to allow external hardware control of ADV data collection.
-
Page 47: Deployment Commands
SonTek/YSI 3.7. Deployment Commands Deployment commands affect the parameters used for autonomous deployment. These include: • Deployment name • Start date and time • Sampling rate (also a Setup command; §3.6) • Burst sampling parameters • Data recording options Deployment commands are accessible only if the optional internal recorder has been installed. - Page 48 SonTek/YSI StartTime or ST [hh:mm:ss] • Default parameter: (midnight) 00:00:00 • Without parameter: returns the current deployment’s starting time. • When given with a time in a valid format, where hh=hour (2 digits; 24-hour clock), mm=minute (2 digits), and ss=seconds (2 digits): sets the time data collection will begin.
- Page 49 SonTek/YSI SamplesPerBurst or SPB [d] [d] [d] • Default parameters: 1200 0 0 • Parameter range: 32000 • Without parameter: returns its current settings for each burst type. • When used with from one to three valid parameters, sets the number of samples per burst for each burst type.
- Page 50 SonTek/YSI RecordSensor [YES|NO] [YES|NO] [YES|NO] • Default parameters: ○ Neither a temperature or pressure sensor installed: NO NO NO ○ With temperature and/or pressure sensor installed: YES YES YES • Without parameter: returns its current settings for each burst type.
- Page 51 SonTek/YSI RecordExtPress [YES|NO] [YES|NO] [YES|NO] • Default parameters: NO NO NO • Without parameter: returns its current settings for each burst type. • When used with from one to three valid parameters, tells the ADV whether to record data from an optional, external pressure sensor. See §1.3 for a description of burst sampling.
-
Page 52: Recorder Commands
SonTek/YSI 3.8. Recorder Commands Recorder commands interface with the optional ADVField internal recorder. These functions in- clude showing the directory of files and erasing the recorder. Dir or LD • Lists a directory of the deployments currently stored on the recorder. -
Page 53: Sensor Commands
SonTek/YSI 3.9. Sensor Commands Sensor commands output data from the ADVField’s optional internal sensors: temperature, pres- sure, and battery voltage. Additionally, a variety of optional external sensors can be controlled through the direct command interface. 3.9.1. Internal Sensor Commands Sensor [CONT] •... -
Page 54: External Sensor Commands - Resonance Pressure Sensors
SonTek/YSI • Data is output in ASCII-text in the following, single-line format. Example: 87514 468151 351354 ○ CTD temperature in units of 0.0001°C ○ CTD conductivity in units of 0.00001 Siemens per meter ○ CTD pressure in units of 0.001 decibar ○... -
Page 55: External Sensor Commands - Lisst-100 Sensor
SonTek/YSI ○ If the frequency reading is reasonable, but the corresponding pressure is not, this indi- cates that the appropriate calibration is not loaded into the processor. Use the LDDRUCK program (see ADVField Software Manual) to load the calibration. DRUCK Show DRUCK or Show PAROSFREQ •... -
Page 56: Compass Commands
SonTek/YSI 3.10. Compass Commands In normal operation, all commands to the compass are sent automatically, and no direct com- mands need to be sent. The commands in this section are provided to assist in diagnosing prob- lems and to give greater flexibility in ADVField operations. For a detailed description of the op- tional compass/tilt sensor, see §4.7. -
Page 57: Show Commands
SonTek/YSI 3.11. Show Commands There are four “show” commands to display current ADVField parameter settings. Samples of these commands and their outputs are show below. Note: The examples shown here may differ for your system. The number of items shown by each Show command may vary depending on the firmware version being used and depending on the optional sensors that you have installed on your system. -
Page 58: Run Time Commands
1024 Bytes per Burst --- 41058 Comments: SonTek ADVField Autonomous System We know how fast the water moves. Do you? 3.12. Run Time Commands The command shown here can be used while the ADVField is in data collection or deployment mode. -
Page 59: Advfield System Hardware
SonTek/YSI Section 4. ADVField System Hardware 4.1. ADVField Processing Module Overview Figure 8 shows the general layout of the ADVField processing module. The processing module consists of three printed circuit (PC) boards with an optional fourth board for internal recording. - Page 60 SonTek/YSI • Input Power Connector – This keyed, 2-pin, red connector accepts DC input power (12-24 V). The polarity for each pin is labeled. The cable from this connector will lead either to the input power connector (ADVField in splash-proof housing) or to the power and communications underwater connector (ADVField in underwater canister).
- Page 61 SonTek/YSI Jumper J2 Jumper J1 CPU Board Figure 11 shows the layout of the Compass Connector CPU board with a few important fea- EPROM tures labeled. The Second Serial Port for CTD, Serial CPU provides the Paros, LISST, etc. overall control of...
- Page 62 SonTek/YSI Recorder/External Pressure Sensor Board Figure 12 shows the layout of the Card Release Switch Recorder board with important features labeled. The optional Recorder board is used for internal data storage during autonomous deployments. • PCMCIA/Compass Flash Card – PCMCIA...
-
Page 63: Advfield Hardware Switches And Jumpers
SonTek/YSI 4.2. ADVField Hardware Switches and Jumpers The general layout of the ADVField processing module is given in §4.1. There are three places in the processing module where hardware settings determine system configuration. Switches on the Analog board select probe orientation and select the installed optional sensors. Two rotary dials on the CPU board set the communications baud rate and the address for RS485 communication. - Page 64 SonTek/YSI Baud Rate and Address Hex Rotary Dials (CPU Board) Two hex rotary dials are mounted on the side of the CPU board (Figure 11). These dials can be accessed without disassembling the processing module. One hex dial is labeled...
-
Page 65: Input / Output Signals, Cables, And Connectors
SonTek/YSI 4.3. Input / Output Signals, Cables, and Connectors Table 15 summarizes the input and output signal lines used with the ADV. This also establishes the naming convention used in the remainder of §4.3. Sections 4.3.1 and 4.3.2 describe how to access these signals from the cables and connectors supplied with each type of ADV processing module (ADVField splash proof housing and ADVField underwater canister). -
Page 66: Advfield Underwater Canister
SonTek/YSI Table 16. DB9 Connector Pin-outs for Serial Communications Pin # Signal Pin # Signal Pin # Signal Not used Not used Data Out / Tx+ Ground Not used Data In / Tx- Not used The last connector on the splash-proof housing, a DB15, gives access to auxiliary input / output signals. -
Page 67: External Sensor Connector
SonTek/YSI • For older, real-time ADVField systems (without the internal recorder or battery power): o The connector is a female 16-pin underwater mateable connector. o The bulkhead connector used is an Impulse MBH-16-FS. o The mating connector on the cable is an Impulse MIL-16-MP (with locking sleeve). -
Page 68: Accessing The Advfield Processing Module
SonTek/YSI 4.4. Accessing the ADVField Processing Module Under normal operating conditions, you should not need to access the ADVField processing module. The most common reason for accessing the processing module is to change batteries for autonomous systems. It may occasionally be necessary to check the input power fuse located on the Analog board, or to install a new EPROM on the CPU or DSP board. -
Page 69: Accessing The Advfield Round Underwater Canister
SonTek/YSI 8. Remove the Analog board by lifting straight up from the DSP board. These two boards are joined by card connectors at each end. Be careful not to bend any pins. 9. Remove the DSP board by lifting straight up from the CPU board. These two boards are joined by a card connector on one end. - Page 70 SonTek/YSI canister while another unscrews the lid. Once started, the end cap should rotate easily; it re- quires about four turns to undo all threads. 3. Lift the end cap away from the canister. Be careful not to damage the o-ring seal between the end cap and canister.
-
Page 71: Accessing The Advfield Rectangular Underwater Canister [Discontinued]
SonTek/YSI standoffs (1/4” wrench size, 1/2” tall, #4-40 thread). Be certain to install this board in the same orientation in which it was previously installed (with the connectors at the end opposite the end cap). 3. Connect the DSP board to the top of the CPU board by aligning and securely seating the card connector at one end. - Page 72 SonTek/YSI To disassemble the processor board stack: 1. Note the position and orientation of the cables from the end plate to the electronics. See §4.1 for the location of the connectors referred to below. 2. Remove the red, 2-pin input power connector from the Analog board. This cable goes to the power and communications connector on the end plate.
- Page 73 SonTek/YSI 5. Connect the red, 2-pin input power connector to the Analog board. This cable goes to the power and communication connector on the end plate. 6. Connect the red, 2-pin battery backup connector to the Analog board (systems with internal recorder only).
-
Page 74: Changing Batteries In The Advfield Round Underwater Canister
SonTek/YSI 4.4.4. Changing Batteries in the ADVField Round Underwater Canister These instructions apply to the ADVField in the round un- derwater canister with internal batteries. Figure 15 shows Probe Vent the layout of the underwater canister with internal batteries. Connector... -
Page 75: Accessing The Hardware Switches And Jumpers
SonTek/YSI 4.4.5. Accessing the Hardware Switches and Jumpers Hardware settings (in three places on the ADVField processing module) are used to determine the system configuration. See §4.1 for the exact location of each of these areas and §4.2 for de- tails on individual switch and jumper settings. -
Page 76: Advfield Splash-Proof With Rechargeable Batteries
SonTek/YSI 5. Install the new EPROM into the socket. Align the half circle on one end of the EPROM with the half circle on the socket and electronics board. Operation with the incorrect alignment can potentially damage the processing module. Align all pins with the socket before installing; if the pins are too wide for the socket, they can be bent in by carefully pressing one side of the chip on a table or other hard surface. -
Page 77: Accessing The Signal Conditioning Module
SonTek/YSI The power switch on the front panel will disconnect the ADV from any external supply and from the internal rechargeable battery. Make sure this switch is off (the diode on the front panel is lit if the switch is on and the ADV has input power) when not being used to prevent draining the re- chargeable battery. - Page 78 SonTek/YSI you will need to disconnect the cable from the underwater connector to the receiver board. This cable is highly sensitive to noise and should not be modified. To close the conditioning module, first inspect and clean all o-rings and o-ring surfaces. Replace the o-rings if necessary.
-
Page 79: Optional Compass/Tilt Sensor For The Advfield
SonTek/YSI 4.7. Optional Compass/Tilt Sensor for the ADVField The ADVField can be equipped with a compass/tilt sensor to translate data from the probe’s XYZ coordinate system to an Earth (East-North-Up or ENU) coordinate system. The sensor used is the Precision Navigation TCM2 Electric Compass Module. -
Page 80: Compass Installation And Instrument Mounting
SonTek/YSI 4.7.2. Compass Installation and Instrument Mounting There are several ways to mount the compass in the ADVField. The mountings vary with the sys- tem configuration and the intended orientation of the probe. Most newer ADV systems have the compass mounted within the conditioning module as described in §1.1.2 and §1.1.3. These sys- tems are discussed in §4.7.3. - Page 81 SonTek/YSI Probe Probe Probe Up Looking Down Looking Side Looking Figure 17 - ADV / ADVOcean Probe Orientations Internal End Cap Design Figure 18 shows the inside of the conditioning module’s end cap. The items on this end cap will be referenced when describing compass installation.
- Page 82 SonTek/YSI Up-Looking Mounting Figure 11 shows the compass/tilt sensor Compass/Tilt mounted for up-looking operation. The Compass Axis Sensor mounting is in two layers on the end cap 3/8" Hex Standoffs of the conditioning module. Four stand- Pressure / Temp offs ( ) are screwed into the #4-40 x 3/8”...
- Page 83 SonTek/YSI Pressure / Temp 3/8" Hex Standoffs Sensor Board Compass/Tilt Sensor Compass Axis Compass Axis Probe X Figure 21 - Compass/Tilt Sensor, Side-Looking Mounting standoffs; board orientation does not matter. Above the sensor board are four standoffs (#4-40 x 1/2”). Last is the compass, secured by four #4-40 x 3/8” bolts, with fiber washers on each side.
-
Page 84: Enu Coordinate System
SonTek/YSI Conditioning Module Wiring There are four connectors in the signal-conditioning module that must be correctly mated for the system to operate properly. Please note the position of all connectors and cables before discon- necting them so they can be re-assembled in the same manner. -
Page 85: Communicating Directly With The Compass
SonTek/YSI To begin a compass calibration using the compass commands, establish communications with the ADV. Enter the command . The system will display basic instructions for the cali- Compass CAL bration and give a continually updated output of heading, pitch, and roll. The compass is now in multiple-point calibration mode and is collecting sample points. -
Page 86: Optional Sensors (Internal): Temperature And Pressure
SonTek/YSI 4.8. Optional Sensors (Internal): Temperature and Pressure All ADVField systems (16/10/5-MHz) can include temperature and pressure sensors in the signal conditioning module as described in §1.1.2 and §1.1.3. The temperature sensor is used for sound speed corrections. The pressure sensor provides simultaneous pressure and 3D velocity meas- urements (PUVW for directional wave spectra). - Page 87 SonTek/YSI Pressure_dBar = Pressure_Offset + (Pressure_Scale * Pressure_Counts) where Pressure_dBar = measured pressure in dBar Pressure_Offset = offset calibration constant set at factory Pressure_Scale = scaling calibration constant set a factory Pressure_Counts = measured pressure in counts as output over the serial port and stored in...
-
Page 88: Optional Sensors (External): Resonance/Frequency Pressure Sensors
SonTek/YSI 4.9. Optional Sensors (External): Resonance/Frequency Pressure Sensors This section describes the use of fre- Internal pressure sensor (strain gage or Druck RPT) quency pressure sensors with ADVField systems. SonTek supports two types of frequency pressure sensors: (1) the Druck... -
Page 89: Paroscientific Digiquartz Ext. Freq. Pressure Sensor (Parosfreq)
SonTek/YSI Each current meter purchased from SonTek that has the sensor installed already has the DRUCK appropriate calibration coefficients loaded into the processor. If this information is lost, you can use the calibration sheet provided by the pressure sensor vendor to construct your own calibration file. -
Page 90: Direct Command Interface For External Pressure Sensors
SonTek/YSI The structure of the calibration file corresponding to the sensor (see below) is simi- PAROSFREQ lar to the . For historic reasons, calibration file uses the .drk extension. DRUCK PAROSFREQ • Pressure Sensor Serial Number • Oscillator Frequency (in Hz) •... -
Page 91: Optional Sensors (External): Ctd
SonTek/YSI 4.10. Optional Sensors (External): CTD The SeaBird MicroCat CTD with RS232 serial interface provides high quality conductivity, tem- perature, salinity, and pressure (optional) data. When integrated with the ADV, MicroCat data is collected at the beginning of each sampling interval. Data are integrated in a CTD data structure within the ADV data set. -
Page 92: Set Up Advfield/Hydra For Use With Lisst
SonTek/YSI 4.12.3. Set Up ADVField/Hydra for use with LISST LISST data collection is only supported when the ADVField/Hydra operates in burst mode. If burst mode is not enabled, and the LISST sensor option is enabled, the data collection loop will not start. -
Page 93: Operational Considerations
SonTek/YSI Section 5. Operational Considerations 5.1. Velocity Data Coordinate System The ADVField normally reports velocity data in a Cartesian (XYZ) coordinate system relative to probe orientation. The definition of this coordinate system depends on the probe configuration. Definitions of the coordinate systems for all standard probe configurations are given below. If the optional compass/tilt sensor is installed, velocity can be reported in Earth (ENU) coordinates;... -
Page 94: 5-Mhz Advocean Probe
SonTek/YSI 5.1.2. 5-MHz ADVOcean Probe When collecting data in beam or XYZ coordinates, the positive Z-axis of the ADVOcean probe is defined along the axis of the acoustic transmitter from the sampling volume towards the acous- tic sensor. The positive X-axis is defined from the acoustic transmitter to receiver #1 (marked by a machined dimple on the sensor head). -
Page 95: Analog Output Data
SonTek/YSI 5.4. Analog Output Data SonTek always recommends collecting ADVField data using the digital outputs (serial commu- nication). Digital data provides improved resolution of velocity data by avoiding the digital-to- analog-to-digital conversion required by analog data collection. Using the digital outputs also al- lows access to additional diagnostic data (three signal amplitude values and three correlation val- ues instead of one mean signal amplitude line). -
Page 96: External Synchronization
SonTek/YSI Calibration is performed by running the program (see ADVField Software Manual), or ADFCALAO by using the command from the direct command interface (§3.5). Either will set the analog outputs to three predetermined voltages corresponding to the maximum negative velocity, zero velocity, and maximum positive velocity. -
Page 97: Mounting And Handling The Sensor
SonTek/YSI 5.6. Mounting and Handling the Sensor Before starting routine data collection, we recommend building a mounting bracket that clamps onto the conditioning module. Simple mounting arrangements often use hose clamps attached to a rigid bar. For these, cover the conditioning module to protect it from damage. More complex mounting arranges may use pillow block clamps to secure the conditioning module and may be coupled to traversing systems for measuring at different locations. -
Page 98: Seeding Requirements
SonTek/YSI 5.8. Seeding Requirements If ADV velocity data appears “noisy”, it may be due to a lack of scattering material in the water (see the ADV Principles of Operation for general information about the ADV). This can be remedied by adding seeding material. When collecting data at 25 Hz under good operating condi- tions, the ADV noise level is expected to be about 1% of the velocity range (i.e.;... -
Page 99: Routine Maintenance
SonTek/YSI When painting metal housings, a suitable conversion layer must be applied to the metal for adhe- sion and to isolate the metal from the anti-fouling paint. If the metal has been powder coated (as many ADV components are), this acts as an excellent conversion layer. If no powder coat is pre- sent, or if the powder coating has been damaged, we suggest Interlux 360 Underwater Metal Primer. -
Page 100: Troubleshooting
SonTek/YSI 5.11. Troubleshooting This section contains suggestions for diagnosing common problems encountered with the ADV. If you are unable to determine the exact nature of the problem, contract SonTek for assistance. This section is divided into the following areas based on the type of problem. -
Page 101: Excessive Noise In Velocity Data
SonTek/YSI 5.11.3. Excessive Noise in Velocity Data Some random variation (noise) is expected in ADV velocity measurements. Generally, under good operating conditions, the noise for data output at 25 Hz (50 Hz for MicroADVs) should be about 1% of the velocity range setting (i.e.; ±1 cm/s when using the ±100 cm/s velocity range). - Page 102 SonTek/YSI ADVField Operation Manual (September 1, 2001)
-
Page 103: Additional Support / Repair Information
SonTek/YSI Section 6. Additional Support / Repair Information Any questions regarding the ADV can be directed to SonTek by phone, fax, or email. Regular business hours are 8:00 a.m. to 5:00 p.m., Pacific Standard Time, Monday through Friday. Phone +1 (858) 546-8327... - Page 104 SonTek/YSI ADVField Operation Manual (September 1, 2001)
-
Page 105: Appendix 1. Advfield Real-Time Data Output Formats
SonTek/YSI Appendix 1. ADVField Real-Time Data Output Formats This appendix describes the various formats of the output data generated by the ADVField during real-time data collection. The format is the same for all ADVField configurations and models. See Appendix 2 for the output data formats generated during autonomous data collection. For a description of the real-time binary output data file format that is generated by the ADV data ac- quisition software, see the ADVField Software Manual. -
Page 106: A1.2. Real-Time Output Data - Binary Format (To Serial Port)
SonTek/YSI Table 22. Data Outputs Based on Installed Sensors Temperature Compass and External External Col. No Sensors Compass and/or Temperature Pressure Sensor Pressure and/or Pressure Sensor Sample No. Sample No. Sample No. Sample No. Sample No. Sample No. Sample No. - Page 107 SonTek/YSI ADV data with compass/tilt sensor installed The structure (below) is used when the optional compass/tilt sensor is installed (to- ADVCompass tal size 24 bytes). typedef struct { unsigned char Id; /* Data record ID, 0x83 unsigned char Nbytes; /* Number of bytes in record = 24 */ unsigned int SampleNum;...
-
Page 108: A1.2.2 Checksum Calculation
SonTek/YSI A1.2.2 Checksum Calculation The ADV uses a checksum when sending binary data over a serial port. The checksum is com- puted with the C function shown below. To understand how the checksum is ComputeCheckSum computed, assume that a sample has been placed in a segment of memory (i.e.; a character array) in the format shown in §A1.2. -
Page 109: Appendix 2. Advfield Autonomous Data Output Formats
SonTek/YSI Appendix 2. ADVField Autonomous Data Output Formats This appendix describes the various formats of the output data generated by the ADVField during autonomous data collection. The format is the same for all ADVField configurations and models. See Appendix 1 for the output data formats generated during real-time data collection. -
Page 110: A2.2.1 Recorded Data Files
SonTek/YSI A2.2.1 Recorded Data Files Each time a new deployment is started (i.e., by the command), the ADVField firmware Deploy creates a new file (or deployment) on the internal recorder. The name of the file is constructed by adding a 3-digit sequence number to the name of the deployment (set using the Deployment command). - Page 111 SonTek/YSI A large amount of data of various types can be collected by the ADV. However, the storage ca- pacity of your recorder may force you to limit the types of data that are collected. The following parameters let you select which data are recorded (§3.7). Obviously, some of these parameters require that their associated optional sensor has been installed on your system.
- Page 112 SonTek/YSI RecordCompass Set to YES , an additional six bytes of data are recorded with each sample (assumes RecordCompass the optional compass/tilt sensor is installed). Datum Bytes Description Heading Heading angle in units of 0.1 degree Pitch Pitch angle in units of 0.1 degree Roll Roll angle in units of 0.1 degree...
- Page 113 SonTek/YSI RecordStat Set to YES , an additional 36 bytes of data are recorded in a single record at the end of RecordStat the burst (i.e., not at the end of each sample). This data contains the means and standard devia- tions of amplitudes, correlations, heading, pitch, roll, temperature, and pressure for the burst (as- sumes the appropriate optional sensors are installed).
-
Page 114: A2.2.3 Data Block Structures
SonTek/YSI A2.2.3 Data Block Structures This section defines the various data block structures in the “C” programming language. The structure AdvSystemConfigType defines the hardware configuration parameters (24 bytes). typedef struct { unsigned char SoftwareVerNum; unsigned char DspSoftwareVerNum; char AdvType; /* 0-10MHz,5cm 1-10MHz,10cm 2-OCEAN */ char SensorOrientation;... - Page 115 SonTek/YSI unsigned char TempMode; /* 0- User value 1- Measured unsigned char VelRangeInd; /* Velocity range list index char SyncMode; /* 0-Disable; 1-Start; 2-Sample char CoordSystem; /* 0-Beam; 1-XYZ; 2-ENU unsigned int SampRate[3]; /* in units of 0.1 Hz unsigned int BurstInterval[3];...
- Page 116 SonTek/YSI char CoordSystem; /* 0-Beam; 1-XYZ; 2-ENU char RecordedData; /* Data included in time series /* Bit 0 - Amp/Corr for 3 beams /* Bit 1 - Compass data /* Bit 2 - Temp/Press data /* Bit 4 - Time series statistics unsigned int SoundSpeed;...
- Page 117 SonTek/YSI Velocity (6 bytes) Vel[3]; /* velocity in 0.1 mm/s */ MeanAmpCorr (2 bytes) unsigned char MeanAmp; /* mean amplitude, counts unsigned char MeanCorr; /* mean correlation, percent AllAmpCorr (6 bytes) unsigned char Amp[3]; /* amplitude beams 1-3, counts unsigned char Corr[3];...
- Page 118 SonTek/YSI ADVField Operation Manual (September 1, 2001)
-
Page 119: Appendix 3. Multiple Advfield/Hydra Operation Using Rs485
SonTek/YSI Appendix 3. Multiple ADVField/Hydra Operation using RS485 This appendix describes the simultaneous operation of multiple ADVFields/Hydras in RS485 mode. Each system must be hardwired at the factory to use RS485 protocol. A3.1. Overview RS485 serial communication protocol allows multiple systems to be controlled from a single communication line. -
Page 120: A3.2. Setting System Address
SonTek/YSI A3.2. Setting System Address When RS485 systems are ordered, each ADVField/Hydra is configured at the factory to a unique CPU address (from 1 to 99). To change or verify this setting, use the following command to re- turn the current CPU address. -
Page 121: A3.6. Real-Time Data Acquisition Software - Rs485
SonTek/YSI A3.6. Real-Time Data Acquisition Software – RS485 The following relates only to the DOS-based data collection software; the Windows real-time software does not support RS485 multi-system operation. • To run several ADVFields/Hydras simultaneously, you need to create/edit an ASCII text file named ADVPROBE.DEF... - Page 122 SonTek/YSI ADVField Operation Manual (September 1, 2001)
-
Page 123: Index
SonTek/YSI INDEX configuration, system, 13 +++ command, 46 connector, external sensor, 55 connectors, 53 accessing modules, 56 coordinate system, ENU, 72, 81 ADF.EXE, 15 coordinate system, XYZ (Cartesian), 81 ADFCALA0.EXE, 84 CoordSystem (CY) command, 33 ADFCHECK.EXE, 15, 18 CoordSystem command, 81 ADVPROBE.DEF, 14, 17, 109... - Page 124 SonTek/YSI hardware, ADV, 47 real-time output, binary format, 94 help commands, 25, 28 RecordAmpCorr command, 37 housing, splash-proof, 2, 53, 56 RecordCompass command, 37 RecordCTD command, 39 input signals, 53 recorder board, 50 installation, 13 recorder commands, 26, 40 instrument mounting, 68...
- Page 125 SonTek/YSI splash-proof housing, 2, 53, 56 temperature, 8 Start command, 29 temperature sensor, 74 start on sync, 84 TempMode (TM) command, 33 StartDate (SD) command, 35 terminology, 8 StartTime (ST) command, 36 testing compass operation, 67 strategies, sampling, 10 tilt/compass sensor, optional, 67...
- Page 126 SonTek/YSI ADVField Operation Manual (September 1, 2001)
- Page 127 (for use with software version 7.7) Copyright 2002 by SonTek/YSI, Inc. All rights reserved. This document may not, in whole or in part, be copied, photocopied, reproduced, translated, or reduced to any electronic medium or machine-readable form without prior consent in writing from SonTek. Every effort has been made to ensure the accuracy of this manual.
- Page 128 SonTek/YSI RECORD OF CHANGES Effective Description 01 SEP 1999 Base document: ADVField software version 7.1 01 SEP 2001 ADVField firmware v7.9; ADVField software v7.7; Windows software added ADVField Software Manual (September 1, 2001)
- Page 129 SonTek/YSI TABLE OF CONTENTS Page RECORD OF CHANGES......................ii INTRODUCTION........................v Section 1. Software Installation and Overview ..............1 1.1. ADVField/Hydra Software Installation................. 1 1.2. ADVField/Hydra DOS Software................... 2 1.3. ADVField/Hydra Windows Software ................3 1.4. Common System-Specific Files ..................3 1.5.
- Page 130 SonTek/YSI Section 11. SonUtils Utility Software (Windows) .............. 43 11.1. Overview ........................43 11.2. Terminal – Dumb Terminal Emulator............... 44 11.3. Compass – Compass Calibration ................46 11.4. Recorder – Internal Recorder Data Extraction ............48 Section 12. ViewHydra / ViewHydraPro (Windows) ............51 12.1.
-
Page 131: Introduction
SonTek/YSI INTRODUCTION Thank you for buying an ADVField/Hydra from SonTek. Included with your system is the soft- ware designed to provide a user-friendly interface. All software is written for DOS running on PC-compatible computers. Software for the different ADV configurations operates in essentially the same manner, and is intended to be self-explanatory. - Page 132 SonTek/YSI NOTES ADVField Software Manual (September 1, 2001)
-
Page 133: Software Installation And Overview
SonTek/YSI Section 1. Software Installation and Overview The software package for SonTek/YSI ADVField and Hydra systems includes both DOS and Windows-based programs that control all common system functions. All software is written for operation on PC-compatible computers. • DOS software is written for DOS version 6.0 and later. DOS software is best run from a dedicated DOS computer (or a Windows computer restarted in DOS mode). -
Page 134: Advfield/Hydra Dos Software
SonTek/YSI 1.2. ADVField/Hydra DOS Software The following DOS programs/files are included on the ADVField/Hydra software distribution disk (CD-ROM). These programs are mostly self-explanatory. To learn about program use, enter the name at the DOS prompt. If the program requires command line parameters, a help screen will show the required inputs and their format. -
Page 135: Advfield/Hydra Windows Software
SonTek/YSI • - Source code (in C) for the autonomous data conversion software. Allows you to write software to directly access the binary data files. The programs are internally documented and should be easily interpreted by anyone familiar with the C programming language. - Page 136 SonTek/YSI ADVField Software Manual (September 1, 2001)
-
Page 137: Real-Time Data Acquisition (Adf.exe)
SonTek/YSI Section 2. Real-Time Data Acquisition (ADF.EXE) The most common method of collecting ADV data is using SonTek’s real-time data acquisition software, ADVField ( ). This program is written for DOS on a PC-compatible computer ADF.EXE with the minimum hardware requirements shown below. -
Page 138: Probe Configuration Files
SonTek/YSI 2.1. Probe Configuration Files Before running the data acquisition software, you must specify which ADVField probe is being used. This is done in the ASCII probe definition file , which is read by the data ADVPROBE.DEF acquisition software upon execution. The probe configuration files ( ) are supplied by Son- .PRO... - Page 139 SonTek/YSI The first portion specifies the path ( ) and the first two characters ( ) in the ADV file c:\adv\ name. The remainder of the file name is generated using the date and time (see Appendix 1). The second word on this line specifies the interval at which new ADV files are created. The interval...
-
Page 140: Setup Mode
SonTek/YSI 2.3. Setup Mode Figure 2 shows the setup screen for the ADVField software program. Figure 2 - Data Acquisition Software “Setup Mode” The upper right part of the screen shows the current PC date and time, as well as the ADV speci- fied in indicates the ADV is properly installed and operational. - Page 141 SonTek/YSI Water Temperature / Salinity (Enter value) Temperature and salinity are used to calculate the speed of sound, which determines the scale factor used to convert the Doppler shift to velocity. You can enter temperature in °C or °F, de- pending on the selected Units System (-2 to 50°C;...
- Page 142 SonTek/YSI CONTINUOUS Recording Mode: In continuous mode, the ADV begins to record data upon starting data collection and will continue to record data until stopped by the operator. Pressing Ctrl+S will stop data recording to the disk, but the system will stay in the data acquisition mode and continue to display real-time data.
-
Page 143: Boundary Adjustment Mode
SonTek/YSI 2.4. Boundary Adjustment Mode Figure 3 shows the boundary adjustment screen. In boundary adjustment mode, the ADV con- tinuously scans the region in front of the probe to detect the presence of a solid or surface bound- ary. The screen displays the probe number from the probe definition file ( ), the ADVPROBE.DEF... -
Page 144: Data Acquisition Mode
SonTek/YSI 2.5. Data Acquisition Mode Figure 4 shows the data acquisition screen. After completing the boundary adjustment by press- ing <F10>, the data acquisition software shows the real-time display screen. It then waits for you to press <Enter> before starting data collection. The extra step of pressing <Enter> has been in- cluded to provide precise timing for the first data sample, independent of computer speed. - Page 145 SonTek/YSI Start Time / Current Time These times are obtained from the computer’s clock. is the time at which data acquisi- Start Time tion was started (time of first sample). is the time of the last screen update (screen Current Time is updated with each sample, but no more than once per second).
- Page 146 SonTek/YSI Graphical Display The main portion of the screen displays two plots. The upper plot represents the mean value for signal-to-noise ratio (SNR) from the three receivers (in dB) and the mean value for correlation for the three receivers (percent). The lower plot is the time-series of the three velocity compo- nents.
- Page 147 SonTek/YSI (executed when key pressed) F7 - Mark Data Point This key is active only when data are being recorded. Pressing <F7> marks the current sample so it can be easily located when the data are later analyzed. On the graphical plot, this mark is shown as a colored vertical bar.
-
Page 148: Recorded Data
SonTek/YSI 2.6. Recorded Data The ADV data acquisition software records data in an efficient binary file format. Note: A differ- ent file format is used for autonomous data collection with the ADVField internal recorder. See the ADVField Operation Manual for a description of all data file formats. -
Page 149: Real-Time Data Conversion (Get
SonTek/YSI Section 3. Real-Time Data Conversion (GET___.EXE) The ADV real-time data conversion programs (known as the programs) extract specific por- tions of data from the ADV binary files and convert the data to easily read ASCII files. Data col- lected using the ADV internal recorder use a different file format (see Section 9). The following conversion routines are provided for real-time data files. - Page 150 SonTek/YSI File names must be given without an extension. The programs assume the ADV binary data file has the extension and assigns the output file an extension based on the type of data being .ADV extracted (extensions are , and ).
- Page 151 SonTek/YSI Some specific notes for the conversion programs are given below. For additional information about the different types of data, see the ADVField Principles of Operation. • - Retrieves signal strength from each of the three receivers in units of counts. One GETAMP count is equal to 0.43 dB.
- Page 152 SonTek/YSI ADVField Software Manual (September 1, 2001)
-
Page 153: Hardware Diagnostics (Adfcheck.exe)
SonTek/YSI Section 4. Hardware Diagnostics (ADFCHECK.EXE) Included with the ADVField software is a diagnostic program ( ) that can be used ADFCHECK.EXE to verify ADV performance and identify most hardware problems. is the same pro- ADFCHECK gram used at SonTek during system testing. It provides you with a powerful tool for understand- ing and verifying system performance. - Page 154 SonTek/YSI Figure 5 – ADFCHECK Display Several important features can be identified in Figure 5. Each of these is described below, start- ing at the left side of the plot. • The first ≈20 counts of the horizontal axis shows “ringing” following the transmit pulse. The transmit pulse is generated by a strong electrical signal and requires time for the electronics and transducers to recover.
- Page 155 SonTek/YSI probe tip (this example uses a 10-MHz ADV probe). In normal conditions, a 16/10-MHz ADV can detect the boundary at a range up to about 25 cm, while the 5-MHz ADVOcean can detect the boundary at a range up to about 50 cm.
-
Page 156: Diagnosing Hardware Problems
SonTek/YSI Included with each ADV is a calibration sheet that shows the results from the factory calibration. One portion of this sheet includes values for noise level, peak level, and peak position during the factory calibration. The values for noise level and peak position should match those shown on the calibration sheet to within about five counts. - Page 157 SonTek/YSI Figure 6 - ADFCHECK with Low Scattering Strength Figure 7 - ADFCHECK with Malfunctioning Acoustic Receiver Figure 8 - ADFCHECK with Malfunctioning Acoustic Transmitter ADVField Software Manual (September 1, 2001)
- Page 158 SonTek/YSI Case F: Damaged receiver arm (Figure 9) If the sampling volume in one receiver is offset along the horizontal axis, the receiver arm has been physically bent. Often, bent probes can be repaired quickly and inexpensively by unbending the arm and recalibrating the probe. Contact SonTek if you have a damaged probe for details about repair options.
- Page 159 SonTek/YSI Figure 9 - ADFCHECK with Bent Receiver Arm Figure 10 - ADFCHECK with Excessive Acoustic Noise in Tank ADVField Software Manual (September 1, 2001)
- Page 160 SonTek/YSI ADVField Software Manual (September 1, 2001)
-
Page 161: Analog Output Calibration (Adfcalao.exe)
SonTek/YSI Section 5. Analog Output Calibration (ADFCALAO.EXE) All ADVField systems generate analog output voltages. The analog outputs include three lines for the three velocity components, and one line proportional to the mean signal amplitude. Sam- pling these voltage lines with an external analog data acquisition system provides an alternative means of recording ADV data. - Page 162 SonTek/YSI ADVField Software Manual (September 1, 2001)
-
Page 163: Compass Calibration (Compcal.exe)
SonTek/YSI Section 6. Compass Calibration (COMPCAL.EXE) A program ( ) has been provided that lets you calibrate the optional compass/tilt COMPCAL.EXE sensor. Calibration minimizes the effects of ambient magnetic fields on compass data. We rec- ommend you perform a compass calibration before each ADV deployment. - Page 164 SonTek/YSI ADVField Software Manual (September 1, 2001)
-
Page 165: Terminal Emulator (Sonterm.exe)
SonTek/YSI Section 7. Terminal Emulator (SONTERM.EXE) is used for direct communication with the ADV through a computer serial port. Direct SONTERM communication can be used to verify all aspects of system operation and to initiate autonomous deployments (see the ADVField Operation Manual for details). To establish direct communica- tion with the ADV, simply connect the cable from the instrument to COM1 on your computer, , and press <Alt-B>... - Page 166 SonTek/YSI Table 4. Changing Communication Parameters (Alt-S) Parameter Keystroke and Function Communication port F1 – COM1 F2 – COM2 Baud rate 1 – 300 4 – 4800 7 – 38400 2 – 1200 5 – 9600 8 – 57600 3 – 2400 6 –...
-
Page 167: Recorder Data Extraction (Sonrec.exe)
SonTek/YSI Section 8. Recorder Data Extraction (SONREC.EXE) extracts data from the optional internal recorder to a computer disk. To learn about its SONREC operation, type at the DOS prompt. The command syntax is: SONREC SONREC [com port] [baud rate] [extraction rate] where •... - Page 168 SonTek/YSI ADVField Software Manual (September 1, 2001)
-
Page 169: Autonomous Data Conversion
SonTek/YSI Section 9. Autonomous Data Conversion The following ADVField autonomous data conversion programs extract and convert specific por- tions of the data from the binary files stored on the internal recorder to easily read ASCII files. • - Extracts file configuration and setup information. -
Page 170: Extracting Burst Data (Gadvhdr)
SonTek/YSI 9.2. Extracting Burst Data (GADVHDR) program extracts the burst header and burst statistics data from an autonomous GADVHDR ADV data file. The command syntax is: GADVHDR [ADV file] [burst type] [output file] [first burst] [last burst] File names must be given without an extension. The program assumes the autonomous ADV data... -
Page 171: Burst Data Block
SonTek/YSI 9.3.2. Burst Data Block Each “Burst Data Block” of the recorded data structure begins with a Header Record that con- tains the date/time at the beginning of the burst as well as a few parameters that describe the data contained in the block and the status of the ADV (built-in tests). -
Page 172: Extracting Time-Series Data (Gadvts)
SonTek/YSI 9.5. Extracting Time-Series Data (GADVTS) program extracts the time-series data from an autonomous ADVField data file. This GADVTS includes all data recorded with each sample: velocity, signal amplitude, correlation, compass data (if enabled), and sensor data (if enabled). The command syntax is: GADVTS [ADV file] [burst type] [output file] [first burst] [last burst] File names must be given without an extension. -
Page 173: Probe Configuration Download (Adfset.exe)
SonTek/YSI Section 10. Probe Configuration Download (ADFSET.EXE) program allows you to download a probe configuration file to the ADVField when ADFSET operating from a PC-compatible computer using only a text interface (e.g., a palmtop computer). This may be useful when changing probes in the field with limited computer access. When oper- ating the ADV from the direct command interface (e.g.;... - Page 174 SonTek/YSI ADVField Software Manual (September 1, 2001)
-
Page 175: Sonutils Utility Software (Windows)
SonTek/YSI Section 11. SonUtils Utility Software (Windows) 11.1. Overview Upon startup, SonUtils displays the opening menu shown in Figure 11. From this menu, you can start the following programs. • Terminal – Dumb terminal emulator (§11.2) [previously named SonTermW] • Compass – Compass calibration (§11.3) [previously named CompCalW] •... -
Page 176: Terminal - Dumb Terminal Emulator
SonTek/YSI 11.2. Terminal – Dumb Terminal Emulator Terminal is a terminal emulator used for direct communication with the ADVField. Note: This software was formerly named SonTermW. • All major ADVField functions can be accessed from a terminal or terminal emulator. - Page 177 SonTek/YSI Communication parameters • COM port and baud rate settings can be modified in the upper left area of the screen. • Access to all communication settings (data bits, stop bits, etc.) can be set using Communica- (Alt+S). tion|Settings Quick/Show/Misc Command Icons •...
-
Page 178: Compass - Compass Calibration
SonTek/YSI 11.3. Compass – Compass Calibration Compass is used to calibrate the optional internal compass/tilt sensor for the effects of ambient magnetic fields. Note: This software was formerly named CompCalW. • Compass establishes communication and starts a display of compass data. - Page 179 SonTek/YSI Communication Parameters • COM port and baud rate settings can be modified in the upper left portion of the screen. • Access to all communication settings (data bits, stop bits, etc.) can be set using the Set- menu. tings|Port Settings RS485 Multiple System Operation •...
-
Page 180: Recorder - Internal Recorder Data Extraction
SonTek/YSI 11.4. Recorder – Internal Recorder Data Extraction Recorder is used to download binary data files from the optional internal recorder. Note: This software was formerly named SonRecW. • Recorder establishes communication and displays a directory of the files currently stored on the ADVField’s internal recorder. - Page 181 SonTek/YSI Basic Downloading Instructions • Click to establish communication and display the recorder’s directory. Connect • Specify a destination directory on the bottom right (or use the button). Browse • Select one or more files from the display list. Files can be selected several ways.
- Page 182 SonTek/YSI ADVField Software Manual (September 1, 2001)
-
Page 183: Viewhydra / Viewhydrapro (Windows)
SonTek/YSI Section 12. ViewHydra / ViewHydraPro (Windows) ViewHydra is a data display and analysis program (Figure 15). This post-processing package is designed specifically for use with the data collected by a SonTek Hydra system. ViewHydra lets you quickly and easily look at Hydra data in a variety of ways: as time-series graphs, as tabular displays, or as an ASCII text file. - Page 184 SonTek/YSI Figure 15 – ViewHydra Screen Shot ADVField Software Manual (September 1, 2001)
- Page 185 SonTek/YSI If you have previously opened the current data file, and saved its work- Load Workspace? space, you will be prompted as to whether you want to reload your previous set of settings (Yes - Burst Type 1/2/3) or return all settings to their default state (No). Note: If you never want to save your last-used settings (i.e.;...
-
Page 186: What Am I Looking At
SonTek/YSI 12.2. What Am I Looking At? After loading a data file, ViewHydra will display the following (Figure 15). • Burst Data Time-Series Graph (top; §12.2.1) • Sample Data Time-Series Graphs (middle & bottom; §12.2.2) • Burst Tabular Data (upper right, but movable; §12.2.3) •... -
Page 187: Sample Data Time-Series Graphs
SonTek/YSI 12.2.2. Sample Data Time-Series Graphs The two Sample Data Time-Series Graphs (middle and bottom of screen) let you view data points over time for a user-selected variable over the range of samples contained in the selected burst. Several variables are available, of which two can be displayed at the same time on each graph - one on the left axis and one on the right axis of each graph. -
Page 188: Sample Tabular Data
SonTek/YSI • Corr1, Corr2, Corr3 - Correlation components of selected burst as a percentage (if left-axis = Correlation) • Corr StD1, Corr StD2, Corr StD3 - Correlation standard deviation components of selected burst as a percentage (if left-axis = Corr StD) •... -
Page 189: Menu Item Descriptions
SonTek/YSI • Mean Amp - The mean of the signal amplitude components of the selected sample in counts • Corr1/Corr2/Corr3 - Correlation components of the selected sample as a percentage • Mean Corr - The mean of the correlation components of the selected sample as a percentage •... -
Page 190: Edit Menu
SonTek/YSI Table 6. ViewHydra/ViewHydraPro ASCII Output Files Output Variables Extension Notes Configuration Data .ctl Header Data .hd1, .hd2, .hd3 Numeric extension applies to the appropriate burst type. Note: Matlab* files will use filename-hdn.mat, where n = burst type. Time-Series Data .st1, .st2, .st3... -
Page 191: Processing Menu
SonTek/YSI 12.3.4. Processing Menu The Processing Menu contains the following options. Note that all items in this menu affect the burst statistics file that is used to display your data. See the Recompute Burst Statistics File op- tion (below) for more information. -
Page 192: Hydra Config Menu
SonTek/YSI To begin: 1. Enter any modifications to the Processing Settings. 2. Select the burst number to display. 3. Press Compute Spectra. 4. Select the plot/display you would like to view. 5. Press Display Burst Graph. 6. Some of the displays let you zoom-in/out using the right and left mouse buttons, or by clicking and dragging a selection box around the area to be magnified. -
Page 193: Analysis Menu
SonTek/YSI • User Setup - Lists the setup used during data collection for each sampling burst type (1/2/3): o Number of bursts o Sample rate (Hz) o Burst interval (s) o Samples per burst o Record (Yes/No) - Amplitude / Correlation data, Compass data, Sensor data, Statistical... -
Page 194: Toolbar Icons
SonTek/YSI 12.3.7. Toolbar Icons The toolbar contains the following icons: • File Toolbar (§12.3.1): o Open o Copy o Print o Export Data o About – Displays software version number • Processing Toolbar (§12.3.4): o Beam Coordinate System o XYZ Coordinate System... -
Page 195: Additional Support
SonTek/YSI Section 13. Additional Support Any questions regarding the ADVField can be directed to SonTek/YSI by telephone, FAX, or email. Regular business hours are 8:00 a.m. to 5:00 p.m., Pacific Standard Time, Monday through Friday. Phone +1 (858) 546-8327 +1 (858) 546-8150 Email inquiry@sontek.com... - Page 196 SonTek/YSI ADVField Software Manual (September 1, 2001)
-
Page 197: Appendix 1. Automatic File Naming Convention
SonTek/YSI Appendix 1. Automatic File Naming Convention When automatically generating file names for data storage (using data acquisition software with the -f or -g command line options), the ADV uses a convention where the file name is based on the date and time at which the file was created. Unless the clock has been reset such that two files are started within the same minute, it is not possible to have a repeated file name. - Page 198 SonTek/YSI ADVField Software Manual (September 1, 2001)
-
Page 199: Appendix 2. Adv Real-Time Binary Data File Format
SonTek/YSI Appendix 2. ADV Real-Time Binary Data File Format This appendix describes the format of the binary files generated by the ADV data acquisition software. The format is the same for all ADV configurations. A2.1. Overview of Binary File Format There are four basic data types in the ADV real-time binary files: file configuration, data sample, event counter, and analog input sample. -
Page 200: A2.1.2 Data Sample, Event Counter, And Analog Input Module Structures
SonTek/YSI Probe Configuration Structure (254 bytes) typedef struct { unsigned char Spare[10]; char SerialNum[6]; unsigned char Bpar[226]; float Fpar[3] } ProbeConfType; Date / Time Structure (referenced above) (8 bytes) typedef struct { year; char day, month, minute, hour, sec100, second;... - Page 201 SonTek/YSI Compass structure (6 bytes) typedef struct { Heading; /* In 0.1 deg Pitch; /* In 0.1 deg Roll; /* In 0.1 deg } CompDatType; Sensor structure (6 bytes) typedef struct { Temp; /* In 0.1 deg float Press; /* In dbar } SensorDatType;...
- Page 203 SonTek/YSI INDEX extracting burst data, 38 Vz, 13 extracting setup and configuration data, 37 σ σ σ extracting time-series data, 40 active keys, 14 ADF.EXE, 2, 5 file comment, 10 ADFCALAO.EXE, 2, 29 file configuration structure, 67 ADFCHECK.EXE, 2, 21 file format, binary, 67 ADFSET.EXE, 2, 41...
- Page 204 SonTek/YSI SNR1/SNR2/SNR3, 13 parameter files, software, 7 software installation, 1 peak level, 23 software parameter files, 7 peak pos, 23 SONREC.EXE, 2, 35 pitch, 13 SonRecW, 48 probe configuration download, 41 SONTERM.EXE, 2, 33 probe configuration file, 3, 6 SonTermW (Terminal), 44...
- Page 205 SonTek/YSI Technical Notes 6837 Nancy Ridge Dr., Suite A • San Diego, CA 92121 • Telephone (858) 546-8327 • Fax (858) 546-8150 • Internet: inquiry@sontek.com SonTek/YSI, Inc. Acoustic Doppler Velocimeter Principles of Operation Table of Contents Page Introduction ....................... 1 The Doppler Shift and Bistatic Current Meters.............
-
Page 207: Introduction
SonTek/YSI 1. Introduction The SonTek/YSI Acoustic Doppler Velocimeter (ADV) is a single-point, high-resolution, 3D Doppler current meter. The Doppler processing techniques used by the ADV provide several ad- vantages: accurate, fast, 3D velocity measurements in a remote sampling volume; invariant fac- tory calibration - no periodic calibration required;... -
Page 208: Beam Geometry And 3D Velocity Measurements
SonTek/YSI Figure 1 shows the operation of a bistatic Doppler current meter, such as the ADV. The term bistatic refers to the fact that the ADV uses separate acoustic transducers to transmit and to re- ceive. Both transmitter and receiver are constructed to generate very narrow beam patterns. The transmitter generates sound with the majority of the energy concentrated in a narrow cone, while the receiver is most sensitive to sound coming from a very narrow angular range. -
Page 209: Sampling Volume Definition
SonTek/YSI Figure 3 shows the geometry of a 2D ADV. The axis of each re- ceiver is slanted 30° relative to the transmitter. The bistatic axis for each receiver is in the middle of the transmitter and receiver 5, 10, axes (slanted 15°... -
Page 210: Pulse-Coherent Processing
SonTek/YSI The vertical extent of the sampling volume is defined by the convolution of the acoustic pulse length with the receive window over which the return signal is sampled. Both of these are pre- cisely controlled by the ADV software (within the limits of the transducer bandwidth). The total height of the sampling volume for the 16-MHz and 10-MHz ADVs is 9 mm;... -
Page 211: Adv Data
SonTek/YSI 6. ADV Data The ADV records nine values with each sample: three velocity values (one for each component), three signal strength values (one for each receiver), and three correlation values (one for each re- ceiver). Naturally, the velocity data are of foremost interest. Concerns relating to the use of the velocity data are discussed in §6.1. -
Page 212: Sampling
SonTek/YSI When operating in highly turbulent flows, the ADV may show low correlation values that indi- cate increased noise in velocity measurements. For turbulent flow, the noise level may be re- duced by increasing the velocity range. The magnitude of the turbulent fluctuations can be ap- proximated by the standard deviation of velocity data displayed by the ADV data acquisition software. -
Page 213: Signal Strength
SonTek/YSI in post processing (see §7.2). Probe geometry is calibrated at the factory for each ADV; no re- calibration is required unless the probe has been physically damaged. The accuracy of the probe geometry, with factory calibration, is specified to ±1.0% of the meas- ured velocity (i.e., an accuracy of ±1.0 cm/s on a measured velocity of 100 cm/s). -
Page 214: Special Considerations
SonTek/YSI lation values will affect the short-term variability in velocity data (e.g., increase the noise), but will not bias the mean velocity measurements. For mean velocity measurements, correlation val- ues as low as about 30% can be used. The description given above is intended to provide general guidelines when using the correlation coefficient as a data quality parameter. -
Page 215: Sound Speed
SonTek/YSI 7.2. Sound Speed The ADV uses sound speed to compute velocity from the measured Doppler shift. This section discusses how to correct ADV velocity data for errors in the sound speed value used for data col- lection. Any errors in sound speed are typically very small, so postprocessing corrections are rarely required. -
Page 216: Near-Boundary Measurements
SonTek/YSI A more precise method to correct ADV velocity involves calculating the exact geometry change and re-computing the Cartesian velocity values. This is done in four steps. 1. Transform Cartesian (XYZ) velocities back to bistatic velocities. 2. Scale bistatic velocities for correct sound speed. - Page 217 SonTek/YSI Sampling Volume Boundary Reflection Time after transmit pulse Figure 7 – ADV Signal Strength Profile with Boundary Return There is a second, less obvious, source of boundary interference for ADV measurements. The ADV sends two pulses for each velocity measurement (see Section 5). Thus it is possible that the reflection of the first pulse from the boundary may arrive at the same time as the return of the second pulse from the sampling volume.
-
Page 218: Reduced Sampling Volume
SonTek/YSI possible to use a higher velocity range and the ADV will be forced to use a reduced velocity range. The most significant limitations occur when trying to measure high flows (> 1 m/s) very close to the boundary. These measurements can typically be made, but require careful adjustment and monitoring. - Page 219 SonTek/YSI The lowest ADV velocity range, ± 3 cm/s, will yield good results for flows down to about 0.1 cm/s. If working in an environment with lower flows, the ADV software can be modified to use lower velocity ranges that will improve performance in flows less than 0.1 cm/s. For more in- formation about using the ADV for low flow applications, contact SonTek.
- Page 220 SonTek/YSI Acoustic Doppler Velocimeter Principles of Operation (September 1, 2001)
- Page 221 (strain gage or Druck RPT) External Paroscientific External Paroscientific Pressure Sensor Pressure Sensor Power and Power and communication cable SonTek ADP communication cable SonTek ADVO Figure 1: ADP and ADVOcean with external pressure sensors. Using Frequency Pressure Sensors with SonTek/YSI Systems (December 2001)
- Page 222 Example – Druck calibration file 1145118.drk 1145118 12.0000000E+06 +8.8880000E+03 +5.5200000E+02 -2.21 +1.6214761E+03 -2.0699499E-02 +5.5220000E-05 -5.6160001E-08 +1.8251241E+00 -5.8612000E-06 +3.6197001E-08 -3.8715001E-10 +3.8615943E-04 -1.5274000E-09 -4.7059999E-12 -1.3233001E-13 +7.0553313E-08 -1.9064000E-12 -4.0058001E-14 +9.0119996E-16 +1.7913088E-11 -1.3525000E-15 +1.7647000E-17 +3.8552999E-19 +3.7756621E-15 +1.9573000E-19 +3.6951001E-20 -3.3300999E-22 Using Frequency Pressure Sensors with SonTek/YSI Systems (December 2001)
- Page 223 • T1 T2 T3 T4 • N/A N/A N/A N/A • N/A N/A N/A N/A Example – Paroscientific calibration file p68888.drk P68888 12.0000000E+06 5.880670 -3898.415 -10940.31 224.5927 6.013600 -245.2861 0.041219 27.94067 0.859765 20.65914 26.99304 Using Frequency Pressure Sensors with SonTek/YSI Systems (December 2001)
- Page 224 If the frequency reading is reasonable, but the corresponding pressure is not, this indi- cates that the appropriate calibration is not loaded into the processor. Section 5 describes how to load the calibration. DRUCK Using Frequency Pressure Sensors with SonTek/YSI Systems (December 2001)
- Page 225 The following command applies to Argonaut SL and XR systems that have an external pressure sensor installed. ExtPressInstalled [NONE|PAROS|DRUCK] • Selects or disables the frequency pressure sensor type. • Set at the factory. Does not need to be changed. Using Frequency Pressure Sensors with SonTek/YSI Systems (December 2001)
- Page 226 RS-485 system. -Address Example: will retrieve the calibration data from the system GTDRUCK B199 –p2 –b19200 connected to COM port baud and store the data into file 19200 B199.DRK Using Frequency Pressure Sensors with SonTek/YSI Systems (December 2001)
- Page 227 DRUCK PAROSFREQ HYDRAFILE.ADR file. p87654.DRK Note that in both cases that if incorrect calibration data is used, the output data will be invalid. Using Frequency Pressure Sensors with SonTek/YSI Systems (December 2001)
- Page 228 2. If pressure calibration data is not loaded, wave data processing is disabled. 3. ViewADP will save the calibration data in the associated data file’s workspace. This allows the calibration data to load automatically the next time the data file is opened. Using Frequency Pressure Sensors with SonTek/YSI Systems (December 2001)
Need help?
Do you have a question about the SonTek ADVField and is the answer not in the manual?
Questions and answers