Advertisement
Quick Links
™
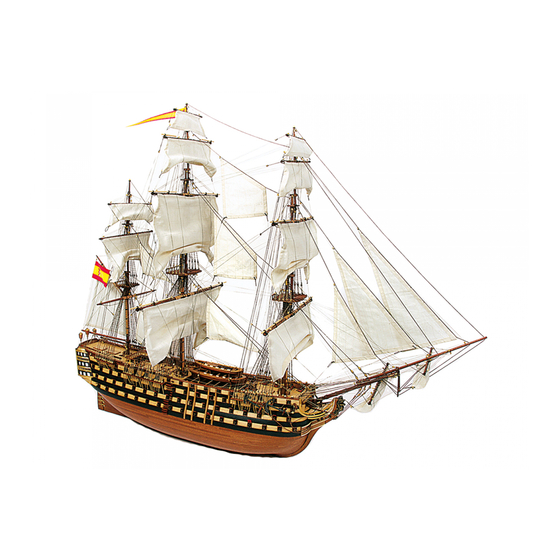
SANTISIMA TRINIDAD: Step by Step
Stage 121
Your parts
Chain
Nails
Parts fret (chainwales and rail)
Brass wire 0.5mm
Brown thread 0.5mm
Carriages
Cannons
Tools and equipment
Glue
Knife
Ruler
Brushes/wood stain
Sandpaper
A
Retrieve the template from Stage 53
and cut out template B 2. Temporarily
fix the template to the side of the
second gun deck and cut out the gun
ports, as shown.
B
As with the gun ports on the first gun
deck, glue pieces of 2 x 7mm strips
upright on the sides of each port, and a
2 x 5mm strip on the inside of the ribs,
with gaps for the ports.
481
Advertisement

Related Manuals for De Agostini Model Space SANTISIMA TRINIDAD


Summary of Contents for De Agostini Model Space SANTISIMA TRINIDAD
- Page 1 ™ SANTISIMA TRINIDAD: Step by Step Stage 121 Your parts Chain Nails Parts fret (chainwales and rail) Brass wire 0.5mm Brown thread 0.5mm Carriages Cannons Tools and equipment Glue Knife Ruler Brushes/wood stain Sandpaper Retrieve the template from Stage 53 and cut out template B 2.
- Page 2 ™ SANTISIMA TRINIDAD: Step by Step Glue another 2 x 5mm wooden strip to fit above the first, with gaps cut for the ports. Then glue a 3 x 3mm wooden strip above the 2 x 5mm wooden strips. The top of this should be in line with the cutouts in the ribs.
- Page 3 ™ SANTISIMA TRINIDAD: Step by Step Prepare the two ladder sides and 1 x 4mm wooden strip from previous stages. Cut the wooden strip into 10mm lengths and glue them between the two ladder sides. Test-fit the ladder in the hole in the deck, and adjust the angles at the top and bottom of the ladder until the fit matches the one shown.
- Page 4 ™ SANTISIMA TRINIDAD: Step by Step Retrieve the two deck halves from Stage 89 and cover them with 1 x 3mm wooden strips. Cut away the excess and smooth with sandpaper. Glue the two deck halves to the ribs and to the tops of the beams you fitted in Step E.
-
Page 5: Tools And Equipment
™ SANTISIMA TRINIDAD: Step by Step Stage 122 Your parts 4mm deadeyes 4mm blocks Carriages Cannons Wooden strips 1 x 4 x 300mm Wooden strip 2 x 2 x 300mm Ballast Tools and equipment Knife Glue Ruler Brushes/Wood stain Sandpaper Cut two lengths of 2 x 3mm wooden strip and glue them to the ribs at the sides of the deck. - Page 6 ™ SANTISIMA TRINIDAD: Step by Step Cut ten 90mm lengths of 2 x 5mm wooden strip and glue five of them onto each side of the model, on the outside of the ribs. Then cut two 90mm lengths of 2 x 5m brown wooden strip, and glue one on each side above the 2 x 3mm strips on the inside of the ribs.
- Page 7 ™ SANTISIMA TRINIDAD: Step by Step Cut three 90mm lengths of 2 x 5mm wooden strip to fit over the ports of the second gun deck. Cut out spaces for the ports and then glue them into place. Use 2 x 7mm, 2 x 4mm and 2 x 3mm wooden strips to repeat Steps B and C from Stage 121 (pages 481-482) to create the inside wall of the third gun...
- Page 8 ™ SANTISIMA TRINIDAD: Step by Step Remove the six knees from the fret received with Stage 90. Sand and stain them, and then glue them into place on the undersides of the beams and up against the walls. Glue 1 x 3mm wooden strips to the top of the deck received with Stage 17.
- Page 9 ™ SANTISIMA TRINIDAD: Step by Step Stage 123 Your parts Mainmast plan 2-3. Rubbing paunch and cheeks 9. Main top 15. U-shaped guides 18. Topmast 22. Topgallant mast D. 4mm blocks Z. Cannons Y. Carriages Important notice The numbers in the parts photo refer to those listed on the 1:1 scale mast diagram.
- Page 10 ™ SANTISIMA TRINIDAD: Step by Step Glue 90mm lengths of 2 x 5mm wooden strip up the outside of each gunwale, and cut out the gun ports. Place a gun port frame in each port, and then file the wooden strips to match the top edges of the gunwales.
- Page 11 ™ SANTISIMA TRINIDAD: Step by Step Cut three lengths of 2 x 4mm wooden strip and glue them to the edges of the opening in the deck, flush with the bottom of the deck. Cut the beam in the opening in the deck at the angle shown (inset), 7mm from the edge of the opening.
- Page 12 ™ SANTISIMA TRINIDAD: Step by Step Remove the two chainwale sections from the fret received with Stage 121, and two knees from the fret with Stage 52. Glue them to the sides of the gunwale, as shown, on both sides of the model.
- Page 13 ™ SANTISIMA TRINIDAD: Step by Step Stage 124 Your parts 5. Bibbs 21. Top mast 6. Crosstrees crosstrees 7. Trestletrees 25. Main yard 8. Chock 36. Top mast yard 10. Main top ribs 41. Topgallant 13. Stanchions yard Tools and equipment Sanding block File Sandpaper...
- Page 14 ™ SANTISIMA TRINIDAD: Step by Step Use the thread that came with Stage 121 to create the bindings (part 4), at the points indicated on the plan. Cut the main top ribs (part 10) (2 x 2mm wooden strip) and glue them to the maintop (part 9), to fit at the points shown on the plan and in the photo.
- Page 15 ™ SANTISIMA TRINIDAD: Step by Step Prepare four double blocks from Stage 123 with 0.15mm thread and tie them around the notches in the fore crosstrees, as shown. Then glue the crosstrees and trestletrees to the underside of the maintop, as on the plan.
- Page 16 ™ SANTISIMA TRINIDAD: Step by Step Glue the two U-shaped guides (part 15) to the port and starboard sides of the top of the lower mast, as shown. Prepare two C blocks and tie them to the top of the lower mast, above the guides, as illustrated on the plan.
- Page 17 ™ SANTISIMA TRINIDAD: Step by Step Stage 125 Your parts 17-27 17-27. Yard slings 44. Royal yard 28. Boom irons F. Trucks (large) S. Cannons 29. Boom irons T. Carriages (medium) B. Natural thread 38. Boom irons 0.15mm (small) Tools and equipment Sandpaper Tweezers Knife...
- Page 18 ™ SANTISIMA TRINIDAD: Step by Step Attach one D block around the topmast, positioned so that it hangs down the hole in the crosstrees in front of the mast. Then fit two more D blocks and two C blocks to the crosstrees, as shown.
- Page 19 ™ SANTISIMA TRINIDAD: Step by Step Use 0.8mm thread to create parts 16, looping them over the mast cap guide and through the U-shaped guide (this one should have a D block at the end). Glue one of the part 17 fittings to the front of the lower mast, using the plan to find the correct position.
- Page 20 ™ SANTISIMA TRINIDAD: Step by Step Attach all of the rigging blocks to the topgallant mast, as indicated on the plan. Glue the topmast cap (part 19) to the top of the topmast. Pass the bottom of the topgallant mast down through the hole in the cap until it rests in the crosstrees.
Need help?
Do you have a question about the Model Space SANTISIMA TRINIDAD and is the answer not in the manual?
Questions and answers