SOMFY SGS 501 Operating And Installation Manual
Hide thumbs
Also See for SGS 501:
- Operating and installation manual (72 pages) ,
- Manual (44 pages) ,
- Replacing (52 pages)
Table of Contents
Advertisement
Available languages
Available languages
Quick Links
Advertisement
Chapters
Table of Contents

Related Manuals for SOMFY SGS 501


Summary of Contents for SOMFY SGS 501
- Page 1 SGS 501 Operating and installation guide Montage- und Gebrauchsanleitung...
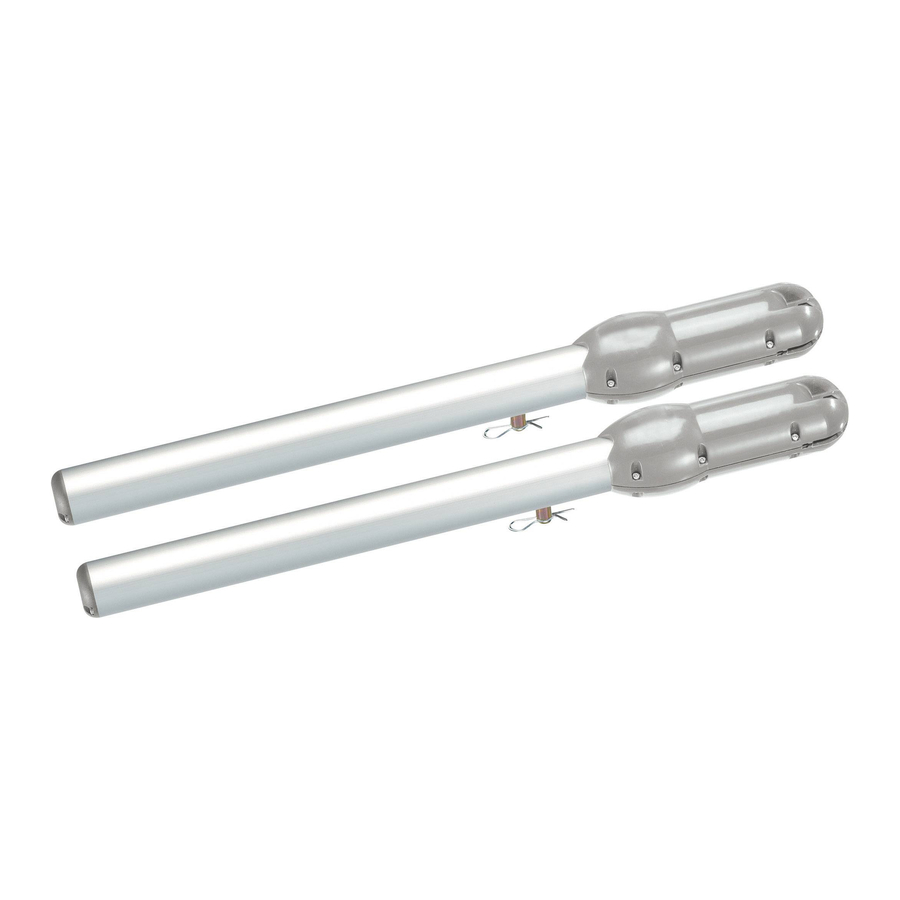
- Page 2 19 Cable clamp Unlocking mechanism 20 Cable clamp bolt Unlocking mechanism screw 21 2-button remote control Pin for securing the cylinder to the wall/pillar bracket 11 M8x22 flat washer 12 Remote control customisation clip Copyright © 2013 Somfy SAS. All rights reserved.
- Page 3 Bracket screw Bracket Sealing strip Control unit cover Electronics Cable clamp Cover bolt Cable clamp bolt Wall/pillar mounting bracket Cylinder bracket pin Cylinder Unlocking mechanism screw Catch Gate leaf bracket Unlocking mechanism Copyright © 2013 Somfy SAS. All rights reserved.
-
Page 4: Table Of Contents
Linking the other accessories ................................. 10 INSTALLATION AND COMMISSIONING ..............11 Drilling the pillars ............................ 11 Taking dimensions ..................................11 Tracing the AM and AH axes ................................12 Drilling the pillars .................................... 12 Copyright © 2013 Somfy SAS. All rights reserved. - Page 5 Diagnostics ..................................... 30 Assistance ....................................... 30 Replacing the remote control battery .............................. 30 Clearing the settings ..................................31 Clearing the memorised settings and remote controls ........................31 Unlocking/locking the motors ................................31 Copyright © 2013 Somfy SAS. All rights reserved.
-
Page 6: Safety Instructions
The installation must comply with the current standards and regulations in force in the country in which the product is being installed. Failure to follow these installation instructions may result in serious injury or damage to the equipment. Somfy shall not be held liable in this event. -
Page 7: Electrical Pre-Equipment
As stated in EN 12453, which relates to the safe use of motorised doors and gates, the use of a TAHOMA/Somfy Box unit for controlling an automatic garage door or gate control system, where the user cannot be seen, requires the mandatory installation of a photoelectric cell type safety device on this automatic control system. -
Page 8: Safety Instructions Relating To Operation
When using a non-locking switch, ensure that other people keep well away. Do not deliberately obstruct the movement of the motorised product. If not operating correctly, switch off the power supply, use emergency unlocking to gain access and contact Somfy assistance. -
Page 9: Risk Prevention
- cut off the corner of the pillar, 10 cm mini without weakening it Entaille du pilier ZONE 3 Solution: Risk of impact Obstacle detection built into the motor STOP Copyright © 2013 Somfy SAS. All rights reserved. -
Page 10: Regulations
This product complies with the essential requirements of the Machinery Directive 2006/42/EC and the RTT&E Directive 1999/5/EC. A declaration of conformity is available from www.somfy.com/ce (EXAVIA 500 / SGS201 / SGS 400 / SGS 501 / WISPA 800). Product can be used in the European Union, Switzerland and Norway. RECyCLING AND DISPOSAL... -
Page 11: General Information
At Somfy, the pursuit of quality is a continuous process of improvement. Somfy's reputation has been built upon the reliability of its products and the Somfy brand is synonymous with innovation and technological expertise worldwide. -
Page 12: Technical Data
* For a 50 kg gate, self-learning of the gate speed based on its weight. Overview of your installation Area lighting Code keypad Key lock Offset aerial Photoelectric cells Orange light Cylinders Control unit Copyright © 2013 Somfy SAS. All rights reserved. -
Page 13: Tools And Hardware Required
Patte de bracket These reinforcements must ideally be placed 1/3 of the way up the gate. fixation If there are no reinforcements, provide metal reinforcement plates approximately 4 mm thick. Renfort Reinforcement Copyright © 2013 Somfy SAS. All rights reserved. -
Page 14: Closing End Stops
Transmitter cell Cellule réceptrice Cellule émettrice • For the cell cables, route a sheath across each pillar. Pavement side Côté Chaussée Property side Côté Propriété „ Linking the other accessories See page 25. Copyright © 2013 Somfy SAS. All rights reserved. -
Page 15: Installation And Commissioning
If dimension A is negative, the gate leaf hinge is located in < 0 cm front of the pillar. Add a shim so that the cylinder mounting = 0 cm bracket is aligned with the gate leaf hinge and A is 0 cm. Copyright © 2013 Somfy SAS. All rights reserved. -
Page 16: Tracing The Am And Ah Axes
Check that the bracket is horizontal, then mark the mounting holes for the bracket. Drill 3 holes in each pillar at the marked locations (see page 9 for the drilling diameter corresponding to suitable hardware). Copyright © 2013 Somfy SAS. All rights reserved. -
Page 17: Securing The Motors To The Pillars
Have you checked that the brackets are perfectly horizontal on the cylinders? „ Fitting the cylinder on the mounting bracket Fit the cylinder on its mounting bracket. Immobilise it with the pin (10). Copyright © 2013 Somfy SAS. All rights reserved. -
Page 18: Securing The Motors To The Gate Leaves
Check that the cylinder is horizontal. Mark the markings on the sides of the gate leaf mounting bracket. Unclip the unlocking mechanism, then remove the cylinder from the gate leaf mounting bracket. Copyright © 2013 Somfy SAS. All rights reserved. - Page 19 The third mounting hole must only be drilled after self- learning of the gate leaf travel. Check before proceeding to the next step Have you checked that the cylinders are perfectly horizontal? Copyright © 2013 Somfy SAS. All rights reserved.
-
Page 20: Installing The Control Unit
The drilling diameter is to be defined based on the type of screws used for mounting (see page 9). Secure the bracket to the pillar/wall. Position the base of the unit to mark the 2 mounting points at the bottom of the unit. Copyright © 2013 Somfy SAS. All rights reserved. - Page 21 (see page 9). Secure the base of the unit to the pillar/wall: 1 screw (18) to secure the unit to the bracket + 2 screws to secure the unit to the pillar/wall. Copyright © 2013 Somfy SAS. All rights reserved.
-
Page 22: Connecting The Motors
Neutral Live Cable clamp „ Other connections (optional) Cells (see page 25) 230V power supply cable Orange light (see page 26) Other accessories (see pages 26 to 28) Copyright © 2013 Somfy SAS. All rights reserved. -
Page 23: Commissioning
Position the opening stops in contact with the cylinder knob, then tighten the stops with a 3 mm Allen key (2 screws per stop). STOP Turn the Allen key twice after contact. Copyright © 2013 Somfy SAS. All rights reserved. -
Page 24: Programming The Gate Leaf Travel
Have you set the position of the opening stop on each motor? „ Programming the gate leaf travel Somfy electronics automatically stores: the travel distances required to fully open and close the gate leaves with the positions of the end stops. -
Page 25: Finishing Mounting The Gate Leaf Bracket
„ Closing the control unit Affix the summary label (7) to the back of the control unit cover. Close the control unit and screw in the cover. yOUR MOTORS ARE READy TO OPERATE Copyright © 2013 Somfy SAS. All rights reserved. -
Page 26: Customising Your Installation
When using your gate in automatic mode, standard EN 12 453 requires a set of photoelectric cells to be installed (see wiring on page 25). Somfy recommends installing an orange light (see wiring on page 26) and area lighting (see wiring on page 26). „ Activating automatic closing mode The automatic mode can only be activated if a set of photoelectric cells is installed (see wiring page 25). -
Page 27: Deactivating Automatic Closing Mode
„ Operating your gate in pedestrian opening mode STOP STOP Partial opening (M1 motor) by pressing the activated button. STOP Stop when moving by pressing the activated button again. STOP STOP Close by pressing the activated button again. Copyright © 2013 Somfy SAS. All rights reserved. STOP... -
Page 28: Memorising Remote Controls
3-button remote controls or control points cannot be used to control the gate for pedestrian access. If you have stored 16 remote controls and you store a 17 remote control, the first remote control stored will be deleted and so on. Copyright © 2013 Somfy SAS. All rights reserved. -
Page 29: Wiring The Accessories
20 cm - 20°C HO5 RR-F 43 mm 26 mm 25 cm Pavement side Wiring for a set of cells 2 2 4 4 V V yellow label (BUS) 1 2 3 5 Copyright © 2013 Somfy SAS. All rights reserved. -
Page 30: Orange Light
Indication for your gate during movement Area lighting comes on each time the motor is switched on. It goes out automatically 1 minute and 30 seconds after movement has finished. Copyright © 2013 Somfy SAS. All rights reserved. -
Page 31: Backup Battery
This accessory is not compatible with solar power. We recommend the radio code keypad (page 28). Connect the key switch to terminals 3 and 4 (yellow "BUS" label) 2 2 4 4 V V on the control unit. Copyright © 2013 Somfy SAS. All rights reserved. -
Page 32: Video Entry Phone
- the ground strap on terminal 2. „ Radio code keypad „ Multi-application remote control 2400625 2400660 CODE „ 2 button remote control „ 4 button remote control Keytis NS 2 RTS 2400549 Keytis NS 4 RTS 2400576 Copyright © 2013 Somfy SAS. All rights reserved. -
Page 33: Solar
- the gate be closed to optimise the battery charge, - the gate not be left open for more than 2 days, - that the automatic closing of your installation be activated (see page 22). Copyright © 2013 Somfy SAS. All rights reserved. -
Page 34: Troubleshooting Guide
„ Assistance If the fault remains or for any other problem or enquiry relating to your motors, you can contact our Somfy advisors. „ Replacing the remote control battery The service life of the battery is generally 2 years. -
Page 35: Clearing The Settings
Locking the motors Unlocking the motors Install the cylinder. Clip the unlocking mechanism Unclip the unlocking mechanism, then remove the on the catch to secure it. cylinder from the gate leaf mounting bracket. Copyright © 2013 Somfy SAS. All rights reserved. - Page 36 Beutel mit Zubehör für die Spindel 19 Kabelzugentlastungsklemme Verriegelungsteil 20 Kabelklemmschrauben Schraube Verriegelungsteil 21 Funkhandsender mit 2 Tasten Achse zur Befestigung der Spindel am Winkel für Pfeiler/Mauer 11 Unterlegscheibe M8x22 12 Clip zur Personalisierung des Funksenders Copyright © 2013 Somfy SAS. All rights reserved.
- Page 37 DETAILLIERTE PRODUKTBESCHREIBUNG Schraube Befestigungswinkel Befestigungswinkel Steuerkastenabdeckung Elektronik Dichtungsschnur Kabelzugentlastungsklemme Schraube Kabelklemmschrauben Abdeckung Befestigungswinkel Pfeiler/Mauer Achse Befestigungswinkel/ Spindel Spindel Schraube Verriegelungsteil Mitnehmerbolzen Befestigung Torflügel Verriegelungsteil Copyright © 2013 Somfy SAS. All rights reserved.
- Page 38 INSTALLATION UND INBETRIEBNAHME ..............11 Herstellung der Bohrungen in den Pfeilern ................... 11 Ermittlung der Maße ..................................11 Anzeichnen der Achsen AM und AH .............................. 12 Herstellen der Bohrungen an den Pfeilern ............................. 12 Copyright © 2013 Somfy SAS. All rights reserved.
- Page 39 STöRUNGSBESEITIGUNG .................... 30 Diagnose ......................................30 Support ......................................30 Wechsel der Batterie des Funkhandsenders ..........................30 Löschen von Einstellungen ................................31 Löschen von Einstellungen und programmierten Funkhandsendern ..................... 31 Entriegeln/Verriegeln der Antriebe ..............................31 Copyright © 2013 Somfy SAS. All rights reserved.
-
Page 40: Sicherheitshinweise
Die Installation muss unter Berücksichtigung der geltenden Vorschriften und Gesetze im Installationsland erfolgen. Bei Nichtbeachtung dieser Anweisungen kann es zu schweren Körperverletzungen und Sachschäden kommen. Somfy kann für solche Schäden nicht haftbar gemacht werden. Bei korrekter Installation und Verwendung erfüllt der Antrieb alle Sicherheitsanforderungen. Es wird dennoch empfohlen, bestimmte Verhaltensregeln zu befolgen, um Belästigungen oder Unfälle ganz auszuschließen. -
Page 41: Elektrische Vorbereitung
Gemäß der Norm EN 12453 zum sicheren Gebrauch von Toren mit Antrieb erfordert der Einsatz eines Steuergeräts TAHOMA/Somfy Box für die Steuerung eines automatischen Hof- oder Garagentorantriebs ohne Sichtverbindung zum Nutzer zwingend die Installation einer Lichtschranke als Sicherheitsvorrichtung an diesem automatischen Antrieb. -
Page 42: Sicherheitshinweise Bei Der Benutzung
Lassen Sie den Antrieb einmal pro Jahr von einer qualifizierten Fachkraft überprüfen. Wenden Sie sich für alle direkten Arbeiten am Antrieb an den Support von Somfy. Wenn die Installation mit Fotozellen und/oder einer gelben Signalleuchte ausgestattet ist, reinigen Sie die Fotozellen und die Signalleuchte regelmäßig. -
Page 43: Gefahrenvermeidung
10 cm zwischen Torflügel und Pfeiler/Mauer vorsehen, 10 cm mini - die Ecke Pfeilers Entaille abschrägen, ohne diesen du pilier instabil zu machen. ZONE 3 Lösung: Gefahr durch Aufprall Erfassung eines Hindernisses durch den Antrieb STOP Copyright © 2013 Somfy SAS. All rights reserved. -
Page 44: Normen
Funkanlagen und Telekommunikationseinrichtungen 1999/5/EG. Die Konformitätserklärung ist unter folgender Adresse verfügbar: www.somfy.com/ce (EXAVIA 500 / SGS201 / SGS 400 / SGS 501 / WISPA 800). Das Produkt kann in der Europäischen Union, in der Schweiz und in Norwegen eingesetzt werden. -
Page 45: Allgemeine Informationen
ALLGEMEINE INfORMATIONEN Herzlich willkommen Wir bedanken uns für das Vertrauen, das Sie uns mit dem Kauf eines Somfy Produkts entgegenbringen. Dieses Produkt wurde von Somfy nach den organisatorischen Anforderungen der Qualitätsnorm ISO 9001 konzipiert, hergestellt und ausgeliefert. „ wer ist Somfy? Somfy entwickelt, produziert und vertreibt Antriebe und Automatikvorrichtungen für Hausanlagen. -
Page 46: Technische Daten
* Für ein Tor mit einem Gewicht von 50 kg, Selbsteinlernung der Geschwindigkeit des Tors in Abhängigkeit vom Gewicht. Übersicht über die Anlage Umfeldbeleuchtung Codetastatur Schlüsselschalter Externe Zusatzantenne fotozellen Gelbe Signalleuchte Spindeln Steuerkasten Copyright © 2013 Somfy SAS. All rights reserved. -
Page 47: Erforderliche Werkzeuge Und Eisenwaren
Diese Verstärkungsschienen sollten sich im Idealfall auf einem Drittel der Höhe des Tors befinden. Wenn keine Verstärkungsschienen vorhanden sind, sind Gegenplatten aus Renfort Verstärkungsschiene Metall mit einer Stärke von ca. 4 mm vorzusehen. Copyright © 2013 Somfy SAS. All rights reserved. -
Page 48: Schließanschlag
Cellule réceptrice Cellule émettrice • Die Kabel der Fotozellen können mit einem Straßenseite Côté Chaussée Kabelschutzrohr an den einzelnen Pfeilern befestigt werden. Grundstückseite Côté Propriété „ Anschluss weiteren Zubehörs Siehe Seite 25. Copyright © 2013 Somfy SAS. All rights reserved. -
Page 49: Installation Und Inbetriebnahme
< 0 cm = 0 cm vor dem Pfeiler. Verwenden Sie einen Einsatz, so dass der Befestigungswinkel der Spindel sich auf der Achse des Torscharniers befindet und Maß A gleich 0 cm ist. Copyright © 2013 Somfy SAS. All rights reserved. -
Page 50: Anzeichnen Der Achsen Am Und Ah
Achten Sie darauf, dass der Winkel horizontal ist und markieren Sie dann die Befestigungslöcher des Winkels. Bohren Sie an den markierten Stellen 3 Löcher in jeden Pfeiler (siehe Seite 9 für Informationen zum Bohrdurchmesser für die entsprechenden Schrauben). Copyright © 2013 Somfy SAS. All rights reserved. -
Page 51: Befestigung Der Antriebe An Den Pfeilern
Nachkontrolle vor dem nächsten Schritt Haben Sie geprüft, ob die winkel genau horizontal sitzen? „ Anbringung der Spindel am Befestigungswinkel Bringen Sie die Spindel am Befestigungswinkel an. Blockieren Sie sie mit der Achse (10). Copyright © 2013 Somfy SAS. All rights reserved. -
Page 52: Befestigung Der Antriebe An Den Torflügeln
Verstärkungsschiene der Flügel. Prüfen Sie, ob die Spindel genau horizontal sitzt. Markieren Sie die Seiten des Befestigungswinkels für die Flügel entsprechend. Rasten Sie das Verriegelungsteil aus und nehmen Sie die Spindel vom Spindelbefestigungswinkel ab. Copyright © 2013 Somfy SAS. All rights reserved. - Page 53 Rasten Sie das Verriegelungsteil am Mitnehmerbolzen ein, um ihn zu fixieren. dritte Befestigungsloch wird erst gebohrt, nachdem der weg der Torflügel eingelernt ist. Nachkontrolle vor dem nächsten Schritt Haben Sie überprüft, ob die Spindel ganz horizontal sitzt? Copyright © 2013 Somfy SAS. All rights reserved.
-
Page 54: Installation Des Steuerkastens
Der Bohrdurchmesser ist von dem für die Befestigung verwendeten Schraubentyp abhängig (siehe Seite 9). Bringen Sie den Befestigungswinkel an Pfeiler/Mauer an. Bringen Sie das Unterteil des Steuerkastens an, um die beiden Befestigungspunkte unten am Steuerkasten zu markieren. Copyright © 2013 Somfy SAS. All rights reserved. - Page 55 Schraubentyp abhängig (siehe Seite 9). Bringen Sie das Unterteil des Steuerkastens an Pfeiler/Mauer an: 1 Schraube (18) zur Befestigung des Kastens am Winkel und 2 Schrauben zur Befestigung des Kastens an Pfeiler/ Mauer. Copyright © 2013 Somfy SAS. All rights reserved.
-
Page 56: Anschluss Der Antriebe
Phase (grün/gelb) und arrangieren Sie diese im Steuerkasten. Kabelzugentlastungsklemme Versorgungskabel 230 V „ Zusätzliche Anschlüsse (optional) fotozellen (siehe Seite 25) Gelbe Signalleuchte (siehe Seite 26) weiteres Zubehör (siehe Seiten 26 bis 28) Copyright © 2013 Somfy SAS. All rights reserved. -
Page 57: Inbetriebnahme
Kettennuss der Spindel. Ziehen Sie dann die Anschläge mit einem Sechskant-Inbusschlüssel mit Durchmesser 3 an (2 Schrauben je Anschlag). STOP Drehen Sie den Schlüssel, wenn die Schraube Kontakt hat, noch um 2 Umdrehungen weiter. Copyright © 2013 Somfy SAS. All rights reserved. -
Page 58: Einlernen Des Wegs Der Torflügel
Nachkontrolle vor dem nächsten Schritt Haben Sie die Position des öffnungsanschlags für beide Antriebe eingestellt? „ Einlernen des wegs der Torflügel Die Somfy Elektronik speichert automatisch: Die für das vollständige Öffnen und Schließen der Flügel notwendigen Wege einschl. Erkennung der Anschläge. -
Page 59: Abschließende Befestigung Des Befestigungswinkels Des Torflügels
Schneiden Sie nie den Antennendraht ab. „ Schließen des Steuerkastens Bringen Sie das Anleitungsschild (7) unten am Steuerkasten Schließen Sie den Steuerkasten und verschrauben Sie die Abdeckung. DIE ANTRIEBE SIND NUN BETRIEBSBEREIT. Copyright © 2013 Somfy SAS. All rights reserved. -
Page 60: Individuelle Anpassung Der Anlage
Für die Verwendung Ihres Tors im Automatikmodus schreibt die Norm EN 12 453 die Installation einer Lichtschranke vor (siehe Schaltplan Seite 25). Somfy empfiehlt die Installation einer gelben Signalleuchte (siehe Schaltplan Seite 26) und einer Somfy Umfeldbeleuchtung (siehe Schaltplan Seite 26). -
Page 61: Deaktivieren Des Automatischen Zulaufs
Teilweise öffnung (Antrieb M1) durch Betätigen der aktivierten Taste. STOP Anhalten des Tors während des Öffnens durch erneutes Drücken auf STOP die aktivierte Taste. STOP Schließen durch erneutes Drücken der aktivierten Taste. Copyright © 2013 Somfy SAS. All rights reserved. STOP... -
Page 62: Einlernen Von Funkhandsendern
Taste. Mit 3-Tasten-Funkhandsendern oder -tastaturen kann keine Fußgängeröffnung des Tors ausgelöst werden. wenn Sie, nachdem Sie schon 16 funkhandsender gespeichert haben, einen 17. funkhandsender speichern, wird der erste funkhandsender gelöscht usw. Copyright © 2013 Somfy SAS. All rights reserved. -
Page 63: Verkabelung Des Zubehörs
24 Vac/dc max. 20 cm - 20°C HO5 RR-F 43 mm 26 mm 25 cm Straßenseite Verkabelung eines Satzes fotozellen 2 2 4 4 V V Gelber Aufkleber (BUS) 1 2 3 5 Copyright © 2013 Somfy SAS. All rights reserved. -
Page 64: Gelbe Signalleuchte
14 (weißes Schild „LIGHT“) des Steuerkastens an. Signalisierung der Bewegung des Tores Die Umfeldbeleuchtung schaltet bei jeder Inbetriebnahme des Antriebs ein. Sie erlischt automatisch 1 Minute und 30 Sekunden nach Ende der Bewegung. Copyright © 2013 Somfy SAS. All rights reserved. -
Page 65: Notstrombatterie
Dieses Zubehör ist mit einer Solarstromversorgung nicht kompatibel. wir empfehlen Ihnen die Installation einer funk-Codetastatur (Seite 28). Schließen Sie den Schlüsselkontakt an die Klemmen 3 und 4 2 2 4 4 V V (gelbes Schild „BUS“) des Steuerkastens an. Copyright © 2013 Somfy SAS. All rights reserved. -
Page 66: Video-Türsprechanlage
- Die geflochtene Hülle (Masse) an Klemme 2 „ Mehrzweck-funkhandsender „ funk-Codetastatur 2400625 2400660 CODE „ funkhandsender mit 2 Tasten „ funkhandsender mit 4 Tasten Keytis NS 2 RTS 2400549 Keytis NS 4 RTS 2400576 Copyright © 2013 Somfy SAS. All rights reserved. -
Page 67: Solarversorgung
- das Tor stets zu schließen, um die Batterieaufladung zu optimieren, - das Tor nicht länger als 2 Tage offen zu lassen, - den automatischen Zulauf an Ihrer Anlage zu aktivieren (siehe Seite 22). Copyright © 2013 Somfy SAS. All rights reserved. -
Page 68: Störungsbeseitigung
In der Regel halten Batterien 2 Jahre. Entfernen Sie den Clip Öffnen Sie den Nehmen Sie die Ersetzen Sie die des Funkhandsenders. Funkhandsender. Batterie mit Hilfe eines Batterie (3V CR 2430). Schraubenziehers heraus. Copyright © 2013 Somfy SAS. All rights reserved. -
Page 69: Löschen Von Einstellungen
Entriegeln der Antriebe Bringen Sie die Spindel an. Rasten Sie das Rasten Sie das Verriegelungsteil aus und nehmen Verriegelungsteil am Mitnehmerbolzen ein, um ihn Sie die Spindel vom Spindelbefestigungswinkel ab. zu fixieren. Copyright © 2013 Somfy SAS. All rights reserved. - Page 72 Somfy 50 Avenue du Nouveau Monde BP 250 - 74307 Cluses Cedex France www.somfy.com SOMFY LTD Moorfield Road Yeadon West Yorkshire LS19 7BN UNITED-KINGDOM +44 (0) 113 391 3030 www.somfy.co.uk Somfy GmbH Felix-Wankel-Str. 50 72108 Rottenburg Telefon: 07472-930-0 www.somfy.de...
Need help?
Do you have a question about the SGS 501 and is the answer not in the manual?
Questions and answers