AMX TPI-PRO-2 Quick Start Manual
Total presentation interface - pro edition
Hide thumbs
Also See for TPI-PRO-2:
- Operation/reference manual (218 pages) ,
- Datasheet (2 pages) ,
- Installation manual (2 pages)
Table of Contents
Advertisement
Quick Links
For more detailed installation, configuration, programming, and operating
instructions, refer to the Total Presentation Interface - Pro Edition Instruction
Manual available on-line at www.amx.com.
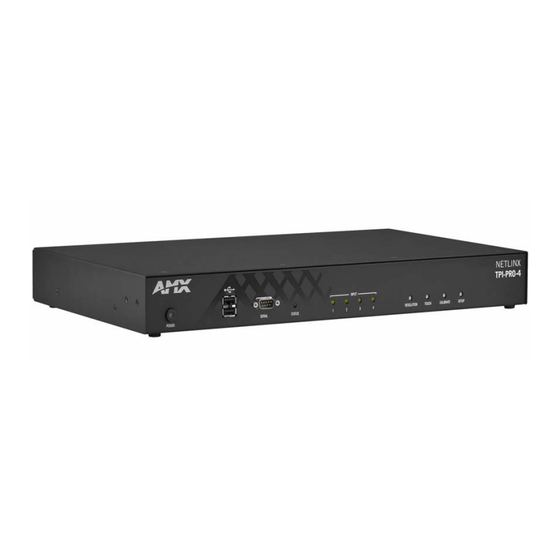
FIG. 1
Total Presentation Interface - Pro Edition (showing the TPI-Pro-2)
ATTENTION!
Verify you are using the latest NetLinx Master and TPI-Pro firmware (available
from www.amx.com). Verify the TPDesign4 program you are using is Version
2.8 or higher.
Overview
The Total Presentation Interface - Pro Edition (TPI-Pro) (FIG. 1) is a touch panel
interface that supports AMX's 4th generation graphics (G4) consisting of both
rich colors and support for high-contrast images. This G4 interface device is
capable of mixing Video/RGB inputs and then combining those inputs with
graphics, which can then be displayed on a variety of monitors. The TPI-Pro can
scale and merge up to four video sources onto two simultaneous outputs.
Specifications
TPI-Pro Specifications
Dimensions:
TPI-Pro-4
• 2.24" x 17.00" x 10.27" (5.69 cm x 43.18 cm x 26.09 cm)
(FG2275-104)
• 2.24" x 17.00" x 10.27" (5.69 cm x 43.18 cm x 26.09 cm)
TPI-Pro-2
(FG2275-102)
Power:
Constant current draw: 2.6A @ 12 VDC
Memory:
• 256 MB SDRAM
• 256 MB disk memory
Certifications:
FCC Part Class B, CE, and IEC60950
Front
• Touch Input connector communicates with the touch panel
• 2 USB ports (for keyboard and mouse control)
Components:
• LED Indicators - PWR, NetLinx Master status, and 4 yellow
LEDs for each source input (TPI-Pro-4 only)
• LED Indicators - PWR, NetLinx Master status, and 2 yellow
LEDs for each source input (TPI-Pro-2 only)
• Pushbuttons - RESOLUTION, TOUCH, CALIBRATE, and
SETUP
Rear
• HD-15 connectors - 4 input sources (TPI-Pro-4 only)
• HD-15 connectors - 2 input sources (TPI-Pro-2 only)
Connectors:
• 4 USB Type-B ports for source mouse/keyboard control
(TPI-Pro-4 only)
• 2 USB Type-B ports for source mouse/keyboard control
(TPI-Pro-2 only)
• Touch Input connector communicates with the touch panel
• 2 USB Type-A ports (for keyboard and mouse control)
• 2 HD-15 VGA Output connectors to send out a maximum
resolution of 1920 x 1200@60Hz
• 1 RJ-45 Ethernet port for network control
• Audio connector for use with a 3.5 mm mini-jack
Output
640x 480@60Hz to 1920 x 1200@ 60Hz
Resolution:
Input Resolution: 640x 480@60Hz to 1920 x 1200@ 60Hz
Included
• 2-pin PWR connector (41-5025)
• Assembly Kit (Four-#10-32 screws and Four-#10 washers)
Accessories:
(KA0001)
• TPI-Pro Quick Start Guide (93-2275-101)
• Rack Ear brackets (Left/Right) for shelf, wall, and under-table
mounting (60-0900-03)
Other AMX
• PSN6.5: Power Supply with 3.5 mm mini-Phoenix connector
(FG423-40)
Equipment:
• CC-HD15M-HD15M – HD15 Male to HD15 Male
(FG10-2170-01)
• CC-HD15M-RCAM3 – HD15 to 3x Male RCA connectors for
component or composite sources (FG10-2170-03)
• CC-HD15M-SVIDM – HD15 to S-Video connector
(FG10-2170-04)
Note: Using a USB hub may cause functionality issues with all USB ports on the
TPI-Pro. AMX recommends you do not use a USB hub to connect multiple USB
devices to the TPI-Pro.
USB 2.0 support is required for all USB devices.
Total Presentation Interface - Pro Edition
Disconnecting or reconnecting USB devices from the TPI-Pro front panel
may result in a loss of connectivity. If this occurs, resetting the unit will allow
the devices to re-establish connectivity.
Setting up the TPI-Pro for Communication
Step 1: Wiring the TPI-Pro
1.
Discharge any acquired static electricity by touching a grounded metal
object.
2.
Disconnect any incoming power connector from the rear of the TPI-Pro.
- A PSN supplies power to the TPI-Pro through a 3.5 mm mini 2-pin Phoenix
connector. The incoming PWR and GND cable from a PSN power supply must
be connected to the corresponding location on the rear TPI-Pro mini 2-pin PWR
connector.
3.
Connect the touch input cables from the touch monitor into the Touch Input
Port on the rear of the unit. This cable sends the touch input coordinates
from the touch panel to the TPI-Pro. When using a CRT monitor, use the
NullTouch driver.
4.
Connect an HD-15 video cable from the video inputs to the HD-15 source
inputs on the rear of the TPI-Pro.
5.
Connect an HD-15 video cable from the touch monitor to the HD-15 VGA
Output Port on the rear of the TPI-Pro.
6.
Connect any related USB devices to the rear of the unit.
7.
Connect the power cable to the touch monitor (or other monitor type).
8.
Connect the terminal-end of the power cable into an outlet to power-up the
touch device.
9.
Connect an RJ-45 10/100baseT Ethernet connector to the Ethernet port.
10. Connect the terminal end of the Ethernet (to an Ethernet Hub) cable to its
respective location.
11.
Connect the incoming PSN power connector to the 12 VDC power
connector on the rear of the unit.
12. Power on the unit.
Note: Verify that all rear connectors are connected prior to the unit being
installed onto a surface or within an equipment rack. Once the TPI-Pro has been
configured, connected, and installed properly; you can then provide power.
Note: The factory-shipped default resolution of the TPI-Pro is
1280x1024@60Hz. If your panel doesn't match the initial TPI-Pro output
resolution, the following procedures must be done to manually "sync-up" both
device settings.
Step 2: Setting the Output Resolution on the TPI-Pro
1.
Firmly press the front TPI-Pro RESOLUTION button. This single press
opens the Resolution Setup page (FIG. 2) on the panel.
FIG. 2
Resolution Setup page (showing the comparative resolutions)
Selections originate at a 1280x1024@60Hz display option and with every
consecutive single push of the RESOLUTION button, the TPI-Pro resolution
increases to a maximum output of 1920x1200@60Hz.
2.
Firmly press the RESOLUTION button again to cycle through the available
resolution settings.
•
Every consecutive button push cycles the output resolution to the next
highest available setting.
•
A double-push of the RESOLUTION button adjusts the resolution to the
previous setting. The following list describes the available pixel display and
refresh rates.
Quick Start Guide
Previously saved
output resolution
Currently selected
output resolution
Advertisement
Table of Contents

Related Manuals for AMX TPI-PRO-2


Summary of Contents for AMX TPI-PRO-2
-
Page 1: Specifications
(FG10-2170-04) Note: Using a USB hub may cause functionality issues with all USB ports on the TPI-Pro. AMX recommends you do not use a USB hub to connect multiple USB devices to the TPI-Pro. USB 2.0 support is required for all USB devices. - Page 2 AMX reserves the right to alter specifications without notice at any time. 3000 RESEARCH DRIVE, RICHARDSON, TX 75082 • 800.222.0193 • fax 469.624.7153 • technical support 800.932.6993 • www.amx.com If the calibration fails, repeat the above steps to select another driver and •...
Need help?
Do you have a question about the TPI-PRO-2 and is the answer not in the manual?
Questions and answers