
Related Manuals for AMX Tango


Summary of Contents for AMX Tango
- Page 1 Operation/Reference Guide Tango Distributed Audio Controllers DAS-T0804-SIG 8-Source, 4-Zone Audio Controller DAS-T0808-SIG 8-Source, 8-Zone Audio Controller D i s t r i b u t e d A u d i o L a s t R e v i s e d : 3 / 0 9 / 2 0 1 2...
- Page 2 AMX is not responsible for products returned without a valid RMA number. AMX is not liable for any damages caused by its products or for the failure of its products to perform. This includes any lost profits, lost savings, incidental damages, or consequential damages.
-
Page 3: Important Safety Instructions
Warning – To reduce the risk of fire or electric shock, do not expose this apparatus to rain or moisture. Do not expose this equipment to dripping or splashing and ensure that no objects filled with liquids are placed on the equipment. Tango Series Audio Controllers... - Page 4 IMPORTANT SAFETY INSTRUCTIONS Tango Series Audio Controllers...
-
Page 5: Table Of Contents
Connecting IR Outputs ..................... 7 Connecting Zone Outputs ..................7 SWT Connectors......................8 Connecting SWT Keypads to the Tango Controller............8 Connecting SWT Speakers to SWT Keypads ..............8 Connecting Paging Inputs/Outputs ................9 Connecting Tango Zone Expanders ................9 Zone Expander Addressing .................. - Page 6 Overview ........................ 25 Source Documentation ....................25 Key-By-Key Programming ..................... 25 Programming Worksheets ..................... 25 Programming the Tango Controller ................ 26 The Programming Panel ....................26 Main Menu screen....................26 System Setup Mode screen ..................27 System Setup - MRC Setup Mode screen ..............27 MRC Setup Mode Options screen .................
- Page 7 Removing the Pre-Installed DAS-AMFM Tuner Module .......... 43 Installing a Second DAS-AMFM Tuner Module ............44 Installing the DAS-SIRIUS Tuner Module..............46 Connecting and Positioning the SIRIUS Antenna ............47 Activating Your SIRIUS Subscription ................48 Tango Series Audio Controllers...
- Page 8 Table of Contents AMX Duet Module Interface Specifications ............49 Port Mapping......................49 Channels ......................... 49 Levels........................51 Command Control....................51 ?BAND ........................... 51 ?DEBUG ..........................51 DEBUG ........................... 51 ?FWVERSION ......................... 52 ?INPUT ........................... 52 INPUT ............................. 52 PASSBACK ..........................52 PASSTHRU ..........................
- Page 9 MSLOr ............................74 MCLOr ............................74 MGLO .............................74 MSPSs,n,p ..........................74 MGPSs,n ..........................75 MRPSs,n ..........................75 MSTPs .............................75 MSSDs,d ..........................76 MGSSs ............................77 CSSTh,m,s ..........................77 CGST ............................77 CSALr,s,v,h,m .........................77 CCALr .............................77 CGALr .............................78 MV++r ............................78 MV--r ............................78 SGSTx,y ..........................78 SGID ............................78 Tango Series Audio Controllers...
- Page 10 RSCIx`y`s`z`c`t`a`p ........................84 RSCTx`y`z ..........................84 RSCHs,x,y,z ..........................84 Troubleshooting ....................85 Overview ........................ 85 Power Connections ....................85 Source Unit Connections..................85 Zone Connection Problems..................86 Dead Zones ........................86 LED Does Not light ....................... 86 Tango Series Audio Controllers...
- Page 11 Table of Contents Source Connections....................... 86 No Keypad Activity (At All)..................87 Keypad Lights, No Sound ..................87 Programming ......................88 Tango Series Audio Controllers...
- Page 12 Table of Contents viii Tango Series Audio Controllers...
-
Page 13: Tango Series Audio Controllers
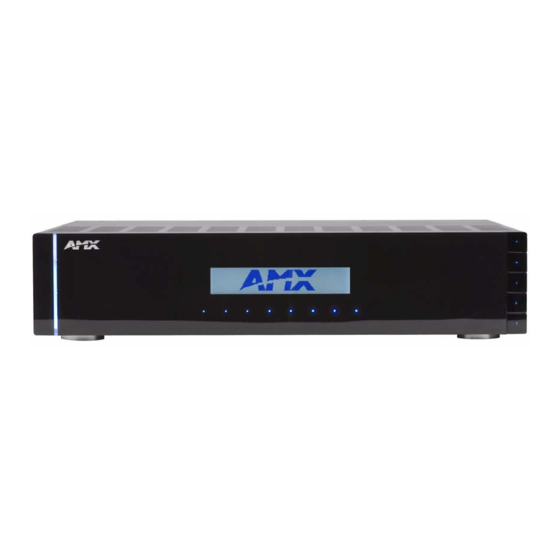
Tango Series Audio Controllers Overview The Tango Series of Audio Controllers allow centralized control of common audio equipment for up to 4 or 8 independently controlled audio zones per Controller. Each Tango Controller is capable of controlling the source via Metreau Keypad, RS-232, IP address (via the optional Ethernet Module), SWT Speakers (equipped with IR receivers), or the MIO R-4 AUDIO IR remote control. -
Page 14: Product Specifications
Tango Series Audio Controllers Product Specifications The following table provides technical specifications for the Tango Audio Controllers. Unless otherwise noted, these specifications apply to both the DAS-T0804-SIG and DAS-T0808-SIG models. Tango Audio Controllers Product Specifications Models Available: • DAS-T0804-SIG Tango 8-Source, 4-Zone Audio Controller (FG1103-01) •... - Page 15 • DAS-SIRIUS Sirius Satellite Radio Tuner Module (FG1110-02) • DAS-MNET Network Interface Card (FG1101-61) • DAS-LLC Line Level Converter with Speaker Wire Technology (FG1110-05) • DAS-TRMK Rack Mount Kit for Tango Audio Controllers and Zone Expanders (FG1102-60) • DAS-SWTC Ten Speaker Wire Terminal Connectors (FG1110-11)
- Page 16 Tango Series Audio Controllers Tango Series Audio Controllers...
-
Page 17: Installation
Each audio zone can be configured with either 2 pushbutton keypads (Numeric or Source), or 1 LCD Keypad and 1 pushbutton Keypad, but not 2 LCD keypads. Each Tango Controller can power 2 sets of speakers as long as the impedance does not drop below 4 ohms. -
Page 18: Speaker Wire Technology (Swt)
This remarkable technology removes the need for control wire since the control and audio signals are shared on the same wire. The reliability and simplicity of this system has been proven for years. AMX Matrix Audio is the only company that offers a “retrofit solution”, one which allows the replacement of volume controls with AMX Matrix Audio keypads and Controllers, giving full control over the sources. -
Page 19: Connecting Sources (Audio Inputs/Outputs)
Connecting Sources (Audio Inputs/Outputs) Up to eight audio devices can be connected to the Tango Controllers via the Sources INPUT and OUTPUT RCA connectors on the rear panel (see FIG. 1 on page 1). Industry standard RCA connectors provide line-level input and output connections for devices such as CD, DSS, MP3 players etc. -
Page 20: Swt Connectors
Installation SWT Connectors SWT cabling follows a specific pinout configuration that is labelled on the Tango Controller, Metreau keypads, and other Matrix devices, as shown in FIG. 5. L = Left audio channel (+) D = Data / Power (+) -
Page 21: Connecting Paging Inputs/Outputs
Connecting Tango Zone Expanders Tango Zone Expanders (FIG. 9) are used to expand the number of zones in the system beyond the 8 that are available using the Tango Controller. Each Tango Zone Expander has the capability of offering either 4 or 8 zones per Zone Expander. - Page 22 9 – 16, set to "2" for zones 17 – 24 and so on until all seven Zone Expanders are utilized (see FIG. 10). Refer to the Zone Expander Addressing section on page 11 for further details. Connect the source inputs. Patch each source from the source output on the Tango controller to the source inputs on the Zone Expander.
-
Page 23: Zone Expander Addressing
Refer to the Tango Zone Expanders Installation Guide for additional details. Zone Expander Addressing Use the 7-position Address switch (FIG. 11) on the rear panel of the Tango Zone Expanders to set the Address for each Expander, according to the values in the following tables: Address 1 FIG. -
Page 24: On-Board Am/Fm Tuner Module
Invalid commands are responded to with “ERROR” RS-232 Cable When connecting to the RS-232 port located on the back of the Tango Controller, it is necessary to use a DB9 cable. Tango Controllers utilize DCE protocol therefore no NULL modem adapter is necessary. You may also use a USB to DB9 adapter. -
Page 25: Connecting A Tango Amplifier
Installation Connecting a Tango Amplifier Tango Amplifiers provide extra output power for up to 4 additional speaker pairs driven from one zone. The DAS-TAMP4-SIG Tango 4-Channel Amplifier (FG1103-21) is a 4-channel amp that supports an additional 2 speaker pairs per unit. -
Page 26: Mio-R1 Audio Tango Distributed Audio Remote Control
Installation MIO-R1 AUDIO Tango Distributed Audio Remote Control The MIO R-1 AUDIO (FG147-04) remote provides custom control features, contained in an elegant handheld device, designed specifically for use with Matrix Distributed Audio Systems using Metreau DAS-MET-6SRC keypads. The MIO R-1 AUDIO controls up to 8 different devices or Sources. -
Page 27: Installing Custom Buttons
Place the top assembly back down on the PCB and return the unit over, exposing the 6 screw points. Tighten the 6 screw points. Place the battery door back on the device, slide to lock it in place. Tango Series Audio Controllers... -
Page 28: Inserting Batteries Into The Mio R-1 Audio
The Programming Jack is used for communication between the device and KeypadBuilder. The programming jack uses a three-wire, 2.5 mm stereo jack, you can order the programming cable (FG10-817) from AMX if you do not currently possess one. While loading your configuration file make sure the device is situated as such that the batteries will not fall out. -
Page 29: Tone Control & Srs Setting
Note: One minute after an ALL OFF has been performed, the Controller and all Sources will be powered down Note: Pressing Source Buttons switches between sources and turns the Source On, but does not toggle between ON and OFF. Tango Series Audio Controllers... -
Page 30: Source Control
User Def SELECT NAV Center (press/hold) Guide User Def HOLD SELECT Custom XM NAV Button CUSTOM XM NAV Up NAV Down DOWN NAV Left LEFT NAV Right RIGHT NAV Center (press) CENTER NAV Center (press/hold) CEN hold Tango Series Audio Controllers... -
Page 31: Direct Numeric Access
Pressing button 4 toggles development mode between ON and OFF. The display indicates the selected mode. In development mode, the display shows the IR code assigned to buttons when pressed. This mode is useful to the programmer when determining what IR codes are associated to each mode. Tango Series Audio Controllers... -
Page 32: Battery Type
MIO R-1 AUDIO assumes while in the charging cradle. Additional Documentation Refer to the MIO R-1 AUDIO Remote Operation/Reference Guide for additional information on MIO R-1 AUDIO functionality, including: Privacy Mode, Presets, Zone Grouping, Favorites, Alarm, and Keypad Lockout. Tango Series Audio Controllers... -
Page 33: System Integration Drawings
System Integration Drawing Using Four Conductor Speaker Wire Using the Audio Zone Expander IR OUT LINE IN Zones 1-8 Tango Controller LINE IN RJ11 Shared 4-conductor keypad/speaker wire Tango Zone Expander FIG. 16 System Integration Drawing Using the Audio Zone Expander Tango Series Audio Controllers... -
Page 34: Rf Interference
If you face an installation where your cable runs are in parallel to these types of systems you may consider shielded cable to the keypads. In this case ground the drain wire by connecting it to the chassis of the Tango Controller. -
Page 35: Remote Amplifier Configuration
System Integration Drawings Remote Amplifier Configuration In some cases, especially where the distance between the Tango Controller and the zone is unusually long, such as another building on the property i.e. cottage-to-boathouse for example, it is sometimes desirable to have a remote amplifier at the zone end. -
Page 36: Split Zone / Analog Volume Control (Option 1) One Keypad
The impedance will be approximately 4 Ohms. If you are using an impedance matching volume control with 2 pairs of speakers set the impedance matching to the 2X setting. Tango Series Audio Controllers... -
Page 37: Setup And Configuration
Setup and Configuration Overview Configuration and IR Capture take place on the front panel of the Tango Controller. Setting such as Favorites, Grouping, Bass, and Treble, Balance, SRS, Alarm, and Lockout functions are programmed from within any zone using the zones interface. (i.e. Keypad). -
Page 38: Programming The Tango Controller
The IR learning programming controls are located on the front of the Tango Controller. FIG. 21 shows the front of the Tango Controller with the navigation array to the left of the readout. The array is used to navigate through the programming and setup of the Controller. -
Page 39: System Setup Mode Screen
Backlight - Accesses the MRC Backlight screen. About - Accesses the About screen, which displays the firmware version of the Controller, Zone Expanders and all connected keypads. Exit - returns to the previous screen. Tango Series Audio Controllers... -
Page 40: Mrc Setup Mode Options Screen
Placement of the Remote - The audio source remote should be located about 6 to 12 inches away from the IR port on the Tango Controller. The path between the devices should be unobstructed with a clear line of sight. Fluorescent light fixtures and bright sunlight may interfere with the learning process. -
Page 41: Learn Ir Commands
IR not taught – Error Code # (command was not received, was incomplete or could not be learned) IR OK – 99 percent sure (More than 2 commands were received) IR OK – 75 percent sure (2 commands were received) IR OK – 50 percent sure (1 command received) Tango Series Audio Controllers... -
Page 42: Setting Gain/Attenuation
Setting Gain/Attenuation Audio Sources tend to have varying output levels. The Tango Controller gives the installer the ability to raise and lower the output gain of the audio source. The installer may attenuate the source input from 0db to -12db and may also increase output gain of the source from 0db to +18db. -
Page 43: Adjusting Output Gain
The Output Gain Mode screen is displayed. Select the source to be adjusted for “Output Gain” (FIG. 34). FIG. 34 Output Gain Mode - Exit The following screen is displayed (FIG. 35): FIG. 35 Set Output Gain for Source # 3 Tango Series Audio Controllers... -
Page 44: Paging
Select NextRm to view/change the status of the next room. Select PrevRm to view/change the status of the previous room. Once a room has been selected, select PageOn / PageOff to change the status for that particular room. Tango Series Audio Controllers... -
Page 45: System Setup - Tuner Setup Mode Screen
Once a desired station is tuned, select Preset on the Tuner (#) Options screen (FIG. 40) to save the station as a preset. This selection invokes the Select Which Preset To Save screen (FIG. 41): FIG. 41 Select Which Preset To Set screen Select a Preset (1-10) to associate with the currently tuned station. Tango Series Audio Controllers... -
Page 46: System Setup - Clock Setup Mode Screen
Alarms set at individual keypads can be viewed from the front of the Controller. Select “Alarms” from the Clock Setup Mode screen (FIG. 42). If there are no alarms set for any zone/room, the following will be displayed (FIG. 44). Tango Series Audio Controllers... -
Page 47: Backlight Options
Return to the previous screen Select an intensity setting FIG. 47 Backlight Intensity options screen To change the backlight intensity, select the option (i.e. 25%, 50%, 75% or Full), the backlight will dim to the selected value. Tango Series Audio Controllers... -
Page 48: Backlight - Mode
Expansion Units 1 – 7 (X1 – X7) All Main Keypads & Aux Keypads connected to the main Controller All Main Keypads & Aux Keypads connected to each Zone Expander From the System Setup Mode screen, select About (FIG. 50): Tango Series Audio Controllers... -
Page 49: Program Lcd Kp
I2C bus will be stopped so that the programming of the LCD keypads is not interrupted. Once the LCD KP has been programmed, select QUIT to exit the screen. Communication on the I2C bus will resume. Tango Series Audio Controllers... - Page 50 Setup and Configuration Tango Series Audio Controllers...
-
Page 51: Tuner Modules
Tuner Modules Tuner Modules DAS-AMFM Tuner Add AM/FM Radio functionality to your Mi Series or Tango system with the DAS-AMFM AM/FM Tuner Module (FG1110-01). Tuner Jumpers 20-pin Tuner Ribbon Cable Tuner connector Mounting Plate FM Antenna AM Antenna connector connector FIG. - Page 52 Tuner Modules All Mi-Series and Tango Audio Controllers come equipped with a DAS-AMFM AM/FM Tuner Module. Since Mi-Series and Tango Audio Controllers support 2 Tuner Modules in any combination, the DAS-SIRIUS Module can either be installed in addition to the DAS-AMFM Module, or the DAS-AMFM Module can be removed to allow 2 DAS-SIRIUS Modules.
-
Page 53: Setting The Jumpers
Mi-Series and Tango Audio Controllers come equipped with one DAS-AMFM Tuner Module, installed into Slot 2 (see FIG. 57). Mi-Series and Tango Audio Controllers support 2 Tuner Modules in any combination, this document describes installing the DAS-AMFM Tuner Module into Slot 1, leaving the factory-installed DAS-AMFM Tuner Module in Slot 2. -
Page 54: Audio Controller Jumpers - Dual Tuner Setting
FIG. 62 Tuner Module Jumper Configuration (Green Interface Boards) Remove all jumpers from the new tuner, and attach the 2-wire (red and white) end of the cable included with your kit to the pins (FIG. 63): Tango / Mi-Series Audio Controllers... -
Page 55: Removing The Pre-Installed Das-Amfm Tuner Module
Top Left of Rear-Board Pin Bus TUNER 1 Tuner 1 jumpers (in OFF position) Jumpers TUNER 2 Tuner 2 jumpers (in OFF position) Jumpers FIG. 64 Audio Controller Jumper Configuration (Dual Tuners) Replace the unit cover. Tango / Mi-Series Audio Controllers... -
Page 56: Installing A Second Das-Amfm Tuner Module
The ribbon cable must be oriented so that the red stripe is connected to Pin 1 on the connector. Rear of controller 20-pin connector on Tuner 2 FIG. 67 Tuner 2 Module Connection Verify that both ends of the cable are securely plugged into their respective boards through the 20-pin connectors (FIG. 68). Tango / Mi-Series Audio Controllers... - Page 57 FIG. 70 Connection of the cable to the left-side pins on the back of the interface board. The 3-wire end connects to the open pins on the Interface Board with the white wire pointed up. Tango / Mi-Series Audio Controllers...
-
Page 58: Installing The Das-Sirius Tuner Module
(see Note below) Slot 2 Slot 1 Rear Panel FIG. 73 Tuner Ribbon Cable Connect the Slot 1 connector on the ribbon cable to the 20-pin Tuner Ribbon Cable connector on the DAS-SIRIUS Module (FIG. 74). Tango / Mi-Series Audio Controllers... -
Page 59: Connecting And Positioning The Sirius Antenna
Select "SAT" to determine the Satellite Signal Strength. Ensure the signal strength is at a minimum of "weak". Adjustments may need to be made to the position of the Antenna in order to get a better signal. Tango / Mi-Series Audio Controllers... -
Page 60: Activating Your Sirius Subscription
If using either a Metreau or Matrix tactile keypad without the optional numeric keypad, access the programming menus via the front of the Controller by pressing the centre Nav button on the Controller: Select Setup\SIRIUS, then select "ID" from the SIRIUS menu, and the SIRIUS ID will be displayed. Tango / Mi-Series Audio Controllers... -
Page 61: Amx Duet Module Interface Specifications
305,306 Channels The UI module controls the Mi-Series or Tango Controller via channel events (NetLinx commands pulse, on, and off) sent to the COMM module. The channels supported by the COMM module are listed below. These channels are associated with the virtual device(s) and are independent of the channels associated with the touch panel device. - Page 62 AMX Duet Module Interface Specifications Tango Controllers - Channels (Cont.) Channel Description PULSE: Back Button PULSE: Forward Button PULSE: Increment Balance PULSE: Decrement Balance PULSE: Increment Bass PULSE: Decrement Bass PULSE: Increment Treble PULSE: Decrement Treble PULSE: Cycle Input Source ON: Set Volume Mute On –...
-
Page 63: Levels
AMX Duet Module Interface Specifications Levels The UI module controls the Tango Controllers via level events (NetLinx command SEND_LEVEL) sent to the COMM module. The levels supported by the COMM module are listed below. These levels are associated with the virtual device(s) and are independent of the levels associated with the touch panel device. -
Page 64: Fwversion
AMX Duet Module Interface Specifications Mi-Series & Tango Controllers - Command Control (Cont.) Command Description ?FWVERSION Get the device's firmware version. Syntax: ?FWVERSION This query should be issued on port 1. Replies with FWVERSION-<version> Example: ?FWVERSION ?INPUT Get the currently selected input source. -
Page 65: Property
AMX Duet Module Interface Specifications Mi-Series & Tango Controllers - Command Control (Cont.) Command Description ?PROPERTY Get the value of a property <key>. Syntax: ?PROPERTY-<key> If the value is not initialized, an empty string is returned. This query should be issued on port 1. -
Page 66: Command Feedback
Feedback is only provided when there is a state change. If no state change resulted from the command sent in, then no feedback will be returned. The commands supported are listed below. Mi-Series & Tango Controllers - Command Feedback Command Description BAND Returns the current tuner band. -
Page 67: Product_Id
AMX Duet Module Interface Specifications Mi-Series & Tango Controllers - Command Feedback (Cont.) Command Description PRODUCT_ID Reports the current product ID. Syntax: PRODUCT_ID-<val> This reply is received on port 1 after the module is re-initialized. <val>: string Example: PRODUCT_ID-M104 PROPERTY Feedback on the value of property <key>. -
Page 68: Input Source Types
For more detailed information on the Duet Module Interface Specification, including Device and Protocol notes, refer to the "Duet Module Interface Specification for Matrix Audio Tango Series" document, available for download from the InConcert section of the www.amx.com website. Mi-Series & Tango Audio Controllers... -
Page 69: Ir Commands By Source Type
TRACK – (kp DOWN) Press & Hold CENTER = User Defined2 DISC – (kp LEFT) DISC + (kp RIGHT) UDEF1 (kp CENTRE) UDEF2 (kp CEN hold) Direct Access: DISC END DISC TRACK END TRACK 0-9, (10+) Tango Series Audio Controllers... - Page 70 Press & Hold CENTER = Guide SELECT (kp CENTRE) GUIDE (kp CEN hold) Direct Access: START DIRECT END DIRECT NOTE: You may SKIP the Direct Access functions if they do not pertain to the source you are programming Tango Series Audio Controllers...
- Page 71 RIGHT (kp RIGHT) SELECT (kp CENTRE) HOLD C (kp CEN hold) Direct Access: DISC END DISC TRACK END TRACK NOTE: You may SKIP the Direct Access functions if they do not pertain to the source you are programming Tango Series Audio Controllers...
- Page 72 Direct Access: Matrix Onboard Nav. UP = SEEK UP Tuner Nav. DOWN = SEEK DOWN Nav LEFT = Previous PRESET Nav. RIGHT = Next PRESET Nav. CENTER = AM/FM (toggle) Press & Hold CENTER = Stereo/Mono (toggle) Tango Series Audio Controllers...
-
Page 73: Serial Control Strings
MASON MASOFF MASOFF0 MBAL MPRV MRGS MFAV MLOT MPRS MSST CALM RSST RSCI RSCT Mi Series and Tango Audio Controllers... -
Page 74: Command Messages
2) 'aaa' is the device ID 3)'vvvv' is the version 4) 'pppp' is the product ID 5) 'ddddd' is a descriptive string for the device, the string is of variable length - or - Mi Series and Tango Audio Controllers... -
Page 75: Amx
Get Volume, where: Volume Status: 'r' is the desired room, (1-64) "MVLr,v" where: 1) 'r' denotes the room (1-64) 2) 'v' denotes the volume setting: 101: Mute 0..100 : 0..-100 dB - or - Mi Series and Tango Audio Controllers... -
Page 76: Msbsr,B
- or - MSAAs Source All On Command, where: Source All On Occurred: 's' is the desired source (1-8) "MSAONs" (Note: v7.02 or higher only) where: 's' denotes the source 1-8 - or - Mi Series and Tango Audio Controllers... -
Page 77: Msaos
2) 's' denotes the SRS state, values are: 2: SRS 3D 0: Off 3: Focus 1: Bass Boost 4: WOW 2: SRS 3D 3: Focus 4: WOW 5: SRS not Available - or - Mi Series and Tango Audio Controllers... -
Page 78: Mgsrr
3) 'o' denotes the output gain, values are: 0: 0 dB 1: +3 dB 2: +6 dB 3: +9 dB 4: + 12 dB 5: + 15 dB 6: + 18 dB - or - Mi Series and Tango Audio Controllers... -
Page 79: Mspgr,S
‘r’ is the desired room, (1-64) "MPGr,s" (Note: v7 or higher only) where: 1) 'r' denotes the room 1-64 2) 'v' denotes the volume setting, values are: 101: Mute 100..0: -100..0 dB - or - Mi Series and Tango Audio Controllers... -
Page 80: Mgstr
8) 'l' denotes the balance, valid values are: 0: balanced equally 1..10: 100% … 10% Left 11..20: 10% … 100% Right 9) 'p' denotes the privacy status, values are: 0: Off 1: On - or - Mi Series and Tango Audio Controllers... -
Page 81: Mssts,X
Refer to MCMD - Command Codes on 2) 'x' is the Category number (0-99) page 79 for details. 3) 'y' is the Channel number (3 digits) 4) 'z' is the Service ID (3 digits) - or - Mi Series and Tango Audio Controllers... -
Page 82: Msblr,X
Get Room Privacy, where: Privacy Status: ‘r’ is the desired room, (1-64) "MPRVr,x" where: 1) 'r' denotes the room 1-64 2) 'x' denotes the privacy status, values are: 0: Off 1: On - or - Mi Series and Tango Audio Controllers... -
Page 83: Msrgs,B8,B7,B6,B5,B4,B3,B2,B1
64 and the least significant bit in 'b1' is for room 1. Note: If none of the bits are set in the room selection bitmap, then the room grouping has been removed. - or - Mi Series and Tango Audio Controllers... -
Page 84: Mrrgr
2) ‘i’ is the increment value or 0 for system 1) 'r' denotes the room in the group, default values are 1-64 2) 'v' denotes the volume setting, values are: 101: Mute 0..100: 0..-100 dB - or - Mi Series and Tango Audio Controllers... -
Page 85: Mdgvr,I
Zero length data will clear the 0 to 7 characters long and is translated favorite. as specified in the 'Send Source Direct Data' command: Zero length data is returned if the favorite is not set - or - Mi Series and Tango Audio Controllers... -
Page 86: Mgfvr,S
Zero length data will clear the from 0 to 7 characters long and is preset. translated as specified in the 'Send Source Direct Data' command: Zero length data is returned if no preset is set. - or - Mi Series and Tango Audio Controllers... -
Page 87: Mgpss,N
2) 'tt' is the source type, valid values are: 0: undefined 1: AM/FM Tuner 2: CD Changer 3: DVD Player 4: Satellite Receiver 5: Audio Server 6: Other 8: Internal Sirius tuner 20: Internal AM/FM Tuner - or - Mi Series and Tango Audio Controllers... -
Page 88: Mssds,D
5) 'c' is the Channel Name (36 characters max) 6) 't' is the Title (36 characters max) 7) 'a' is the Artist (0-36 characters max) 8) 'p' is the Composer (36 char Max) - or - Mi Series and Tango Audio Controllers... -
Page 89: Mgsss
Clear the Clock Alarm, where 'r' is the Alarm Status: desired room. (0-64). "CALMr,0,0,0,0" • 0: clear the alarm for all rooms See "CSALr,s,v,h,m" (above) • 1-64: clear the alarm for the specified room - or - Mi Series and Tango Audio Controllers... -
Page 90: Cgalr
5) 'c' is the Channel Name (36 char max) 6) 't' is the Title (36 char max) 7) 'a' is the Artist (36 char max) 8) 'p' is the Composer (36 char max) - or - Mi Series and Tango Audio Controllers... -
Page 91: Sgctx
Next Down Preset Audio Server Previous Next Previous Next Play Next Page Page Preset Other Previous Next Left Right SEL+Hold Prev Next Preset Preset Custom XM Down Left Right SEL+Hold Prev Next Preset Preset Mi Series and Tango Audio Controllers... -
Page 92: Status Messages
2) 'b' denotes the bass level, (0-20) 0: level 1..10: -10..-1 dB 11..20: 1..10 dB MTRr,t Treble Status, where: 1) 'r' denotes the room, (1-64) 2) 't' denotes the bass level, (0-20) 0: level 1..10: -10..-1 dB 11..20: 1..10 dB Mi Series and Tango Audio Controllers... -
Page 93: Mscr,S
1: On (Note: v7 or higher only) MPVr,v Paging Volume Status, where: 1) 'r' denotes the room, (1-64) 2) 'v' denotes the volume setting, (0-70) 101: Mute 70..0: -70..0 dB (Note: v7 or higher only) Mi Series and Tango Audio Controllers... -
Page 94: Mbalr,X
2) ‘b8’…’b1’ is a binary room selection bitmap where all rooms listening to ‘s’ have a binary 1 in the room position. The most significant bit in ‘b8’ is for room 64 and the least significant bit in ‘b1’ is for room 1. Mi Series and Tango Audio Controllers... -
Page 95: Mfavr,S,F
'b' is the band: 1 = AM, 2 = FM 'm' is the mono/stereo status: 1 = mono, 0 = stereo 's' is the seek/tune status: '1' = seek, '0' = tune 'f' is the currently tuned frequency (5 digits max) Mi Series and Tango Audio Controllers... -
Page 96: Cstv,H,M,S
Sirius Radio Channel Number Status, where: 1) ‘s’ is the Sirius number (1-2) 2) ‘x’ is the Category number (0-99) 3) ‘y’ is the Channel number (3 digits) 4) ‘z’ is the Service ID (3 digits) Mi Series and Tango Audio Controllers... -
Page 97: Troubleshooting
Ensure that the source component’s LINE OUT connections are connected to the Controller’s LINE IN connections for the correct device. These can sometimes be mismatched. Take a look at the source component to ensure that MUTE functions have not accidentally been activated. Tango Series Audio Controllers... -
Page 98: Source Connections
Dead Zones There is power and the source devices and the Tango Controller seem to be powering up OK, but one or more of the zones are not working. Check each zones keypad for functionality by pressing the desired source button. The LED should light Red next to the source. -
Page 99: No Keypad Activity (At All)
When a keypad command is received and communicated to the source device, there is a LED that lights on the front of the Tango Controller indicating the processing of the command. If the LED does not light with a keypad press, then it is possible that the device has not been programmed. If the LED does light, there may be a problem with the infrared emitter lead. -
Page 100: Programming
Watch and wait for a confirmation of a good signal from the Tango Controller (99%, 75% or 50% sure). - Page 101 Troubleshooting Tango Series Audio Controllers...
- Page 102 It’s Your World - Take Control™ 3000 RESEARCH DRIVE, RICHARDSON, TX 75082 USA • 800.222.0193 • 469.624.8000 • 469-624-7153 fax • 800.932.6993 technical support • www.amx.com...
Need help?
Do you have a question about the Tango and is the answer not in the manual?
Questions and answers