
Related Manuals for Crestron HD-WP-4K-401-C


Summary of Contents for Crestron HD-WP-4K-401-C
- Page 1 HD-WP-4K-401-C 4K Multi-Window Video Processor with HDBaseT and HDMI Outputs ® ® Supplemental Guide Crestron Electronics, Inc.
- Page 2 Crestron disclaims any proprietary interest in the marks and names of others. Crestron is not responsible for errors in typography or photography.
-
Page 3: Table Of Contents
Using the Web Interface Accessing the Web Interface ................... 3 Opening a Web Browser Directly ............... 3 Opening a Web Browser within the Crestron Toolbox Application ....3 Logging In to the HD-WP-4K-401-C ............4 Navigating the Web Interface ..............5 Viewing Status Information .................. -
Page 5: Introduction
(TT-100 Series) directly to the HD-WP-4K-401-C affords a perfect multi-window collaboration solution for huddle rooms and classrooms. Easy setup and configuration of the HD-WP-4K-401-C is enabled using a web browser or the front panel controls. This guide provides information about the out-of-the box functionality of the HD-WP-4K-401-C as well as configuration of the HD-WP-4K-401-C using the web interface and the front panel OLED display. - Page 6 3. (Optional) Connect up to four Crestron Connect It cable caddies to the USB input ports of the HD-WP-4K-401-C. Press a button on a cable caddy while the LED is blue to display the associated source as a full-screen window on the display.
-
Page 7: Using The Web Interface
The Login page opens. For login information, refer to "Logging In to the HD-WP-4K-401-C" on the following page. Opening a Web Browser within the Crestron Toolbox Application To access the user interface by opening a web browser within the Crestron Toolbox application, do the following: 1. Open the Crestron Toolbox application. -
Page 8: Logging In To The Hd-Wp-4K-401-C
HD-WP-4K-401-C. For login information, refer to "Logging In to the HD-WP-4K-401-C" below. Logging In to the HD-WP-4K-401-C The user name and password dialog box allows login to the HD-WP-4K-401-C. NOTE: Depending on the web browser being used, the appearance of the user name and password dialog box may vary from the dialog box shown below. -
Page 9: Navigating The Web Interface
The navigation bar provides access to the web pages as follows: • Clicking Status accesses the Status page, which provides general information about the HD-WP-4K-401-C as well as network-related and control system information. For additional information, refer to "Viewing Status Information" on the following page. -
Page 10: Viewing Status Information
Viewing Status Information General information, such as model name, serial number, and firmware version of the HD-WP-4K-401-C, can be viewed. The current network settings as well as control system connection settings can also be viewed. To view status information, do the following: In the navigation bar, click Status. -
Page 11: Configuring Windowing Settings
Displays four detected inputs as a quad view consisting of four equal-sized windows (two side-by-side windows above two side-by-side windows) Displays three detected inputs as three equal-sized windows (two side-by-side windows above one centered window) HD-WP-4K-401-C: 4K Multi-Window Video Processor • 7 Supplemental Guide – DOC. 7901B... - Page 12 If Custom is selected, enter the X (horizontal) and Y (vertical) coordinates in pixels to set the size of the smaller window, and then click the Save button. 8 • HD-WP-4K-401-C: 4K Multi-Window Video Processor Supplemental Guide – DOC. 7901B...
-
Page 13: Configuring On-Screen Display Settings
By default, the Disable radio button is selected, preventing text from being overlaid on the display device. 2. In the Text to display text box, enter the desired text, and then click the Save button. HD-WP-4K-401-C: 4K Multi-Window Video Processor • 9 Supplemental Guide – DOC. 7901B... -
Page 14: Configuring Image Overlay Settings
• If the image is located on the hard drive of the device from which the HD-WP-4K-401-C web interface is accessed, select Local (default setting). • If the image is located on a device other than the local hard drive, select Remote. -
Page 15: Configuring Inputs On The Input Page
Send EDID to All inputs drop-down list. • In the Inputs section of the page, the custom EDID filename is added to the EDID drop-down lists. HD-WP-4K-401-C: 4K Multi-Window Video Processor • 11 Supplemental Guide – DOC. 7901B... - Page 16 EDID, and HDCP Support entries for the corresponding input. (Clicking Revert goes back to the previous settings without saving the current entries.) • Click Save All to save all unsaved entries. 12 • HD-WP-4K-401-C: 4K Multi-Window Video Processor Supplemental Guide – DOC. 7901B...
-
Page 17: Configuring Inputs On Input-Specific Pages
In the TT-100 Support section of the page, select the TT-100 mode to determine how the HD-WP-4K-401-C is to interpret button presses on the connected Crestron Connect It cable caddies (TT-100 Series): • Quick Selection: (Default setting) Pressing a button on a cable... - Page 18 Disabled. The default setting is HDCP 2.2. 3. In the HID Control section of the page, observe the status of the connection of the Crestron Connect It cable caddy to the USB port on the HD-WP-4K-401-C: • A green icon indicates that a Crestron Connect It cable caddy is detected.
-
Page 19: Configuring Output Settings
Configuring Outputs on the Output Page To configure outputs on the Output page, do the following: 1. In the navigation bar, click Output. The Output page opens. Output Page HD-WP-4K-401-C: 4K Multi-Window Video Processor • 15 Supplemental Guide – DOC. 7901B... - Page 20 • 0% (default setting) • 2.5% • • 7.5% • Custom 16 • HD-WP-4K-401-C: 4K Multi-Window Video Processor Supplemental Guide – DOC. 7901B...
-
Page 21: Configuring Outputs On Output-Specific Pages
To configure HDMI output settings and to view information about the connected display and HDMI output signal, do the following: In the navigation bar, click Output and then click HDMI Output. The HDMI Output page opens. HD-WP-4K-401-C: 4K Multi-Window Video Processor • 17 Supplemental Guide – DOC. 7901B... - Page 22 HDBT output signal, do the following: In the navigation bar, click Output and then click HDBT Output. The HDBT Output page opens. HDBT Output Page Refer to the following sections for HDMI and HDBT output configuration information. 18 • HD-WP-4K-401-C: 4K Multi-Window Video Processor Supplemental Guide – DOC. 7901B...
- Page 23 Select the Yes radio button to turn off the output or the No radio button to prevent the output from turning off. HD-WP-4K-401-C: 4K Multi-Window Video Processor • 19 Supplemental Guide – DOC. 7901B...
- Page 24 None (specifies no terminator), CR (carriage return), LF (line feed), or CR LF (carriage return followed by a line feed). The default setting is CR LF. 20 • HD-WP-4K-401-C: 4K Multi-Window Video Processor Supplemental Guide – DOC. 7901B...
-
Page 25: Configuring Network Settings
HDCP: Specifies the HDCP version (1.4 or 2.2) or inactive Configuring Network Settings To configure network settings, do the following: 1. In the navigation bar, click Network. The Network page opens. Network Page HD-WP-4K-401-C: 4K Multi-Window Video Processor • 21 Supplemental Guide – DOC. 7901B... - Page 26 In the Domain Name text box, enter up to two domain names separated by a comma and a space. • Specify whether the IP address of the HD-WP-4K-401-C is to be assigned by a DHCP (Dynamic Host Configuration Protocol) server. To set the IP address, click either of the following radio buttons:...
-
Page 27: Configuring Device Settings
1. In the Address or Host Name text box, enter the IP address or host name of the control system. 2. In the IP ID text box, enter the IP ID of the HD-WP-4K-401-C. Valid values range from 03 to FE in hexadecimal notation. -
Page 28: Enabling Or Disabling The Front Panel
Enabling or Disabling the Front Panel By default, the front panel state of the HD-WP-4K-401-C is enabled, allowing the OLED display and front panel push buttons (navigation pad, MENU, BACK, and EXIT) to function. In addition, the front panel LEDs are enabled by default. The OLED display, front panel push buttons, and LEDs can be disabled. -
Page 29: Configuring Rs232 Port Settings
5. In the Hardware Flow Control drop-down list, select RTS/CTS or NONE. The default setting is NONE. 6. In the Software Flow Control drop-down list, select NONE or XON/XOFF. The default setting is NONE. HD-WP-4K-401-C: 4K Multi-Window Video Processor • 25 Supplemental Guide – DOC. 7901B... -
Page 30: Updating Firmware
If the Use service port radio button is selected, do the following: 1. Using a USB mass storage device that contains only the firmware file, insert the USB device into the SERVICE port of the HD-WP-4K-401-C. 2. Click the Load button. A prompt appears asking that a USB drive be inserted. -
Page 31: Rebooting The Hd-Wp-4K-401-C
(refer to "Logging In to the HD-WP-4K-401-C" on page 4). If a static IP address has been set, clicking the Restore button reverts the IP address to DHCP mode, which is the default setting (refer to "Configuring Network Settings"... -
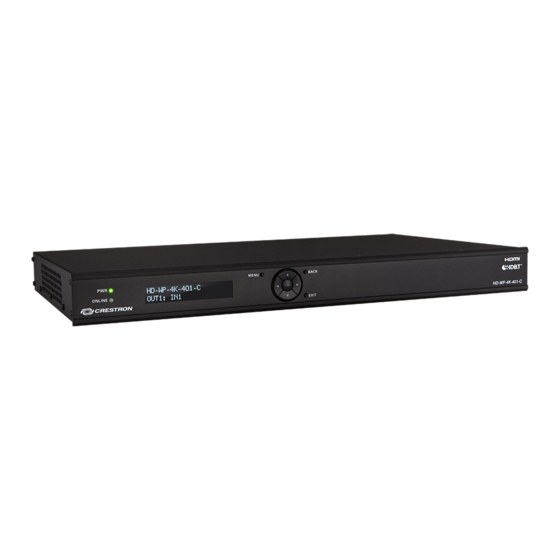
Page 32: Accessing And Navigating The Oled Display Menu
Accessing and Navigating the OLED Display Menu To access and navigate the OLED display menu, use the OLED push buttons and the navigation pad on the front panel of the HD-WP-4K-401-C. OLED Push Buttons and Navigation Pad To access the main menu of the OLED display, press the MENU button. The OLED main menu, which displays two lines at a time, appears as follows. -
Page 33: Configuring Windowing Settings
To configure the video window layout, do the following: 1. In the Windowing submenu, select Layout. Windowing Submenu < Windowing > Layout The Layout submenu opens. Layout Submenu < Layout > Layout Select HD-WP-4K-401-C: 4K Multi-Window Video Processor • 29 Supplemental Guide – DOC. 7901B... - Page 34 In the Layout submenu, select the window, for example, Window 1. Layout Submenu < Layout > Window 1 The Window submenu opens for the selected window, for example, Window 1. 30 • HD-WP-4K-401-C: 4K Multi-Window Video Processor Supplemental Guide – DOC. 7901B...
-
Page 35: Configuring Window Titles
(Applicable only when Window Titles is enabled) Select one of the following options to position window titles: Upper Left (default setting), Center Left, Lower Left, Upper Right, Center Right, Lower Right. An asterisk precedes the current setting. HD-WP-4K-401-C: 4K Multi-Window Video Processor • 31 Supplemental Guide – DOC. 7901B... -
Page 36: Configuring Input Settings
External EDID 1 External EDID 2 External EDID 3 External EDID 4 External EDID 5 External EDID 6 External EDID 7 External EDID 8 Copy Output 1 Copy Output 2 32 • HD-WP-4K-401-C: 4K Multi-Window Video Processor Supplemental Guide – DOC. 7901B... - Page 37 () or right () button, respectively. To save the name, press the Enter button. The message Saving… Complete is displayed. (Continued on following page) HD-WP-4K-401-C: 4K Multi-Window Video Processor • 33 Supplemental Guide – DOC. 7901B...
- Page 38 EDID from the output to all of the inputs. HDCP Assigns the HDCP version or disables HDCP. Select HDCP 2.2, HDCP 1.4, or Disable. The default setting is HDCP 2.2. An asterisk precedes the current setting. 34 • HD-WP-4K-401-C: 4K Multi-Window Video Processor Supplemental Guide – DOC. 7901B...
-
Page 39: Configuring Output Settings
IP Setup (Displayed only if DHCP is set to OFF) DNS Server 1 DNS Server 2 Items on the Network Status and Configuration submenu are listed in the following table. Refer to the table for configuration guidelines. HD-WP-4K-401-C: 4K Multi-Window Video Processor • 35 Supplemental Guide – DOC. 7901B... -
Page 40: Configuring Device Settings
IP Setup (Displayed only if DHCP is set to OFF) Enter the following network-related information: • IP Address: Enter a unique IP address for the HD-WP-4K-401-C. • Subnet Mask: Enter the subnet mask that is set on the network. •... - Page 41 When Restore is selected, a prompt appears asking for confirmation that the default settings be restored. NOTE: Restoring the HD-WP-4K-401-C to factory default settings restores all settings—including the user name and password settings and the network settings—to the factory default settings.
- Page 42 Crestron Electronics, Inc. Supplemental Guide – DOC. 7901B 15 Volvo Drive Rockleigh, NJ 07647 (2047790) Tel: 888.CRESTRON 01.17 Fax: 201.767.7576 Specifications subject to www.crestron.com change without notice.
Need help?
Do you have a question about the HD-WP-4K-401-C and is the answer not in the manual?
Questions and answers