Table of Contents
Advertisement
Available languages
Available languages
Quick Links
AGO
AGO (400-600-424E-624E)
Motoriduttori elettromeccanici
ISTRUZIONI PER L'INSTALLAZIONE
Electromechanical reduction gears
INSTRUCTION FOR INSTALLATION
Motoréducteurs électromécaniques
INSTRUCTIONS POUR L'INSTALLATION
Motoreductor electromecánico
INSTRUCCIONES PARA LA INSTALACIÓN
Elektromechanische motorreductor
INSTRUCTIES VOOR DE INSTALLATIE
I
UK
F
E
NL
Advertisement
Table of Contents

Subscribe to Our Youtube Channel
Related Manuals for GiBiDi AGO 400


Summary of Contents for GiBiDi AGO 400
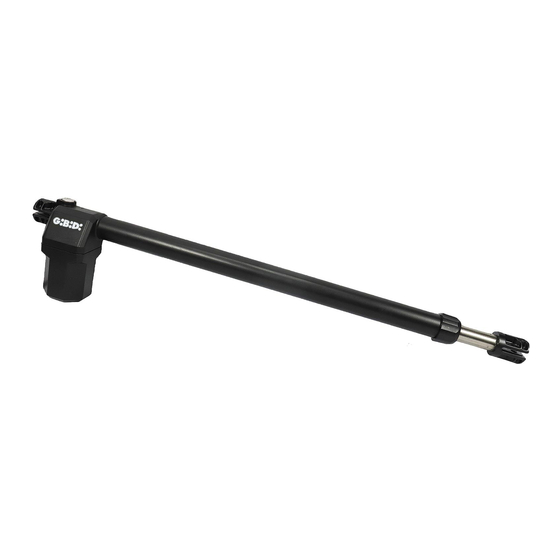
- Page 1 AGO (400-600-424E-624E) Motoriduttori elettromeccanici ISTRUZIONI PER L’INSTALLAZIONE Electromechanical reduction gears INSTRUCTION FOR INSTALLATION Motoréducteurs électromécaniques INSTRUCTIONS POUR L’INSTALLATION Motoreductor electromecánico INSTRUCCIONES PARA LA INSTALACIÓN Elektromechanische motorreductor INSTRUCTIES VOOR DE INSTALLATIE...
-
Page 2: Avvertenze Per L'installazione
PREMESSA Ci congratuliamo con voi per l'ottima scelta affidataci. Il vostro nuovo motoriduttore elettro-meccanico è prodotto seguendo standard di qualità ed affidabilità elevate; questo vi garantirà rendimento e sicurezza nel tempo. Allegato al presente libretto troverete tutte le informazioni utili per il montaggio del vostro motoriduttore, e la tutela della vostra sicurezza. -
Page 3: Norme Di Sicurezza
Azionare il telecomando solo in vista dell'automazione. Tutte le operazioni di comando vanno effettuate solo in punti dove l'automazione risulti completamente visibile. Ogni modifica arbitraria apportata a questo prodotto, solleva il produttore da ogni responsabilità per a danni o lesioni a cose, persone o animali. La non osservanza delle norme di sicurezza qui elencate e delle normative vigenti solleva il produttore da qualsiasi responsabilità... -
Page 4: Verifiche Preliminari
DEMOLIZIONE L'eliminazione dei materiali va fatta rispettando le norme vigenti. È opportuno, se si devono recuperare materiali, separarli per tipologia (rame, alluminio, plastica, parti elettriche ecc). SMANTELLAMENTO Per smantellare l'automazione in altra sede bisogna: 1 - togliere l'alimentazione e scollegare l'impianto elettrico; 2 - smontare il quadro di comando e tutti i componenti dell'istallazione. -
Page 5: Dati Tecnici
DATI TECNICI AGO 400 AGO 600 AGO 424E AGO 624E Lunghezza max anta 4,0 m 5,0 m 4,0 m 5,0 m Peso max anta 300 kg 300 kg 250 kg 250 kg Corsa pistone 40 cm 60 cm 40 cm... -
Page 6: Installazione
MANOVRA DI EMERGENZA Per il blocco e lo sblocco manuale delle ante agire con la chiave in dotazione sulla vite C (Vedi FIG. 1). 1 - Rimuovere il tappo di protezione e inserire la chiave in dotazione nella sede come in figura. 2 - Ruotare la chiave nel senso indicato sulla freccia posta nella parte superiore del motoriduttore per sbloccare ed in senso opposto per bloccare. - Page 7 Per una corretta messa in opera del motoriduttore AGO, agire come segue: 1 - Aprire l'imballo ed estrarre il motoriduttore AGO, avendo cura di verificare che lo stesso non abbia subito danni durante il trasporto. 2 - Assicurarsi che l'anta del cancello sia perfettamente orizzontale. 3 - Posizionare il riduttore di modo da essere inclinato di 1º...
- Page 8 Posizionare i fermi meccanici di finecorsa. 11 - Posizionare il tappo di copertura sul perno di sblocco (FIG. 6). TAB. 1 MOTORE ROTAZIONE 95° ROTAZIONE 120° AGO 400/424E 1122 1122 AGO 600/624E 1532 1532 COLLEGAMENTI - AGO 24 VDC...
- Page 9 S.r.l. Via Abetone Brennero, 177/B, 46025 Poggio Rusco (MN) ITALY dichiara che i prodotti: OPERATORI ELETTROMECCANICI AGO 400-600-424E-624E sono conformi alle seguenti Direttive CEE: • Direttiva LVD 2006/95/CE e successive modifiche; • Direttiva EMC 2004/108/CE e successive modifiche; e che sono state applicate le seguenti norme armonizzate: •...
-
Page 10: Installation Warnings
INTRODUCTION Our compliments for your excellent choice. AGO electro-mechanical gear motor has been produced for reliability and high quality. This Manual will offer information you may need to install your gear motor assuring long-lasting performance and to safeguard your safety. HOWEVER, CAUTION IS UNQUESTIONABLY INDISPENSABLE AND NOTHING IS BETTER THAN PREVENTING ACCIDENTS. -
Page 11: Safety Rules
Operate the remote only in view of automation. All activation actions must be executed only at points from where the automation is fully visible. Any unauthorized and arbitrary modification made to this product releases the company Gi.Bi.Di. Srl from any liability resulting from damage or injury to things, people or animals. -
Page 12: Preliminary Checks
DEMOLITION You have to operate the elimination of the materials in conformity with the regulations in force. All materials must be divided by type (copper, aluminium, plastic, electrical parts, etc.). DISMANTLING In order to move away the automation, follow these instructions: 1 - Cut off the power supply and disconnect the electrical installation;... -
Page 13: Technical Data
TECHNICAL DATA AGO 400 AGO 600 AGO 424E AGO 624E Maximum length of the gate 4.0 m 5.0 m 4.0 m 5.0 m Maximum weight of the gate 300 kg 300 kg 250 kg 250 kg Stroke 40 cm 60 cm... -
Page 14: Installation
EMERGENCY MANOEUVRE For the manual door locking and unlocking act with the supplied key on the screw C (See PIC. 1). 1 - Remove the protection cap 2 - Insert the key into the seat allocation as in FIG.1 and turn the key in the sense of the arrow to the top of the gearmotor to unlock and in the opposite block. - Page 15 To operate a good installation of the gear motors AGO, follow these instructions: 1 - Open the box and take out gear motor. Make sure that it has not been damaged during the transport. 2 - Make sure that the leaf of the gate is perfectly horizontal. 3 - Place the gear motor tilted approximately 1º...
- Page 16 10 - Connect the electrical wires and safety devices: place the mechanical limit stops. 11 - Place the cover on the unblocking screw (FIG. 6). TAB. 1 MOTOR ROTATION 95° ROTATION 120° AGO 400/424E 1122 1122 AGO 600/624E 1532 1532 AGO 24 VDC CONNECTIONS...
- Page 17 S.r.l. Via Abetone Brennero, 177/B, 46025 Poggio Rusco (MN) ITALY declares that the products: ELECTROMECHANICAL GEARMOTOR AGO 400-600-424E-624E are in conformity with the following CEE Directives: • LVD Directive 2006/95/CE and subsequent amendments; • EMC Directive 2004/108/CE and subsequent amendments and that the following harmonised standards have been applied: •...
-
Page 18: Recommandations Pour L'installation
PRÉSENTATION Compliments pour le choix ; le moteur électro mécanique que vous venez d'acheter est un produit de très haute qualité et performance. Ça vous garantira un rendement et une sécurité dans le temps. Ci-joint vous trouverez toutes informations nécessaires pour l'installation du motoréducteur et information sur la sauvegarde de vôtre sécurité. -
Page 19: Normes De Sécurité
Actionner le télécommande seulement en vue de l'automatisme. Toutes opérations de commande doivent être faites seulement dans endroits où l'action d'automation est parfaitement visible. N'importe quelle modification arbitraire apportée à ce produit, rende automatiquement la société Gi.Bi.Di. Srl pas responsable des conséquences causées par cette modification (dommages à personnes, choses, animaux. La non observation des normes de sécurité... -
Page 20: Contrôle Préliminaire
DEMOLITION Les matériaux doivent être éliminés selon les normes en vigueur. En cas de récupération des matériaux, il conviendrait de les séparer par type (cuivre, aluminium, plastique, pièces électriques etc.). DEMONTAGE Pour déplacer l'automatisme il faut: 1 - couper l'alimentation et débrancher l'installation électrique; 2 - démonter le tableau de commande et tous les composants de l'installation. -
Page 21: Caractéristiques Techniques
CARACTÉRISTIQUES TECHNIQUES AGO 400 AGO 600 AGO 424E AGO 624E Longueur max du portail 4,0 m 5,0 m 4,0 m 5,0 m Poids max. du portail 300 kg 300 kg 250 kg 250 kg Course du piston 40 cm 60 cm... - Page 22 MANOEUVRE D’EMERGENCE Pour le blocage et le déblocage manuel des volets, agir avec la clé en dotation sur les vis C (voir FIG. 1). 1 - Enlever le bouchon de protection et insérer la clé en dotation dans le siège comme en figure. 2 - Tourner la clé...
- Page 23 Pour une installation correcte d'un motoréducteur AGO, suivre les indications suivantes: 1 - Ouvrir l'emballage et extraire le motoréducteur, en vérifiant qu'il n'ait pas eu de dommages pendant le transport. 2 - S'assurer que le vantail de la grille soit parfaitement horizontal. 3 - Positionner le motoréducteur et s'assurer qu'il soit incliné...
- Page 24 Positionner les arrêts mécaniques du fin de course. 11 - Mettre le bouchon de couverture du déblocage manuel. (FIG. 6). TAB. 1 MOTEUR ROTATION 95° ROTATION 120° AGO 400/424E 1122 1122 AGO 600/624E 1532 1532 CONNEXIONS - AGO 24 VDC CÂBLE MARRON...
- Page 25 S.r.l. Via Abetone Brennero, 177/B, 46025 Poggio Rusco (MN) ITALY déclare que les produits: MOTORÉDUCTEUR ÉLECTROMÉCANIQUE AGO 400-600-424E-624E ont en conformité avec les exigences des Directives CEE: • Directive LVD 2006/95/CE et ses modifications; • Directive EMC 2004/108/CE et ses modifications et que les normes harmonisées suivantes ont été...
-
Page 26: Advertencias Para La Instalación
PRESENTACIÓN Le felicitamos por la óptima elección efectuada. Nuestro nuevo motorreductor electromecánico, de elevada calidad y fiabilidad, garantizará un óptimo rendimiento y seguridad a lo largo del tiempo. Junto con el presente manual encontrará todas las informaciones útiles para el montaje de su motorreductor y la tutela de su seguridad. -
Page 27: Normas De Seguridad
Accionar el control remoto sólo cuando el dispositivo de automatización esté a la vista. Todas las operaciones de mando se deben realizar sólo en los puntos desde donde el dispositivo de automatización quede completamente visible. Cualquier modificación arbitraria realizada en este producto exime a la empresa Gi.Bi.Di. Srl de toda responsabilidad por daños o lesiones a personas, animales o cosas. -
Page 28: Controles Preliminares
DESGUACE Los materiales tienen que ser eliminados respetando las normas vigentes. En el caso de recuperar los materiales, es oportuno separarlos por tipo (latón, aluminio, plástico, piezas eléctricas, etc.). DESMONTAJE Para desplazar la automatización a otro lugar, hay que: 1 - cortar la alimentación y desconectar la instalación eléctrica; 2 - desmontar el cuadro de mandos y todos los componentes de la instalación. -
Page 29: Datos Tecnicos
DATOS TECNICOS AGO 400 AGO 600 AGO 424E AGO 624E Longitud máxima de la verja 4,0 m 5,0 m 4,0 m 5,0 m Peso máximo verja 300 kg 300 kg 250 kg 250 kg Carrera pistón 40 cm 60 cm... -
Page 30: Instalación
MANIOBRAS DE EMERGENCIA Para el bloqueo y desbloqueo manual de las verjas, actuar con la clave suministrada en el tornillo C (ver FIG. 1). 1 - Quitar la tapa de protección y insertar la llave en la asignación de asientos como en la figura. 2 - Girar la llave en el sentido de la flecha de la parte superior del Motoreductor para desbloquear y en el sentido contrario para bloquear. - Page 31 Para poner en obra en modo correcto el motoreductor AGO, hacer como sigue: 1 - Abrir la caja y sacar el motorreductor, chequeando que el mismo no haya sufrido daños durante el transporte. 2 - Asegurarse que la hoja de la verja sea perfectamente horizontal. 3 - Colocar el motorreductor de tal manera que esté...
- Page 32 10 - Conectar los cables y los dispositivos de seguridad. Posicionar los finales de carrera mecánicos. 11 - Colocar la tapa sobre el tornillo de desbloqueo (FIG. 6). TAB. 1 MOTOR ROTACIÓN 95° ROTACIÓN 120° AGO 400/424E 1122 1122 AGO 600/624E 1532 1532 CONEXIONES - AGO 24 VDC CABLE MAR N Ó...
- Page 33 GI.BI.DI. S.r.l. Via Abetone Brennero, 177/B, 46025 Poggio Rusco (MN) ITALY declara que el producto: MOTORREDUCTOR ELECTROMECÁNICO AGO 400-600-424E-624E cumple las siguientes Directivas CEE: • Directiva LVD 2006/95/CE y modificaciones sucesivas; • Directiva EMC 2004/108/CE y modificaciones sucesivas y que se han aplicado la siguientes normas armonizadas: •...
- Page 34 VOORSTELLING We danken u voor uw keuze. Deze nieuwe elektro-mechanische reductiemotor is vervaardigd volgens hoge betrouwbaarheids- en kwaliteitsnormen en garandeert een langdurig rendement en veiligheid. Samen met deze handleiding ontvangt u alle informatie voor de installatie van de reductiemotor en de bescherming van uw veiligheid.
- Page 35 Activeer de afstandsbediening pas als u het hek kunt zien. Geef de commando's slechts op de punten waar het systeem duidelijk zichtbaar is. De firma Gi.Bi.Di. Srl acht zich niet aansprakelijk voor schade of letsel aan eigendommen, personen of dieren als het product wordt gewijzigd.
- Page 36 AFBRAAK Elimineer het materiaal in overeenstemming met de van kracht zijnde normen. Scheid de materialen voor de recycling op soort (koper, aluminium, kunststof, elektrische onderdelen, enz.). ONTMANTELEN Om de automatisering op een andere plaats te laten ontmantelen moet u: 1 - de spanning verwijderen en de elektrische installatie loshalen; 2 - het bedieningspaneel en alle componenten demonteren.
-
Page 37: Technische Gegevens
TECHNISCHE GEGEVENS AGO 400 AGO 600 AGO 424E AGO 624E Max. lengte hekdeel 4,0 m 5,0 m 4,0 m 5,0 m Max. gewicht hekdeel 300 kg 300 kg 250 kg 250 kg Nuttige slag 40 cm 60 cm 40 cm... - Page 38 NOODMANOEUVRES Draai voor het handmatig ont- en vergrendelen van het hekdeel met de meegeleverde sleutel aan schroef C (Zie AFB. 1). 1 - Verwijder de beschermdop en breng de meegeleverde sleutel aan, zie de afbeelding. 2 - Draai de sleutel in de richting van de pijl bovenop de reductiemotor om deze te deblokkeren, draai in tegenovergestelde richting om deze te blokkeren.
- Page 39 Pas de volgende procedure toe voor een correcte inbedrijfstelling van de reductiemotor AGO: 1 - Open de verpakking en haal er de reductiemotor AGO uit. Controleer of deze tijdens het transport geen schade heeft opgelopen. 2 - Controleer of het hekdeel perfect horizontaal is geplaatst. 3 - Plaats de reductiemotor met een hoek van ongeveer 1°...
- Page 40 10 - Verricht de elektrische aansluitingen en monteer de veiligheidsinrichtingen. Plaats de mechanische pallen. 11 - Breng de dop aan op de ontgrendelpen (AFB. 6). TAB. 1 MOTOR ROTATIE 95° ROTATIE 120° AGO 400/424E 1122 1122 AGO 600/624E 1532 1532 AANSLUITINGEN - AGO 24 VDC...
- Page 41 VERWERKING GI.BI.DI. adviseert om de kunstof componenten te recycleren en de elektronische componenten af te voeren naar erkende inzamelpunten, om te voorkomen dat het milieu verontreinigd wordt door vervuilende stoffen. CE-Conformiteitsverklaring De fabrikant: GI.BI.DI. S.r.l. Via Abetone Brennero, 177/B, 46025 Poggio Rusco (MN) ITALY verklaart dat de producten: ELEKTROMECHANISCHE LINEAIRE OPERATOR 400-600-424E-624E conform de volgende CEE-richtlijnen...
- Page 42 NOTE / NOTES...
- Page 43 NOTE / NOTES...
- Page 44 GI.BI.DI. S.r.l. Via Abetone Brennero, 177/B 46025 Poggio Rusco (MN) - ITALY Tel. +39.0386.52.20.11 Fax +39.0386.52.20.31 E-mail: info@gibidi.com Numero Verde: 800.290156 w w w . g i b i d i . c o m...
Need help?
Do you have a question about the AGO 400 and is the answer not in the manual?
Questions and answers