Table of Contents
Advertisement
Quick Links
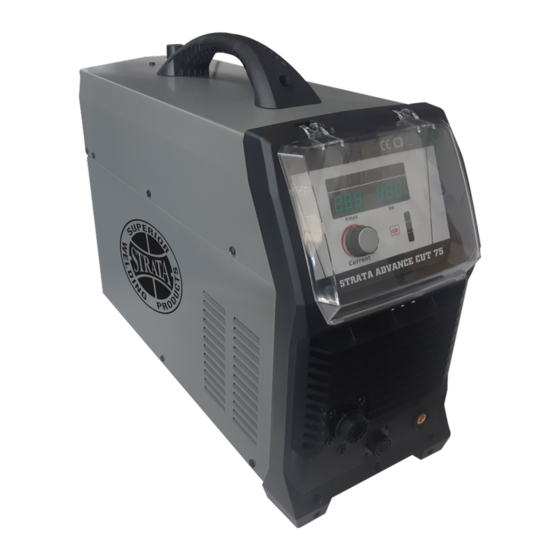
ADVANCECUT 75
PLASMA CUTTER
OPERATING INSTRUCTIONS
IMPORTANT!
To qualify for full 36 month warranty, you must register within 30 days of purchase. See inside for details.
Read these Operating Instructions Completely before attempting to use this machine. Save this manual and keep
it handy for quick reference. Pay particular attention to the safety instructions we have provided for your
protection. Contact your distributor if you do not fully understand anything in this manual.
DIRECT
SPIKE/
400V 50HZ
PILOT
CNC
INTELLIGENT
CORROSION
IGBT INVERTER
CURRENT
GENERATOR
CUTTING
PROTECTION
RESISTANT
3 PHASE
ARC START
TECHNOLOGY
SAFE
SYSTEM
www.strata.co.nz
Advertisement
Table of Contents
Troubleshooting

Subscribe to Our Youtube Channel
Related Manuals for Strata ADVANCECUT 75


Summary of Contents for Strata ADVANCECUT 75
- Page 1 ADVANCECUT 75 PLASMA CUTTER OPERATING INSTRUCTIONS IMPORTANT! To qualify for full 36 month warranty, you must register within 30 days of purchase. See inside for details. Read these Operating Instructions Completely before attempting to use this machine. Save this manual and keep it handy for quick reference.
-
Page 2: Table Of Contents
ADVANCECUT 75 CONTENT 1 Overview ..................5 1.1 Features ........................10 1.2 Technical Data ......................10 1.3 Working Principle ....................... 11 1.4 Duty cycle and Over-heat ................... 11 1.5 Volt-Ampere Characteristic ..................12 2 Installation & Operation ............13 2.1 Layout for the front and rear panel ................. 13 2.2 Installation &... - Page 3 ADVANCECUT 75 Congratulations on the purchase of your new Stata Welding Product! The Strata range of Welding Products from Euroquip utilises the latest design technology and is engineered to produce welding products that combine market leading value, features and durability.
- Page 4 65A @ 90% 400V AC 20A Steel 25mm 295L/min 640 x 240 x 445mm 24kg 12.5KVA 20-65A Steel 35mm EN60974-1:2012 61A @100% 50/60Hz 3ph Alum. 20mm 6 Bar * 36 Month Warranty only with online registration of product - www.strata.co.nz www.strata.co.nz...
-
Page 5: Overview
• Euro connect torch system with safe & robust connection to machine. • Advanced strata plasma torch with european torch head for superior cutting performance and consumable life. • Non HF arc starting system for increased reliability and low EMF pollution. -
Page 6: Working Principle
ADVANCECUT 75 The max. cutting thickness to Carbon ≤ 30 steel(mm) Carbon steel ≤ 20 Optimal cutting Stainless steel ≤ 20 thickness (mm) ≤ 16 Aluminum Cuprum ≤ 14 640 x 240 x 445mm Dimensions(mm) i t c i t a Net weight (kg))... -
Page 7: Volt-Ampere Characteristic
ADVANCECUT 75 The relation between the duty cycle “X” and the output cutting current “I” is shown as Relation of cutting current and duty cycle for the right figure. ADVANCECUT75 If the plasma cutter is overheating, the IGBT over-heat protection sensing will send... -
Page 8: Installation & Operation
ADVANCECUT 75 2 Installation & Operation 2.1 Layout for the front and rear panel Front View (1) Cutting Current Control Knob. (2) Power Indicator: Lights when input power connected and machine switched on. (3) Alarm Indicator. * (4) Torch System Error Indicator. * (5) Cutting Power Indicator: Lights when cutting power circuit activated . - Page 9 ADVANCECUT 75 Torch System Error Indicator Lights when issue with torch system or air supply detected and cutting output is disabled as a result. Flashing light means that torch shield cap is not installed. Continuous light means likely damaged or missing torch consumables or insufficient air pressure supply to the torch.
-
Page 10: Installation & Operation
It is also very important to only use genuine Strata consumables and parts for the TH-125 torch. They are engineered to suit the machine and non-genuine items may cause lack of performance, short life span, torch and machine damage and void warranty. - Page 11 ADVANCECUT 75 voltage protection inside the welder, the alarm light will on, at the same time, the current output will be cut off. If the power supply voltage continually goes beyond the safe work voltage range, it will shorten the welder life-span.
- Page 12 ADVANCECUT 75 5) Select the output current using the current control knob. You are now ready to plasma cut! Cutting Operation After turning the Power Switch to the ON position and making control and air pressure adjustments, proceed as follows: 1) Hold the tip of the Torch within 3-4mm the work piece, at about 15- 30°...
- Page 13 ADVANCECUT 75 Note: • The alarm lamp on when cutting, it is needed to loose the switch of the torch until the alarm release, then press on the switch to start cutting again. • In the automatic gas test and examine, press on the cutting torch, there will no reflection.
- Page 14 ADVANCECUT 75 2. Remove the machine interface receptacle’s cover from the rear of the power supply. 3. Connect the machine interface cable to the power supply. Arc Signal Torch Switch Signal Pilot Arc Signal Refer to the following table when connecting the CUT system to a torch height controller or CNC controller with a machine interface cable.
-
Page 15: Plasma Cutting Guide
ADVANCECUT 75 2. Remove the power supply cover. 3. Locate the voltage divider DIP switches on the left side of the power supply. Note: the table below for the shift and scale selection scale selection 20:1 30:1 40:1 50:1 dial number 2.3 Plasma Cutting Guide... -
Page 16: Operating Techniques
ADVANCECUT 75 NOTE: Keep moving while cutting. Cut at a steady speed without pausing. Maintain the cutting speed so that the arc lag is 10° to 20° behind the travel direction. Use a 5° - 15° leading angle in the direction of the cut. - Page 17 ADVANCECUT 75 Note: The speeds given here are typical for best quality cuts. Your actual speeds may vary depending on material composition, surface condition, operator technique, etc. If cutting speed is too fast, you may lose the cut. With slower speeds excessive dross may accumulate. If speed is too slow, the arc may extinguish.
-
Page 18: Troubleshooting
ADVANCECUT 75 it off using pliers or chipping off with a chisel or scraping or grinding the finished cut as needed and is generally only a minor inconvenience. A combination of factors contributes to the build-up of dross. They include; material type, material thickness, amperage used for the cut, speed of the torch across the work-piece, condition of the torch tip, input line voltage, air pressure, etc. -
Page 19: Operation Environment
ADVANCECUT 75 1. Tool/material building up heat 1. Allow material to cool then continue cut. Dross build-up on 2. Cutting speed too slow or current too 2. Increase speed and/or reduce current until parts of cuts high dross is reduced to minimum 3. -
Page 20: Operation Notices
ADVANCECUT 75 2.6 Operation Notices ▲ Read this manual carefully before starting to use this equipment. ▲ Connect the ground wire with the machine directly. ▲ Ensure that the input is three-phase: 50/60Hz, 380V ±10%. ▲ Before operation, none concerned people should not be around the working area and especially children. -
Page 21: Maintenance & Troubleshooting
ADVANCECUT 75 3 Maintenance & Troubleshooting 3.1 Cutting gun maintenance Warning : 1. Check the consumable parts for damage, if worn, replace it. 2. Turn off the power source before check or remove cutting gun parts Note: When operating the torch in a normal condition, a small amount of gas vents through the gap between the shield cup and the torch handle, Do not attempt to over tighten the shield cup as irreparable damage to internal components may result. - Page 22 ADVANCECUT 75 A. Power lamp and temperature lamp on. Air flow blocked, check for blocked air flow around the unit and correct condition. Fan blocked, check and correct condition. Unit is overheated, let unit cool down for at least 5 minutes. Make sure the unit has not been operated beyond Duty Cycle limit, refer to technology parameters in Section 2.
- Page 23 ADVANCECUT 75 E. Difficult Starting Worn torch parts (consumables), shut off input power. Remove and inspect torch shield cup, tip and electrode. Replace electrode or tip if worn; replace shield cup if excessive spatter adheres to it. F. Arc shuts off during operation; arc will not restart when torch switch is activated.
-
Page 24: Electrical Schematic Drawing
ADVANCECUT 75 3.3 Electrical schematic drawing www.strata.co.nz... -
Page 25: Safety
ADVANCECUT 75 4 Safety Welding and cutting equipment can be dangerous to both the operator and people in or near the surrounding working area, if the equipment is not correctly operated. Equipment must only be used under the strict and comprehensive observance of all relevant safety regulations. Read and understand this instruction manual carefully before the installation and operation of this equipment. - Page 26 ADVANCECUT 75 ELECTRIC SHOCK CAN KILL. Touching live electrical parts can cause fatal shocks or severe burns. The electrode and work circuit is electrically live whenever the output is on. The input power circuit and internal machine circuits are also live when power is on. In Mig/Mag welding, the wire, drive rollers, wire feed housing, and all metal parts touching the welding wire are electrically live.
- Page 27 ADVANCECUT 75 FUMES AND GASES CAN BE DANGEROUS. Smoke and gas generated whilst welding or cutting can be harmful to people’s health. Welding produces fumes and gases. Breathing these fumes and gases can be hazardous to your health. • Do not breathe the smoke and gas generated whilst welding or cutting, keep your head out of the fumes.
- Page 28 ADVANCECUT 75 watch the arc nor expose themselves to the arc rays or to hot spatter or metal. SELF-PROTECTION • Keep all equipment safety guards, covers and devices in position and in good repair. Keep hands, hair, clothing and tools away from V-belts, gears, fans and all other moving parts when starting, operating or repairing equipment.
- Page 29 ADVANCECUT 75 insure that such procedures will not cause flammable or toxic vapors from substances inside. They can cause an explosion even though they have been “cleaned”. • Vent hollow castings or containers before heating, cutting or welding. They may explode.
- Page 30 ADVANCECUT 75 Gas Cylinders. Shielding gas cylinders contain gas under high pressure. If damaged, a cylinder can explode. Because gas cylinders are normally part of the welding process, be sure to treat them carefully. CYLINDERS can explode if damaged. •...
-
Page 31: Emc Device Classification
ADVANCECUT 75 • Route the electrode and work cables together – Secure them with tape when possible. • All cables should be put away and far from the operator. • Never coil the power cable around your body. • Make sure welding machine and power cable to be far away from the operator as far as possible according to the actual circumstance. -
Page 32: Emc Measure
ADVANCECUT 75 EMC device can be classified by power nameplate or technical data. hanker welding machines belong to Class A. 4.4 EMC measure In the special situation, The specified area may be affected, the standard of radiation limit value has been complied with (eg: The device, which is easy effected by electromagnetism, is used at the installation location, or there is radio or TV near the installation location). -
Page 33: Warning Label
ADVANCECUT 75 4.5 Warning label The device with a warning label. Do not remove, destroy or cover this label. These warnings are intended to avoid incorrect device operations that could result in serious personal injury or property damage. www.strata.co.nz... -
Page 34: Warranty
Registered warranty period for the ADVANCECUT 75: The decision that an issue with a product qualifies as a Commercial Use: 36 Months warranty claim is made at the sole jurisdiction of Euroquip. - Page 35 ADVANCECUT 75 www.strata.co.nz...
- Page 36 Congratulations on your new STRATA product. We are proud to have you as our customer and will strive to provide you with the best service and reliability in the industry. This product is backed by our extensive warranty. To locate your nearest distributor or service agency visit www.strata.co.nz, or email us at...
Need help?
Do you have a question about the ADVANCECUT 75 and is the answer not in the manual?
Questions and answers