Table of Contents
Advertisement
Quick Links
Advertisement
Table of Contents

Subscribe to Our Youtube Channel
Related Manuals for PCE Health and Fitness PCE-RT 2300


Summary of Contents for PCE Health and Fitness PCE-RT 2300
- Page 1 User Manual PCE-RT 2300 Roughness Tester User manuals in various languages (français, italiano, español, português, nederlands, türk, polski, русский, 中文) can be found by using our product search on: www.pce-instruments.com Last change: 1 December 2020 v1.1 © PCE Instruments...
-
Page 2: Table Of Contents
Contents Safety notes ................... 1 Delivery contents .................. 1 Specifications ..................2 Measurement ranges by parameter .................. 2 Measuring principle ................3 Device description ................3 Display description ......................4 Key description......................... 4 Hidden buttons on the touch screen ................. 4 Recharging the battery ..................... - Page 3 Accessories ........................23 General information about the sensor ..........23 General information about the meter ..........23 10 General information about the reference ......... 23 11 Troubleshooting .................. 24 12 Chart for recommended “cut-offs“ ........... 24 13 Warranty ....................25 14 Disposal ....................25 ©...
-
Page 5: Safety Notes
If you have any questions please contact PCE Instruments. The contact details can be found at the end of this manual. Delivery contents 1 x Roughness tester PCE-RT 2300 1 x Microprobe 1 x Removable motorized sensor 2 x Connection cable for motor unit... -
Page 6: Specifications
Specifications 320 μm Measuring range Accuracy ± 10% Repeatability ± 7% ± 20 μm: 0.01 μm Resolution ± 40 μm: 0.02 μm ± 80 μm: 0.04 μm Measurement Ra, Rz, Rq, Rt, Rc, Rp, Rv, R3z, R3y, Rz (JIS), Ry, Rs, Rsk, Rku, Parameters Rmax, Rsm, Rmr, RPc, Rk, Rpk, Rvk, Mr1, Mr2 Measurement... -
Page 7: Measuring Principle
Measuring principle If you wish to measure the roughness of the surface, place the meter on the surface to be measured. The meter will move the sensor over the surface to capture its structure. Through displacement measuring needle, an induction coil in the sensor will be changed. -
Page 8: Display Description
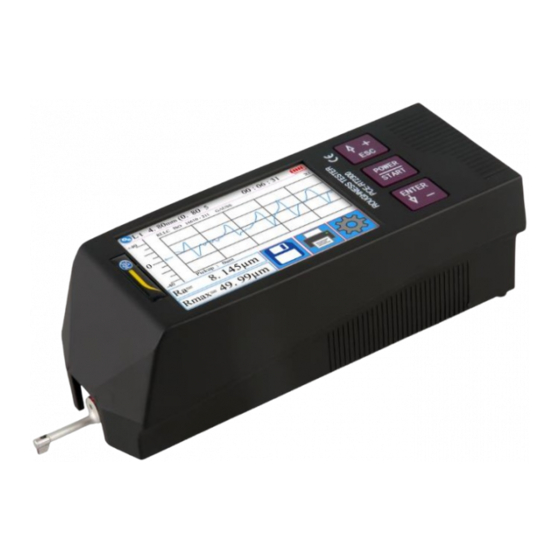
Display description Bluetooth active Length assessment Filter Activity time Start measurement Sensor position Status information Sensor position range 1st reading (Master) 10. 2nd reading (Slave) 11. Battery level indicator 12. Profile scale 13. Profile display area 14. Menu key 15. Save button 16. -
Page 9: Recharging The Battery
Recharging the battery As soon as the display shows a flat battery icon, the battery is discharged and should be recharged as soon as possible. To charge the meter, you can use the included charger or you can charge it directly via your computer. If you want to use a different charger, it should fulfil the following specifications: Output: 5 V / 1000 mA After connecting the charger, a charging animation will be displayed. -
Page 10: Connecting The Drive Unit To The Main Device
Fig. 1: Handling the sensor Fig. 2: Sensor dimensions in mm Connecting the drive unit to the main device Insert the drive unit into the main device according to the picture until it is attached firmly onto the pin on the inside. Now push down the drive unit so that it can snap into place. -
Page 11: Removing The Drive Unit From The Main Device
Removing the drive unit from the main device To remove the drive unit from the main device, first unsnap the drive unit. Then lift the tip of the drive unit. Pull out the drive unit. Using the extension cable When the drive unit is not connected to the display, use the included extension cable as shown in the picture. -
Page 12: Measurement
Measurement On/off To power the meter on/off, press and hold the On/off key for two seconds. The meter will go directly to measurement on when turned on. Preparing the meter Turn on the meter and check whether the battery voltage is sufficient. Then clean the surface of your sample. -
Page 13: Readings
Readings To access all measuring functions involving a conversion, touch the part where the readings are displayed (1). To zoom into the graphics, touch the graphics part (2) on the touch screen. 4 different zoom levels are possible: 1x, 2x, 4x and 8x. You can start the measurement via the scale (3). -
Page 14: Menu
Menu To enter the menu, press the button on the touch screen. You can leave the menu by pressing “ESC“ or ”Return HomePage“. Fig. 5: Main menu System The menu item “System“ has two pages. You can switch between them by pressing “System Setting X/2“... - Page 15 Fig. 7: System setting page 2 7.1.1 Display Master/Slave Under “Master Display“ and “Slave Display“, you can select the measuring unit you wish to see on the measuring display. Via “Master Display“, you can set the first tab and “Slave Display“ is used to set the second tab.
- Page 16 7.1.3 Automatic Power Off If this function is activated, the meter will turn off automatically after 10 minutes of inactivity. If this function is disabled, the meter will operate continuously. 7.1.4 Bluetooth mode There are two Bluetooth functions which can be set via the menu ”Bluetooth Mode“. If you want to connect a printer to the meter, the “Print“...
- Page 17 7.1.8 Setting date and time To set the date and time, go to “Date & Time“ in the menu. To be able to set the date and time, the current time must first be stopped by touching ”STOP“. Now use the plus and minus buttons on the touch screen to set the date and time.
- Page 18 7.1.10 Reset to default To reset all settings to their default settings, go to the menu “ResetToDefault“ and confirm via the green checkmark. Fig. 12: Reset of settings 7.1.11 Deleting all measured data To delete all saved measuring data, go to the menu “Format Memory“. The memory will be formatted as soon as you confirm via the green checkmark.
-
Page 19: Setting The Measuring Parameters
Setting the measuring parameters To set the measuring parameters, go to the menu “Condition“ and set all measuring parameters. Fig. 13: Setting the measuring parameters Cut-off length λc 0.25 mm; 0.80 mm; 2.50 mm No. of measurements per 1 … 5 measuring process Range ±20 µm;... -
Page 20: Device Information
Device information To view the device information, go to the menu “About Version“ where you can find some information on the battery and the software version. Touch the touch screen to leave this view. Calibration and adjustment Before making a measurement, a calibration should be carried out with the included reference to make sure the meter works within the specified parameters. -
Page 21: Printer Settings
Printer settings To make some printer settings, go to the menu “PrintCond.“ where you can decide what information you want your printer to include in the printout. “Surface Roughness Tester“ is displayed in the head line. The wording Logo cannot be changed. Date Date and time will be included on the printout. - Page 22 Fig. 18: Example printout © PCE Instruments...
-
Page 23: Connection To A Pc
Connection to a PC The software does not come with the meter but can be downloaded here: https://www.pce-instruments.com/deutsch/download-win_4.htm To connect the meter to the PC, first install the software and the driver. Now make the following settings in the meter: BPS: 921.6 Bluetooth: Print Bluetooth off... - Page 24 Communication with Windows PC; Currently, are unable to communicate with the MS Windows DataView software via Bluetooth. You should use a cable (which include in the 2300 kits) and this require PC software and install driver. On the 2300 system settings make sure that )...
- Page 25 Manage Manage data records Operate Connect meter, start measurement, show sensor position Tool Show/hide toolbar icon Configure Configure meter Analysis Export all data from the database in the software as a csv file Curve Set graphical views Help Show all information about the software Open raw data Save raw data Save raw data in txt format...
- Page 26 Transfer the measuring data saved in the meter to the PC Disconnect meter from the PC Reset display of the meter Fig. 20: Example test report © PCE Instruments...
-
Page 27: Accessories
General information about the meter Keep the touch screen clean. Only clean it with a dry cloth. The PCE-RT 2300 is a highly accurate meter and must be treated with special care. Always make sure the battery is sufficiently charged. -
Page 28: Troubleshooting
Troubleshooting Error message Reason Solution After starting the meter, Cables connected Disconnect connect nothing displayed correctly or damaged cables again replace approx. 1 minute. cables. The motor unit does not show any reaction. Touch screen does not work Touch screen parameters Refer to 7.1.6 in the manual. -
Page 29: Warranty
Warranty You can read our warranty terms in our General Business Terms which you can find here: https://www.pce-instruments.com/english/terms. Disposal For the disposal of batteries in the EU, the 2006/66/EC directive of the European Parliament applies. Due to the contained pollutants, batteries must not be disposed of as household waste. They must be given to collection points designed for that purpose. - Page 30 PCE Instruments contact information Germany France Spain PCE Deutschland GmbH PCE Instruments France EURL PCE Ibérica S.L. Im Langel 4 23, rue de Strasbourg Calle Mayor, 53 D-59872 Meschede 67250 Soultz-Sous-Forets 02500 Tobarra (Albacete) Deutschland France España Tel.: +49 (0) 2903 976 99 0 Téléphone: +33 (0) 972 3537 17 Tel.
Need help?
Do you have a question about the PCE-RT 2300 and is the answer not in the manual?
Questions and answers