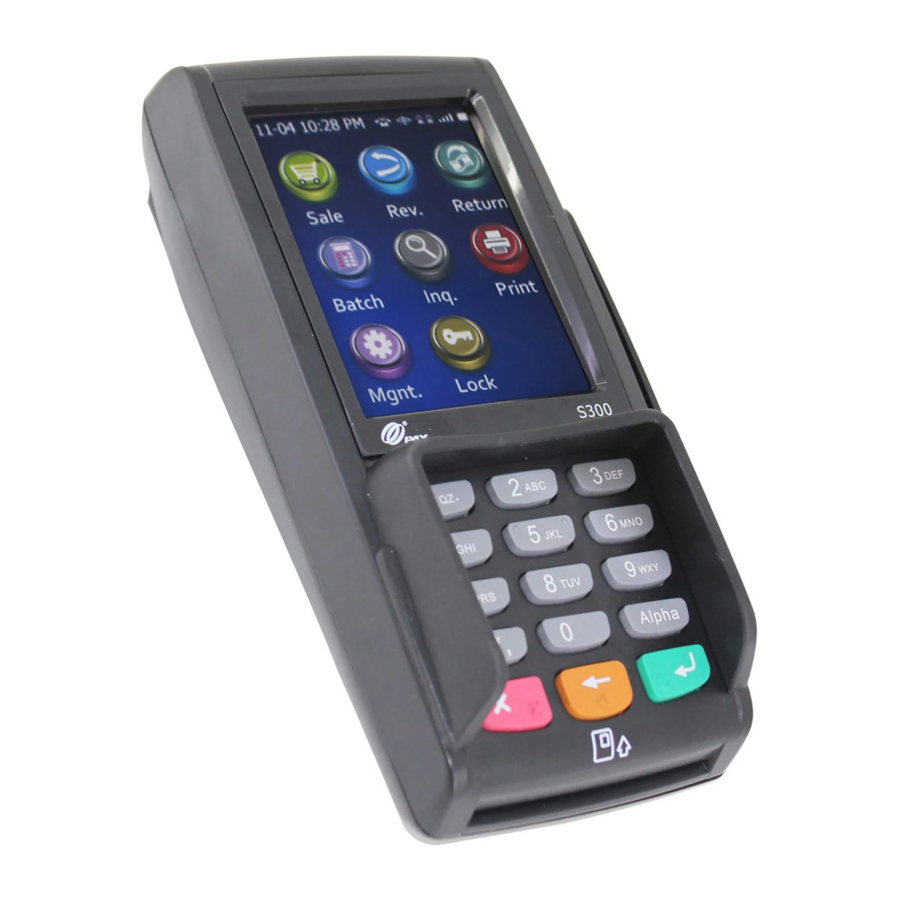
PAX S300 Quick Reference Manual
Integrated mode
Hide thumbs
Also See for S300:
- User manual (194 pages) ,
- Manual (78 pages) ,
- Quick reference manual (4 pages)
Table of Contents
Advertisement
Quick Links
S300
MENU LAYOUT AND KEY USAGE
•
The PAX S300 has two menu menus: Transaction and
Administration (ADMIN)
•
Use the on-screen scroll arrows to navigate the menus
•
To enter letters using the numeric keypad, press the number
key for the corresponding letter and then press the ALPHA key
until the desired letter appears
•
Press 0 (zero) and then the ALPHA key to enter a space
•
Press the on-screen Up arrow and then the ALPHA key to enter
special characters
•
To confirm an entry, press the green
•
To correct an entry, press the yellow
•
To cancel a function, press the red X key
PREPARING THE TERMINAL FOR USE
1. Turn the terminal over and remove the back cover (you may
need to remove one screw).
2. Install the S300 connector cable to the terminal.
3. Replace the terminal's back cover (fasten the screw if required).
4. Connect power adapter cable to S300 connector cable.
5. If using an Ethernet connection:
a.
Connect an Ethernet cable to red LAN connector of the S300
connector cable.
b. Connect the other end of the Ethernet cable to your
network router.
6. If using a serial connection:
a.
Connect the S80 download cable RJ11 plug to the blue
RS232A connector of the S300 connector cable.
b. Fasten the two DB-9 connectors together.
c.
Connect the DB-9 to USB serial connector to a USB plug on
the POS system.
7. Press the terminal's red cancel X button to exit ECR mode.
8. Enter administrator password to enter Admin mode.
9. To return to ECR mode press yellow
Integrated Mode
Quick Reference Guide
CHANGING TEMPORARY ADMIN PASSWORD
1. Press the on-screen Up arrow to access the ADMIN menu.
2. Press 9 to access the PASSWORD menu.
3. Press 2 for ADMIN PWD.
4. Enter the temporary admin password (000000) and press the
key
5. Enter the new admin password and press the green
key
6. Re-enter the new password to confirm and press the green
COMMUNICATION TO HOST SET-UP
1. Press the on-screen Up arrow to access the ADMIN menu.
2. Press 3 for SETUP.
3. Press 2 for HOST SETUP.
4. Enter the admin password and press the green
5. Enter the assigned MERCHANT ID (provided by PayFacto) and
6. Enter the assigned TID (Terminal ID, provided by PayFacto) and
7. Select the FALLBACK TO DIAL option: press 1 for Yes or 2 for No.
8. Select the INPUT TYPE: press 1 for IP or 2 for NAME.
9. Enter the information provided by PayFacto for the following
10. Press the red X key two times to return to the main screen.
HOST DOWNLOAD
1. Press the on-screen Up arrow to access the ADMIN menu.
2. Press 6 for MAINTENANCE.
3. Press 1 for PARAM DLL.
4. Press the green
5. After the download completes, press 2 for EMV KEY DLL.
6. After the download completes, press 3 for ASSOCIATION.
key.
green
key.
key.
NOTE:
If you have not already, change the temporary Admin
password
press the green
key to confirm.
press the green
key to confirm.
NOTE: If you select Yes, ensure that the terminal has
a telephone connection.
parameters and press the green
• IP ADDRESS or IP NAME (according to the option selected in
step 8)
• PORT
• CTP GWAY URL
• CTP GWAY PORT
key to perform the download.
NOTE: This step is only required if the terminal will be used as a
wireless device.
key.
.
key.
key to confirm:
Advertisement
Table of Contents

Summary of Contents for PAX S300
- Page 1 • PORT 5. If using an Ethernet connection: • CTP GWAY URL Connect an Ethernet cable to red LAN connector of the S300 • CTP GWAY PORT connector cable. 10. Press the red X key two times to return to the main screen.
- Page 2 S300 Integrated Mode Quick Reference Guide SYSTEM SET-UP • ENTER LAST 4 DIGITS: Whether to require the entry or the card’s 1. Press the on-screen Up arrow to access the ADMIN menu. last 4 digits as fraud prevention 2. Press 3 for SETUP.
- Page 3 S300 Integrated Mode Quick Reference Guide CHANGING MERCHANT AND ADMIN PASSWORDS TRAINING MODE 1. Press the on-screen Up arrow to access the ADMIN menu. NOTES : 2. Press 9 to access the PASSWORD menu. • Training mode is unavailable if the batch is open (must perform 3.


Need help?
Do you have a question about the S300 and is the answer not in the manual?
Questions and answers
Can the PAX S300 be powered by a USB Connection
The provided context does not explicitly state that the PAX S300 can be powered by a USB connection. However, it mentions a power supply is included in the box, indicating that an external power source is required. Therefore, it is unclear if USB power alone is sufficient.
This answer is automatically generated