Table of Contents
Advertisement
Quick Links
Advertisement
Table of Contents

Subscribe to Our Youtube Channel
Related Manuals for Viavito ST1000


Summary of Contents for Viavito ST1000
- Page 1 Owner’s Manual. ST1000 Squat Stand www.viavito.com Manual version 1.1...
-
Page 2: Table Of Contents
Congratulations Manual Contents on purchasing your Safety Information very own ST1000 Assembly 04/10 Squat Stand. Product Overview Part Identification Chart Before You Begin You have chosen a high-quality, safe and Assembly Instructions 07/09 innovative piece of exercise equipment as Adjustment... -
Page 3: Safety Information
• The specifications of this product may any issues have been resolved. Use only vary slightly from the illustrations and spare parts supplied by Viavito. are subject to change without notice. 09 Periodically check all bolts, nuts and This exercise machine is built for optimum other connections to make sure that safety. -
Page 4: Assembly
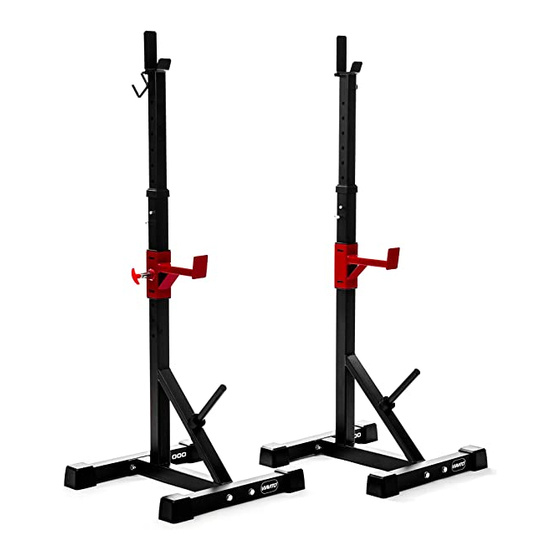
Assembly Product Overview Thank you for selecting the Viavito ST1000 squat stand. This manual will guide you through the assembly process. ASSEMBLED DIMENSIONS: 148 x 58 x 177cm Left Safety Hook Weight Rest Right Safety Hook Upright U-Pin Safety Spotter... -
Page 5: Part Identification Chart
Parts List on page 18. Note: Some small parts may have been preattached. If a part is not in the hardware kit, check if it has been preattached. M10 Locknut (19) M8 Locknut (18) M10 Washer (17) M10 x 70mm Bolt (16) www.viavito.com... -
Page 6: Before You Begin
- 2 adjustable wrenches - 1 rubber mallet - 1 standard screwdriver - 1 Phillips screwdriver Assembly may be more convenient if you have a socket set, a set of open-end or closed-end wrenches, or a set of ratchet wrenches. www.viavito.com... -
Page 7: Assembly Instructions
Attach the Left Upright (1) to the 02 Repeat this step for the Right Upright Bases (3) with four M10 x 70mm (2) and the other Base (3). Bolts (16) , four M10 Washers (17) and four M10 Locknuts (19). www.viavito.com... - Page 8 Safety Spotters to the same height. 02 Pull the Adjustment Knob (11). Slide the Right Safety Spotters (5) onto the Right Upright (2) and then release the Adjustment Knob to the adjustment hole, tighten the Adjustment knob. www.viavito.com...
- Page 9 02 Attach the Safety Hooks (7,8) to the Weight tightened before you use the Squat Rests (6) with two M8 Locknuts (18). Stand. Congratulations! You have completed assembly of your Squat 03 Slide two Bumpers (14) onto the Stand. Uprights (1,2). www.viavito.com...
-
Page 10: Adjustment
Adjustment Knob into one Upright of the adjustment holes in the uprights (1,2), tighten the adjustment knob. Put the Barbell (A) (not included) on the Weight Rests (6).Then, slide the Safety Hooks (7,8) against the Barbell. www.viavito.com... -
Page 11: Conditioning Guidelines
• Control appetite injuries, joint problems, obesity and • Boost self-image asthma. • Improve muscle tone and strength • Improve flexibility • Lower blood pressure • Relieve insomnia www.viavito.com... -
Page 12: Beginner's Guide To Exercise
• Start slowly and build up your time, speed and resistance gradually; doing too much too soon can lead to injuries. • If you are sore or tired, give yourself a few extra days to recover. www.viavito.com... -
Page 13: Stretching Guide
• Stretch at least three times a week to perature, which greatly reduces the risk of maintain flexibility. injury. Stretching develops flexibility and reduces muscles soreness. Stretches should be held for 15 to 30 seconds. www.viavito.com... - Page 14 The purpose of cooling down is to return the body to its normal or near normal, resting state at the end of each exercise session. A proper cool-down slowly lowers your heart rate, allows blood to return to the heart and helps prevent muscle soreness caused by the build-up of lactic acid in the muscles. www.viavito.com...
-
Page 15: Customer Support
• Precise description of the issue or defect. IMPORTANT! Please retain your sales receipt. Viavito Customer Care may request proof of purchase to validate eligibility for warranty service. Warranty cover starts from the date shown on the proof of purchase. -
Page 16: Manufacturer's Warranty
Manufacturer's Warranty Viavito warrants this product to be free Viavito is not responsible or liable for of defects of material and workmanship, direct, indirect, or consequential losses under normal use and conditions, for a arising out of or in connection with the use... -
Page 17: Technical Information
Technical Information Exploded Diagram www.viavito.com... -
Page 18: Parts List
Right Upright Base Left Safety Spotter Right Safety Spotter Weight Rest Left Safety Hook Right Safety Hook Upright Bushing Safety Spotter Bushing Adjustment Knob U-Pin End Cap Bumper Inner Cap M10 x 70mm Bolt M10 Washer M8 Locknut M10 Locknut www.viavito.com... -
Page 19: Space Required
Appendix 1: Space Required For safety reasons, minimum clearance for the equipment is 0.6m in all directions. 1480 www.viavito.com...
Need help?
Do you have a question about the ST1000 and is the answer not in the manual?
Questions and answers