Table of Contents
Advertisement
Quick Links
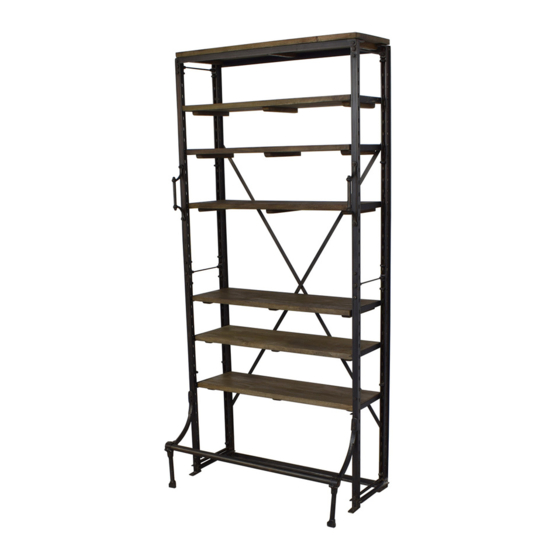
PART LIST
A
Side Panel
C
Angle Support
E
Cast Leg
G
Pin
I
Wooden Shelf
Two people are needed for assembly & set up of Shelving Unit. Assemble the shelving unit as
close to its final location possible. Once built, it is heavy & difficult to move.
Assemble the unit face-down on the ground. Place the two metal side panels on the ground,
same ends facing one direction and follow the steps as shown in picture :
STEP 1 : Remove the bolts from the back of panels, place the cross bracing to match the holes
and tighten the bolts with the wrench provided.
STEP 2 & 3 : Remove the bolts & place the angle supports on top and bottom of side panels
and re-tighten the bolts.
1
1
3
3
1
baby&child
RESTORATION HARDWARE
French Library Shelving
2
3
2
2
6
2
B
Cross Bracing
D
Cast Handle
F
Pipe
H
Angle Bracket
J
Wrench
B
A
1
2
1
10
2
3
1
1
2
C
2
Advertisement
Table of Contents

Related Manuals for RH Baby&child French Library Shelving


Summary of Contents for RH Baby&child French Library Shelving
- Page 1 RESTORATION HARDWARE French Library Shelving PART LIST Side Panel Cross Bracing Angle Support Cast Handle Cast Leg Pipe Angle Bracket Wooden Shelf Wrench Two people are needed for assembly & set up of Shelving Unit. Assemble the shelving unit as close to its final location possible.
- Page 2 Place the shelving unit on the floor with cross bracing facing downwards. STEP 4 : Remove the bolts from the top corners, insert the angle supports & re-tighten the bolts back in place. STEP 5 & 6 : Remove the nuts & place the set of cast legs at bottom of unit &...
- Page 3 Using two people, tilt the shelving unit upright and move into place. STEP 7 : Slide the pipe through the holes in cast legs. STEP 8 : Place the pins through holes to lock the pipe in place...
- Page 4 TOP SHELF STEP 9 : Place the angle bracket on cylindrical holes given on side panels at desired level. Make sure both brackets of a set are placed on same level. STEP 10 : Slide the 5 wooden shelves onto the set of angle brackets installed at various levels.
Need help?
Do you have a question about the French Library Shelving and is the answer not in the manual?
Questions and answers