Telit Wireless Solutions ML865G1 Hw User Manual
Hide thumbs
Also See for ML865G1:
- Reference manual (1039 pages) ,
- At commands reference manual (545 pages) ,
- Quick start manual (33 pages)
Table of Contents
Advertisement
Quick Links
Advertisement
Table of Contents

Subscribe to Our Youtube Channel
Related Manuals for Telit Wireless Solutions ML865G1


Summary of Contents for Telit Wireless Solutions ML865G1
- Page 1 ML865G1 HW User Guide 1VV0301632 Rev. 4 – 2020-09-23 Mod. 0805 2017-01 Rev.6...
-
Page 2: Notice
ML865G1 HW Design Guide SPECIFICATIONS ARE SUBJECT TO CHANGE WITHOUT NOTICE NOTICE While reasonable efforts have been made to assure the accuracy of this document, Telit assumes no liability resulting from any inaccuracies or omissions in this document, or from use of the information obtained herein. -
Page 3: Usage And Disclosure Restrictions
ML865G1 HW Design Guide USAGE AND DISCLOSURE RESTRICTIONS License Agreements The software described in this document is the property of Telit and its licensors. It is furnished by express license agreement only and may be used only in accordance with the terms of such an agreement. -
Page 4: Applicability Table
ML865G1 HW Design Guide APPLICABILITY TABLE PRODUCTS ML865G1-WW 1VV0301632 Rev. 4 Page 4 of 86 2020-09-23... -
Page 5: Table Of Contents
ML865G1 HW Design Guide Contents NOTICE COPYRIGHTS ....................2 COMPUTER SOFTWARE COPYRIGHTS ............2 USAGE AND DISCLOSURE RESTRICTIONS ..........3 License Agreements ............... 3 Copyrighted Materials ..............3 III. High Risk Materials ................ 3 Trademarks ..................3 Third Party Rights ................3 APPLICABILITY TABLE .................. - Page 6 Power Supply Requirements ............24 Power Consumption ..............25 4.2.1. Idle mode ..................25 4.2.2. ML865G1-WW Connected Mode ..........27 General Design Rules ..............28 4.3.1. Electrical Design Guidelines ............28 4.3.1.1. +5V Source Power Supply Design Guidelines ......28 4.3.1.2.
- Page 7 ML865G1 HW Design Guide External SIM Holder ..............55 ADC Converter ................55 5.11.1. Using ADC Converter ..............56 Forced USB boot ................56 RF SECTION ................57 Bands Variants ................57 TX Output power ................57 RX Sensitivity ................57 Antenna requirements ..............
- Page 8 ML865G1 HW Design Guide Solder Reflow ................75 PACKAGING ................77 Tray ....................77 Reel ....................79 Moisture sensitivity ............... 79 CONFORMITY ASSESSMENT ISSUES ........81 ANATEL Regulatory Notices ............81 SAFETY RECOMMENDATIONS ..........82 READ CAREFULLY ..............82 ACRONYMS ................83 DOCUMENT HISTORY ..............
-
Page 9: Introduction
INTRODUCTION Scope Scope of this document is is the description of some hardware solutions useful for developing a product with the Telit ML865G1 module. Audience This document is intended for Telit customers, who are integrators, about to implement their application using our ML865G1 module. -
Page 10: Text Conventions
ML865G1 HW Design Guide Text Conventions Danger – This information MUST be followed or catastrophic equipment failure or bodily injury may occur. Caution or Warning – Alerts the user to important points about integrating the module, if these points are not followed, the module and end user equipment may fail or malfunction. -
Page 11: Related Documents
ML865G1 HW Design Guide Related Documents 80000NT10001A - SIM INTEGRATION DESIGN GUIDES Application Note 1VV0301632 Rev. 4 Page 11 of 86 2020-09-23... -
Page 12: General Product Description
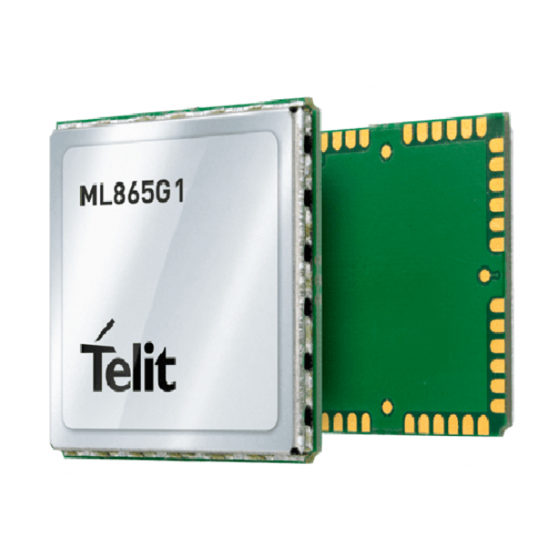
ML865G1 HW Design Guide 2. GENERAL PRODUCT DESCRIPTION Overview The ML865G1 module is a CATM / NBIoT / 2G communication product which allows integrators to plan on availability for even the longest lifecycle applications, highly recommended for new designs specified for coverage worldwide. -
Page 13: Target Market
ML865G1 HW Design Guide Target Market ML865G1 can used telematics applications where tamper-resistance, confidentiality, integrity, and authenticity of end-user information are required, for example: Telematics services • • Road pricing Pay-as-you-drive insurance • Stolen vehicles tracking • Internet connectivity •... -
Page 14: Tx Output Power
ML865G1 HW Design Guide TX Output Power ML865G1-WW RF power (dBm) Band Mode Class GPRS 32.5 850/900MHz EGPRS GPRS 29.5 1800/1900MHz EGPRS B1, B2, B3, B4, B5, B8, B12, (LTE) CAT- B13, B18, B19, B20, B25, B26, B27, B28, B66, B85... -
Page 15: Rx Sensitivity
ML865G1 HW Design Guide RX Sensitivity 2.6.1. ML865G1-WW REFsens (dBm) (dBm)* 3GPP REFsens Band Typical CATM1 / Band1 -106.2 -102.7 CAT M1 / Band2 -107.4 -100.3 CAT M1 / Band3 -106.1 -99.3 CAT M1 / Band4 -107.1 -102.3 CAT M1 / Band5 -106.4... - Page 16 ML865G1 HW Design Guide CAT M1 / Band66 -106.8 CAT M1 / Band85 -102.2 CAT NB2 / Band1 -116.2 -108.2 CAT NB2 / Band2 -116.4 -108.2 CAT NB2 / Band3 -116.2 -108.2 CAT NB2 / Band4 -116.0 CAT NB2 / Band5 -116.0...
-
Page 17: Mechanical Specifications
• Width: 24.0 mm • Thickness: 2.6 mm • 2.7.2. Weight The nominal weight of the ML865G1-WW is 2 grams. Temperature Range Note The module is fully functional (*) and Operating Temperature –40°C to +85°C compliant according to regulatory Range standards. -
Page 18: Pins Allocation
ML865G1 HW Design Guide PINS ALLOCATION Warning: ML865G1 is adopting a modified 56-pin xL865 Form Factor, pin to pin compatible with the previous 48-pin xL865 FF and with 8 additional pads. The numbering of the pins has been changed accordingly and attention has to be paid when comparing with previous 48-pin xL865 FF design. - Page 19 ML865G1 HW Design Guide C107/DSR Output for Data set CMOS ready signal (DSR) to 1.8V C108/DTR Input for Data terminal CMOS ready signal (DTR) 1.8V from DTE C105/RTS Input for Request to CMOS send signal (RTS) 1.8V from DTE C106/CTS...
- Page 20 ML865G1 HW Design Guide RXD_AUX /SPI_MISO Auxiliary UART (RX CMOS Data)/SPI_MISO 1.8V TXD_AUX / SPI_MOSI Auxiliary UART (TX CMOS Data)/SPI_MOSI 1.8V Miscellaneous ON_OFF/WAKE Input Command for 1.8V Active Power ON/OFF and High to wake from deep sleep mode (PSM) HW_SHUTDOWN*...
- Page 21 ML865G1 HW Design Guide GPIO_05/ GPIO05 Configurable CMOS GNSS_LNA_EN GPIO 1.8V GPIO_06 / SPI_CS GPIO06 Configurable CMOS GPIO /SPI_CS 1.8V GPIO_07 GPIO07 Configurable CMOS GPIO 1.8V GPIO_08 GPIO08 Configurable CMOS STAT_LED GPIO 1.8V alternate function SPI_CLK SPI_CLK CMOS 1.8V Power Supply...
- Page 22 ML865G1 HW Design Guide Reserved 1VV0301632 Rev. 4 Page 22 of 86 2020-09-23...
-
Page 23: Pin Layout
ML865G1 HW Design Guide Pin Layout TOP VIEW The pins defined as NC/RFU shall be considered RESERVED and must not be connected to any pin in the application. 1VV0301632 Rev. 4 Page 23 of 86 2020-09-23... -
Page 24: Power Supply
ML865G1 HW Design Guide POWER SUPPLY The power supply circuitry and board layout are a very important part in the full product design and they strongly reflect on the product overall performance, hence read the requirements carefully and the guidelines that will follow for a proper design. -
Page 25: Power Consumption
ML865G1 HW Design Guide NOTE: For PTCRB approval on the final products the power supply is required to be within the “Normal Operating Voltage Range”. Power Consumption 4.2.1. Idle mode Measure Mode Mode (Typical) Description IDLE CATM NBIoT MODE (mA) - Page 26 ML865G1 HW Design Guide Typical (mA) MODE AT+CPS No current source or sink by any connected MS=1 PSM in between eDRX Measure* Mode Description Mode (Typical) (mA) Acquisition 69.3 GPS+GLO, DPO off Active State (GNSS ON, GPS+GLO, DPO on DWELL=280ms...
-
Page 27: Ml865G1-Ww Connected Mode
ML865G1 HW Design Guide 4.2.2. ML865G1-WW Connected Mode Measure Mode (Typical) Description CONNECTED Average Peak MODE (mA) (mA) 1 RB, RMC, TBS=5, QPSK, 23dBm, 1100 Band 85, 28, 12 1 RB, RMC, TBS=5, QPSK,23dBm, CATM Band 13, 26, 5, 18, 19, 20, 8... -
Page 28: General Design Rules
ML865G1 HW Design Guide General Design Rules The principal guidelines for the Power Supply Design embrace three different design steps: the electrical design • the thermal design • the PCB layout • 4.3.1. Electrical Design Guidelines The electrical design of the power supply depends strongly from the power source where this power is drained. -
Page 29: Source Power Supply Design Guidelines
A protection diode should be inserted close to the power input, in order to save the • ML865G1 from power polarity inversion. Otherwise the battery connector should be done in a way to avoid polarity inversions when connecting the battery. -
Page 30: Thermal Design Guidelines
ML865G1 HW Design Guide NOTE: DON'T USE any Ni-Cd, Ni-MH, and Pb battery types directly connected with ML865G1. Their use can lead to overvoltage on the ML865G1 and damage it. USE ONLY Li-Ion battery types. 4.3.2. Thermal Design Guidelines This section will be available in next document revisions. -
Page 31: Power Supply Pcb Layout Guidelines
• The PCB traces to the ML865G1 and the Bypass capacitor must be wide enough to ensure no significant voltage drops occur. This is for the same reason as previous point. Try to keep this trace as short as possible. -
Page 32: Rtc Supply
ML865G1 HW Design Guide RTC supply RTC is functional when ML865G1 is in PSM state and VBATT pin is supplied. RTC settings are erased if VBATT supply is temporary disconnected. VAUX Power Output A regulated power supply output is provided on pin 51 in order to supply small devices from the module, like: level translators, audio codec, sensors, and others. - Page 33 ML865G1 HW Design Guide NOTE: The Output Current MUST never be exceeded; care must be taken when designing the application section to avoid having an excessive current consumption. 1VV0301632 Rev. 4 Page 33 of 86 2020-09-23...
-
Page 34: Digital Section
OFF state: Vbatt is applied and only RTC is running. Baseband is switched OFF • and the only change possible is the ON state. ON state: baseband is fully switched on and ML865G1 is ready to accept AT • commands. ML865G1 can be idle or connected. -
Page 35: Power On
ML865G1 HW Design Guide Power On To turn on the ML865G1 the pad ON_OFF/WAKE must be set HIGH level for at 5 seconds and then released. ON_OFF/WAKE pad can make also an asynchronous wakeup of the system from the PSM Mode, before the scheduled event of timer T3412 expired. - Page 36 ML865G1 HW Design Guide “Modem ON Proc” START VBATT>VBATT PWRMON=ON ON_OFF = HI Delay = 5 sec ON_OFF= LOW PWRMON=ON ? Delay = 1 sec GO TO “Start AT Commands”” “Modem ON Proc” 1VV0301632 Rev. 4 Page 36 of 86...
- Page 37 In order to avoid a back powering effect it is recommended to avoid having any HIGH logic level signal applied to the digital pins of the ML865G1 when the module is powered off or during an ON-OFF transition. 1VV0301632 Rev. 4...
-
Page 38: Auto Power On
After HW_SHUTDOWN* is released you could again use the ON_OFF/WAKE line to power on the module. Auto Power On ML865G1 module can be switched on with ON_OFF/WAKE pin 7 permanently fixed to HI level (1.8V). In the configuration there are two limitations: the asynchronous PSM wake-up cannot be implemented. - Page 39 VBATT can be removed when PWRMON is in LOW state. In order to avoid a back powering effect it is recommended to avoid having any HIGH logic level signal applied to the digital pins of the ML865G1 when the module is powered off or during an ON-OFF transition. WARNING: Not following the recommended shut-down procedures might damage the device and consequently void the warranty.
-
Page 40: Unconditional Shutdown
ML865G1. Whenever this signal is pulled low, the ML865G1 is reset. When the device is reset it stops any operation. After the release of the line, the ML865G1 is unconditionally shut down, without doing any detach operation from the network where it is registered. This behaviour is not a proper shut down because any cellular device is requested to issue a detach request on turn off. - Page 41 ML865G1 HW Design Guide For example: Let us assume you need to drive the HW_SHUTDOWN* pad with a totem pole output of a +3/5 V microcontroller: 1VV0301632 Rev. 4 Page 41 of 86 2020-09-23...
- Page 42 In order to avoid a back powering effect it is recommended to avoid having any HIGH logic level signal applied to the digital pins of the ML865G1 when the module is powered off or during an ON-OFF transition. 1VV0301632 Rev. 4...
-
Page 43: Wake From Deep Sleep Mode
Fast power down The procedure to power off ML865G1 described in Chapter 5.4 normally takes more than 1 second to detach from network and make ML865G1internal filesystem properly closed. In case of unwanted supply voltage loss the system can be switched off without any risk of filesystem data corruption by implementing Fast Shut Down feature. -
Page 44: Fast Shut Down By Hardware
ML865G1 HW Design Guide NOTE: Refer to ML865G1 series AT command reference guide (Fast power down - #FASTSHDN) in order to set up detailed AT command. 5.7.1. Fast Shut Down by Hardware The Fast Power Down can be triggered by configuration of any GPIO. HI level to LOW level transition of GPIO commands fast power down. -
Page 45: Fast Shut Down By Software
Fast Shut Down by Software The Fast Power Down can be triggered by AT command. Communication ports 5.8.1. USB 2.0 HS The ML865G1 includes one integrated universal serial bus (USB 2.0 HS) transceiver. The following table is listing the available signals: Signal Function NOTE... - Page 46 ML865G1 HW Design Guide NOTE: Disconnect or assert to GND the VUSB pin before activating the Power Saving Mode. 1VV0301632 Rev. 4 Page 46 of 86 2020-09-23...
-
Page 47: Spi
ML865G1 HW Design Guide 5.8.2. The ML865G1 Module is provided by a standard 3-wire master or slave SPI interface with chip select control. The following table is listing the available signals: Signal Function Type NOTE CMOS SPI_CLK SPI Clock 1.8V... -
Page 48: Spi Connections
5.8.4.1. Modem serial port 1 (USIF0) The serial port 1 on the ML865G1 is a +1.8V UART with all the 7 RS232 signals. It differs from the PC-RS232 in the signal polarity (RS232 is reversed) and levels. The following table is listing the available signals: 1VV0301632 Rev. - Page 49 Detect presence Transmit line Output transmit line of C104/RXD *see Note ML865G1 UART Receive line Input receive of the ML865G1 C103/TXD *see Note UART Input to the ML865G1 that Data Terminal C108/DTR controls the DTE READY Ready...
-
Page 50: Modem Serial Port 2 (Usif1)
ML865G1 when the module is powered off or during an ON/OFF transition. 5.8.4.2. Modem serial port 2 (USIF1) The secondary serial port on the ML865G1 is a CMOS1.8V with only the RX and TX signals. The signals of the ML865G1 serial port are: Signal... -
Page 51: Rs232 Level Translation
Refer to ML865G1 series AT command reference guide for port configuration. 5.8.4.3. RS232 level translation In order to interface the ML865G1 with a PC com port or a RS232 (EIA/TIA-232) application a level translator is required. This level translator must: • invert the electrical signal in both directions;... -
Page 52: General Purpose I/O
General purpose I/O The ML865G1 module is provided by a set of Configurable Digital Input / Output pins (CMOS 1.8V). Input pads can only be read; they report the digital value (high or low) present on the pad at the read time. Output pads can only be written or queried and set the value of the pad output. -
Page 53: Using A Gpio As Input
ML865G1 HW Design Guide Signal Output Default State NOTE Drive Strength GPIO_01 INPUT – PD (100K) GPIO_02 INPUT – PD (100K) GPIO_03 INPUT – PD (100K) GPIO_04 INPUT – PD (100K) GPIO_05 INPUT – PD (100K) GPIO_06 INPUT – PD (100K) GPIO_07 INPUT –... -
Page 54: Using A Gpio As Output
The function is available as alternate function of GPIO_08 (to be enabled using the AT#GPIO=1,0,2 command). In the ML865G1 modules, the STAT_LED needs an external transistor to drive an external LED and its voltage level is defined accordingly to the table below:. -
Page 55: External Sim Holder
Please refer to the related User Guide (SIM Holder Design Guides, 80000NT10001a). ADC Converter The ML865G1 is provided by one AD converters. It is able to read a voltage level in the range of 0÷1.8 volts applied on the ADC pin input, store and convert it into 10 bit word. -
Page 56: Using Adc Converter
ML865G1 HW Design Guide Item Typical Unit Input Voltage range Volt AD conversion bits Input Resistance Mohm Input Capacitance 5.11.1. Using ADC Converter Available in a next document revision. Forced USB boot In some case of firmware upgrade FORCED_USB_BOOT pin must be set to 1.8V during poweron of ML865G1. -
Page 57: Rf Section
The antenna and antenna transmission line on PCB for a Telit ML865G1-WW device shall fulfil the following requirements:... -
Page 58: Pcb Design Guidelines
PCB Design guidelines When using the ML865G1, since there's no antenna connector on the module, the antenna must be connected to the ML865G1 antenna pad (K1) by means of a transmission line implemented on the PCB. This transmission line shall fulfil the following requirements:... - Page 59 Ground Plane by means of via holes (once per 2mm at least), placed close to the ground edges facing line track; • Place EM noisy devices as far as possible from ML865G1 antenna line; • Keep the antenna line far away from the ML865G1 power supply lines;...
-
Page 60: Pcb Guidelines In Case Of Fcc Certification
6.4.2. PCB Guidelines in case of FCC Certification In the case FCC certification is required for an application using ML865G1, according to FCC KDB 996369 for modular approval requirements, the transmission line has to be similar to that implemented on ML865G1 interface board and described in the following chapter. - Page 61 ML865G1 HW Design Guide A characteristic impedance of nearly 50 Ω is achieved using trace width = 1.1 mm, clearance from coplanar ground plane = 0.3 mm each side. The line uses reference ground plane on layer 3, while copper is removed from layer 2 underneath the line. Height of trace above ground plane is 1.335 mm.
-
Page 62: Transmission Line Measurements
ML865G1 HW Design Guide 6.4.2.2. Transmission Line Measurements An HP8753E VNA (Full-2-port calibration) has been used in this measurement session. A calibrated coaxial cable has been soldered at the pad corresponding to RF output; a SMA connector has been soldered to the board in order to characterize the losses of the transmission line including the connector itself. - Page 63 ML865G1 HW Design Guide Line input impedance (in Smith Chart format, once the line has been terminated to 50 Ω load) is shown in the following figure: Insertion Loss of G-CPW line plus SMA connector is shown below: 1VV0301632 Rev. 4...
-
Page 64: Antenna Installation Guidelines
ML865G1 HW Design Guide 6.4.2.3. Antenna Installation Guidelines Install the antenna in a place covered by the LTE signal with CAT-M1 support. • • Antenna must not be installed inside metal cases Antenna must not be installed according Antenna manufacturer instructions •... -
Page 65: Audio Section
ML865G1 HW Design Guide AUDIO SECTION The Telit digital audio interface (DVI) of the ML865G1 Module is based on the I S serial bus interface standard. The audio port can be connected to end device using digital interface, or via one of the several compliant codecs (in case an analog audio is needed). -
Page 66: Gnss Section
GNSS External LNA Enable RF Front End Design The ML865G1 Module doesn’t contain the LNA needed to reach the maximum sensitivity. Active antenna (antenna with a built-in low noise amplifier) must be used and must be supplied with proper bias-tee circuit. -
Page 67: Hardware-Based Solution For Gnss And Lte Coexistence
A SAW filter can be added on LTE side, to protect GNSS receiver from LTE out-of-band emissions, as described in the schematic below. When the GNSS receiver embedded in the ML865G1 module is used, there is no condition for degradation, because LTE part and GNSS part are never active simultaneously, therefore the filtering on the LTE side is not needed. -
Page 68: Gnss Antenna - Installation Guidelines
Powering the External LNA (active antenna) The LNA of active antenna needs a source of power because 1.8V or 3V DC voltage needed by active antenna is not supplied by the ML865G1 module, but can be easily included by the host design. -
Page 69: Gnss Characteristics
ML865G1 HW Design Guide GNSS Characteristics The table below specifies the GNSS characteristics and expected performance: Parameters Typical Measurement Tracking Sensitivity -159 dBm Sensitivity Navigation -155 dBm Cold Start -144 dBm Min Navigation update rate 1VV0301632 Rev. 4 Page 69 of 86... -
Page 70: Mechanical Design
ML865G1 HW Design Guide MECHANICAL DESIGN Drawing NOTE: Dimensions in mm. General Tolerance ±0.1, Angular Tolerance ±1°, The tolerance is not cumulative. 1VV0301632 Rev. 4 Page 70 of 86 2020-09-23... -
Page 71: Application Pcb Design
ML865G1 HW Design Guide APPLICATION PCB DESIGN General The ML865G1 modules have been designed to be compliant with a standard lead-free SMT process. Footprint 1VV0301632 Rev. 4 Page 71 of 86 2020-09-23... - Page 72 ML865G1 HW Design Guide In order to easily rework the ML865G1 is suggested to consider on the application a 1.5 mm placement inhibit area around the module. It is also suggested, as common rule for an SMT component, to avoid having a mechanical part of the application in direct contact with the module.
-
Page 73: Pcb Pad Design
ML865G1 HW Design Guide PCB pad design Non solder mask defined (NSMD) type is recommended for the solder pads on the PCB. Copper Pad Solder Mask NSMD (Solder Mask Defined) (Non Solder Mask Defined) PCB pad dimensions It is not recommended to place via or micro-via not covered by solder resist in an area of 0.3 mm around the pads unless it carries the same signal of the pad itself... -
Page 74: Stencil
ML865G1 HW Design Guide Holes in pad are allowed only for blind holes and not for through holes. Recommendations for PCB pad surfaces: Finish Layer thickness Properties [µm] good solder ability Electro-less Ni / protection, 3 –7 / 0.03 – 0.15... -
Page 75: Solder Paste
ML865G1 HW Design Guide Solder paste Item Lead Free Solder Paste Sn/Ag/Cu We recommend using only “no clean” solder paste in order to avoid the cleaning of the modules after assembly Solder Reflow Recommended solder reflow profile: WARNING: The above solder reflow profile represents the typical SAC reflow limits and does not guarantee adequate adherence of the module to the customer application throughout the temperature range. - Page 76 Time 25°C to Peak Temperature 8 minutes max. NOTE: All temperatures refer to topside of the package, measured on the package body surface WARNING: THE ML865G1 MODULE WITHSTANDS ONE REFLOW PROCESS ONLY. 1VV0301632 Rev. 4 Page 76 of 86 2020-09-23...
-
Page 77: Packaging
Package on tray • • Package on reel Tray The ML865G1 modules are packaged on trays of 40 pieces each. These trays can be used in SMT processes for pick & place handling. 1VV0301632 Rev. 4 Page 77 of 86 2020-09-23... - Page 78 ML865G1 HW Design Guide 1VV0301632 Rev. 4 Page 78 of 86 2020-09-23...
-
Page 79: Reel
ML865G1 HW Design Guide Reel The ML865G1 can be packaged on reels of 200 pieces each. See figure for module positioning into the carrier. Moisture sensitivity The moisture sensitivity level of the Product is “3” according with standard IPC/JEDEC J-STD-020, take care of all the relative requirements for using this kind of components. - Page 80 ML865G1 HW Design Guide a) The shelf life of the Product inside of the dry bag is 12 months from the bag seal date, when stored in a non-condensing atmospheric environment of < 40°C and < 90% RH. b) Environmental condition during the production: <= 30°C / 60% RH according to IPC/JEDEC J-STD-033B.
-
Page 81: Conformity Assessment Issues
"Este equipamento não tem direito à proteção contra interferência prejudicial e não pode causar interferência em sistemas devidamente autorizados" "This equipment is not entitled to protection against harmful interference and must not cause interference in duly authorized systems" ME910G1-WW, ME310G1-WW, ML865G1-WW Homologation #: 08566-20-02618 1VV0301632 Rev. 4 Page 81 of 86 2020-09-23... -
Page 82: Safety Recommendations
ML865G1 HW Design Guide SAFETY RECOMMENDATIONS READ CAREFULLY Be sure the use of this product is allowed in the country and in the environment required. The use of this product may be dangerous and has to be avoided in the following areas: Where it can interfere with other electronic devices in environments such as •... -
Page 83: Acronyms
ML865G1 HW Design Guide ACRONYMS Telit Technical Support Centre TTSC Universal Serial Bus High Speed Data Terminal Equipment Universal Mobile Telecommunication System UMTS Wideband Code Division Multiple Access WCDMA High Speed Downlink Packet Access HSDPA High Speed Uplink Packet Access... - Page 84 ML865G1 HW Design Guide Slave Ready SRDY Chip Select Real Time Clock Printed Circuit Board Equivalent Series Resistance Voltage Standing Wave Radio VSWR Vector Network Analyzer 1VV0301632 Rev. 4 Page 84 of 86 2020-09-23...
-
Page 85: Document History
ML865G1 HW Design Guide DOCUMENT HISTORY Revision Date Changes 2019-12-06 First issue In the table of chapter 3.1 the "Auxiliary" section 2020-06-16 title has been changed in Auxiliary (USIF1). The title of chapter 5.8.4.2 has been changed from "Modem serial port 2" in "Modem serial port 2 (USIF1)". - Page 86 Mod. 0805 2017-01 Rev.6...
Need help?
Do you have a question about the ML865G1 and is the answer not in the manual?
Questions and answers