Advertisement
Quick Links
Advertisement

Related Manuals for Right Weigh 310-M3 Series


Summary of Contents for Right Weigh 310-M3 Series
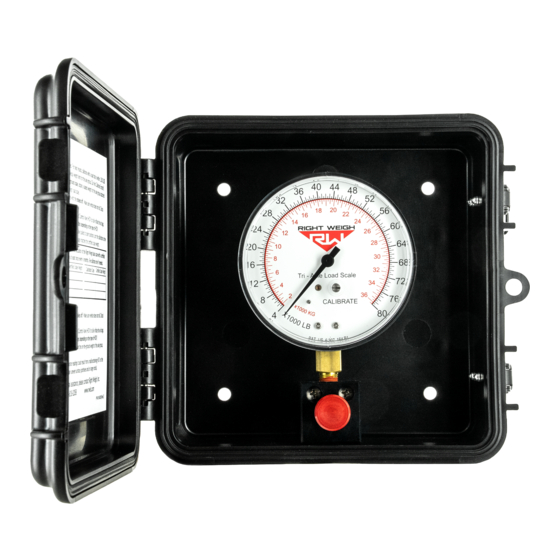
- Page 1 ONBOARD LOAD SCALE EXTERIOR ANALOG 310-M3 Series...
- Page 2 IMPORTANT! Please read instructions COMPLETELY and thoroughly before installation. Right Weigh, Inc. is not responsible or liable for product failure or vehicle damage due to improper installation. The installation requirements are outlined in this manual and should be followed thoroughly to avoid inaccuracy or damage to the product.
-
Page 3: Table Of Contents
CONTENTS Parts Requried Specifications & Overview Scale Installation Calibration and Operation Troubleshooting Warranty Statement Return Policy & Repairs... -
Page 4: Parts Requried
PARTS REQUIRED 1/4 NPT Female to 1/4 NPT Male Brass Adaptor Included These parts are sold separately in the 103-SK kit (two of these kits will be required to complete installation): Male Branch Tee The thread size and type should match the thread size and type of the existing suspension air line 1/4”... -
Page 5: Specifications & Overview
114.3 mm 114.3 mm 406.4 mm The 310-M3 series is designed for use on an air suspension axle group with two height control valves. Within this series, there are different products designed for different axle group configurations. Before installation, make sure... -
Page 6: Scale Installation
SCALE INSTALLATION The 310-M3 Series gauge averages the pressure from two air bags on an axle group with two height control valves to give a single axle group weight. This product comes in a protective box and the following steps will walk you through how to correctly mount and install the scale. - Page 7 SCALE INSTALLATION ASSEMBLE TEE FITTING Choose a tee fitting that matches the size of the existing air line, then install the female NPT tube fitting onto the tee as shown. Use teflon tape or equivalent to seal threads, tighten securely. INSTALL TEE FITTING Insert the cut ends of the existing air line and the new...
-
Page 8: Calibration And Operation
CALIBRATION AND OPERATION CALIBRATING 1: The vehicle must be fully loaded. For best results, calibrate with a loaded weight within 750kgs of your typical axle group weight (DO NOT calibrate empty!) 2: Using a certified in-ground scale, obtain a loaded weight for the axle group attached to the gauge. -
Page 9: Troubleshooting
If the HCV is not functioning correctly, the air pressure applied to the suspension system could be inconsistent and/or erratic. To test for an HCV problem, acquire a weight reading from the Right Weigh gauge and write it down (refer to gauge operating instructions for proper procedure). Drive the vehicle around the block and return to the same location. -
Page 10: Warranty Statement
Products manufactured or sold by Right Weigh, Inc. are warrantied to be free from significant defects in material and workmanship 3 years from date of purchase. During this time, and within the boundaries set forth in this warranty statement, Right Weigh, Inc. -
Page 11: Return Policy & Repairs
Right Weigh, Inc. will return the product at its expense via a shipping method (carrier to be at sole discretion of Right Weigh, Inc.) equal to or faster than the method used by the customer. Products or parts thereof not covered by warranty will be repaired or replaced at customer expense upon authorization by the customer. - Page 12 For additional support contact: Smart Truck Solutions +61 418 622840 rightweigh.com.au ©2015-2020 Right Weigh, Inc. All rights reserved.
Need help?
Do you have a question about the 310-M3 Series and is the answer not in the manual?
Questions and answers