Table of Contents
Advertisement
Quick Links
Advertisement
Table of Contents

Related Manuals for Viavi ONX-220


Summary of Contents for Viavi ONX-220
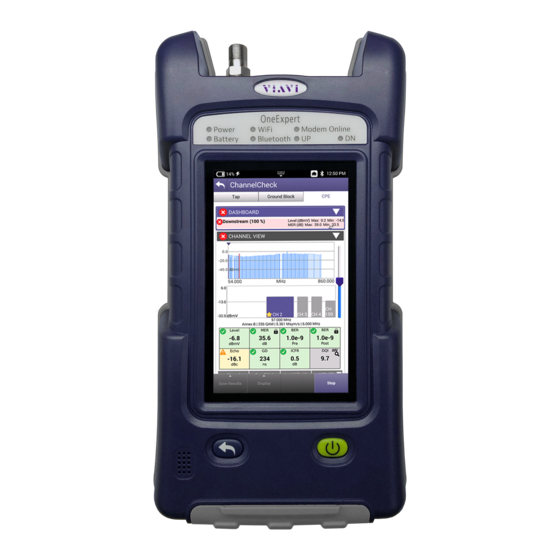
- Page 1 ONX-220 User's Guide...
- Page 2 Copyright/Trademarks © Copyright 2020 VIAVI Solutions Inc. All rights reserved. No part of this guide may be reproduced or transmitted, electronically or otherwise, without written permission of the publisher. VIAVI Solutions and the VIAVI logo are trademarks of VIAVI Solutions Inc. (“Viavi”).
- Page 3 (1) This device may not cause harmful interference, and (2) This device must accept any interference received, including interference that may cause undesired operation. Any changes or modifications not expressly approved by VIAVI could void the user's authority to operate the equipment.
- Page 4 VIAVI has established a take-back process in compliance with the EU Waste Electrical and Electronic Equipment (WEEE) Directive, 2012/19/EU, and the EU Battery Directive, 2006/66/EC. Instructions for returning waste equipment and batteries to VIAVI can be found in the WEEE section of the VIAVI Standards and Policies web page.
- Page 5 California and the state’s drinking water and environment from excessive exposure to chemicals known to the state to cause cancer, birth defects or other reproductive harm. For the VIAVI position statement on the use of Proposition 65 chemicals in VIAVI products, see the Hazardous Substance Control section of the VIAVI Standards and Policies web page.
- Page 6 WARNING: The antenna used for this instrument is installed at the VIAVI factory or by VIAVI-approved repair facilities. During operation of the device, a distance of 20 cm or more should be maintained between the antenna in this device and person.
- Page 7 Use only the battery charger supplied with the meter. Use of any other charger may damage the battery. NOTE: All spent batteries should be disposed of according to local laws and guidelines. ONX-220 User's Guide June 2020 22135173, Rev. 000...
- Page 8 ONX-220 User's Guide 22135173, Rev. 000 June 2020...
-
Page 9: Table Of Contents
Typographical conventions................20 Keyboard and menu conventions .............. 21 Symbol conventions ..................21 Symbol conventions (continued) ...............22 Safety Definitions ..................22 What ships with the ONX-220? ................. 23 Preparation for use ....................23 Available models ....................23 Chapter 1 Quick Tour About the ONX-220 ....................26 Benefits ......................26... - Page 10 Adding a WiFi network profile ..............45 Connecting to a WiFi network ..............46 Establishing a Bluetooth connection ............47 Enabling Bluetooth connectivity ............... 47 Connecting to a Bluetooth device ............. 47 Updating the instrument’s firmware .............. 48 ONX-220 User's Guide 22135173, Rev. 000 June 2020...
- Page 11 Ending a remote operation session ............70 Browsing the web ....................71 Accessing the web browser .................71 Navigating the browser ................71 Opening a web page ..................72 Adding bookmarks ..................72 Exiting the browser ..................72 ONX-220 User's Guide June 2020 22135173, Rev. 000...
- Page 12 To run a DOCSIS Check ...............85 Results .....................85 Saving results ..................85 Spectrum ......................86 To run a Spectrum test ..............86 Results ....................86 Quick Check .....................87 To run a Quick Check ................87 Results ....................88 ONX-220 User's Guide 22135173, Rev. 000 June 2020...
- Page 13 Scanning for WiFi networks ................111 Chapter 9 Configuring the OneExpert with StrataSync Configuration Templates ..................114 Limit Plans ......................115 Limit Plan Configuration ................115 New Limit Plans .....................116 Limit Plan Configuration ..............116 ONX-220 User's Guide June 2020 22135173, Rev. 000...
- Page 14 Viewing, Editing, Renaming, or Deleting Tilt Settings .... 136 Saving Tilt Settings ................136 Tilt Settings Deployment ................137 Digital Measurement Settings ................. 138 Digital Measurement Settings Configuration ........138 New Digital Measurement Settings............138 ONX-220 User's Guide 22135173, Rev. 000 June 2020...
- Page 15 Saving Throughput URL Settings ........... 151 Throughput URL Settings Deployment ..........152 Chapter 10 Using the OneExpert with a Mobile Device VIAVI Mobile Tech app ..................154 Connecting to StrataSync .................. 154 Using the Mobile Tech app ................155 Logging in to StrataSync ................155 Pairing the OneExpert to your mobile device ........
- Page 16 DOCSISCheck results ..................... 183 QAM Channels ....................183 OFDM Channels .................... 183 Dashboard ...................... 183 Downstream ....................184 Level Over Time (optional) ................184 MER Over Time (optional) .................184 BER Over Time (optional) ................185 ONX-220 User's Guide 22135173, Rev. 000 June 2020...
- Page 17 Changing RBW and AGC ................195 Stopping the test ..................195 WiFi Scan results ....................196 AP List ......................196 List Data ......................196 Choosing APs to graph ................196 Channel Graph ....................197 Time Graph..................... 197 ONX-220 User's Guide June 2020 22135173, Rev. 000...
- Page 18 Resolving problems ..................200 General testing ..................200 Data testing ..................200 Limited warranty ....................201 Getting technical assistance ................201 Additional information ..................201 Specifications ....................... 202 Ordering information ..................206 Feature matrix ......................207 ONX-220 User's Guide 22135173, Rev. 000 June 2020...
-
Page 19: About This Guide
About this Guide Thank you for purchasing the ONX-220. This guide provides setup and operating instructions to get you up and running as soon as possible. Purpose and scope The purpose of this guide is to help you successfully use the product features and capabilities. -
Page 20: Safety And Compliance Information
A vertical bar | means “or”: only one option can appear in a single platform [a|b|e] command. Square brackets [ ] indicate an login [platform name] optional argument. Slanted brackets < > group <password> required arguments. ONX-220 User's Guide 22135173, Rev. 000 June 2020... -
Page 21: Keyboard And Menu Conventions
This symbol represents a risk of a hot surface. It may be associated with either a DANGER, WARNING, CAUTION, or ALERT message. See the "Safety Definitions" on page 22 for more information. ONX-220 User's Guide June 2020 22135173, Rev. 000... -
Page 22: Symbol Conventions (Continued)
Indicates that there is an action that must be ALERT performed in order to protect equipment and data or to avoid software damage and service interruption. ONX-220 User's Guide 22135173, Rev. 000 June 2020... -
Page 23: What Ships With The Onx-220
ONX-220 Quick Start Guide Safety information sheet Preparation for use This section explains how to start using the ONX-220. When you unpack your instrument, do the following: Inspect the OneExpert for damage. If the instrument is damaged, put it back in the box and contact VIAVI customer service (see "Technical assistance"... - Page 24 About this Guide NOTE: This hand-held instrument is not intended to be body worn, or operated while held against the body. ONX-220 User's Guide 22135173, Rev. 000 June 2020...
-
Page 25: Chapter 1 Quick Tour
This chapter provides an overview of the unit, status indicators, connectors, and user interface, including the following: "About the ONX-220" on page 26 "A guided tour of the ONX-220" on page 28 "Navigating the user interface" on page 31 "Personalizing the user interface" on page 33... -
Page 26: About The Onx-220
Chapter 1 Quick Tour About the ONX-220 The VIAVI ONX-220™ is an installation/service meter with ONX DNA, making it unequalled in speed, simplicity, and value. When home network quality is unreliable, customers become dissatisfied and are more likely to churn. At the same time technical complexity is increasing, but technician skill and experience at the installation service tier is typically minimal. -
Page 27: Connected
Chapter 1 Quick Tour Connected Complete connectivity with the VIAVI MobileTech app via the technician’s mobile device Real-time data connection updates supervisors and back office systems Provides complete information tracking that couples work orders to jobs and enables geotagging for... -
Page 28: A Guided Tour Of The Onx-220
Chapter 1 Quick Tour A guided tour of the ONX-220 Front view RF connector Status indicators Touchscreen Softkeys Back button Water resistant speaker Power button ONX-220 User's Guide 22135173, Rev. 000 June 2020... -
Page 29: Bottom View
USB 3.0 Port (Type A) NOTE: In the image above, the protective rubber door is in the open position for illustrative purposes. This door should remain closed when not using any of these ports. ONX-220 User's Guide June 2020 22135173, Rev. 000... -
Page 30: Status Indicators
The Back and Power buttons are found under the main screen. Back/Cancel – Exit a menu or go back to the previous menu. Power – Press and hold the Power button to turn the ONX-220 on or off. ONX-220 User's Guide 22135173, Rev. 000... -
Page 31: Navigating The User Interface
Chapter 1 Quick Tour Navigating the user interface The user interface of the ONX-220 is designed to be intuitive and easy to use. The LCD is a touchscreen that operates similar to a mobile device (such as an iPad or similar Android device), where you swipe to go to the next page or zoom in/out by pinching or opening your fingers. -
Page 32: Battery Status And Time
Workflow Manager – Allows you to see all your current work orders. Screen Shot – Takes a screen capture of the current menu (the screen you were viewing when you launched the tray menu). ONX-220 User's Guide 22135173, Rev. 000 June 2020... -
Page 33: Entering Data
To rearrange icons inside a menu, touch and hold the icon and then drag it to the new location. For example, if you frequently use the Ingress Scan test, touch and drag the Ingress Scan icon from the CATV menu to the top row. ONX-220 User's Guide June 2020 22135173, Rev. 000... - Page 34 Chapter 1 Quick Tour ONX-220 User's Guide 22135173, Rev. 000 June 2020...
- Page 35 "Viewing your work orders" on page 59 "Managing files" on page 65 "Managing files with StrataSync" on page 66 "Viewing the User’s Guide on your instrument" on page 67 "Remotely operating the instrument" on page 67 ONX-220 User's Guide June 2020 22135173, Rev. 000...
-
Page 36: Chapter 2 Utilities
Using the items provided on the System Settings menu, you can turn on remote operation (via VNC Viewer), change screen and power settings, control the volume, view hardware and software versions, view options purchased with the ONX-220 meter, and complete USB software updates. -
Page 37: Displaying The Tray Menu
You can also take screenshots of the user interface and review a PDF of this guide on your instrument. To bring up the Tray menu, swipe downward from the top of the screen. ONX-220 User's Guide June 2020 22135173, Rev. 000... -
Page 38: Setting Up Your Instrument
Select the value for the setting from the list. 4. Press Back/Cancel to exit the menu. 5. Turn off the power, then turn back on to reboot the instrument. The international settings are configured and the user interface is localized. ONX-220 User's Guide 22135173, Rev. 000 June 2020... -
Page 39: Setting The Date And Time
1. Press Time Synchronization. You can also set this up to synchronize through StrataSync. 2. If synchronization is required, select NTP. If synchronization is not needed, select None. When enabled, Network Time Protocol (NTP) synchronizes your system clock to a central time server. ONX-220 User's Guide June 2020 22135173, Rev. 000... -
Page 40: Changing Screen And Power Settings
Set the power off delay 1. Press Power Off Delay. 2. Select the amount of idle time to wait before the instrument automatically powers itself off. Press the Back/Cancel button to save and exit. ONX-220 User's Guide 22135173, Rev. 000 June 2020... -
Page 41: Setting The Volume
1. Go to the System Settings menu, then select User Information. 2. Specify the user’s first and last name, workgroup, company, email address, and other information. 3. Press the Back/Cancel button to save and exit the menu. ONX-220 User's Guide June 2020 22135173, Rev. 000... -
Page 42: Restoring Factory Defaults
1. Go to the Tray menu. 2. Press the Network icon. The icon will be green when connectivity is enabled. Network connectivity is enabled. NOTE: The Bluetooth and WiFi interfaces cannot be ON at the same time. ONX-220 User's Guide 22135173, Rev. 000 June 2020... -
Page 43: Establishing An Ethernet Connection
IPv4 Gateway – Enter the address for the gateway that is used to route packets that are not on the same subnet. IPv4 DNS Server – Enter the address of the DNS server. If you specified IPv6 as your network mode, specify the following settings: ONX-220 User's Guide June 2020 22135173, Rev. 000... -
Page 44: Ipv6 Address Mode
Manual – See the IP Dual Stack Address Mode in this section. 6. Display the Tray menu, and then press Network to establish the connection. The instrument establishes an Ethernet connection to the LAN. ONX-220 User's Guide 22135173, Rev. 000 June 2020... -
Page 45: Establishing An Rf Connection
SSID – The SSID (Service Set Identifier) of the WiFi network. Password – The password required to authenticate to the network. A password is not required if Key Management is set to None. Key Management – Open, WEP, or WPA/WPA2 Personal. ONX-220 User's Guide June 2020 22135173, Rev. 000... -
Page 46: Connecting To A Wifi Network
The status of the connection (Network Up), and details concerning the connection (IP address, netmask, gateway, and DNS server) appear at the top right of the menu. The instrument is connected to the WiFi network. ONX-220 User's Guide 22135173, Rev. 000 June 2020... -
Page 47: Establishing A Bluetooth Connection
If pairing was successful, you can use the instrument with the paired device. NOTE: For more detail on using your meter with the VIAVI Mobile Tech app, see Connecting to StrataSync from the Mobile Tech... -
Page 48: Updating The Instrument's Firmware
Updating the instrument’s firmware All ONX units should be upgraded to the latest production software release—available through StrataSync (or your VIAVI representative). Software and firmware releases are the best way to ensure your VIAVI OneExpert ONX is functioning at its best. - Page 49 Firmware link. The file will begin to download. 6. Once file has been downloaded, plug in the USB drive and copy the firmware file to the root directory. The file name will be similar to “ONXCBL.xxx.xxx.xxx.oxu”. Download firmware ONX-220 User's Guide June 2020 22135173, Rev. 000...
-
Page 50: Updating The Firmware From A Usb Drive
5. In the pop-up menu, select the desired firmware file on the USB drive. 6. Press the Update button, then press it again to confirm. The update will begin and the meter will power off when finished. ONX-220 User's Guide 22135173, Rev. 000 June 2020... -
Page 51: Updating The Firmware From Stratasync
Interface – Ethernet ; DOCSIS. If set to DOCSIS, firmware upgrades will be skipped without warning. NOTE: This setting does not select the communication interface – Ethernet or RF/DOCSIS. This setting must be made via the CATV screen Connection icon. ONX-220 User's Guide June 2020 22135173, Rev. 000... -
Page 52: Troubleshooting The Upgrade Process
Ethernet port to the Ethernet testing function. 4. Press the Back button on the unit and cycle power to the meter. 5. When the meter returns to the Home Screen, restart the upgrade process. ONX-220 User's Guide 22135173, Rev. 000 June 2020... -
Page 53: Ip Address Of Onx Or Gateway Starts With 192.168.0
ID if you are adding options. To review the status of available options, select Software or Hardware Options. A list of available options appears with the status for each option (Enabled or Upgradeable). ONX-220 User's Guide June 2020 22135173, Rev. 000... -
Page 54: Installing Options
8. Optional. Press the System menu and then select File Browser to verify that the option file was copied to the unit. 9. Reboot the instrument (turn off the power, then turn it back on). The option is installed. ONX-220 User's Guide 22135173, Rev. 000 June 2020... -
Page 55: Synchronizing To The Stratasync Server
To obtain the latest configuration settings, software options and updates, and ownership registration information, the OneExpert CATV can synchronize with a VIAVI server via the internet. The synchronization also stores any user files saved on the unit to the StrataSync server. - Page 56 The unit will then send any reports, configuration profiles, XML results, screen shots, etc. that have been saved on the unit since the last configuration. The server then applies any applicable options to the unit. ONX-220 User's Guide 22135173, Rev. 000 June 2020...
-
Page 57: Generating Reports
(for example, cablecheck001). 3. Specify the format (PDF, XML, or HTML). 4. If you want to include custom fields in the report, enable, then specify values for the fields. ONX-220 User's Guide June 2020 22135173, Rev. 000... -
Page 58: Capturing A Screen Shot
To capture the tray menu or a popup menu If you wish to capture the tray menu itself, or if you wish to capture a popup menu, press and hold the Tray button for 5 seconds. ONX-220 User's Guide 22135173, Rev. 000 June 2020... -
Page 59: Viewing Your Work Orders
Get confirmation that techs and contractors have performed the work with geo-tagged test reports uploaded via the Mobile Tech App. ONX-220 User's Guide June 2020 22135173, Rev. 000... - Page 60 Deploy work order to instrument (with test profile reference). Sync to StrataSync with work order info after testing and saving CDM reports (JSON). View test results & associated work order on StrataSync and/or (contractor) transfer to customer. ONX-220 User's Guide 22135173, Rev. 000 June 2020...
- Page 61 The OneExpert has a variety of testing and reporting features that are enhanced through StrataSync. This helps to ensure complete test processes for performance to standards and to minimize return service calls. ONX-220 User's Guide June 2020 22135173, Rev. 000...
-
Page 62: Editing Work Orders
Information to add comments, location ID, or circuit number, etc. 4. To create a new work order, select the New button and name the work order. Creating a new work order automatically activates it. ONX-220 User's Guide 22135173, Rev. 000 June 2020... -
Page 63: Saving A Report To A Work Order
You can also create a new order order or choose to deactivate the current order order by choosing None when you save it. "Saving a report" on page 57 for more information. ONX-220 User's Guide June 2020 22135173, Rev. 000... -
Page 64: Work Order Notifications
1. From the Tray menu, select Workflow Settings at the bottom. (Workflow Manager needs to be running to see this). 2. From the Workflow Settings screen, select the setting you want to edit and adjust as necessary. ONX-220 User's Guide 22135173, Rev. 000 June 2020... -
Page 65: Managing Files
Opening files or folders 1. Go to the file browser and select the file or folder. 2. Press Open. The contents of the folder appear or the file is displayed on the screen. ONX-220 User's Guide June 2020 22135173, Rev. 000... -
Page 66: Copying And Pasting Files Or Folders
StrataSync cloud, such as test reports, screenshots, work orders, and configurations. You can access these files via the StrataSync website. For more information see "Synchronizing to the StrataSync server" on page 55. ONX-220 User's Guide 22135173, Rev. 000 June 2020... -
Page 67: Viewing The User's Guide On Your Instrument
The optional Remote Operation features allows you to access the OneExpert user interface from the VIAVI Mobile Tech app, your computer, or mobile device through a virtual network connection (VNC), connecting over an Ethernet interface or WiFi network. The is a great way to capture screens shots for additional troubleshooting, etc. -
Page 68: Setting Up The Onx For Vnc
Remote Operation. The Remote Operation menu appears. 2. Select VNC. The VNC menu appears. 3. Select Enable VNC Server and note the VNC password underneath: viavi-vnc. You will need it to connect via VNC Viewer. ONX-220 User's Guide 22135173, Rev. 000 June 2020... -
Page 69: Connecting To Your Onx Via Vnc On Your Pc Or Mobile Device
1. Download a VNC viewer application from your App Store or available from your VIAVI representative. VNS apps are available for PC and mobile devices. 1. Launch the app. 2. In the viewer’s server address field, enter the OneExpert’s IP address,... -
Page 70: Using A Pc Keyboard
Ending a remote operation session To end a remote operation session, either exit the VNC session on the PC or app, or turn the OneExpert off and then on again (power cycle). ONX-220 User's Guide 22135173, Rev. 000 June 2020... -
Page 71: Browsing The Web
In addition, you can connect a USB mouse or a USB keyboard/ mouse combination to the OneExpert to navigate the web browser as you would with a desktop computer. Going back or forward one page ONX-220 User's Guide June 2020 22135173, Rev. 000... -
Page 72: Opening A Web Page
When you are finished demonstrating internet access to the user, you should exit the browser. Press the Home function key or tap the home icon on the browser menu. The browser closes. ONX-220 User's Guide 22135173, Rev. 000 June 2020... -
Page 73: Chapter 3 Menus And Workflow
OneExpert, including the following: "Main Screen Selections" on page 74 "Testing Workflow" on page 74 "Review Test Results" on page 76 ONX-220 User's Guide June 2020 22135173, Rev. 000... -
Page 74: Main Screen Selections
Connect the Meter For every test, the Setup screen includes a graphic showing the proper or a suggested connection arrangement. Often notes on where a port is to be connected are supplied. ONX-220 User's Guide 22135173, Rev. 000 June 2020... -
Page 75: Enter Work Order
1. On the setup screen for the test you are running, select the Work Order ID button. 2. Add new Work Order. 3. Enter the name of the new Work Order (up to 50 characters), then press Enter. ONX-220 User's Guide June 2020 22135173, Rev. 000... -
Page 76: Review Test Results
– When results are not within the parameters expected for a test, the background on the screen will change to light red and a fail icon will appear in the upper left corner. ONX-220 User's Guide 22135173, Rev. 000 June 2020... -
Page 77: Channel View
ONX-220 User's Guide June 2020 22135173, Rev. 000... - Page 78 Chapter 3 Menus and Workflow ONX-220 User's Guide 22135173, Rev. 000 June 2020...
-
Page 79: Chapter 4 Catv Testing
"Ingress Scan" on page 83 "ChannelCheck" on page 84 "DOCSIS Check" on page 85 "Spectrum" on page 86 "Quick Check" on page 87 "Cable Fault Finder (optional)" on page 89 "HL Leakage (optional)" on page 91 ONX-220 User's Guide June 2020 22135173, Rev. 000... -
Page 80: Catv Test Options
CATV Settings Spectrum Quick Check Cable Fault Finder (optional) HL Leakage (optional) OneCheck OneCheck conducts comprehensive and automated testing of Ingress, Downstream & DOCSIS from a chosen demarcation point utilizing the RF port. ONX-220 User's Guide 22135173, Rev. 000 June 2020... -
Page 81: To Run A Onecheck Test
Select the Work Order ID button and the list of available work orders will appear. Select one. 4. Start the test by selecting the Start button at the bottom of the screen. ONX-220 User's Guide June 2020 22135173, Rev. 000... -
Page 82: Cable Fault Finder And Hl Leakage (Optional)
172. Saving Results OneCheck will automatically save the results of the last test run. To capture these specific results prior to retesting, hit the Save button and then name the file. ONX-220 User's Guide 22135173, Rev. 000 June 2020... -
Page 83: Ingress Scan
3. Start the test by selecting the Start button at the bottom of the screen. Results For a detailed discussion of the results produced by this test, see "Ingress Scan results" on page 189. ONX-220 User's Guide June 2020 22135173, Rev. 000... -
Page 84: Channelcheck
176. Saving results To capture a snapshot of the results for review, press the Stop button. To save for later review, press the Save button and then give them a name. ONX-220 User's Guide 22135173, Rev. 000 June 2020... -
Page 85: Docsis Check
183. Saving results To capture a snapshot of the results for review, press the Stop button. To save for later review, press the Save button and then give them a name. ONX-220 User's Guide June 2020 22135173, Rev. 000... -
Page 86: Spectrum
4. Start the test by selecting the Start button at the bottom of the screen. The live spectrum analysis graph will appear for your inspection. Results For a detailed discussion of the results produced by this test, see "Ingress Scan results" on page 189. ONX-220 User's Guide 22135173, Rev. 000 June 2020... -
Page 87: Quick Check
Select one. 4. Configure the carrier to be checked by adding or removing the carrier frequency and type. 5. Start the test by selecting the Start button at the bottom of the screen. ONX-220 User's Guide June 2020 22135173, Rev. 000... -
Page 88: Results
Chapter 4 CATV Testing Results Quick Check results screen displays a graph of the specified channel’s signal strength along with its type. ONX-220 User's Guide 22135173, Rev. 000 June 2020... -
Page 89: Cable Fault Finder (Optional)
The Drop Check mode is intended to validate the quality of a disconnected drop cable and distance to the end of the coax drop, looking for a single reflection to indicate it is good. ONX-220 User's Guide June 2020 22135173, Rev. 000... -
Page 90: Cable Length
6. Start the test by selecting the Start button at the bottom of the screen. Results For a detailed discussion of the results produced by this test, see "Cable Fault Finder results" on page 190. ONX-220 User's Guide 22135173, Rev. 000 June 2020... -
Page 91: Hl Leakage (Optional)
4. Start the test by selecting the Start button at the bottom of the screen. 5. Walk around noting where leak level, tag, and audible tone indicate a higher than desired leak. 6. When HL Leakage is complete press Stop. ONX-220 User's Guide June 2020 22135173, Rev. 000... -
Page 92: Results
(+40 dBmV/+100 dBμV) and re-check. Repair, tighten or replace leaking component. Recheck room to ensure all leak sources have been addressed and repaired. Move to remaining rooms to continue locating leaks. ONX-220 User's Guide 22135173, Rev. 000 June 2020... -
Page 93: Chapter 5 Ethernet Testing
"Selecting Ethernet mode" on page 94 "Specifying Ethernet settings" on page 95 "Configuring a new Ethernet profile" on page 95 "Connecting to the line" on page 96 "Testing the data layer" on page 97 ONX-220 User's Guide June 2020 22135173, Rev. 000... -
Page 94: About Ethernet Testing
To select Ethernet mode 1. From the Home screen, expand the Ethernet Test menu. 2. Select the Ethernet Test. When the Network Up heading turns green, tests can be run or settings changed. ONX-220 User's Guide 22135173, Rev. 000 June 2020... -
Page 95: Specifying Ethernet Settings
– Select IP mode and then specify the network mode: IPv4, IPv6, or IPv4/IPv6 Dual Stack. 7. Specify the LAN network settings as described in step 5 of Establishing an Ethernet connection on page ONX-220 User's Guide June 2020 22135173, Rev. 000... -
Page 96: Saving Test Profiles
ID, location, and other settings as needed. 3. To clear the results, use the asterisk (*) key. Chapter 10: Test Results to learn what your results mean. ONX-220 User's Guide 22135173, Rev. 000 June 2020... -
Page 97: Testing The Data Layer
Chapter 5 Ethernet Testing Testing the data layer Using the data layer tests, you can test for connectivity and throughput. See Chapter 6: Data Testing. ONX-220 User's Guide June 2020 22135173, Rev. 000... - Page 98 Chapter 5 Ethernet Testing ONX-220 User's Guide 22135173, Rev. 000 June 2020...
-
Page 99: Chapter 6 Data Testing
This chapter provides steps for using the Data testing features of the OneExpert. The data layer tests allow you to test for connectivity and throughput, including the following: "Ping and Traceroute testing" on page 100 "Speed Check testing (optional)" on page 101 ONX-220 User's Guide June 2020 22135173, Rev. 000... -
Page 100: About Data Tests
Transmit Size (how many ping messages are in each packet). 5. Press the Results button. 6. Use the Tray menu to save the results. See "Saving a report" on page ONX-220 User's Guide 22135173, Rev. 000 June 2020... -
Page 101: Speed Check Testing (Optional)
The server needs to be placed in the network in a way that will allow it to deliver very high data rate traffic to the ONX for downstream and upstream throughput testing. VIAVI recommends the Apache HTTP server (v 2.4) that is readily available from Apache and supports multiple operating systems. - Page 102 3. Press the configuration to edit or use the arrows to highlight and press Enter. The upstream and downstream URL settings are configurable from this screen. ONX-220 User's Guide 22135173, Rev. 000 June 2020...
- Page 103 1. When finished editing the configuration, press the Back icon or Back button to return to the main Speed Check screen. 2. The test can now be performed with the desired configuration, as shown here. ONX-220 User's Guide June 2020 22135173, Rev. 000...
-
Page 104: Server Scaling
Speed Check test time. However, if the workflow time is longer, then the probability of simultaneous tests becomes much lower and the server over-provisioning could be higher. ONX-220 User's Guide 22135173, Rev. 000 June 2020... -
Page 105: Chapter 7 Fiber Testing
This chapter provides steps for using the optional fibert testing accessories, including the following: "About the optical tools" on page 106 "Inspecting fiber" on page 106 "Measuring optical power" on page 108 ONX-220 User's Guide June 2020 22135173, Rev. 000... -
Page 106: About The Optical Tools
OneExpert USB Connector. Inspecting fiber The optional VIAVI P5000i Probe microscope accessory is used to view a live video of a simplex fiber to determine if the fiber is clean. It can also capture a snap-shot and provide pass/fail analysis. - Page 107 8. To save the results, press Save and then specify the file name for the still image. The filename can be up to 50 characters, so if desired, details such as the company name, technician, and location could be included. ONX-220 User's Guide June 2020 22135173, Rev. 000...
-
Page 108: Measuring Optical Power
Measuring optical power The Optical Power Meter is a VIAVI accessory used to measure optical power. The MP-60 meter measures 850, 1300, 1310,1490, and 1550 nm wavelengths The MP-80 meter measures 980, 1310,1480, and 1550 nm wavelengths 1. -
Page 109: Chapter 8 Wifi Testing
This chapter provides task-based instructions for using the optional WiFi testing features. Topics discussed in this chapter include the following "About the WiFi tests (Plus and Pro models)" on page 110 "Scanning for WiFi networks" on page 111 ONX-220 User's Guide June 2020 22135173, Rev. 000... -
Page 110: About The Wifi Tests (Plus And Pro Models)
The test set can attach to a customer's network and provide assessment of the signal strength throughout the premises. On the Main menu, select WiFi. The WiFi menu appears. NOTE: The Bluetooth and WiFi interfaces cannot be ON at the same time. ONX-220 User's Guide 22135173, Rev. 000 June 2020... -
Page 111: Scanning For Wifi Networks
– Security status of the WiFi network, indicated by an open or closed padlock. – WiFi channel being used by the specific network – The power level of the selected WiFi Network. Indicated by the signal strength (in dBm) and a colored bar graph. ONX-220 User's Guide June 2020 22135173, Rev. 000... - Page 112 To see a graph of the channels on the selected APs, press the Channel Graph button. To see a graph of signal strength over time on the selected APs, press the Time Graph button. ONX-220 User's Guide 22135173, Rev. 000 June 2020...
-
Page 113: Configuring The Oneexpert With Stratasync
"Tilt Settings" on page 135 "Digital Measurement Settings" on page 138 "Ingress Span" on page 141 "Auto Purge" on page 144 "Channel Plan Template" on page 147 "Throughput URL Settings" on page 150 ONX-220 User's Guide June 2020 22135173, Rev. 000... -
Page 114: Configuration Templates
Chapter 9 Configuring the OneExpert with StrataSync Configuration Templates All high-level features for StrataSync are accessible from the main menu. The configuration templates for OneExpert are accessed via the Assets menu in the tool bar. XPERTrak Main Dashboard ONX-220 User's Guide 22135173, Rev. 000 June 2020... -
Page 115: Limit Plans
You can find Limit Plans through the Global Limit Plan Archives pane on the left side of the StrataSync Manage Templates screen. The Limit Plan screen appears. ONX-220 User's Guide June 2020 22135173, Rev. 000... -
Page 116: New Limit Plans
Limit Plan Configuration Limit Plans determine when a test result will end up being a pass or fail, or if any result should be determined at all for that measurement. ONX-220 User's Guide 22135173, Rev. 000 June 2020... -
Page 117: Viewing, Editing, Renaming, Or Deleting A Limit Plan
3. Select View, Edit, Rename, or Delete from the dropdown list and change or confirm from the following screen. For deployment, see Limit Plan Deployment in the next section. Saving Limit Plans When all values have been entered, select Save. ONX-220 User's Guide June 2020 22135173, Rev. 000... -
Page 118: Limit Plan Deployment
To deploy to all meters in the list, select the checkbox in the header of the first column. 5. After all desired meters have been checked, select the Next button. A message will appear confirming the deployment. ONX-220 User's Guide 22135173, Rev. 000 June 2020... -
Page 119: Docsis Service Plans
Plan button on the upper right of the screen. The Create DOCSIS Service Plan screen appears. 2. Enter the name (required) and description if desired. 3. Select the Create button. The DOCSIS Service Plan template appears. ONX-220 User's Guide June 2020 22135173, Rev. 000... -
Page 120: General Info
Typically it is the same IP/URL as downstream. VOIPCheck Server – If a VoIPCheck reflection server is available this can be entered into the VoIPCheck Server field. ONX-220 User's Guide 22135173, Rev. 000 June 2020... -
Page 121: Data Limits
Warning – Pass but no fail. The measurement is highlighted to bring attention to the result that has exceeded the limit None – Test result is shown but no pass or fail criteria is applied to the result. ONX-220 User's Guide June 2020 22135173, Rev. 000... -
Page 122: Voipcheck Limits
Warning – Pass but no fail. The measurement is highlighted to bring attention to the result that has exceeded the limit None – Test result is shown but no pass or fail criteria is applied to the result. ONX-220 User's Guide 22135173, Rev. 000 June 2020... -
Page 123: Viewing, Editing, Renaming, Or Deleting A Docsis Plan
For deployment, see DOCSIS Service Plan Deployment in the next section. Saving DOCSIS Service Plans When all values have been entered, select Save. ONX-220 User's Guide June 2020 22135173, Rev. 000... -
Page 124: Docsis Service Plan Deployment
To deploy to all meters in the list, select the checkbox in the header of the first column. 5. After all desired meters have been checked, select the Next button. A message will appear confirming the deployment. ONX-220 User's Guide 22135173, Rev. 000 June 2020... -
Page 125: Off-Air Ingress Plans
The Create Off-Air Ingress Plan screen appears. 2. Enter the desired name and optional description. 3. When the desired data has been entered, select the Create button. The Off-Air Ingress Plan template appears. ONX-220 User's Guide June 2020 22135173, Rev. 000... -
Page 126: Off-Air Ingress Band
The Actions dropdown appears. 3. Select View, Edit, Rename, or Delete from the dropdown list and change or confirm from the following screen. Saving Off-Air Ingress Plan When all values have been entered, select Save. ONX-220 User's Guide 22135173, Rev. 000 June 2020... -
Page 127: Off-Air Ingress Plan Deployment
To deploy to all meters in the list, select the checkbox in the header of the first column. 5. After all desired meters have been checked, select the Next button. A message will appear confirming the deployment. ONX-220 User's Guide June 2020 22135173, Rev. 000... -
Page 128: Measurement Settings
The Create Measurement Setting screen appears. 2. Enter the desired name and optional description. 3. When the desired data has been entered, select the Create button. ONX-220 User's Guide 22135173, Rev. 000 June 2020... -
Page 129: Onecheck Settings
DOCSIS Service Tests – Determines whether a OneCheck test should also perform IP service (throughput & packet loss) tests. Only available if DOCSIS Test is enabled. Enable – Will perform IP service test Disable – IP service test not performed ONX-220 User's Guide June 2020 22135173, Rev. 000... -
Page 130: Viewing, Editing, Renaming Or Deleting A Measurement Plan
The Actions dropdown appears. 3. Select View, Edit, Rename, or Delete from the dropdown list and change or confirm from the following screen. Saving Measurement Settings When all values have been entered, select Save. ONX-220 User's Guide 22135173, Rev. 000 June 2020... -
Page 131: Measurement Settings Deployment
To deploy to all meters in the list, select the checkbox in the header of the first column. 5. After all desired meters have been checked, select the Next button. A message will appear confirming the deployment. ONX-220 User's Guide June 2020 22135173, Rev. 000... -
Page 132: Limit Plan Exclusion Zones
The Create Limit Plan Exclusion Zones screen appears. 2. Enter the name (required) and description if desired. 3. Select the Create button. The Limit Plan Exclusion Zone template appears. ONX-220 User's Guide 22135173, Rev. 000 June 2020... -
Page 133: Limit Plan Exclusion Zone Configuration
3. Select View, Edit, Rename, or Delete from the dropdown list and change or confirm from the following screen. Saving Limit Plan Exclusion Zones When all values have been entered, select Save. ONX-220 User's Guide June 2020 22135173, Rev. 000... -
Page 134: Limit Plan Exclusion Zone Deployment
To deploy to all meters in the list, select the checkbox in the header of the first column. 5. After all desired meters have been checked, select the Next button. A message will appear confirming the deployment. ONX-220 User's Guide 22135173, Rev. 000 June 2020... -
Page 135: Tilt Settings
The Create Tilt Settings screen appears. 2. Enter the name (required) and description if desired. New Tilt Settings 3. Select the Create button. The Tilt Settings template appears. ONX-220 User's Guide June 2020 22135173, Rev. 000... -
Page 136: Tilt Settings
The Actions dropdown appears. 3. Select View, Edit, Rename, or Delete from the dropdown list and change or confirm from the following screen. Saving Tilt Settings When all values have been entered, select Save. ONX-220 User's Guide 22135173, Rev. 000 June 2020... -
Page 137: Tilt Settings Deployment
To deploy to all meters in the list, select the checkbox in the header of the first column. 5. After all desired meters have been checked, select the Next button. A message will appear confirming the deployment. ONX-220 User's Guide June 2020 22135173, Rev. 000... -
Page 138: Digital Measurement Settings
The Create Digital Measurement Settings screen appears. 2. Enter the name (required) and description if desired. 3. Select the Create button. The Digital New Digital Measurement Settings Measurement Settings template appears. ONX-220 User's Guide 22135173, Rev. 000 June 2020... -
Page 139: Digital Measurement Settings
The Actions dropdown appears. 3. Select View, Edit, Rename, or Delete from the dropdown list and change or confirm from the following screen. SavingDigital Measurement Settings When all values have been entered, select Save. ONX-220 User's Guide June 2020 22135173, Rev. 000... -
Page 140: Digital Measurement Settings Deployment
To deploy to all meters in the list, select the checkbox in the header of the first column. 5. After all desired meters have been checked, select the Next button. A message will appear confirming the deployment. ONX-220 User's Guide 22135173, Rev. 000 June 2020... -
Page 141: Ingress Span
The Create Ingress Span screen appears. 2. Enter the name (required) and description if desired. New Ingress Span 3. Select the Create button. The Ingress Span template appears. ONX-220 User's Guide June 2020 22135173, Rev. 000... -
Page 142: Ingress Span
The Actions dropdown appears. 3. Select View, Edit, Rename, or Delete from the dropdown list and change or confirm from the following screen. Saving Ingress Span When all values have been entered, select Save. ONX-220 User's Guide 22135173, Rev. 000 June 2020... -
Page 143: Ingress Span Deployment
To deploy to all meters in the list, select the checkbox in the header of the first column. 5. After all desired meters have been checked, select the Next button. A message will appear confirming the deployment. ONX-220 User's Guide June 2020 22135173, Rev. 000... -
Page 144: Auto Purge
The Create Auto Purge screen appears. 2. Enter the name (required) and description if desired. New Auto Purge 3. Select the Create button. The Tilt Settings template appears. ONX-220 User's Guide 22135173, Rev. 000 June 2020... -
Page 145: Auto Purge Settings
The Actions dropdown appears. 3. Select View, Edit, Rename, or Delete from the dropdown list and change or confirm from the following screen. Saving Auto Purge When all values have been entered, select Save. ONX-220 User's Guide June 2020 22135173, Rev. 000... -
Page 146: Auto Purge Deployment
To deploy to all meters in the list, select the checkbox in the header of the first column. 5. After all desired meters have been checked, select the Next button. A message will appear confirming the deployment. ONX-220 User's Guide 22135173, Rev. 000 June 2020... -
Page 147: Channel Plan Template
The Create Channel Plan Template screen appears. 2. Enter the name (required) and description if desired. New Channel Plan 3. Select the Create button. The Template Channel Plan Template screen appears. ONX-220 User's Guide June 2020 22135173, Rev. 000... -
Page 148: Channel Plan Template Settings
The Actions dropdown appears. 3. Select View, Edit, Rename, or Delete from the dropdown list and change or confirm from the following screen. Saving Channel Plan Templates When all values have been entered, select Save. ONX-220 User's Guide 22135173, Rev. 000 June 2020... -
Page 149: Channel Plan Template Deployment
To deploy to all meters in the list, select the checkbox in the header of the first column. 5. After all desired meters have been checked, select the Next button. A message will appear confirming the deployment. ONX-220 User's Guide June 2020 22135173, Rev. 000... -
Page 150: Throughput Url Settings
The Create Throughput URL Settings screen appears. 2. Enter the name (required) and description if desired. 3. Select the Create button. The New Throughput URL Settings Throughput URL Settings template appears. ONX-220 User's Guide 22135173, Rev. 000 June 2020... -
Page 151: Throughput Url Settings
The Actions dropdown appears. 3. Select View, Edit, Rename, or Delete from the dropdown list and change or confirm from the following screen. Saving Throughput URL Settings When all values have been entered, select Save. ONX-220 User's Guide June 2020 22135173, Rev. 000... -
Page 152: Throughput Url Settings Deployment
To deploy to all meters in the list, select the checkbox in the header of the first column. 5. After all desired meters have been checked, select the Next button. A message will appear confirming the deployment. ONX-220 User's Guide 22135173, Rev. 000 June 2020... -
Page 153: Chapter 10 Using The Oneexpert With A Mobile Device
Using the OneExpert with a Mobile Device This chapter provides steps for using the VIAVI Mobile Tech app, including the following: "VIAVI Mobile Tech app" on page 154 "Connecting to StrataSync" on page 154 "Using the Mobile Tech app" on page 155 "Connecting to your OneExpert via Remote Display"... -
Page 154: Viavi Mobile Tech App
The OneExpert is designed to be paired with a mobile device or tablet (such as an iPhone, iPad, or similar Android device), and leverages the user interface of those devices along with the VIAVI Mobile Tech App to provide a smooth user experience. -
Page 155: Using The Mobile Tech App
2. Press the Login to StrataSync button. The Login screen will be displayed. 3. Enter your Username and Password, then press the Sign In button. The Mobile Tech Main menu will be displayed. ONX-220 User's Guide June 2020 22135173, Rev. 000... -
Page 156: Pairing The Oneexpert To Your Mobile Device
Discover Devices. 4. Select the OneExpert you want to connect to and the devices will begin pairing. 5. When connected, your ONX-220 should appear in the Mobile Tech app. You can now transfer files and sync your OneExpert to StrataSync through the Mobile Tech App. -
Page 157: Mobile Tech Main Menu
Use the Instrument Files menu to manage files stored on your meter, use the Local Files menu to manage those stored on your mobile device. ONX-220 User's Guide June 2020 22135173, Rev. 000... - Page 158 Documentation – View and download various documentation for your instrument, including applications notes, software release notes, and quick reference guides Settings– Configure advanced settings for the Mobile Tech app, including when the unit syncs and clearing local data ONX-220 User's Guide 22135173, Rev. 000 June 2020...
-
Page 159: Connecting To Your Oneexpert Via Remote Display
Chapter 10 Using the OneExpert with a Mobile Device Product Support – Contact the VIAVI Technical Assistance Center, request repair or calibration, or watch quick tip videos Connecting to your OneExpert via Remote Display Once your OneExpert is paired to the Mobile Tech app, you can connect to it remotely to configure and run tests. -
Page 160: Updating The Firmware From Stratasync
Please wait as this could take 10-15 minutes, based on the size of the update file and connection speed. NOTE: You need the appropriate permissions in StrataSync to update the firmware. ONX-220 User's Guide 22135173, Rev. 000 June 2020... -
Page 161: Viewing Hardware/Software Versions And Options
You can easily see more detail about your OneExpert, including the software version, serial number, Tech ID, and installed software options. From the Main menu, select Show More near the top of the screen. Scroll down to see more details. ONX-220 User's Guide June 2020 22135173, Rev. 000... -
Page 162: Syncing To The Stratasync Server
OneExpert can sync with a VIAVI server via the internet. The synchronization also stores any user files saved on the unit to the StrataSync server. You should sync immediately upon receipt of the unit and on a regular (daily) basis thereafter to ensure that the unit is as up-to-date as possible and to allow all user information to be backed up. -
Page 163: Syncing With Stratasync
Deploy – Shows any files from StrataSync that are ready to be deployed to the unit Completed – Shows files that have been synced or deployed. Select the arrow to the right for more detail Instrument Sync ONX-220 User's Guide June 2020 22135173, Rev. 000... - Page 164 This can be used to create a “golden” unit. Lastly, if any updates are available, you will be prompted that you can update When synchronization is complete, the Status will indicate “Sync Complete”. ONX-220 User's Guide 22135173, Rev. 000 June 2020...
-
Page 165: Managing Files
1. From the Main menu, select Instrument Files. The File Manager screen appears, showing the User Files directory. Here you will see the following directories: Reports Screenshots Workflow Templates Instrument Channel Plans Files ONX-220 User's Guide June 2020 22135173, Rev. 000... - Page 166 To select multiple files, press the Select Multiple button at the bottom, and then select the files to download or delete. Then select Download or Delete. ONX-220 User's Guide 22135173, Rev. 000 June 2020...
-
Page 167: Local Files
To view PDF files, you may need to download a PDF reader app, such as Adobe PDF Reader. 1. From the Main menu, select Local Files. The Local Files screen appears, showing the list of files on your mobile device. Local Files ONX-220 ONX-220 User's Guide June 2020 22135173, Rev. 000... - Page 168 The file will also be deployed or uploaded to StrataSync, if selected. To delete a file, select the file and swipe to the left. Then select Delete. ONX-220 ONX-220 User's Guide 22135173, Rev. 000 June 2020...
-
Page 169: Managing Files With Stratasync
Network | Ping .92&company= Server IP 4.2.2.1 Requests Sent Replies Received Replies Lost Average Delay (ms) 14.0 Replies Lost (%) Network | IP Address bh001 2 / 4 NSC-100 / RRSO0071990071 0.0.99-2049 ONX-220 User's Guide June 2020 22135173, Rev. 000... - Page 170 Chapter 10 Using the OneExpert with a Mobile Device ONX-220 User's Guide 22135173, Rev. 000 June 2020...
-
Page 171: Chapter 11 Test Results
"Ingress Scan results" on page 189 "Quick Check results" on page 189 "Cable Fault Finder results" on page 190 "HL Leakage results" on page 193 "Spectrum results" on page 195 "WiFi Scan results" on page 196 ONX-220 User's Guide June 2020 22135173, Rev. 000... -
Page 172: Onecheck Results
Troubleshoot in Ingress Scan button. To get an updated scan of the circuit under test, select the Sync button To save the scan for future reference, select the Save button. ONX-220 User's Guide 22135173, Rev. 000 June 2020... -
Page 173: Downstream Details
Troubleshoot In Channel Check button. Some of these features are similar to ChannelCheck, but we'll cover the differences here. For more detail, see "ChannelCheck results" on page 176. ONX-220 User's Guide June 2020 22135173, Rev. 000... -
Page 174: System View
The MER screen displays the current MER performance. The BER screen displays the current BER performance. Off-Air Ingress The Off-Air Ingress screen displays the current peak off-air ingress performance for both frequency and level. ONX-220 User's Guide 22135173, Rev. 000 June 2020... -
Page 175: Docsis Details
DOCSIS area of the OneCheck results dashboard. All the results displayed are similar to those described later in this chapter, except that OneCheck does not display live results. See DOCSISCheck results on page 183 ONX-220 User's Guide June 2020 22135173, Rev. 000... -
Page 176: Channelcheck Results
Measurements for OFDM channels remove all of the over time and constellation measurements mentioned above, and instead include: Level Variation MER Variation Profile Analysis NOTE: The Over Time measurements are available for the optional PRO options package only. ONX-220 User's Guide 22135173, Rev. 000 June 2020... -
Page 177: Dashboard
The Measurements table provides values for the parameters under test, indicating their condition in comparison to the configured limits. Data values for the focused channel are provided for the following: QAM Channels Level Echo ICFR ONX-220 User's Guide June 2020 22135173, Rev. 000... -
Page 178: Ofdm Channels
There is no recovery from dropped packets for real-time apps like VoIP. Important: For a good D 3.1 signal, you want to make sure there are no uncorrectable CWE. ONX-220 User's Guide 22135173, Rev. 000 June 2020... -
Page 179: Spectrum/Iuc
This is an optional feature. BER Over Time (optional) The BER (both pre- and post) Over Time screen displays a graph of the historical BER performance up to the present. This is an optional feature. ONX-220 User's Guide June 2020 22135173, Rev. 000... -
Page 180: Dqi Over Time (Optional)
SmartScan (optional) The SmartScan screen simplifies system analysis by taking out the effects of tilt and different carrier types at TAP, GB and CPE. This is an optional feature. ONX-220 User's Guide 22135173, Rev. 000 June 2020... -
Page 181: Favorites
The Favorites screen shows the Level and MER of channels selected for monitoring by the user in both graphical and table format. Constellation The Constellation screen shows the constellation diagram for quick analysis of interference and distortion. ONX-220 User's Guide June 2020 22135173, Rev. 000... -
Page 182: Level Variation (Ofdm)
The MER Variation screen shows the live and overall MER variation values and graph for the channel. Profile Analysis (OFDM) The Profile Analysis shows the profiles and code word errors for the channel. ONX-220 User's Guide 22135173, Rev. 000 June 2020... -
Page 183: Docsischeck Results
Measurements for OFDM channels remove all of the over time measurements mentioned above, and instead include: Level Variation MER Variation Profile Analysis Dashboard The Dashboard displays condition, status and upstream and downstream performance data for the selected demarcation point. ONX-220 User's Guide June 2020 22135173, Rev. 000... -
Page 184: Downstream
Level performance up to the present. This is an optional feature. MER Over Time (optional) The MER Over Time screen displays a graph of the historical MER performance up to the present. This is an optional feature. ONX-220 User's Guide 22135173, Rev. 000 June 2020... -
Page 185: Ber Over Time (Optional)
ICFR (dB) Transmit Over Time (optional) Displays a graph of the level of the upstream carrier under test as well as minimum and maximum values during the test. This is an optional feature. ONX-220 User's Guide June 2020 22135173, Rev. 000... -
Page 186: Upstream Icfr (Optional)
The meter must be provisioned for data service to be able to conduct this test. For throughput testing, ONX meters are defaulted to public servers that have limited bandwidth capabilities. Other servers are configurable via StrataSync. ONX-220 User's Guide 22135173, Rev. 000 June 2020... -
Page 187: Ping/Traceroute (Over Docsis) (Optional)
The meter must be provisioned for data service to be able to conduct this test. Level Variation (OFDM) The Level Variation screen shows the live and overall level variation values and graph for the channel. ONX-220 User's Guide June 2020 22135173, Rev. 000... -
Page 188: Profile Analysis (Ofdm)
The MER Variation screen shows the live and overall MER variation values and graph for the channel. Profile Analysis (OFDM) The Profile Analysis shows the profiles and code word errors for the channel. ONX-220 User's Guide 22135173, Rev. 000 June 2020... -
Page 189: Ingress Scan Results
Quick Check results Quick Check results screen displays a graph of the specified channel’s signal strength at the selected demarcation point along with its type. ONX-220 User's Guide June 2020 22135173, Rev. 000... -
Page 190: Cable Fault Finder Results
IS within 7.5 dB of the largest reflection, the distance to the furthest reflection that meets this criteria will be marked as the length to the end of the cable ONX-220 User's Guide 22135173, Rev. 000 June 2020... -
Page 191: Changing The Display
To add a second marker for delta measurements, just double tap the screen and it will appear. Drag to the desired location and the displayed measurements will automatically update to delta intervals. ONX-220 User's Guide June 2020 22135173, Rev. 000... -
Page 192: Stopping The Test
Select the Stop button to prevent the meter from taking any more readings and updating the results. StrataSync reports You can see more detailed reports for the Cabel Fault Finder tests you associated to each work order in StrataSync. ONX-220 User's Guide 22135173, Rev. 000 June 2020... -
Page 193: Hl Leakage Results
Adjusting the volume and mute Audio sound volume can be adjusted using the volume bar at the bottom of the screen, or the Mute button can be enabled to fully mute the audible tone when desired. ONX-220 User's Guide June 2020 22135173, Rev. 000... -
Page 194: Stratasync Reports
Chapter 11 Test Results StrataSync reports You can see more detailed reports for the leakage tests you associated to each work order in StrataSync. ONX-220 User's Guide 22135173, Rev. 000 June 2020... -
Page 195: Spectrum Results
Changing RBW and AGC Select the Settings button to change the RBW or AGC settings. Stopping the test Select the Stop button to prevent the meter from taking any more readings and updating the results. ONX-220 User's Guide June 2020 22135173, Rev. 000... -
Page 196: Wifi Scan Results
To select those APs that you would like to be include in the graphs, select the checkbox in front of its entry. To include all APs in the list, select he Graph all checkbox in the header. ONX-220 User's Guide 22135173, Rev. 000 June 2020... -
Page 197: Channel Graph
To view a color-coded graph of the selected APs signal level over time, select the Time Graph button at the bottom of the screen. To stop the graphing of the selected network signals, select the Stop button. ONX-220 User's Guide June 2020 22135173, Rev. 000... - Page 198 Chapter 11 Test Results ONX-220 User's Guide 22135173, Rev. 000 June 2020...
-
Page 199: Appendix
"Resolving problems" on page 200 "Limited warranty" on page 201 "Getting technical assistance" on page 201 "Additional information" on page 201 "Specifications" on page 202 "Ordering information" on page 206 "Feature matrix" on page 207 ONX-220 User's Guide June 2020 22135173, Rev. 000... -
Page 200: Cleaning The Instrument
Make sure that the Ethernet interface cabling is correct. If the Ethernet cable is not hooked up, or is hooked up incorrectly, a packet will not be sent. Thus the Ethernet statistics will not increment. ONX-220 User's Guide 22135173, Rev. 000 June 2020... -
Page 201: Limited Warranty
Limited warranty For the latest warranty information, visit https://www.viavisolutions.com/literature/viavi-solutions-inc-general-terms-en.pdf https://www.viavisolutions.com/en-us/literature/viavi-manufacturer-warranty-nse- products-en.pdf Getting technical assistance If you require technical assistance, call 1-844-GO-VIAVI / 1.844.468.4284. For the latest TAC information, visit http://www.viavisolutions.com/en/services-andsupport/support/technical-assistance Additional information For more detailed information, contact us at TAC@viavisolutions.com for these additional documents. -
Page 202: Specifications
Ingress under carrier — full span ingress noise trace Group delay and in-channel frequency response (ICFR) Digital quality index (DQI) over time Errored/severely errored seconds Level, measured symbol rate, carrier frequency, modulation, interleaver depth (data log only) ONX-220 User's Guide 22135173, Rev. 000 June 2020... - Page 203 OFDM downstream channels, 8 SC-QAM + 2 OFDMA of bonded carriers, per DOCSIS upstream channels specification Compliant with CableLabs® specifications for DOCSIS SC-QAM channels up to 8 per DOCSIS specification Compliant with CableLabs® specifications for DOCSIS 3.0 (32x8 bonding) ONX-220 User's Guide June 2020 22135173, Rev. 000...
- Page 204 10 – 90% RH non-condensing RF immunity 8.5 V/m (for CATV measurements) Maximum altitude 4000 m (13,123 ft) 1. MER range declines as input levels decrease. Expected MER range at MIN LOCK level of –15 dBmV ONX-220 User's Guide 22135173, Rev. 000 June 2020...
- Page 205 Quick start guide Min/max/average dBm, mW StrataSync Core support optical power level and wavelength Connector input Universal 2.5 and 1.25 mm connectors Power source USB port Selectable pass/fail threshold Signal QoS Reference value ONX-220 User's Guide June 2020 22135173, Rev. 000...
-
Page 206: Ordering Information
ONX-220 Wall Charger with Integrated Cable ONX-2XX-PWR-ADPT-WALL ONX-220 Field Replaceable Battery (48 WHR) ONX-2XX-BATT-48WHR OneExpert Field Replaceable F-Connectors (25 PK) ONX-CATV-FCON-25PK ONX-220 Form Fitted Case with Shoulder Strap ONX-2XX-CASE-DELUXE Replacement Screen Protector (5 Pack) ONX-SCREEN-PROTECTION ONX-220 User's Guide 22135173, Rev. 000... -
Page 207: Feature Matrix
Upstream DOCSIS Channel Scan Basic Upstream Channel Details – Tx Level, Modulation Type Advanced Upstream Channel Details – ICFR DOCSIS Throughput DOCSIS Packet Quality ONX-220 User's Guide June 2020 22135173, Rev. 000... - Page 208 Upstream ICFR Speed Check – Throughput Packet Quality – Packet Loss, Round Trip Delay, Jitter Ping & Traceroute Pass Through Modem RJ-45 Port ONX-220 User's Guide 22135173, Rev. 000 June 2020...
- Page 209 OFDM Ingress Under Carrier Analysis Web Browser Ping & Trace Route Speed Check – Throughput * Base model has WiFi connectivity only (no testing) ONX-220 User's Guide June 2020 22135173, Rev. 000...
- Page 210 Web Browser Fiber Optic Modes ONX-220 Measurement Feature BASE PLUS Optical Fiber Scope Support – P5000i Optical Power Measurement Support – MP60/MP80 ONX-220 User's Guide 22135173, Rev. 000 June 2020...
- Page 212 22135173 Rev. 000, June 2020 English VIAVI Solutions North America: 1.844.GO VIAVI / 1.844.468.4284 Latin America +52 55 5543 6644 EMEA +49 7121 862273 APAC +1 512 201 6534 All Other Regions: viavisolutions.com/contacts email TAC@viavisolutions.com...
Need help?
Do you have a question about the ONX-220 and is the answer not in the manual?
Questions and answers