Advertisement
Quick Links
1
READ!
2
3
4
5...
6... 7... 8...
9... 10...
F035+F036 — 12 /18 — USL.1
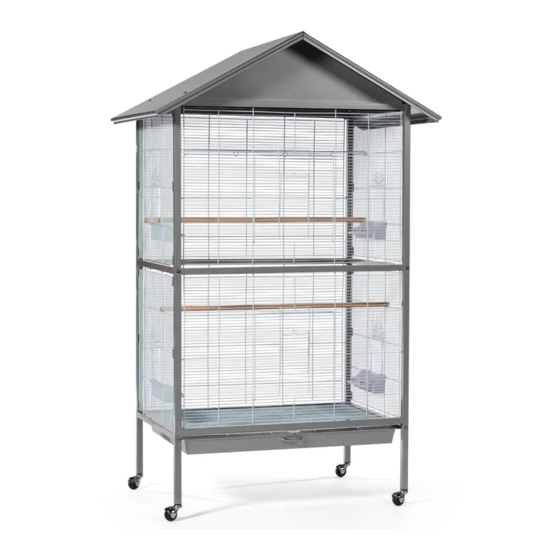
For assembly of your Charming Aviary MODEL #F035 (Large) / #F036 (Extra-Large)
Follow this flight path
READ!
READ THESE INSTRUCTIONS!
Assembly for the #F035 or #F036 Aviary cages are the same. The only
difference is the size and dimension of parts.
READ!
These assembly steps have been compiled to lead you to a successful
assembly. If you still have questions, please call our Prevue Customer
Service line at 1 (312) 243-3624.
INCLUDED
HELPFUL TOOLS
An allen wrench is included with the hardware.
You will need a small adjustable wrench for the roof assembly.
NEEDED
FIND A FRIEND (or GO IT ALONE—both are OK)
If you follow these steps, cage assembly will be easy for one person. But you
FRIEND ME !
may find a second person's assistance useful in some steps. Look for this
symbol:
EASY AS 1-2-3 !
REVIEW ALL PARTS & HARDWARE
After unpacking all components, review all parts and count the contents of
the screw packets and compare the quantities against the Hardware List on
the Parts List page.
Please contact Prevue if any problems or issues arise.
Made in China for Prevue Pet Products, Inc., 224 N Maplewood Ave, Chicago IL 60612 USA • www.prevuepet.com • 1 [312 ] 243-3624 • customerservice @ prevuepet.com
Advertisement

Related Manuals for Prevue Hendryx Charming Aviary F035


Summary of Contents for Prevue Hendryx Charming Aviary F035
- Page 1 For assembly of your Charming Aviary MODEL #F035 (Large) / #F036 (Extra-Large) Follow this flight path READ! READ THESE INSTRUCTIONS! READ! Assembly for the #F035 or #F036 Aviary cages are the same. The only difference is the size and dimension of parts. READ! These assembly steps have been compiled to lead you to a successful assembly.
- Page 2 For assembly of your Charming Aviary MODEL #F035 (Large) / #F036 (Extra-Large) Follow this flight path C RE FOR BIRDS CAGE PLACEMENT CUSTOMER SUPPORT Place the cage away from drafts and drafty areas and out of Please contact Prevue Pet Products: harsh or direct sun. Keep the cage away from strong fumes and PHONE 1 (312) 243-3624 odors.
-
Page 3: Parts List
CUSTOMER SUPPORT MODEL #F035/#F036 CHARMING AVIARY Please contact Prevue Pet Products: PARTS LIST PHONE 1 (312) 243-3624 ONLINE www.prevuepet.com EMAIL customerservice @prevuepet.com F035+F036 — 12 /18 — USL.3 Made in China for Prevue Pet Products, Inc., 224 N Maplewood Ave, Chicago IL 60612 USA • www.prevuepet.com • 1 [312 ] 243-3624 • customerservice @ prevuepet.com... -
Page 4: Hardware Included
CUSTOMER SUPPORT MODEL #F035/#F036 CHARMING AVIARY Please contact Prevue Pet Products: PARTS LIST PHONE 1 (312) 243 -3624 ONLINE www.prevuepet.com EMAIL customerservice@prevuepet.com HARDWARE INCLUDED: Long Screws 12 pcs +1 ( Step 1 & Step 2) Short Screws with Nuts 7 pairs +1 ( Step 4) KEY: R = Roof Pieces F = Front Panel... - Page 5 Charming Aviary CUSTOMER SUPPORT Please contact Prevue Pet Products: 1 (312) 243 -3624 PHONE Models: #F035 (Large) / #F036 (Extra-Large) www.prevuepet.com ONLINE customerservice@ prevuepet.com EMAIL Instructions online at www.prevuepet.com Assemble the CAGE FRAME You will need these pieces: Attach the front and back frame panels together with the LS1 and RS1 framing rails.
- Page 6 Assemble the cage SIDES You will need these pieces: Guide the LS2 side panel into place down through the brackets. Make sure the panel is oriented so that the cup door can be operated from the exterior. Make sure the panel is centered in all brackets on both sides.
- Page 7 Install the ACCESSORIES You will need these pieces: TOY RAIL PERCHES Hook the toy rail over the Install the perches anywhere in top horizontal wire of the the cage by inserting the slotted side panels. ends onto a vertical wire. Rest the perch on a horizontal wire for stability.
- Page 8 Assemble the ROOF You will need these pieces: Overlap the R2 roof panel with the R1 roof panel. Align the holes at the center. Insert a short screw from the top, and tighten the nut from the underside. [ 7 ] SHORT with Nuts Attach the R3 roof brace.
- Page 9 ...continued Tip the assembled roof into position by catching the lower horizontal flap on the R3 roof brace under the front panel frame rail. On the back end, the vertical panel will slip straight down into place on the interior side of the frame.
Need help?
Do you have a question about the Charming Aviary F035 and is the answer not in the manual?
Questions and answers