Advertisement
Quick Links
TOOLS : Allen wrench (included) • For best results, follow Assembly Steps in the order presented.
KEY:
RAIL = Stand rails
F = Front parts
S = Storage shelf
B = Back parts
FG = Floor grilles
LS = Left side parts
R = Roof
RS = Right side parts
T = Tray
1
PIECES
a
i
}
}
l
F
× 4
( long)
× 4
2
PIECES
]
]
F
a
i
}
l
}
× 4
(long )
3
PIECES
]
L s
]
g
× 4
( long )
431 — 04 /19 — USL
MODEL #
43
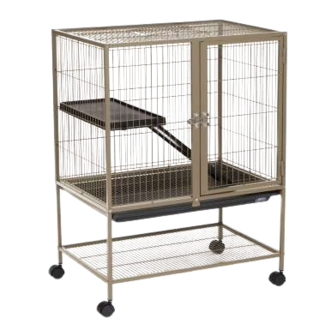
Ferret Delight
Instructions online at www.prevuepet.com
Attach the shelf to the leg rails
with long screws. Note: Position
the windbell lock to face out.
a
i
}
l
}
B
]
S
LS
a
i
}
l
}
RS
Slide the floor grille down into
place. Note: g does not have
any inset doors.
]
R s
Made in China for Prevue Pet Products, Inc., 224 N Maplewood Ave, Chicago IL 60612 USA • 1 [312] 243-3624 • www.prevuepet.com • customerservice @ prevuepet.com
CUSTOMER SUPPORT
For assistance or replacement parts,
please contact Prevue Pet Products:
PHONE
ONLINE www.prevuepet.com
EM IL
Fully insert rolling casters
into each frame leg.
Insert posts on the lower front and back panels
into the leg frames. Note: The lower panels
have openings at the top corners.
Attach the grille/tray rails with the long
screws. Note: Orient the rail with the open
end facing the front.
Slide the lower side
panels into place.
Note: Orient the tracks
at the top and facing
in. Secure the panels
with one long screw
in each bottom corner.
1 (312) 243-3624
customerservice@ prevuepet.com
Advertisement

Related Manuals for Prevue Hendryx FERRET DELIGHT 431


Summary of Contents for Prevue Hendryx FERRET DELIGHT 431
- Page 1 CUSTOMER SUPPORT For assistance or replacement parts, MODEL # Ferret Delight please contact Prevue Pet Products: PHONE 1 (312) 243-3624 ONLINE www.prevuepet.com EM IL customerservice@ prevuepet.com Instructions online at www.prevuepet.com TOOLS : Allen wrench (included) • For best results, follow Assembly Steps in the order presented. KEY: RAIL = Stand rails F = Front parts...
- Page 2 PIECES First, insert the upper panels into place. Next, secure them together with a long screw in each corner. Note: Each corner screw secures the intersection of the three panels. × 4 (long) Slide the floor grille (with Secure the grille with a First, slide the upper side PIECES the removable hatch door)
Need help?
Do you have a question about the FERRET DELIGHT 431 and is the answer not in the manual?
Questions and answers