Table of Contents
Advertisement
Quick Links
KEY:
R = ROOF piece
G
= GRILLE
T
= TRAY
B = BACK panel
F
= FRONT panel
S
= SIDE panel
SF = SIDE FRAME rail
HARDWARE
INCLUDED:
Hex Screw
12 pcs + 1
Long screw + nut
3 sets
Short screw + nut
8 sets + 1
Tray Handle
+ two screws
TOOLS:
Hex key
(included)
Phillips-head screwdriver
(not included)
Adjustable wrench
optional
(not included)
Small slotted screwdriver
(not included)
F037 — 11 / 23 — A4.1
Made in China for Prevue Pet Products, Inc., 224 N Maplewood Ave, Chicago IL 60612 USA • 1 [312] 243-3624 • www.prevuepet.com • customerservice @ prevuepet.com
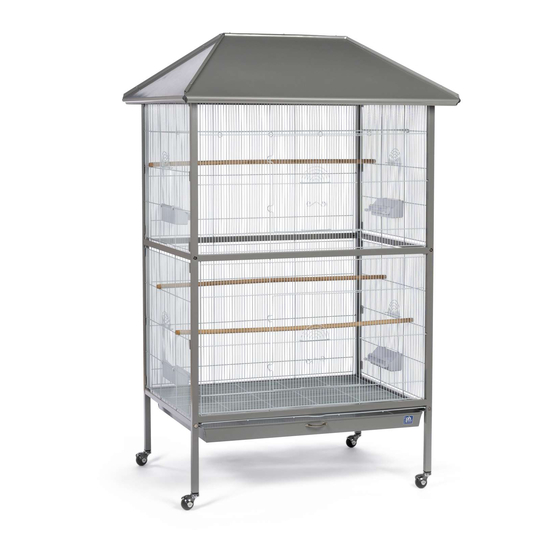
Charming Aviary Flight Cage XL
MODEL #
F037
PARTS
Instructions online at www.prevuepet.com
]
R
1
R
]
5
R
]
6
R
]
3
T
]
CUSTOMER SUPPORT
For assistance or replacement parts,
please contact Prevue Pet Products:
PHONE
1 (312) 243 -3624
ONLINE www.prevuepet.com
EMAIL
customerservice@ prevuepet.com
R
]
]
R
2
]
⁕
These parts are
interchangeable
R
R
S
4
R
1 =
2
R
3 =
4
panels are all
the same
f
f
1 =
2
f
f
3 =
4
f
f
5 =
6
Advertisement
Table of Contents

Related Manuals for Prevue Hendryx Charming Aviary Flight Cage XL


Summary of Contents for Prevue Hendryx Charming Aviary Flight Cage XL
- Page 1 CUSTOMER SUPPORT Charming Aviary Flight Cage XL For assistance or replacement parts, MODEL # F037 please contact Prevue Pet Products: PARTS PHONE 1 (312) 243 -3624 ONLINE www.prevuepet.com EMAIL customerservice@ prevuepet.com Instructions online at www.prevuepet.com KEY: R = ROOF piece = GRILLE...
- Page 2 CUSTOMER SUPPORT Charming Aviary Flight Cage XL For assistance or replacement parts, MODEL # F037 please contact Prevue Pet Products: PARTS PHONE 1 (312) 243-3624 ONLINE www.prevuepet.com EMAIL customerservice @prevuepet.com Instructions online at www.prevuepet.com F037 — 11 / 23 — A4.2...
- Page 3 CUSTOMER SUPPORT Charming Aviary Flight Cage XL For assistance or replacement parts, MODEL # F037 please contact Prevue Pet Products: ASSEMBLY PHONE 1 (312) 243 -3624 ONLINE www.prevuepet.com EMAIL customerservice@ prevuepet.com Instructions online at www.prevuepet.com Follow the Assembly Steps in the order presented for best results.
- Page 4 the middle rails have holes PIECES on top and bottom of the rail orient the rails so the holes are on the exterior-side of center interch nge ble Orient the side panels so the door is on the exterior. interch nge ble Slide the side panels down through the channels along the...
- Page 5 PIECES Slide the side panels down through the channels along the frame legs. Add the top side frame rails to the top of the panels; insert the extended wires into the rail holes, and; attach the rails with hex screws. interch nge ble interch nge ble PIECES...
- Page 6 PIECES This Blow-Up diagram shows the arrangement of roof panels and parts. x 8 sets interch nge ble interch nge ble TO ASSEMBLE: Slide the sleeved strip of the side roof panel over the single strip on the back roof panel, and align the holes.
- Page 7 continued The tapered roof caps finish off the roof; one on top and one on the interior. top cap is longer, and tapered on all edges x 3 sets end view inside cap is shorter, and tapered only on the long edges Flip the top cap upside-down on the floor and insert long screws up from the bottom.
- Page 8 continued With your friend, carefully turn the assembled roof upright and set it on the cage. Carefully reach under the roof line and catch the tabs on the roof in the brackets along the frame rails and 2 under the rail. side view see-through view Assembly completed.
Need help?
Do you have a question about the Charming Aviary Flight Cage XL and is the answer not in the manual?
Questions and answers