
Subscribe to Our Youtube Channel
Related Manuals for Tektronix B MSO 6 Series


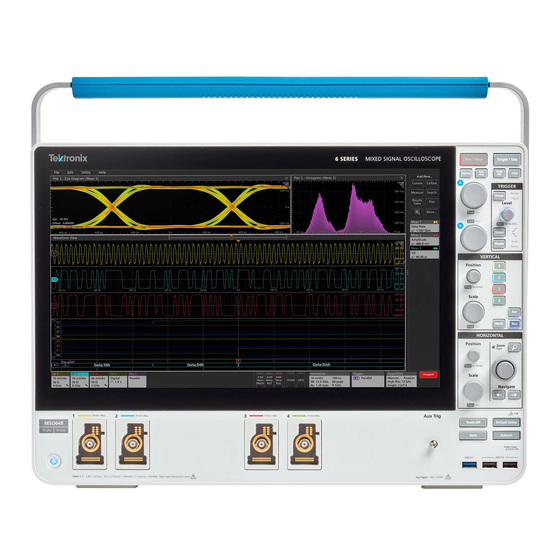
Summary of Contents for Tektronix B MSO 6 Series
- Page 1 6 Series B MSO MSO64B, MSO66B, MSO68B Service Supports Product Firmware V1.0 and above Register now! Click the following link to protect your product. www.tek.com/register 077-1696-00...
- Page 2 Copyright © Tektronix. All rights reserved. Licensed software products are owned by Tektronix or its subsidiaries or suppliers, and are protected by national copyright laws and international treaty provisions. Tektronix products are covered by U.S. and foreign patents, issued and pending. Information in this publication supersedes that in all previously published material.
-
Page 3: Table Of Contents
Table of Contents Table of Contents List of Figures....................................v List of Tables....................................vi Important safety information................................ vii General safety summary..............................vii Service safety summary................................ ix Terms in the manual................................ix Terms on the product................................x Symbols on the product................................. x Preface......................................1 Supported products................................1 Replaceable parts.................................. - Page 4 Table of Contents Service level................................. 19 Check for common problems............................19 Equipment required..............................20 Troubleshooting flow chart............................20 Troubleshoot the power supply.............................22 Instrument self tests..............................24 Export log files................................24 Download and install the latest instrument firmware.....................24 After power supply module replacement........................25 Replaceable parts..................................26 Parts ordering information..............................26 Module servicing..................................
-
Page 5: List Of Figures
List of Figures List of Figures Figure 1: 6 Series B MSO block diagram............................2 Figure 2: Primary troubleshooting tree............................21 Figure 3: Power status LEDs..............................22 Figure 4: Front cover and rear case exploded view........................27 Figure 5: Carrier interface board and rear chassis exploded view....................29 Figure 6: Rear chassis baffle and power supply exploded view....................31 Figure 7: Mid-plane chassis exploded view.......................... - Page 6 List of Tables List of Tables Table 1: External inspection checklist............................6 Table 2: Internal inspection checklist.............................7 Table 3: Required equipment for removal and replacement......................8 Table 4: Failure symptoms and possible causes.........................20 Table 5: Parts list column descriptions............................26 Table 6: Front cover and rear case.............................
-
Page 7: Important Safety Information
Use only insulated voltage probes, test leads, and adapters supplied with the product, or indicated by Tektronix to be suitable for the product. Observe all terminal ratings To avoid fire or shock hazard, observe all rating and markings on the product. - Page 8 Warning: The product is heavy. To reduce the risk of personal injury or damage to the device get help when lifting or carrying the product. Use only the Tektronix rackmount hardware specified for this product. Probes and test leads Before connecting probes or test leads, connect the power cord from the power connector to a properly grounded power outlet.
-
Page 9: Service Safety Summary
Important safety information Remove all probes, test leads and accessories that are not in use. Use only correct Measurement Category (CAT), voltage, temperature, altitude, and amperage rated probes, test leads, and adapters for any measurement. Beware of high voltages Understand the voltage ratings for the probe you are using and do not exceed those ratings. -
Page 10: Terms On The Product
Important safety information Warning: Warning statements identify conditions or practices that could result in injury or loss of life. CAUTION: Caution statements identify conditions or practices that could result in damage to this product or other property. Terms on the product These terms may appear on the product: •... -
Page 11: Preface
Preface Preface This manual contains service information for your instrument. Read the General and Service safety summaries before servicing the product. Be sure to read the introductions to all procedures. These introductions provide important information needed to perform the service correctly, safely, and efficiently. Supported products This manual contains information that is necessary to service the following products: •... -
Page 12: Theory Of Operation
Theory of operation Theory of operation This chapter describes the electrical operation of the oscilloscope to the module level. The block diagram shows the oscilloscope module interconnections. Figure 1: 6 Series B MSO block diagram Power supply The Power Supply board converts AC line voltage to +12 V to power for all internal circuits. Carrier interface assembly The Carrier interface assembly contains the following functions: 6 Series B MSO MSO64B, MSO66B, MSO68B Service... -
Page 13: Main Board And Front-End Board
Theory of operation Processor system The processor system contains a microprocessor that controls the entire instrument. The processor system also contains the solid state drive for the operating system, system RAM, and interfaces to I/O ports and the acquisition system. Rear panel I/O ports The Carrier interface assembly contains USB ports, an Ethernet port (LAN), a VGA Video port, a DVI Video port, a DisplayPort Video port, the USB-TMC port, an AUX... -
Page 14: Adjustment Procedures
Specifications and Performance Verification manual (Tektronix part number 077-1461-XX), available to download from the Tektronix web site (www.tek.com/product-support). If the instrument fails any Performance Verification tests, it must be returned to a Tektronix Service Center for adjustment and calibration. 6 Series B MSO MSO64B, MSO66B, MSO68B Service... -
Page 15: Maintenance
Use only deionized water when cleaning the front-panel buttons. Use a 75% isopropyl alcohol solution as a cleaner for cabinet parts. Before using any other type of cleaner, consult your Tektronix Service Center or representative. Inspection - Exterior. Inspect the outside of the instrument for damage, wear, and missing parts. Immediately repair defects that could cause personal injury or lead to further damage to the instrument. -
Page 16: Flat Panel Display Cleaning
Installation Procedures topics. Do not disassemble or clean the front chassis assembly (other than cleaning the front panel display and removing panel knobs). Disassembling the front chassis assembly requires that the instrument be returned to your nearest Tektronix Service Center for calibration. -
Page 17: Lubrication
• Reason for returning. • A complete description of the required service. Mark the address of the Tektronix Service Center and the return address on the shipping carton in two prominent locations. 6 Series B MSO MSO64B, MSO66B, MSO68B Service... -
Page 18: Removal And Replace Procedures
Any module inside of the chassis that does not have a remove and replace procedure requires that the entire instrument be returned to Tektronix Service Center for service. Warning: Before performing this or any other procedure in this manual, read the safety summaries found at the beginning of this manual. -
Page 19: Remove Sata Riser Board Assembly
Maintenance Procedure 1. To remove a knob assembly, pull the knob straight out of the front panel. Finger strength is adequate to pull knobs. Do not use pliers. 2. To reinstall a knob, align the knob with the shaft indent and press the knob onto the shaft. Turn the knob to make sure there is a smooth rotation. -
Page 20: Remove Handle
Maintenance 4. Use a screwdriver with T-10 Torx tip to remove the four screws from each foot assembly. 5. Remove the feet assembles. 6. To reinstall, reverse the steps. Use a screwdriver with T-10 Torx tip to secure the eight screws. First insert and tighten the screws that are near the front edge of the instrument, then insert and tighten the screws that are near the rear edge of the instrument. -
Page 21: Remove Rear Chassis Assembly
Maintenance 5. To reinstall, reverse the steps. Tighten the six T-10 Torx rear case screws to 0.65 N·m. Tighten the six T-8 Torx rear grill screws to 0.45 N·m. Remove rear chassis assembly Use this procedure to remove and replace the rear chassis, to access rear chassis assemblies (power supply, main fan, Carrier interface assembly, AFG Riser board). -
Page 22: Remove The Baffle Bracket
Maintenance 5. To reinstall, reverse the steps: a) Align the rear chassis assembly with the front chassis, slide in, and push gently to seat the connectors. b) Use a screwdriver with T-10 Torx tip to install the 19 chassis screws securing the rear chassis to the front chassis. Tighten to 0.65 N·m. - Page 23 Maintenance About this task Steps: About this task Use the following steps to remove the power supply assembly from the rear chassis and access the power supply bracket, board, cable, and fan. Procedure Disconnect the cables connecting the power supply to the carrier interface assembly, AFG riser board, and AC line filter.
-
Page 24: Remove Carrier Interface Assembly
Use this procedure to remove and replace the carrier interface assembly, which contains the AFG Riser assembly and the M.2 SSD memory board with the system OS. Only use this procedure to sanitize the instrument before sending for repairs at a Tektronix Service Center. Before you begin... - Page 25 Maintenance • To prevent electrostatic damage to components whenever you work on the instrument, wear properly-grounded electrostatic prevention wrist and foot straps, and work in a tested antistatic environment on an antistatic mat. • on page 9 Remove SATA riser board assembly •...
- Page 26 Maintenance 3. Disconnect fan cables. 4. Use a T-10 Torx screwdriver to remove the eight screws on the bottom of the chassis. 5. Use a T-8 Torx screwdriver to remove the two screws on the top front edge of the of the carrier interface chassis. 6 Series B MSO MSO64B, MSO66B, MSO68B Service...
-
Page 27: Remove The Afg Riser Assembly
Use this procedure to remove and replace the AFG riser assembly from the carrier interface assembly. Only use this procedure as part of the sanitize process before sending the instrument for repairs at a Tektronix Service Center. Before you begin Prerequisites: •... -
Page 28: Remove Handle Hub Assembly
Maintenance Remove handle hub assembly Use this procedure to remove and replace the handle hubs from the rear chassis. You will need to remove the left side hub if you want to remove the main fan. Before you begin Prerequisites: •... -
Page 29: Troubleshooting 6 Series Mso
This subsection contains information and procedures to help you determine if a faulty power supply is the problem with your instrument. If replacing the power supply does not fix the fault, you will need to return the instrument to a Tektronix Service Center for repair, as no other internal electronic assemblies or modules are user-replaceable. -
Page 30: Equipment Required
Maintenance Table 4: Failure symptoms and possible causes Symptom Possible cause(s) Instrument will not power on • Power cord not plugged in • Faulty power supply • Defective micro-controller assembly Instrument powers on, but one or more • Faulty fan power cable fans will not operate •... -
Page 31: Figure 2: Primary Troubleshooting Tree
Maintenance Figure 2: Primary troubleshooting tree Status LEDs. A set of six bi-color LEDs report the power management status of the instrument. These LEDs are located under the cover on the bottom of the instrument. 6 Series B MSO MSO64B, MSO66B, MSO68B Service... -
Page 32: Troubleshoot The Power Supply
All of these LEDs should be green a few moments after powering on the instrument. If any of these LEDs are red, or are not lit, return the instrument to a Tektronix Service Center for repair. Note: Before you send the instrument to Tektronix for repair, make sure that each LED status is recorded and attached the recordsheet with the instrument. - Page 33 10, carefully check for 115 V at the connectors of the AC line filter. If there is AC at the line filter, replace the power supply module or reassemble and return the instrument to a Tektronix Service Center for repair.
-
Page 34: Instrument Self Tests
Utility > Self Test. Select a test mode and run the self tests. If you continue to get errors on one or more tests, you will need to return the instrument to your nearest Tektronix Service Center for repair. -
Page 35: After Power Supply Module Replacement
Specifications and Performance Verification manual (Tektronix part number 077-1461-xx). Download this manual from the Tektronix Web site (www.tek.com/manuals). If the instrument fails the Performance Verification tests, it must be returned to a Tektronix Service Center for adjustment. 6 Series B MSO MSO64B, MSO66B, MSO68B Service... -
Page 36: Replaceable Parts
Instrument serial number • Instrument modification number, if applicable If you order a part that has been replaced with a different or improved part, your local Tektronix field office or representative will contact you concerning any change in part number. Module servicing Modules can be serviced by selecting one of the following three options. -
Page 37: Front Cover And Rear Case
Column Column name Description Tektronix part number Use this part number when ordering replacement parts from Tektronix. 3 and 4 Serial number Column three indicates the serial number at which the part was first effective. Column four indicates the serial number at which the part was discontinued. -
Page 38: Table 6: Front Cover And Rear Case
Replaceable parts Table 6: Front cover and rear case Index Tektronix part Serial no. Serial no. Qty Name & description number number effective discont'd Figure 4: Front cover and rear case exploded view on page 27 016-2106-XX CASE, ACCESSORY FRONT COVER... -
Page 39: Carrier Interface Board And Rear Chassis
Replaceable parts Carrier interface board and rear chassis Figure 5: Carrier interface board and rear chassis exploded view Table 7: Carrier interface board and rear chassis Index Tektronix Serial no. Serial no. Qty Name & description number part number effective... - Page 40 878-1143-XX CIRCUIT BOARD SUBASSY; AFG RISER BOARD UNTESTED; 389494600 Return the instrument to Tektronix for service. 348-2287-XX GASKET, EMI, BNC 5.00MM THICK 348-2264-XX GASKET, CONDUCTIVE, FOF, 1MM X 10MM X 100MM 337-4885-XX SHIELD, INSULATOR, POWER SUPPLY AND POSITIONER 348-2350-XX BUMPER, DAMPER;...
-
Page 41: Baffle And Power Supply Module
Replaceable parts Index Tektronix Serial no. Serial no. Qty Name & description number part number effective discont'd 337-4804-XX SHIELD, LAN PORT Baffle and power supply module Figure 6: Rear chassis baffle and power supply exploded view Table 8: Rear chassis baffle and power supply... -
Page 42: Mid-Plane Chassis
POWER SUPPLY; INTERNAL, AC-DC; 90-264VAC 47-63HZ, 103-127VAC 360-440HZ IN; +12V 44A, +12VSB 1.25A OUT; I2C, PSON, ACOK, PWRGOOD SIGNALS; SAFETY CONTROLLED, SAFETY CONTROLLED Return the instrument to Tektronix for service. 211-1584-XX SCREW, MACHINE, M3 X 0.5 X 6MM PAN HEAD, TORX T10 174-6612-XX... -
Page 43: Table 9: Mid-Plane Chassis
Replaceable parts Note: None of the components listed are user-replaceable. Return the instrument to your nearest Tektronix Service Center to repair or replace any internal components or assemblies in this diagram. Table 9: Mid-plane chassis Index Tektronix Serial no. Serial no. -
Page 44: Front Panel And Display
Note: None of the components listed are user-replaceable except for front panel knobs and the front panel label. Return the instrument to your nearest Tektronix Service Center to repair or replace any internal components or assemblies in this diagram. Table 10: Front panel and display... - Page 45 174-6610-XX CABLE ASSY, DISPLAY-FRONT PANEL Return the instrument to Tektronix for service. 174-7244-XX CABLE, TOUCH SCREEN TO FRONT PANEL Return the instrument to Tektronix for service. 366-0920-XX BUTTON, POWER SWITCH, SAFETY CONTROLLED Return the instrument to Tektronix for service.
- Page 46 342-1289-XX THERMAL INTERFACE MATERIAL Return the instrument to Tektronix for service. If Thermal Interface Material is removed during service replace it during reassembly. MSO64B THERMAL INTERFACE MATERIAL Return the instrument to Tektronix for service. If Thermal Interface Material is removed during service replace it during reassembly.
- Page 47 351-1150-XX GUIDE, PROBE VPI PLUS Return the instrument to Tektronix for service. MSO64B GUIDE, PROBE VPI PLUS Return the instrument to Tektronix for service. MSO66B GUIDE, PROBE VPI PLUS Return the instrument to Tektronix for service.
Need help?
Do you have a question about the B MSO 6 Series and is the answer not in the manual?
Questions and answers