Table of Contents
Advertisement
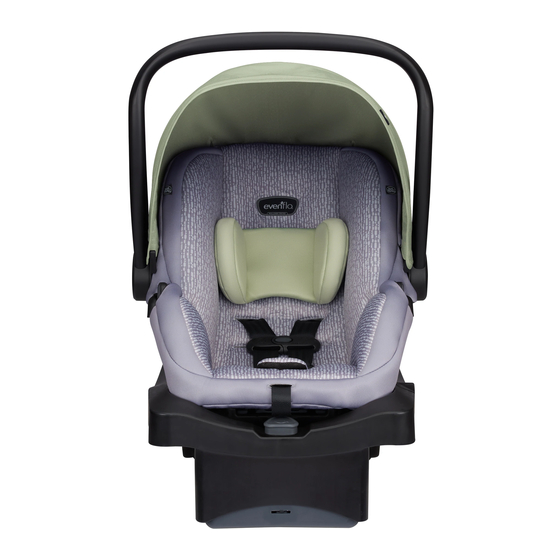
LiteMax™ 35
Rear-facing Child
Restraint System
Owner's Manual
Keep for future use
Rear-facing*
1.8 to 15.8 kg
(4 to 35 lbs)
43 to 81 cm
(17 to 32 in.)
* See page 1
for complete
requirements.
Para instrucciones en Español,
llamar al: 1-800-233-5921
WARNING:
To reduce the risk of serious injury
or death, read this owner's manual prior
to installing and using this child restraint.
© 2015 Evenflo Company, Inc.
25701013 11/15
Advertisement
Table of Contents

Related Manuals for Evenflo LiteMax 35


Summary of Contents for Evenflo LiteMax 35
- Page 1 * See page 1 for complete requirements. Para instrucciones en Español, llamar al: 1-800-233-5921 WARNING: To reduce the risk of serious injury or death, read this owner’s manual prior to installing and using this child restraint. © 2015 Evenflo Company, Inc. 25701013 11/15...
-
Page 2: Table Of Contents
More children are killed every year as passengers in car crashes U.S. REGULATORY NOTICE than by any other type of injury. To reduce the risk of SERIOUS This child restraint meets all the requirements of INJURY or DEATH, read this owner’s manual and your vehicle owner’s Federal Motor Vehicle Safety Standard 213. -
Page 3: Premature Infant Use
Evenflo requires that the evaluation MUST ALWAYS face the rear • This child restraint recommended by the AAP be conducted for all infants born of the vehicle. -
Page 4: Warnings
If the child restraint cannot be properly installed, DO NOT use this child restraint. Consult vehicle owner’s manual, try a different seating location or call Evenflo at 1-800-233-5921 (U.S), or 1-937-773-3971 (Canada). -
Page 5: Latch Warnings
WARNING WARNING Vehicle Seat Belt Warnings LATCH Warnings • DO NOT use this child restraint in a vehicle seating • The LATCH (Lower Anchors and Tethers for CHildren) position with door-mounted seat belts. system is intended to be used ONLY as described in •... -
Page 6: Safe Practices
Complete the registration card provided and mail it to restraint in a vehicle (p. 16). Evenflo or send your name, address, e-mail address, the • When using this restraint in Position 4 (Stand) (p. 16), restraint’s model number, and manufacturing date to:... -
Page 7: Public Notice For Canadian Customers
You must register this restraint to be reached in a public notice. Complete the registration card provided and mail it to Evenflo or send your name, address, e-mail address, the restraint’s model number, and manufacturing date to: Evenflo Company, Inc. -
Page 8: Visual Glossary
Visual Glossary Visual Glossary Front Seat Your vehicle components may be significantly different than pictured. Consult your vehicle owner’s manual to help you identify your vehicle Front Seat Lap components. and Shoulder Belts Fold-down Armrest Back Seat Consult your vehicle owner’s manual. Back Seat Rear Front Headrests... - Page 9 Child Seat Features Child Seat Features Description Front Handle Canopy Seat Pad Body Pillow* Harness Covers* Buckle Tongue Storage* Crotch Buckle Crotch Buckle Cover* Harness Release Button Harness Adjuster Strap Harness Slots Chest Clip Harness Straps Carrier Back Level Indicator Convenience Base Handle Release Harness Straps...
-
Page 10: Using The Litemax Handle
Using the LiteMax Handle Using the LiteMax Handle To change handle positions, squeeze both Handle IMPORTANT: Always secure the child in the carrier. Refer to Releases and rotate the handle to the desired position “Securing your Child in the Carrier” on page 37. until it locks into place. -
Page 11: Proper Installation With The Convenience Base
Proper Installation Installation Checklist WITH 1. Secure convenience base to the vehicle seat. the Convenience Base Convenience base is securely installed with lower anchor connector assembly (shown) (pages 20-24). Child Requirements Convenience base is securely installed with vehicle Weight: 1.8 – 15.8 kg (4 – 35 lbs) seat belt (pages 26-29). -
Page 12: Installing The Convenience Base With The Lower Anchor Connector Assembly
Installing the Convenience Base Before you begin, be sure the with the Lower Anchor Connector vehicle is on a level surface. Assembly Place the base on the vehicle seat and check the WARNING level indicator • This lower anchor connector assembly is intended to be used ONLY as described in these instructions. - Page 13 The Lock-Off that comes with your child restraint will be Know Your Lower Anchor one of the types below. Connector Assembly The Lock-Off provides a way to lock the child restraint The lower anchor connector assembly that comes with your without needing to lock your vehicle seat belt.
- Page 14 This page is intentionally blank. Close One Step Lock-Off Route any excess lower anchor connector assembly harness strap across the belt path so it will be under the Lock-Off. Close the Lock-Off until it clicks into place. Note: If unable to close the Lock-Off, loosen the lower anchor connector assembly, and try again.
-
Page 15: Installing The Convenience Base With The Vehicle Seat Belt
Installing the Convenience Base with The Lock-Off that comes with your child restraint will be one of the types below. the Vehicle Seat Belt Open One Step Lock-Off WARNING • The carrier MUST be locked firmly into the convenience base. Check by lifting up on the carrier. •... - Page 16 Secure the base to your vehicle seat by routing Close One Step Lock-Off the vehicle seat belt through the openings the sides of the base. Close the Lock-Off until it LAP AND clicks into place. LAP BELT SHOULDER BELT Close Two Step Lock-Off Close the Lock-Off.
-
Page 17: Placing The Carrier In The Base
Placing the Carrier in the Base U.S. Models ONLY Canadian Models ONLY Position 1 Position 3 Secure the carrier to the base by placing it into the base and pressing down on the front and back. Recline Indicator Indicateur d’inclinaison 1.8-9 kg (4-20 lbs) 9-15.8 kg (20-35... -
Page 18: Proper Installation Without The Convenience Base
Proper Installation Installation Checklist WITHOUT 1. Place the child in the carrier. The child’s back and bottom are flat against the back the Convenience Base and bottom surfaces of the carrier. Top of child’s head is at least 25 mm (1 inch) below Child Requirements the top of the child restraint seat back. -
Page 19: Installing The Carrier Without The Convenience Base
Installing the Carrier without the Convenience Base Push down on the bottom of the seat using your full weight. WARNING • NEVER use this child restraint in forward-facing position. • DO NOT use this carrier if it moves more than 25 mm (1 inch) side-to-side or front to back at the vehicle belt path. -
Page 20: Securing The Child In The Carrier
Securing the Child in the Carrier Place the baby into the carrier. Baby’s bottom and back If the level line is not level with the ground, use a should be flat against the seat. If there is a gap, baby will not tightly rolled towel or small blanket beneath the front be comfortable. -
Page 21: Removing The Child From The Carrier
Removing the Child from the Carrier Press the red buckle release , and remove the buckle tongues. The harness straps must be snug against the child. A snug strap should not allow any slack. It lies in Align the two sides of the a relatively straight line chest clip and snap... -
Page 22: Changing The Harness Position
Changing the Harness Position Insert both harness straps As your child grows, you will need to change the harness into the new harness strap position so they are routed through the slots closest position slots. to the child’s shoulders. The shoulder harness straps should IMPORTANT: When ALWAYS be as close as possible to, but... -
Page 23: Changing The Crotch Strap Position
Changing the Crotch Strap Position To reposition crotch strap, As your child grows, you will need to change the crotch strap loosen the harness straps position so that it is in the slot closest to your child. The crotch strap should ALWAYS be as close as possible to, but (p. -
Page 24: Changing The Waist Strap Position
Changing the Waist Strap Position Unhook the front of the child restraint’s seat pad and As your child grows, you will need to change the waist strap move it out of the way to position so that it is in the slot closest to your child. The waist expose the waist strap slots strap should ALWAYS... - Page 25 Small size baby Small size baby Medium size baby Medium size baby Larger size baby Larger size baby...
-
Page 26: Removing The Lower Anchor Connector Assembly
Removing the Lower Anchor Connector Assembly When the lower anchor connector assembly is not in use, you MUST securely store it in the area provided on the bottom of the base. Tilt and slide the adjuster Press the adjuster release Make sure the lower anchor connector assembly strap is to loosen the lower anchor button to loosen the lower... -
Page 27: Using As An Infant Carrier
WARNING Using as an Infant Carrier Secure the child in the carrier by following “Securing the • NEVER place this carrier near the edges of counter tops, Child in the Carrier” on page 37. tables, or other high surfaces. The child’s movements can Position 4 cause the carrier to slide and fall. -
Page 28: Securing Your Child Restraint In Aircraft
Securing Your Child Restraint in Aircraft Installing Carrier without Convenience Base in Aircraft The Federal Aviation Administration (FAA) recommends that you secure your child for air travel in an appropriate child restraint based on your child’s weight and size. Turbulence can happen with little or no warning. When turbulence occurs, the safest place for your child is in a properly installed child restraint, not in an adult’s lap or on the aircraft seat with its seat... - Page 29 Installing Carrier without Convenience Base Installing Carrier without Convenience Base in Aircraft in Aircraft The aircraft seat belt must be as tight as possible. Route the excess seat belt strap back through the belt slots , as shown above. Using your full weight, push the child restraint firmly onto the aircraft seat while pulling on the Route the aircraft seat belt through the belt slots...
-
Page 30: Installing The Canopy
Installing the Canopy To remove the harness covers , follow steps for Changing the Harness Position (p. 40). After Step 3, slide harness covers off CLICK! harness straps. Continue CLIC! with Steps 4 through 6. To reattach harness covers , follow steps Insert front canopy end into the holder until it clicks... -
Page 31: Replacement Parts
Proper Disposal of this Child Restraint Not available on all models. Styles may vary. At the end of this child restraint’s useful life, Evenflo To order replacement parts you can order online at encourages you to dispose of it properly. Most of the www.evenflo.com or contact Evenflo. -
Page 32: Limited Warranty
Evenflo’s sole obligation under this express limited warranty shall be, at Evenflo’s option, to repair or replace any Product that is determined to be defective by Evenflo and determined to be covered by this warranty. - Page 33 USA: 1-800-233-5921, 8 AM – 5 PM E.T. Canada: 1-937-773-3971 México: 01-800-706-12-00...
Need help?
Do you have a question about the LiteMax 35 and is the answer not in the manual?
Questions and answers