Table of Contents
Troubleshooting

Subscribe to Our Youtube Channel
Related Manuals for ZyXEL Communications NR2101


Summary of Contents for ZyXEL Communications NR2101
- Page 1 User’s Guide NR2101 5G NR Portable Router Default Login Details Version 1.0 Edition 2, 7/2020 LAN IP Address http: //192.168.225.1 Username admin Password admin Copyright © 2020 Zyxel Communications Corporation...
- Page 2 Every effort has been made to ensure that the information in this manual is accurate. Related Documentation • Quick Start Guide The Quick Start Guide shows how to connect and install the NR2101. • More Information Go to support.zyxel.com to find other information on the NR2101...
-
Page 3: Table Of Contents
Contents Overview Contents Overview User’s Guide ............................9 Get to Know Your NR2101 ........................10 Web Configurator ..........................33 Setup Wizard ............................39 Tutorials ..............................43 Status ..............................50 Technical Reference ........................52 APN & SIM PIN ............................53 WLAN & WWAN ............................. 58 NAT ................................. -
Page 4: Table Of Contents
Chapter 1 Get to Know Your NR2101 .........................10 1.1 Overview ............................10 1.2 Applications ............................ 10 1.3 Ways to Manage the NR2101 ....................... 10 1.4 Hardware Description ........................11 1.4.1 Hardware Installation ......................13 1.5 LCD Screens ............................ 13 1.5.1 The Home & Menu Screen ....................13 1.5.2 Connection Guide ........................ - Page 5 Tutorials ...............................43 4.1 Overview ............................43 4.2 Set Up Your WiFi Network ....................... 43 4.3 Connect to the NR2101 WiFi Network ..................44 4.4 Set Up a Wireless Network Using WPS ................... 46 4.5 Configure the MAC Address Filter ....................48 Chapter 5 Status ..............................50...
- Page 6 12.1.1 What You Can Do in this Chapter ..................90 12.2 Firmware Upgrade ........................90 12.3 Account Configuration ........................ 91 12.4 About ............................. 92 12.5 Factory Reset ..........................93 12.6 Logout ............................93 Chapter 13 Troubleshooting..........................95 13.1 Overview ............................95 NR2101 User’s Guide...
- Page 7 13.4 Internet Access ..........................97 13.5 Wireless Internet Access ....................... 98 13.6 WiFi Connections .......................... 99 13.7 Getting More Troubleshooting Help ..................100 Appendix A Customer Support ..................... 101 Appendix B Legal Information ....................... 107 Index ..............................114 NR2101 User’s Guide...
-
Page 8: Document Conventions
> IPv4 WWAN Settings means you first click WWAN SETTINGS in the navigation panel, and then click the IPv4 WWAN Settings tab to get to that screen. Icons Used in Figures Figures in this user guide may use the following generic icons. The NR2101 icon is not an exact representation of your device. NR2101... -
Page 9: User's Guide
User’s Guide... -
Page 10: Get To Know Your Nr2101
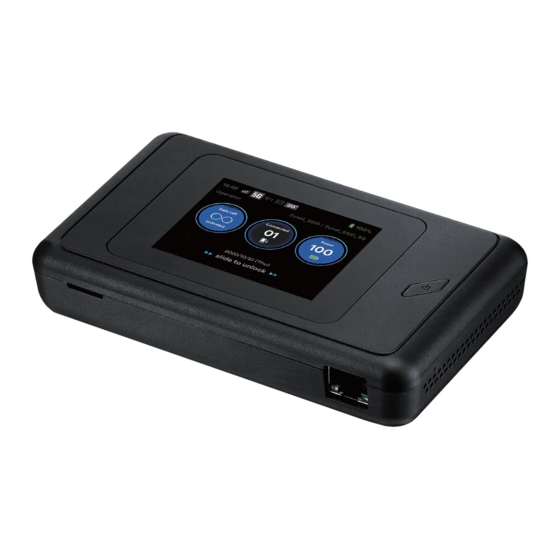
Get to Know Your NR2101 1.1 Overview Your NR2101 (A) is a 5G router that allows you to share Internet Access via WiFi anytime. The NR2101 supports 5G/4G/3G multi-mode and complies with the IEEE 802.11a/b/g/n/ac/ax standards. It can provide data rates of up to 300Mbps to up to 10 simultaneous WiFi clients. The NR2101’s slim design is easy to use anywhere anytime and leaves your smartphone’s bandwidth and battery free for other... -
Page 11: Hardware Description
Reset Button Ethernet Port You can use Power Button on the front panel to turn on the NR2101 and use LCD Touch Screen to navigate the NR2101. Press Power Button and Home screen appears. (Press the power button for three seconds and then release the button to turn on or off the NR2101.) - Page 12 This icon shows the NR2101 battery life. To start navigating the NR2101, slide right to unlock Home Screen and then Menu screen appears as shown next. Tap an icon on the menu screen to configure the selected setting. Slide left if you want to go to another menu screen.
-
Page 13: Hardware Installation
Use Power Saving to change the screen off time. You can also configure WiFi auto- close duration here. SSID Use SSID to allow wireless clients to connect (2.4G/5G) to the NR2101 using SSID and password. Enter a password of 8 to 20 characters, including spaces and special characters. -
Page 14: Connection Guide
1.5.2 Connection Guide To enable a wireless client to connect to the NR2101 using WPS, go to Connection Guide > Next > WPS. • Tap Manual, if you wan to enter the wireless network setting manually. Otherwise, tap WPS to quickly establish a wireless connection. -
Page 15: Power Saving
To configure the time set up for turning off WiFi automatically if no client is connected to the NR2101, select Auto-close WiFi and then choose from 10 minutes, 20 minutes, and 30 minutes in the WiFi auto off field. Tap the check mark at the upper-right corner to save the changes made. -
Page 16: Ssid
LABEL DESCRIPTION Screen off time This displays the screen off time on the NR2101. If the NR2101 is not in use for a certain period of time, the system will automatically turn off the screen. Auto-close WiFi Select this to enable Auto-close WiFi on the NR2101. The NR2101 will automatically turn off Wi-Fi if no wireless client is connected to the NR2101 for a certain period of time. -
Page 17: Sms
Chapter 1 Get to Know Your NR2101 From another device, find this SSID and enter the Password to connect wirelessly to the NR2101. 1.5.5 SMS SMS (Short Message Service) allows you to view and delete SMS messages that the NR2101 received from mobile devices or Internet Service Provider. -
Page 18: Settings
WPS activated. Then, the two devices connect and set up a secure network by themselves. You can use the LCD screen of the NR2101 to activate WPS in order to quickly set up a WiFi network with strong security. - Page 19 Use this to establish a WPS connection. WPS PIN Type the WPS password to enable wireless clients to connect to the NR2101. Note: You must activate WPS on the NR2101 and on another device within 2 minutes of each other. 1.5.6.2 WiFi 2.4G To enable a wireless client to connect to the 2.4GHz WiFi band, select WiFi Enable.
- Page 20 Hide SSID Select this to hide the NR2101’s 2.4GSSID in the outgoing beacon frame so a station cannot obtain the SSID through scanning using a site survey tool. WiFi PMF Select this to enable WiFi Protected Management Frame and enhance the security level on the LAN.
- Page 21 Select this to enable WiFi Protected Management Frame and enhance the security level on the LAN. 1.5.6.4 Connected Users Use this screen to view or manage the blacklist that blocks the devices from connecting to the NR2101. • Select Connected Users and the following screen appears. Figure 17 Connected Users •...
- Page 22 Figure 18 Blacklist 1.5.6.5 Profile management Use this screen to set up the default APN setting. The NR2101 will automatically use the default APN setting saved in your SIM card for connections. • Tap Profile Management and the following screen displays. Select Create to add a Profile name.
- Page 23 NR2101 to monitor how much data is used. Figure 22 Data Usage Monitor • Select Display data usage on home screen to enable or disable the NR2101 to display the percentage of data used on the home screen. Tap Max Data Usage to type the maximum data based on your current data plan.
- Page 24 Data Usage Monitor Select this to enable the NR2101 to monitor how much data is used. Display data usage on Select this to enable the NR2101 to display the percentage of the data used on home screen Home Screen. Max Data Usage This displays the maximum data provided by your ISP based on your data plan.
- Page 25 Click Cancel to return to the previous page. 1.5.6.8 Network Settings Use this screen to select how the NR2101 finds available networks. • Tap Search mode and select Auto to enable the NR2101 to find an available network automatically. Otherwise, select Manual. Figure 26 Search Mode •...
- Page 26 1.5.6.9 PIN Management Use this screen to verify your identity. • If you select Enable PIN, you will be asked to enter your PIN code when you use the NR2101. Figure 28 PIN Management • Select Enable PIN and the following screen appears. Type the PIN number of a four-digit number to activate cellular connections using a SIM card.
- Page 27 Chapter 1 Get to Know Your NR2101 Figure 29 PIN • If you enter incorrect PIN codes over three times, you will need to reset PIN Code using PUK Code of a 8-digit number (10 times is allowed). Tap the check mark at the upper-right corner to save the changes made.
- Page 28 Use a password of a 4-digit number to unlock the screen. 1.5.6.11 Language Use this screen to select the language you want to use on the NR2101. Tap Language and select an UI language from the list. The following screen appears. Tap the check mark at the upper-right corner to save the changes made.
- Page 29 Figure 33 Language 1.5.6.12 Time Setting Use this screen to set up the current time on the NR2101. • Select Time Setting and the following screen appears. Tap Year, Month & Date, Hour & Minute, and AM/PM to configure the selected time settings.
- Page 30 Use this screen to restore the settings back to the factory default mode. This means that you will lose all configurations you had previously, such as SSID and Password. • Navigate to Settings > Restore Default and tap Restore to restore the NR2101 back to the factory default mode.
-
Page 31: About
Figure 37 Restore Default 1.5.7 About Use this screen to view software/hardware information and notifications on the NR2101. • Tap About on the menu screen and select from Device Information, Help, Open Source Notice, and Third Party Notice. The following screen appears. - Page 32 Chapter 1 Get to Know Your NR2101 Table 16 About (continued) LABEL DESCRIPTION Open Source Notice This displays open source notices for your NR2101. Third Party Notice This displays third party notices for your NR2101. NR2101 User’s Guide...
-
Page 33: Web Configurator
Login. If this is the first time you have logged into the NR2101, you will be asked to change the default password. Enter a new password, enter it again to confirm, and then click Login. -
Page 34: Navigating The Web Configurator
Internet traffic details. 2.3 Navigating the Web Configurator The following section summarizes how to navigate the Web Configurator starting from the Status screen. Figure 39 Status Screen • A - Title Bar • B - Navigation Panel NR2101 User’s Guide... -
Page 35: Title Bar
Status screen. 2.3.3 Navigation Panel Use the menu items in the navigation panel to open screens to configure NR2101 features. The following section introduces the NR2101’s navigation panel menus and their screens. Figure 41 Navigation Panel... - Page 36 SSID Settings-2.4G WiFi Enable Use this field to enable or disable 2.4G WiFi. SSID This field displays a descriptive name used to identify the NR2101 in the 2.4G wireless LAN. Password This field displays the password for the 2.4G wireless LAN.
- Page 37 IPv4 Support Use this field to activate the IPv4 support. Settings Choose Backhaul Use this field to allow the NR2101 to connect to the Internet using IPv4. (IPv4) Current State This field displays the current IPv4 WWAN state. IPv6 WWAN IPv6 Support Use this field to activate the IPv6 support.
- Page 38 Software version Use this field to view the current software version of the NR2101. MiFi Software Use this field to view the current MiFi software version of the NR2101. version Zyxel Firmware Use this field to view the current firmware version of the NR2101.
-
Page 39: Setup Wizard
The first Setup Wizard screen displays the APN Settings screen. Use this screen to configure the APN (Access Point Name) provided by your ISP (Internet Service Provider). Enter the user name and password provided by your ISP, and then select your PDP Type (IPv4, IP46, or IPv4 &IPv6). Click Next. NR2101 User’s Guide... - Page 40 Chapter 3 Setup Wizard The WiFi Settings screen appears. Use this screen to configure the settings of the 2.4G/5G wireless LAN and select the security types. NR2101 User’s Guide...
- Page 41 Use this screen to configure the NR2101’s 5G wireless setting, and enter the wireless network name (SSID). For WiFi Setting (5G), select a security type from WPA-PSK, WPA2-PSK, and WPA3/WPA2 mixed mode and then enter a password from 8 to 63 case-sensitive characters, including special characters and numbers for data encryption.
- Page 42 Chapter 3 Setup Wizard Click Done to save your settings or click Previous to go back to the previous screens. You are now ready to access the Internet and allow wireless clients to connect to your NR2101. NR2101 User’s Guide...
-
Page 43: Tutorials
4.2 Set Up Your WiFi Network You can change the NR2101’s WiFi network name and password. It is recommended you change your wireless password regularly for your own security. Use a password that is not easy to guess and that consists of different types of characters, such as numbers and letters. -
Page 44: Connect To The Nr2101 Wifi Network
Chapter 4 Tutorials When your changes are applied you will be disconnected from the NR2101. Connect to the NR2101’s WiFi network once again with the new WiFi settings. 4.3 Connect to the NR2101 WiFi Network In this example,you have configured the NR2101’s WiFi network to the following settings. - Page 45 The Wireless Network Connection screen displays. Click the refresh button to update the list of the available wireless APs within range. Select SSID_Example and click Connect. Click Connect using a security key instead. Enterthe security key in the following screen. Click OK. NR2101 User’s Guide...
-
Page 46: Set Up A Wireless Network Using Wps
Chapter 4 Tutorials Check the status of your wireless connection in the screen below. If the wireless client keeps trying to connect to or acquiring an IP address from the NR2101, make sure you entered the correct security key. If the connection has limited or no connectivity, make sure the DHCP server is enabled on the NR2101. - Page 47 The NR2101 authenticates the wireless client and sends the proper configuration settings to the wireless client. This may take up to two minutes. The wireless client is then able to communicate with the NR2101 securely.
-
Page 48: Configure The Mac Address Filter
SECURITY INFO COMMUNICATION 4.5 Configure the MAC Address Filter This screen allows you to configure the NR2101 to exclude specific devices from accessing the NR2101 (Deny listed stations). Go to the MAC Filter screen, and then click Add New (see Section 7.4 on page... - Page 49 Chapter 4 Tutorials Figure 44 MAC Filter Enter the MAC Address that you want to block accesses to the NR2101 in the MAC Filter screen, and click OK. Figure 45 Add new MAC filter NR2101 User’s Guide...
-
Page 50: Status
Use the Status screen to check status information about the NR2101. 5.2 Status This screen is the first thing you see when you log into the NR2101’s Web Configurator. It also appears every time you click NR2101 in the navigation panel. The Status screen displays the NR2101’s connection mode, wireless LAN information and traffic statistics. - Page 51 This displays the amount of data used by the NR2101. Data Limitation This displays the total limiting amount of data that can be used by the NR2101. SSID1 (2.4G) This displays a descriptive name used to identify the NR2101 in the 2.4G wireless LAN.
-
Page 52: Technical Reference
Technical Reference... -
Page 53: Apn & Sim Pin
3G, 4G, and 5G wireless technology standards for the sending and receiving of voice, video, and data in a mobile environment. You can insert a 5G SIM card and set the NR2101 to use this 3G/4G/5G connection as your WAN. - Page 54 If your ISP gives you DNS server addresses, manually enter them in the IPv6 DNS server fields. If your ISP dynamically assigns the DNS server IP addresses (along with the NR2101’s WAN IP address), set the DNS server fields to get the DNS server address from the ISP.
-
Page 55: Apn Settings
Use this screen to configure the APN (Access Point Name). Enter the credentials provided by your ISP and select your PDP Type from the drop down menus. Click APN Settings and the screen appears as shown next. Figure 48 APN SETTINGS NR2101 User’s Guide... -
Page 56: Sim Pin Settings
Select IPv4 if you want the NR2101 to use IPv4 only. Select IPv6 if you want the NR2101 to use IPv6 only. Select IPv4 & IPv6 to allow the NR2101 to use IPv4 and IPv6 at the same time. Update Click Update to save your changes. -
Page 57: Sim Information
Update Click Update to save your changes. 6.3.1 SIM Information Use this screen to view information about the SIM card currently installed in the NR2101. Click SIM Information and the screen appears as shown next. Figure 50 SIM INFORMATION The following table describes the labels in this screen. -
Page 58: Wlan & Wwan
• Use the MAC Filter screen to deny wireless clients based on their MAC addresses from connecting to the NR2101 (Section 7.4 on page 67). • Use the WWAN Settings screen to configure the WWAN settings on the NR2101 for Internet access (Section 7.5 on page 68). NR2101 User’s Guide... -
Page 59: What You Need To Know
Some wireless devices, such as scanners, can detect wireless networks but cannot use wireless networks. These kinds of wireless devices might not have MAC addresses. Hexadecimal characters are 0, 1, 2, 3, 4, 5, 6, 7, 8, 9, A, B, C, D, E, and F. NR2101 User’s Guide... -
Page 60: Ssid Settings(2.4G/5G)
Use this screen to select the wireless security modes and bandwidth for 2.4G/5G network. Note: If you are configuring the NR2101 from a device connected to the wireless LAN and you change the NR2101’s SSID, channel or security settings, you will lose your wireless connection when you press Update to confirm. - Page 61 Bandwidth Set the operating frequency/channel depending on your particular region. Choices are 20M or 20/40M. Select a channel from the drop-down list box. The options vary depending on the frequency band and the country you are in. NR2101 User’s Guide...
-
Page 62: Wireless Security
Select None (Open) to allow wireless clients to communicate with the access points without any data encryption. Note: If you do not enable any wireless security on your NR2101, your network is accessible to any wireless networking device that is within range. - Page 63 Chapter 7 WLAN & WWAN Figure 54 SSID SETTINGS > Security Type: None (Open) 7.2.1.2 WPA-PSK Select WPA-PSK from the Security Type list. NR2101 User’s Guide...
- Page 64 Chapter 7 WLAN & WWAN Figure 55 SSID SETTINGS > Security Type: WPA-PSK 7.2.1.3 WPA2-PSK Select WPA2-PSK from the Security Type list. NR2101 User’s Guide...
- Page 65 Chapter 7 WLAN & WWAN Figure 56 SSID SETTINGS > Security Type: WPA2-PSK 7.2.1.4 WPA3/WPA2 mixed mode Select WPA3/WPA2 mixed mode from the Security Type list. NR2101 User’s Guide...
-
Page 66: Wps Settings
Figure 57 WPA3/WPA2 mixed mode 7.3 WPS Settings Use this screen to configure WiFi Protected Setup (WPS) on your NR2101. WPS allows you to quickly set up a wireless network with strong security, without having to configure security settings manually. -
Page 67: Mac Filter
00:A0:C5:00:00:02. You need to know the MAC addresses of the devices to configure this screen. Use this screen to view your NR2101’s MAC filter settings and add new MAC filter rules. Click MAC FILTER and the screen appears as shown. -
Page 68: Wwan Settings
Click Add New to enter the MAC address of the wireless devices that are denied access to the NR2101 in this field. Enter the MAC addresses in a valid MAC address format, that is, six hexadecimal character pairs, for example, 12:34:56:78:9a:bc. -
Page 69: Ipv4/Ipv6 Wwan Settings
This field allow you to configure the NR2101’s IPv6 WWAN settings. 7.5.1 IPv4/IPv6 WWAN Settings Use this screen to configure your NR2101’s IPv4 WWAN and IPv6 WWAN settings. Click WWAN SETTINGS > IPv4 WWAN Settings/ IPv6 WWAN Settings and the screen appears as shown. -
Page 70: Wwan Statistics
LABEL DESCRIPTION IPv4 WWAN Settings IPv4 Support Select Enable to allow the NR2101 to use IPv4. Otherwise, select Disable. Choose Backhaul (IPv4) Select Connect to use Backhaul (IPv4). Otherwise, select Disconnect. Current State Use this field to view information of the current IPv4 connection state. - Page 71 Click this field to view the detailed information of IPv4 WWAN Statistics. IPv6 WWAN Statistics Click this field to view the detailed information of IPv6 WWAN Statistics. Click IPv4 WWAN Statistics/IPv6 WWAN Statistics and the screen appears as shown next. NR2101 User’s Guide...
- Page 72 Packets transmitted on WWAN This is the number of transmitted packets on this port. Packets dropped on Rx WWAN This field displays the number of packets dropped by NR2101’s Rx WWAN since it was last connected. Packets dropped on Tx WWAN This field displays the number of packets dropped by NR2101’s Tx WWAN since it...
- Page 73 Packets transmitted on WWAN This is the number of transmitted packets on this port. Packets dropped on Rx WWAN This field displays the number of packets dropped by NR2101’s Rx WWAN since it was last connected. Packets dropped on Tx WWAN This field displays the number of packets dropped by NR2101’s Tx WWAN since it...
-
Page 74: Nat
192.168.1.35 to a third (C in the example). You assign the LAN IP addresses to the devices (A to D) connected to your NR2101. The ISP assigns the WAN IP address. The NAT network appears as a single host on the Internet. All traffic coming from A to D going out to the Internet use the IP address of the NR2101, which is 192.168.1.1. -
Page 75: What You Need To Know
8.1.2 What You Need to Know Inside/Outside Inside/outside denotes where a host is located relative to the NR2101, for example, the computers of your subscribers are the inside hosts, while the web servers on the Internet are the outside hosts. -
Page 76: Nat Settings
Use this screen to Enable IP Pass-Through and VPN Pass-Through protocols. Click NAT SETTINGS to open the following screen. Note: To select NAT Type from the drop down menus or edit DMZ IP, you must disable IP Pass- Through. NR2101 User’s Guide... - Page 77 IPSec VPN account. If IPSEC is disabled, then when a client sends a request to a VPN server, the server will reply to the NR2101 and the NR2101 will drop the request. When IPSEC is enabled, the NR2101 will forward the reply from the VPN server to the client that initiated the request, and the connection will establish successfully.
-
Page 78: Technical Reference
L2TP VPN account. If L2TP is disabled, then when a client sends a request to a VPN server, the server will reply to the NR2101 and the NR2101 will drop the request. When L2TP is enabled, the NR2101 will forward the reply from the VPN server to the client that initiated the request, and the connection will establish successfully. -
Page 79: Nat Port Forwarding Example
Trigger port forwarding solves this problem by allowing computers on the LAN to dynamically take turns using the service. The NR2101 records the IP address of a LAN computer that sends traffic to the WAN to request a service with a specific port number and protocol (a "trigger" port). When the NR2101's WAN port receives a response with a specific port number and protocol ("incoming"... -
Page 80: Two Points To Remember About Trigger Ports
The NR2101 forwards the traffic to Jane’s computer IP address. Only Jane can connect to the Real Audio server until the connection is closed or times out. The NR2101 times out in three minutes with UDP (User Datagram Protocol), or two hours with TCP/IP (Transfer Control Protocol/Internet Protocol). -
Page 81: Firewall
Firewall 9.1 Overview Use these screens to enable and configure the firewall that protects your NR2101 and your LAN from unwanted or malicious traffic. Enable the firewall to protect your LAN devices from attacks by hackers on the Internet and control access between the LAN and WAN. -
Page 82: Firewall Settings
Local Area Network (LAN) to be securely connected to the Internet. The NR2101 can be used to prevent theft, destruction and modification of data, as well as log events, which may be important to the security of your network. -
Page 83: Ipv4/Ipv6 Firewall Entry
The following table describes the labels in this screen. Table 32 FIREWALL SETTINGS LABEL DESCRIPTION Firewall Select Enable to activate the firewall. The NR2101 performs access control when the firewall is activated. View Firewall Select this to add and configure IPv4/IPv6 firewall entries. Entries Apply Click Update to save the settings. - Page 84 IP address size and features. The increase in IPv6 address size to 128 bits (from the 32-bit IPv4 address) allows up to 3.4 x 1038 IP addresses. The NR2101 can use IPv4/ IPv6 dual stack to connect to IPv4 and IPv6 networks, and supports IPv6 rapid deployment (6RD).
- Page 85 This field displays the source IPv6 addresses to which this rule applies. IP Prefix This field displays the IPv6 prefix that the NR2101 will advertise to its clients. Enter the IPv6 prefix for this interface if you want to use a static IP address.
-
Page 86: Lan Settings
TCP/IP configuration at start-up from a server. You can configure the NR2101’s WLAN as a DHCP server or disable it. When configured as a server, the NR2101 provides the TCP/IP configuration for the clients. If DHCP service is disabled, you must have another DHCP server on your LAN, or else the computer must be manually configured. - Page 87 DHCP server unless your ISP instructs you to do otherwise. Select Disable to stop the NR2101 acting as a DHCP server. When configured as a server, the NR2101 provides TCP/ IP configuration for the clients. If not, DHCP service is disabled and you must have another DHCP server on your LAN, or else the computers must be manually configured.
-
Page 88: Sms
11.1 Overview This chapter shows you how to view the text messages. SMS (Short Message Service) allows you to send and view the text messages that the NR2101 received from mobile devices or the service provider. 11.1.1 What You Can Do in this Chapter •... - Page 89 Use this field to enter the phone number of the message receiver. Content Use this field to enter the content of the message. Send Click this to send the message. Cancel Click this to exit this screen without saving. NR2101 User’s Guide...
-
Page 90: Maintenance
(Section 12.6 on page 93). 12.2 Firmware Upgrade This screen allows you to upload new firmware to your NR2101. You can download new firmware releases from your nearest Zyxel FTP site (or www.zyxel.com) to use to upgrade your NR2101’s performance. -
Page 91: Account Configuration
Chapter 12 Maintenance Figure 75 Firmware Upgrade 12.3 Account Configuration Use this screen to configure the NR2101's default admin account settings. To access this screen, click Account Configuration and the following screen appears. Figure 76 Account Configuration NR2101 User’s Guide... -
Page 92: About
Enter how many minutes a management session can be left idle before the session times out (Min) and click Update Timeout to save your changes back to the NR2101. The default is 300 seconds. After it times out you have to log in with your password again. Very long idle timeouts may have security risks. -
Page 93: Factory Reset
IP address of the NR2101 in your Web browser. Figure 78 FACTORY RESET 12.6 Logout Use this screen to log out of the NR2101’s Web Configurator. Click LOGOUT and OK to log out of the system. NR2101 User’s Guide... - Page 94 Chapter 12 Maintenance Figure 79 Logout NR2101 User’s Guide...
-
Page 95: Troubleshooting
H A P T E R Troubleshooting 13.1 Overview Here are offers some suggestions to solve problems you might encounter. The potential problems are divided into the following categories. • Power • Zyxel Device Access and Login • Internet Access •... - Page 96 Reset the device to its factory defaults, and try to access the Zyxel Device with the default IP address. To reset the NR2101, use the LCD touch screen to go to Settings > Restore Default and then select Restore. Section 1.5.6.14 on page Disconnect your computer from the Zyxel Device and then connect once again.
-
Page 97: Internet Access
Chapter 13 Troubleshooting If this does not work, you have to reset the device to its factory defaults. To reset your Zyxel Device use the LCD touch screen to go to Settings > Restore Default and then select Restore. 13.4 Internet Access I cannot access the Internet through a 3G/4G/5G wireless WAN connection. -
Page 98: Wireless Internet Access
Chapter 13 Troubleshooting One of my clients cannot access the Internet anymore. They had access to the Internet (with the Zyxel Device), but the Internet connection is not available anymore. Make sure your client is not blocked. You can check this on the Web Configurator (See Section 7.4 on page 67). -
Page 99: Wifi Connections
Chapter 13 Troubleshooting • Place the AP where there are minimum obstacles (such as walls and ceilings) between the AP and the wireless client. • Reduce the number of wireless clients connecting to the same AP simultaneously, or add additional APs if necessary. -
Page 100: Getting More Troubleshooting Help
Chapter 13 Troubleshooting 13.7 Getting More Troubleshooting Help Search for support information for your model at www.zyxel.com for more troubleshooting suggestions. NR7101 User’s Guide... -
Page 101: Appendix A Customer Support
• Brief description of the problem and the steps you took to solve it. Corporate Headquarters (Worldwide) Taiwan • Zyxel Communications Corporation • http://www.zyxel.com Asia China • Zyxel Communications (Shanghai) Corp. Zyxel Communications (Beijing) Corp. Zyxel Communications (Tianjin) Corp. • https://www.zyxel.com/cn/zh/ India • Zyxel Technology India Pvt Ltd • https://www.zyxel.com/in/en/ Kazakhstan •... - Page 102 • Zyxel Singapore Pte Ltd. • http://www.zyxel.com.sg Taiwan • Zyxel Communications Corporation • https://www.zyxel.com/tw/zh/ Thailand • Zyxel Thailand Co., Ltd • https://www.zyxel.com/th/th/ Vietnam • Zyxel Communications Corporation-Vietnam Office • https://www.zyxel.com/vn/vi Europe Belarus • Zyxel BY • https://www.zyxel.by Belgium • Zyxel Communications B.V. • https://www.zyxel.com/be/nl/...
- Page 103 Appendix A Customer Support • https://www.zyxel.com/be/fr/ Bulgaria • Zyxel България • https://www.zyxel.com/bg/bg/ Czech Republic • Zyxel Communications Czech s.r.o • https://www.zyxel.com/cz/cs/ Denmark • Zyxel Communications A/S • https://www.zyxel.com/dk/da/ Estonia • Zyxel Estonia • https://www.zyxel.com/ee/et/ Finland • Zyxel Communications • https://www.zyxel.com/fi/fi/ France •...
- Page 104 • Zyxel Communications Poland • https://www.zyxel.com/pl/pl/ Romania • Zyxel Romania • https://www.zyxel.com/ro/ro Russia • Zyxel Russia • https://www.zyxel.com/ru/ru/ Slovakia • Zyxel Communications Czech s.r.o. organizacna zlozka • https://www.zyxel.com/sk/sk/ Spain • Zyxel Communications ES Ltd • https://www.zyxel.com/es/es/ Sweden • Zyxel Communications • https://www.zyxel.com/se/sv/ Switzerland •...
- Page 105 Appendix A Customer Support Turkey • Zyxel Turkey A.S. • https://www.zyxel.com/tr/tr/ • Zyxel Communications UK Ltd. • https://www.zyxel.com/uk/en/ Ukraine • Zyxel Ukraine • http://www.ua.zyxel.com South America Argentina • Zyxel Communications Corporation • https://www.zyxel.com/co/es/ Brazil • Zyxel Communications Brasil Ltda. • https://www.zyxel.com/br/pt/ Colombia •...
- Page 106 Appendix A Customer Support Middle East • Zyxel Communications Corporation • https://www.zyxel.com/me/en/ North America • Zyxel Communications, Inc. - North America Headquarters • https://www.zyxel.com/us/en/ Oceania Australia • Zyxel Communications Corporation • https://www.zyxel.com/au/en/ Africa South Africa • Nology (Pty) Ltd. • https://www.zyxel.com/za/en/...
-
Page 107: Appendix B Legal Information
The contents of this publication may not be reproduced in any part or as a whole, transcribed, stored in a retrieval system, translated into any language, or transmitted in any form or by any means, electronic, mechanical, magnetic, optical, chemical, photocopying, manual, or otherwise, without the prior written permission of Zyxel Communications Corporation. Published by Zyxel Communications Corporation. All rights reserved. - Page 108 Appendix B Legal Information • This radio transmitter has been approved by Industry Canada to operate with the antenna types listed below with the maximum permissible gain and required antenna impedance for each antenna type indicated. Antenna types not included in this list, having a gain greater than the maximum gain indicated for that type, are strictly prohibited for use with this device.
- Page 109 Appendix B Legal Information • The NR Band n1 is: 186.21 mW The NR Band n3 is: 109.14 mW The NR Band n20 is: 93.33 mW The NR Band n28 is: 125.6 mW The NR Band n78 is: 132.13 mW Български...
- Page 110 Appendix B Legal Information Polski (Polish) Niniejszym Zyxel oświadcza, że sprzęt jest zgodny z zasadniczymi wymogami oraz pozostałymi stosownymi postanowieniami Dyrektywy 2014/53/UE. Português Zyxel declara que este equipamento está conforme com os requisitos essenciais e outras disposições da Directiva 2014/53/ (Portuguese) Română...
- Page 111 Appendix B Legal Information • Please use the provided or designated connection cables/power cables/ adaptors. Connect it to the right supply voltage (for example, 110V AC in North America or 230V AC in Europe). If the power adaptor or cord is damaged, it might cause electrocution. Remove it from the device and the power source, repairing the power adapter or cord is prohibited.
- Page 112 Appendix B Legal Information • 本器材須經專業工程人員安裝及設定,始得設置使用,且不得直接販售給一般消費者。 安全警告 - 為了您的安全,請先閱讀以下警告及指示 : • 請勿將此產品接近水、火焰或放置在高溫的環境。 • 避免設備接觸 : - 任何液體 - 切勿讓設備接觸水、雨水、高濕度、污水腐蝕性的液體或其他水份。 - 灰塵及污物 - 切勿接觸灰塵、污物、沙土、食物或其他不合適的材料。 • 雷雨天氣時,不要安裝,使用或維修此設備。有遭受電擊的風險。 • 切勿重摔或撞擊設備,並勿使用不正確的電源變壓器。 • 若接上不正確的電源變壓器會有爆炸的風險。 • 請勿隨意更換產品內的電池。 • 如果更換不正確之電池型式,會有爆炸的風險,請依製造商說明書處理使用過之電池。 • 請將廢電池丟棄在適當的電器或電子設備回收處。 • 請勿將設備解體。 • 請勿阻礙設備的散熱孔,空氣對流不足將會造成設備損害。 • 請插在正確的電壓供給插座 ( 如 : 北美 / 台灣電壓 110V AC,歐洲是 230V AC)。 •...
- Page 113 Appendix B Legal Information Note Repair or replacement, as provided under this warranty, is the exclusive remedy of the purchaser. This warranty is in lieu of all other warranties, express or implied, including any implied warranty of merchantability or fitness for a particular use or purpose. Zyxel shall in no event be held liable for indirect or consequential damages of any kind to the purchaser.
-
Page 114: Index
Index Address Assignment Broadband certifications viewing channel contact information copyright current date/time customer support date DHCP see also Dynamic Host Configuration Protocol DHCP server disclaimer DNS Server Domain Name System. See DNS. Dynamic Host Configuration Protocol ESSID NR2101 User’s Guide... - Page 115 Index filters MAC address Firewall guidelines firewall stateful inspection General wireless LAN screen Internet Protocol version 6 IPv6 addressing prefix prefix length IP pool setup LEDs MAC address filter MAC address filter MAC authentication overview port forwarding NR2101 User’s Guide...
- Page 116 Service Set IDentification 61, 62 Service Set IDentity. See SSID. SSID 59, 61, 62 stateful inspection firewall status TCP/IP configuration time trigger port Trigger port forwarding example process WAN (Wide Area Network) warranty note NR2101 User’s Guide...
- Page 117 Index web browser version recommended Wi-Fi wireless channel wireless LAN 58, 99 MAC address filter Wireless network channel MAC address filter security SSID Wireless security overview type wireless security Wireless tutorial Wizard setup NR2101 User’s Guide...
Need help?
Do you have a question about the NR2101 and is the answer not in the manual?
Questions and answers