Table of Contents
Advertisement
Quick Links
Advertisement
Table of Contents

Subscribe to Our Youtube Channel
Related Manuals for HERO GLAMOUR


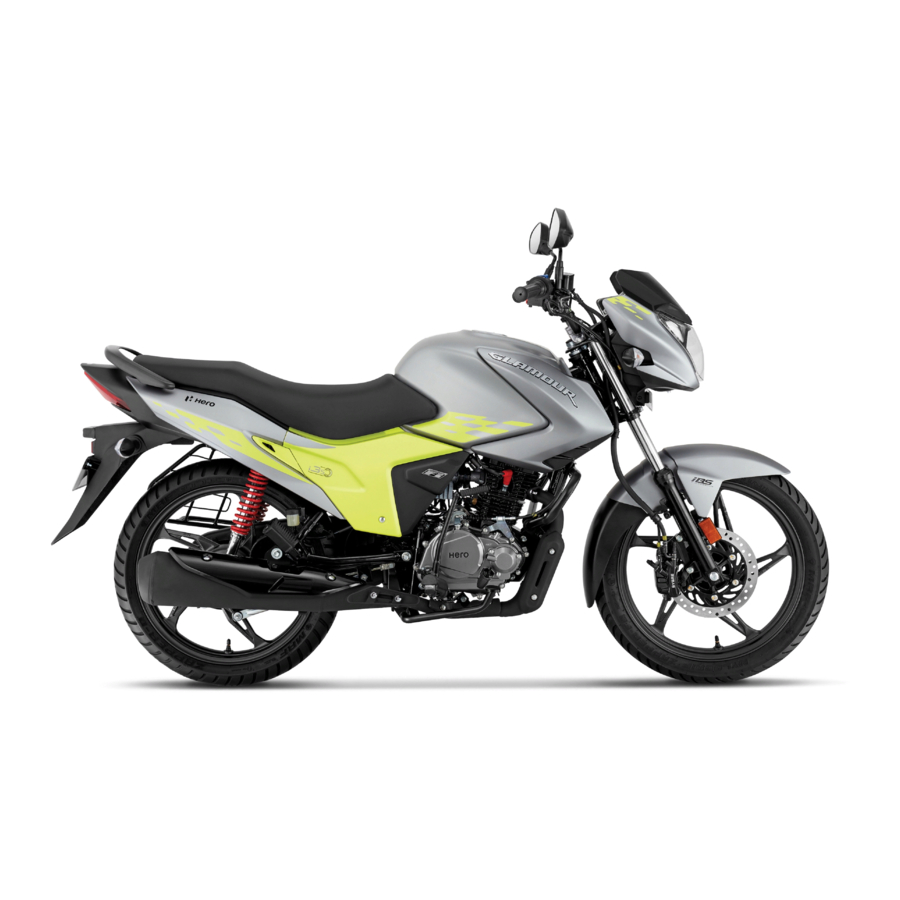
Summary of Contents for HERO GLAMOUR
- Page 1 No : IBND R01 APR15 PREFACE...
-
Page 3: Table Of Contents
MOTORCYCLE IDENTIFICATION Ÿ MAINTENANCE SCHEDULE OIL SCREEN FILTER CENTRIFUGAL FILTER Ÿ PRODUCT SPECIFICATION Ÿ SPARKING PLUG SAFE RIDING TIPS AIR CLEANER Ÿ ACCESSORIES & MODIFICATIONS Ÿ THROTTLE OPERATION TIPS FOR HEALTHY ENVIRONMENT VALVE CLEARANCE Ÿ DESCRIPTION CARBURETOR Ÿ PARTS FUNCTION Ÿ... -
Page 5: Motorcycle Identification
MBLXXXXALYZXYYYYY XXXXAL YYYYY XXXXEJ YYYYY Manufacturer Vehicle Year of Assembly Month of Serial Engine Year of Assembly Month of Serial Code Description Mfg. Plant Mfg. Number Description Mfg. Plant Mfg. Number Model Code.: Model Frame Engine Glamour (Electric Start/Disc/Cast Wheel) -
Page 6: Product Specification
PRODUCT SPECIFICATION ITEM SPECIFICATIONS 2005 mm 1070 mm Saddle Height 790 mm 129 kg 0.95 litre at disassembly 13.6 litres (minimum) 1 litre (usable) 157 ml DoT 3 or DoT 4 Maximum Power Maximum Torque 10.35 N-m @ 4000 rpm In:0.05 mm Valve Clearance (cold) - Page 7 ITEM SPECIFICATIONS Front Suspension Telescopic Hydraulic Shock Absorber Rear Suspension Rectangular Swingarm with 5 Step Adjustable Hydraulic Shock Absorber Front Rear Dia 240 mm (Optional) Dia 130 mm 3.350 (67/20) Primary Reduction 3.071 (43/14) Final Reduction 2.769 (36/13) 1.500 (30/20) 1.095 (23/21) 0.913 (21/23) **MF Battery, MF-4:12V 3 Ah...
-
Page 8: Safe Riding Tips
SAFE RIDING TIPS motorcycle. 4. Never touch any part of the hot exhaust system like muffler. -
Page 9: Accessories & Modifications
ACCESSORIES & MODIFICATIONS Accessories... -
Page 10: Tips For Healthy Environment
Genuine Engine Oil: Use Hero 4T Plus SAE 10W 30 SJ grade (JASO MA) engine oil recommended by Hero MotoCorp and make sure you change it every 6000 kms. -
Page 11: Description
DESCRIPTION km/h T R I P (10) Turn signal indicator (1) Horn switch (11) LCD panel (2) Turn signal switch (12) Reset button (3) Clutch lever (13) Master cylinder (optional) (4) Rear view mirror (14) Front brake lever (5) Pass lamp switch (15) Throttle grip (6) Headlamp dimmer switch (16) Electric starter switch... - Page 12 LEFT SIDE VIEW (1) Reflex reflector (7) Main stand (13) Tail/ Stop lamp (2) Fuel valve (8) Side stand (14) Rear grip (3) Carburetor (9) Pillion foot rest (15) Helmet lock (4) Starter motor (10) Women pillion step (16) Side cover left (5) Gear shift pedal (11) Saree guard (17) Front turn signal lamp...
- Page 13 RIGHT SIDE VIEW (1) Pillion foot rest (6) Brake pedal (11) Headlamp (2) Battery compartment (12) Visor (7) Oil filler cap (inside) (13) Air suction valve (8) Utility box (3) Kick starter pedal (14) Rear turn signal lamp (9) Caliper assembly (optional) (4) Rider foot rest (15) Exhaust muffler (10) Front brake disc (optional)
-
Page 14: Parts Function
PARTS FUNCTIONS INSTRUMENTS AND INDICATORS The indicators are in the speedometer panel above the headlamp. The functions are as below. Sl. No. Description Function High beam indicator Light glows when headlamp is in Hi Beam Neutral indicator Light glows when vehicle is in neutral Speedometer Indicates driving speed Turn signal indicators Flashes when turn signal switch is operated... -
Page 15: Ignition Switch
IGNITION SWITCH “ON” Position “OFF” Position / Lock Open “LOCK” Position The engine can be started. Turn signal lamps, Horn, Tail/Stop “ON” lamp, Fuel gauge and Pass lamp will be functional Engine cannot be started and no “OFF” electrical system will be functional. Steering can be locked. -
Page 16: Fuel Gauge
FUEL GAUGE ODOMETER The fuel gauge (1) is of a Liquid Crystal The Odometer (4) shows accumulated Display (LCD) type. distance traveled. The approximate amount of fuel quantity TRIPMETER available in the fuel tank is indicated by the The Tripmeter (5) shows distance traveled number of segments in the display. -
Page 17: Left Handlebar Controls
LEFT HANDLEBAR CONTROLS 4. Horn switch 1. Passing switch Press the switch to operate the horn. Press the passing lamp switch (1) to operate 5. Clutch switch the passing lamp. (For electric start model) 2. Headlamp Dimmer Switch There is a clutch switch provided for the safety of the rider. -
Page 18: Steering Lock
is engaged in gear press the clutch lever before operating the starter switch. Release starter switch after the engine has started. (1) Ignition key SEAT LOCK Location : On the rear left side of the seat, (1) Starter switch below the rear cowl. Never hold starter switch continuously for more than 5 seconds as continuous cranking of engine will drain the battery. -
Page 19: Helmet Hanger
Operation : Insert the key (1) and turn it clockwise. Pull the knob (2) downwards to At “ON”, fuel will flow from fuel tank to release the seat. To install, engage the lug the carburetor. on the underside of the seat with the frame and press on the top rear side of the seat until the lock clicks. -
Page 20: Fuel Valve
(1) Fuel tank cap (2) Key hole cover (3) Ignition key NOTE 3. To lock, position the cap back on the Do not operate the motorcycle with the fuel valve in the “RES” position after opening with arrow mark (6) facing the refilling. -
Page 21: Engine Oil
4. Check the oil level in the oil level ENGINE OIL window (2). It must be between upper and lower level marks. Use only Hero Genuine Engine Oil. BRAND : Hero 4T plus GRADE : SAE 10W 30 SJ Grade (JASO MA). -
Page 22: Engine Oil Replacement Process
5. Add the specified oil by removing the Stop the engine and let the engine oil oil filler cap (1) and filling till the upper settle down. level mark. Do not overfill. 7. Re check the oil level. 6. Quantity of oil to be filled is 0.75 litre (approx.) during oil change when right crankcase cover is not removed. -
Page 23: Tyres
Over inflated tyres make your motorcycle ride more harshly, are more prone to damage from surface hazards and wear unevenly. TYRES To safely operate your motorcycle, the tyres must be of recommended type and size, in good condition with adequate tread, and correctly (1) Air pressure gauge inflated. - Page 24 (1) Tyre wear indicator (2) Arrow mark Carefully inspect the tyres for any damage, if the motorcycle hits a pothole or hard object.
-
Page 25: Pre-Ride Inspection
PRE - RIDE INSPECTION 18-20 You should conduct pre ride inspection before riding the motorcycle to enhance riding comfort and safety. 38). Clean your motorcycle regularly. It Drive chain - check condition and protects the surface finish. Avoid cleaning slackness (page 39-41). Adjust and with products that are not specifically lubricate if necessary. -
Page 26: Starting The Engine
STARTING THE ENGINE Turn the fuel valve “ON” indicator glows on NOTE : • To start the engine in any gear position using the electric starter, press the clutch lever and push the starter switch. • Kick starting will not be possible when the transmission gears are engaged. Shift the transmission into neutral before kick starting. -
Page 27: Riding
Flooded Engine the same time, gradually increase engine speed by opening the throttle. coordination If the engine fails to start after repeated attempts, it may be flooded with excess of the throttle and clutch lever will fuel. To clear a flooded engine, turn the assure a smooth positive start. -
Page 28: Braking Parking
All your actions should be smooth under these conditions. sudden acceleration, Do not shift gears without operating clutch braking or turning may cause loss of and without closing the throttle otherwise control. For your safety, exercise extreme this would lead to damage of gears. caution when braking, accelerating to BRAKING turning. -
Page 29: Anti-Theft Tips / Utility Box
UTILITY BOX ANTI-THEFT TIPS To store some important utility item a 1. Always lock the steering and never lockable utility box has been provided. leave the key in the ignition switch . 2. Park your motorcycle in a locked garage whenever possible. 3. -
Page 30: Tool Kit
Pull open the utility box cover from the lower tab given below and release the tabs from the upper slots (4). To close the utility box cover insert the two tabs in the upper slots, press downwards gently to lock till the click sound. -
Page 31: Maintenance
MAINTENANCE If your motorcycle overturns or is involved THE IMPORTANCE OF in a crash, be sure your Authorised MAINTENANCE Distributor/ Dealer workshop inspects all A Well-maintained motorcycle is essential major parts, even if you are able to make for safe economical and trouble-free some repairs. -
Page 32: Safety Precautions
* Burns from hot parts. Let the engine and exhaust system To ensure best quality and reliability, use cool before touching. only new Hero MotoCorp Genuine Parts for repair and replacement. * Injury from moving parts. Do not run the engine unless instructed to do so. -
Page 33: Maintenance Schedule
MAINTENANCE MAINTENANCE SCHEDULE Dear Customer, We would strongly recommend the following schedule, to keep your motorcycle in perfect running condition and healthy environment. Motorcycle subjected to severe use or ridden in dusty area will require more frequent servicing. 10th 11th Next Next Next... - Page 34 10th 11th Next Next Next Next Next Next Next 1st 60 Next 90 Next 90 Next 90 12000- 15000- 18000- 21000- 24000- 27000- 30000- 3000-3500 6000-6500 9000-9500 12500 15500 18500 21500 24500 27500 30500 Brake Fluid**** Stop Lamp Switch Headlamp Focus Secondary Air Injection Muffler (Catalytic Converter) More frequent cleaning may be required when riding in dusty areas.
-
Page 35: Ÿoil Screen Filter Centrifugal Filter
OIL FILTER SCREEN & 5. Remove centrifugal filter cover (7) & CENTRIFUGAL FILTER clean the centrifugal filter (8) with non flammable or high flash point solvent (kerosene or diesel). Remove the kick starter pedal (1), 6. Reinstall the centrifugal filter cover, muffler (2), disconnect the clutch cable right crankcase cover &... -
Page 36: Ÿsparking Plug
SPARK PLUG (1) Noise suppressor cap (2) Spark plug number; consult your Authorised Distributor/ Dealer workshop on this if required. Clean any dirt around the spark plug base. Tighten a new spark plug ½ turn with a spark plug wrench to compress the Disconnect the noise suppressor cap (1) washer. -
Page 37: Air Cleaner
AIR CLEANER The air cleaner element is of dry paper pleated type it should be serviced at regular intervals (page 29). When riding in dusty areas, more frequent service may be necessary. Remove the seat (page 15). Remove the side cover (1) by removing side cover screws (2). - Page 38 (7) Air cleaner element (8) Element holder The air cleaner element should be cleaned by blowing moisture free 6. Replace it earlier if it becomes very dirty, pressurized air. damaged on surface or on the sealing area. Start cleaning by directing the air nozzle Install the air cleaner element, on holder (9) inside the element and cleaning it by insert the air cleaner assembly into the...
-
Page 39: Ÿthrottle Operation
(2) Grommet (3) Lock nut (4)Adjuster (A) Decrease free play (B) Increase free play VALVE CLEARANCE Excessive valve clearance will cause noise, and little or no clearance will prevent the valve from closing and cause valve damage and power loss. Check valve clearance at the specified intervals (page 29). - Page 40 The adjustment must be made when the The checking or adjusting of valve piston is at Top Dead Center and both the inlet and exhaust valves are closed. clearance should be performed while the engine is cold. The clearance will change This condition can be determined by as the engine temperature rises.
-
Page 41: Ÿcarburetor
Never adjust air screw (2). Air screw adjustment is to be done only by your Authorised Distributor/ Dealer workshop. -
Page 42: Ÿclutch
Gradually release the clutch lever and open the throttle. The motorcycle should start smoothly and accelerate. 1. To adjust the free play, loosen the lock nut (3). Turn the adjusting nut (4) to obtain the specified free play. If proper adjustment cannot be obtained or the clutch does not work properly, visit your Authorised Distributor/ Dealer workshop. - Page 43 (3) Drive chain slack 30 mm Turn the chain to view chain lock plate (4) inside the hole. Ensure that the chain Turn the engine “OFF” park the lock plate open end (5) is installed in the motorcycle on its main stand and shift opposite direction of the chain rotation.
- Page 44 Align the chain adjuster index mark (5) with the rear edge (6) of the adjusting slots on both sides of the swing arm equally. If the drive chain slack is excessive when the rear axle is moved to the farthest limit of adjustment, the drive chain is worn and must be replaced.
-
Page 45: Ÿdirven Chain
NOTE Visit Authorised Distributor/Dealer workshop for inspection, cleaning, lubrication and adjustment of drive chain at every 2000 kms. (2) Sleeve nut (3) Drive chain lock nut (4) Drive chain adjusting nut (5) Index mark (6) Rear edge of adjusting slot Turn the engine “OFF”, park the (2) Free play 10-20 mm SAE # 90 grade oil. - Page 46 If proper adjustment cannot be obtained by this method, visit your Authorised Hero MotoCorp workshop. Master cylinder/reservoir location : Right handle bar. Brake fluid recommended: DoT 3 or DoT 4 (4) Brake arm pin your Authorised Distributor/Dealer workshop. (A) Cut-out not seated...
- Page 47 Inspection (1) Brake pads (2) Caliper (3) Disc NOTE : (1) Wear indicator marks Clean the dirt and mud accumulation between the brake pads (1), caliper (2) and the disc (3) by using a water jet. Always contact your Authorised Distributor/Dealer workshop for refilling of master cylinder when necessary.
- Page 48 Park the motorcycle on its main stand. Measure the distance brake pedal (1) moves before the brake starts to take hold. Free play (2) should be 20-30 mm. If proper adjustment cannot obtained by this method, visit your Authorised Distributor/Dealer. Drum type (2) Free play 20-30 mm...
-
Page 49: Rear Brake
Front brake wear indication MF Battery, MF-4: 12V 3Ah Rear brake wear indication (1) Battery It is not necessary to check the battery electrolyte level or add distilled water as the battery is an Maintenance-Free (sealed) type. If your battery seems weak and electrolyte is leaking (causing hard starting or other electrical troubles), contact your Authorised Distributor/Dealer... - Page 50 NOTE : Battery charging This symbol on the battery means A l w a y s v i s i t y o u r A u t h o r i s e d that this product must not be Distributor/Dealer if you see any symptom of treated as household waste.
-
Page 51: Stop Lamp Switch
from the battery first, then disconnect the positive (+) terminal lead. 6. Pullout the battery from the battery box. Battery installation 1. Reinstall in the reverse order of removal. Be sure to connect the positive (+) terminal first, then the negative (-) terminal. 2. -
Page 52: Headlamp Adjustment
3. Adjust the headlamp beam vertically stop lamp by loosening the bolt (3) & move the stop lamp headlamp unit forward & backward for correct focus adjustment. retard (3) Adjusting bolt Stop lamp switch An improperly adjusted headlamp may blind oncoming driver or it may fail to light the road for a safe distance. -
Page 53: Ÿfront Wheeel Removal
Check the rear shock absorber by pushing hard downwards on rear grip while the motorcycle is not parked on stand. The suspension action should be smooth and their should be no oil leakage. (1) Pin spanner Drum type 1. Raise the front wheel off the ground. Rear shock absorber adjustment 2. - Page 54 Axle nut torque : 5.2 kgf-m Adjust the front brake (page 41). (Disc type) (1) Front brake cable (2) Brake arm 1. Raise the front wheel off the ground. (3) Brake panel (4) Front brake adjusting nut (5) Axle nut (6) Axle 2.
-
Page 55: Ÿrear Wheel Romval
Do not operate front brake lever when the wheel is removed. Remove the rear brake adjusting nut (1) and disconnect the brake rod (2) from the brake arm (3) by pushing down the brake pedal. Disconnect the brake stopper arm (4) from the brake pedal (5) by removing split pin (6) and lock nut (7). -
Page 56: Ÿwashing The Motorcycle
This motorcycle is equipped with a catalytic converter in the muffler to meet the emission norms. headlamp We at workshop take all above mentioned precautions like recommended detergents and usage of muffler caps / plugs during wash to ensure quality wash. Do not use high pressure water (or air). - Page 57 (1) Air suction valve Further to meet emission standards this motorcycle is provided with an air suction valve. Air suction valve (1) supplies fresh air from the air filter to the exhaust manifold to convert carbon monoxide to carbon dioxide. This reduces the CO% in the vehicle’s exhaust.
-
Page 58: Basic Troubleshooting
1. Starting trouble - Engine does not start A. Fuel system Check fuel valve position Consult Authorised Distributor/Dealer B. Electric-starter not working Fuse Check Fuse Replace Fuse (ref. page 47) Weak Inspect Battery Consult Authorised Distributor/Dealer Loose Check connections, Ignition Secure connections switch / starter switch Consult Authorised Distributor/Dealer... - Page 59 C. No spark at spark plug Replace Spark Plug/ Adjust Spark Plug Gap (0.8 - 0.9 mm) Consult Authorised Distributor/Dealer 2. Engine starts but stalls Check Air Cleaner Consult Authorised Distributor/Dealer...
- Page 60 3. Poor pick-up 33-34 Check Air Cleaner Consult Authorised Distributor/Dealer 4. Electrical system Feeble horn sound or no light Consult Authorised Distributor/Dealer Consult Authorised Distributor/Dealer...
- Page 61 Hero MotoCorp Ltd. No : IBND I certify having taken delivery of one Hero MotoCorp Glamour Motorcycle bearing the following particulars:- I have been explained by the Authorised Distributor/Dealer about correct and safe driving habits, service schedules and maintenance tips.
- Page 62 Hero MotoCorp Ltd. The vehicle has been delivered in factory fresh condition to my satisfaction & I have understood all terms and conditions and shall abide by them. Authorised Distributor / Dealer Name Authorised Distributor / Dealer Address Tool Bag, Driver No. 2 Plus / Minus, Wrench Sparking Plug, Spanner 14 x 17, No.
- Page 63 Hero MotoCorp Ltd. No : IBNC Hero MotoCorp Glamour I certify having taken delivery of one Motorcycle bearing the following particulars:- I have been explained by the Authorised Distributor/Dealer about correct and safe driving habits, service schedules and maintenance tips.
- Page 64 Hero MotoCorp Ltd. The vehicle has been delivered in factory fresh condition to my satisfaction & I have understood all terms and conditions and shall abide by them. Authorised Distributor / Dealer Name Authorised Distributor / Dealer Address Tool Bag, Driver No. 2 Plus / Minus, Wrench Sparking Plug, Spanner 14 x 17, No.
-
Page 65: Genuine Parts
WHAT ARE THE BENEFITS OF HERO MOTOCORP GENUINE SPARE PARTS ? 4Assures long life 4Ensures economy for a long time 4Safety of vehicle and rider 4Peace of mind 4Value for money 4Assured quality... - Page 66 CONSEQUENTIAL DAMAGES ON USING NON-GENUINE PARTS Clutch Plate Material used is inferior Damages other parts of clutch like, clutch center and outer clutch Affects fuel efficiency Poor acceleration Cam Chain Kit Poor performance Reduced life Gasket Cylinder Head Improper sealing Engine knocking Leads to leakage and smoky exhaust Higher emission level...
- Page 67 CONSEQUENTIAL DAMAGES ON USING NON-GENUINE PARTS Element Air Cleaner Improper air filtration resulting in premature engine failure Affects fuel efficiency Poor engine performance Spark Plug Frequent stalling of engine Higher emission level Poor engine performance Affects fuel efficiency Brake Pads / Shoes Poor braking effeciency Rider safety - an issue Discs / Drum wear out, resulting in subsequent repair cost...
-
Page 68: Jobs Applicable To Periodic Services
Hero MotoCorp Ltd. JOBS APPLICABLE TO PERIODIC SERVICES 1. Wash the vehicle, blow dry with air at every service. 2. Fuel line inspection at every service. 3. Inspect throttle free play and operation at every service, adjust if necessary . - Page 69 Engine Oil Authorised Top-up/ Distributor/Dealer Replace (Sig. & Stamp) 500 - 750 3000 - 3500 6000 - 6500 9000 - 9500 12000 - 12500 15000 - 15500 18000 - 18500 VIII 21000 - 21500 24000 - 24500 NOTE : It is mandatory to avail all services as per the recommended schedule. Please ensure that each service is availed within 90 days from the date of previous service or as per the recommended schedule, whichever is earlier.
- Page 70 Engine Oil Authorised Top-up/ Distributor/Dealer Replace (Sig. & Stamp) 27000 - 27500 30000 - 30500 33000 - 33500 XIII 36000 - 36500 39000 - 39500 42000 - 42500...
- Page 71 Authorised Distributor/Dealer (Sig. & Stamp)
- Page 72 Hero MotoCorp Ltd. AUTHORISED DISTRIBUTOR/DEALER NAME AUTHORISED DISTRIBUTOR/DEALER NAME AUTHORISED DISTRIBUTOR/DEALER STAMP AND SIGNATURE...
Need help?
Do you have a question about the GLAMOUR and is the answer not in the manual?
Questions and answers