Table of Contents
Advertisement
Available languages
Available languages
®
allen + roth
is a trademark or registered trademark of LF,
LLC. All rights reserved.
ATTACH YOUR RECEIPT HERE
Serial Number__________________ Purchase Date__________________
Questions, problems, missing parts? Before returning to your retailer, call our customer service
department at 1-866-439-9800, 8 a.m. - 8 p.m., EST, Monday - Sunday.
VR20055
welcoming
•
sophisticated
ELECTRIC FIREPLACE
1
•
inspiring
ITEM #2416658
TV STAND
MODEL #2267FM-28-201
Français p. 19
Español p. 37
Advertisement
Chapters
Table of Contents

Subscribe to Our Youtube Channel
Related Manuals for Allen + Roth 2267FM-28-201


Summary of Contents for Allen + Roth 2267FM-28-201
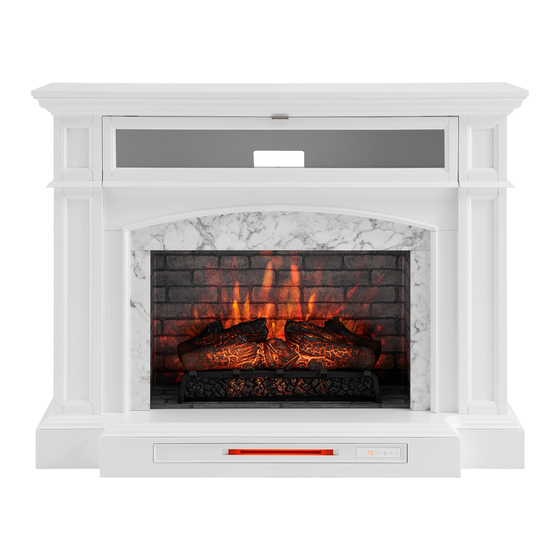
- Page 1 • sophisticated • inspiring ITEM #2416658 ELECTRIC FIREPLACE ® allen + roth is a trademark or registered trademark of LF, LLC. All rights reserved. TV STAND MODEL #2267FM-28-201 Français p. 19 Español p. 37 ATTACH YOUR RECEIPT HERE Serial Number__________________ Purchase Date__________________ Questions, problems, missing parts? Before returning to your retailer, call our customer service department at 1-866-439-9800, 8 a.m.
-
Page 2: Table Of Contents
TABLE OF CONTENTS Package Contents ..........................3 Hardware Contents..........................4 Safety Information ..........................4 Preparation ............................8 Assembly Instructions.......................... 8 Corner Assembly (Optional) .......................11 Change Door Panel (Optional) ......................12 Operating Instructions ........................13 Care And Maintenance ........................15 Troubleshooting ..........................16 One-Year Limited Warranty ....................... -
Page 3: Package Contents
PACKAGE CONTENTS PART DESCRIPTION QUANTITY PART DESCRIPTION QUANTITY Fireplace Brick Wall Corner Panel Fireplace Glass Front Left Wall Fire Log Right Wall Fireplace Grate Left Front Panel Remote Control (Battery Inside) Right Front Panel Center Panel Wood Door Panel (Optional) L Corner Support Rod Base And Heater... -
Page 4: Hardware Contents
HARDWARE CONTENTS (NOT SHOWN ACTUAL SIZE) PART DESCRIPTION QUANTITY Long Bolt Washer Wooden Dowel Touch-up Pen Screw L-Bracket SAFETY INFORMATION Please read and understand this entire manual before • Reorient or relocate the receiving antenna attempting to assemble, operate or install the product. •... - Page 5 SAFETY INFORMATION (CONT'D) Modifications not approved by the party responsible • Extreme caution is necessary when any heater is used by or near children or individuals with for compliance could void user’s authority to operate the equipment. disabilities and whenever the fireplace is left operating and unattended.
- Page 6 SAFETY INFORMATION (CONT'D) • To prevent a possible fire, DO NOT block air intakes • Risk of electric shock, fire and injury-review the or exhaust in any manner. DO NOT use on soft assembly instrustion to confirm that the appropriate critical components and accessories are being used surfaces, like a bed, where opening may become with the furnishing.
- Page 7 SAFETY INFORMATION (CONT'D) Electrical Connection Grounding Instructions • A 15-Amp, 120-volt, 60 Hz circuit with a properly • This heater is for use on 120 volt. The cord has a grounded outlet is required. Preferably, the fireplace plug as shown below. See illustration or grounding will be on a dedicated circuit as other appliances instruction.
-
Page 8: Preparation
PREPARATION Before beginning assembly of product, make sure Estimated Assembly Time: 50 minutes all parts are present. Compare parts with package Tools Required for Assembly (not contents list and hardware contents list. If any part is missing or damaged, do not attempt to assemble the included): Phillips screwdriver product. - Page 9 ASSEMBLY INSTRUCTIONS (CONT’D) 3. Insert two wooden dowels (CC) into the top middle holes on both left front panel (E) and right front panel (F). Carefully position the center panel (G) into place between left front panel (E) and right front panel (F). Secure each side with one washer (BB) and one long bolt (AA).
- Page 10 ASSEMBLY INSTRUCTIONS (CONT’D) 6. Place the fireplace grate (N) by matching the bottom pins into the holes on the base (J). Slot the USB cable from the heater underneath through the cable hole on the base (J). 7. Remove the film from the adhesive on the top of the fireplace grate (N) and place the fire log (M) on the center of the fireplace grate (N).
-
Page 11: Corner Assembly (Optional)
ASSEMBLY INSTRUCTIONS (CONT’D) 9. Insert the fireplace brick wall (K) into the mantel, slotting it into the grooves on base (J). Secure it by using two screws (EE) into the L-bracket (FF). Hardware Used Screw CORNER ASSEMBLY (OPTIONAL) 1. From behind the assembly, Attach L corner support rod (I), secure with one washer (BB) and one long bolt (AA). -
Page 12: Change Door Panel (Optional)
CORNER ASSEMBLY (CONT’D) NOTE: Use the pre-assembled levelers on the base of the fireplace to level the unit. Twist the levelers counterclockwise to increase the height, twist the clockwise to decrease the height. CHANGE DOOR PANEL (OPTIONAL) Note: The pre-installed glass door panel can be switched out with the included wood door panel (H). 1. -
Page 13: Operating Instructions
OPERATING INSTRUCTIONS Control Panel Remote Control To use the remote control, first remove the plastic tab by gently pullling it out of remote control. Controls and Display The control panel will display the heater setting when the unit power is turned ON. Whichever control icon you press will display the current setting of the corresponding function. - Page 14 OPERATING INSTRUCTIONS (CONT’D) Heater Function • Press the HEATER ICON to display the current heater setting. • Press the HEATER ICON again to scroll down through the heater settings. Note: Long-hold the icon to quickly scroll through settings. • Set the heater to “HI” (High) to have the heater run continually. •...
-
Page 15: Care And Maintenance
CARE AND MAINTENANCE • Make sure the unit is turned OFF, unplugged and the heating elements of heater are cool whenever you are cleaning the heater or fireplace. • Clean the metal trim using a water-dampened soft, clean cloth. DO NOT use brass polish or household cleaners as these products will damage the metal trim. -
Page 16: Troubleshooting
TROUBLESHOOTING PROBLEM POSSIBLE CAUSE CORRECTIVE ACTION Error E1 displayed on The overheat sensor has Unplug unit, wait 15-20 minutes, then the sensor will reset control panel. been engaged. itself. Plug the unit back in and turn on the heater. If the problem persists, call customer service. -
Page 17: One-Year Limited Warranty
ONE-YEAR LIMITED WARRANTY The manufacturer warrants that your new electric fireplace is free from manufacturing and material defects for a period of one year from date of purchase, subject to the following conditions and limitations. Install and operate this electric fireplace in accordance with the installation and operating instructions furnished with the product at all times. -
Page 18: Replacement Parts List
For replacement parts, call our customer service department at 1-866-439-9800, 8 a.m. - 8 p.m., EST, Monday - Sunday. PART DESCRIPTION PART # PF-2267FM-28-201-INSERT Insert Surround Set SURROUND SET Flip-Down Door Center 2267FM-28-201-DOOR CENTER Panels PANELS Base And Heater YEH-KDI-28-HEATER Fireplace Brick Wall YEH-KDI-28-INSERT WALL BRICK Fireplace Glass Front... - Page 19 • sophisticated • inspiring ARTICLE #2416658 FOYER ÉLECTRIQUE ® allen + roth est une marque de commerce ou une marque de commerce déposée de LF, LLC. Tous droits réservés. ET MEUBLE POUR TÉLÉVISEUR MODÈLE #2267FM-28-201 JOIGNEZ VOTRE REÇU ICI Numéro de série __________________ Date d’achat__________________ Des questions, des problèmes, des pièces manquantes? Avant de retourner l’article au détaillant,...
- Page 20 TABLE DES MATIÈRES Contenu de l’emballage ........................21 Quincaillerie incluse........................... 22 Consignes de sécurité ........................22 Préparation ............................26 Instructions pour l’assemblage ......................26 Assemblage en coin (facultatif) ......................29 Remplacement des panneaux de porte (facultatif) ................30 Mode d’emploi ........................... 31 Entretien ............................
-
Page 21: Contenu De L'emballage
CONTENU DE L’EMBALLAGE PIÈCE DESCRIPTION QUANTITÉ PIÈCE DESCRIPTION QUANTITÉ Comptoir Mur de briques du foyer Panneau de coin Vitre avant du foyer Cloison gauche Bûche Cloison droite Grille du foyer Panneau avant gauche Télécommande (pile à l’intérieur) Panneau avant droit Panneau central Panneau de porte en bois (facultatif) -
Page 22: Quincaillerie Incluse
QUINCAILLERIE INCLUSE (NON REPRÉSENTÉS EN TAILLE RÉELLE) PIÈCE DESCRIPTION QUANTITÉ Boulon long Rondelle Goujon en bois Crayon à retouche Support en L CONSIGNES DE SÉCURITÉ Assurez-vous de lire et de comprendre l’intégralité de • réorienter ou déplacer l’antenne réceptrice; ce manuel avant de tenter d’assembler, d’installer ou •... - Page 23 CONSIGNES DE SÉCURITÉ (SUITE) Les modifications non autorisées expressément par la • Cet appareil est chaud lorsqu’il est en fonction. Afin d’éviter les brûlures, ne touchez PAS aux partie responsable de la conformité peuvent annuler le droit de l’utilisateur de se servir de cet appareil. surfaces chaudes.
- Page 24 CONSIGNES DE SÉCURITÉ (SUITE) • Tenez le cordon à l'écart des surfaces chauffées. • « AVERTISSEMENT – le déplacement de • N'utilisez jamais l'équipement si les ouvertures d'air l'équipement audio et/ou vidéo vers un mobilier sont bloquées. Les ouvertures d'air doivent être non spécifiquement conçu pour prendre en charge exemptes de peluches, de cheveux et autres.
- Page 25 CONSIGNES DE SÉCURITÉ (SUITE) Branchement électrique Instructions pour la mise à la terre • Un circuit de 15 A, 120 V, 60 Hz avec une prise • Ce radiateur est destiné à être utilisé à une tension correctement mise à la terre est nécessaire. de 120 volts.
-
Page 26: Préparation
PRÉPARATION Avant de commencer l’assemblage du produit, Temps d’assemblage approximatif : assurez-vous d’avoir toutes les pièces en main. 50 minutes. Comparez les pièces dont vous disposez avec Outils nécessaires pour l’assemblage la liste du contenu de l’emballage et celle de la (non inclus) : tournevis cruciforme. - Page 27 INSTRUCTIONS POUR L’ASSEMBLAGE (SUITE) 3. Insérez deux goujons en bois (CC) dans les trous situés au centre de la partie supérieure du panneau avant gauche (E) et du panneau avant droit (F). Placez soigneusement le panneau central (G) entre le panneau avant gauche (E) et le panneau avant droit (F).
- Page 28 INSTRUCTIONS POUR L’ASSEMBLAGE (SUITE) 6. Placez la grille du foyer (N) en insérant les goupilles situées sur le dessous dans les trous correspondants sur la base (J). Faites sortir le câble USB du radiateur à travers le trou pour câble situé sous la base (J). 7.
-
Page 29: Assemblage En Coin (Facultatif)
INSTRUCTIONS POUR L’ASSEMBLAGE (SUITE) 9. Placez le mur de briques du foyer (K) dans le manteau et insérez-le dans les rainures situées sur la base (J). Fixez le tout en insérant deux vis (EE) dans les supports en L (FF). Quincaillerie utilisée ASSEMBLAGE EN COIN (FACULTATIF) 1. -
Page 30: Remplacement Des Panneaux De Porte (Facultatif)
ASSEMBLAGE EN COIN (SUITE) REMARQUE : Utilisez les patins réglables préassemblés qui se trouvent à la base du foyer pour mettre l’appareil à niveau. Tournez les patins réglables dans le sens contraire des aiguilles d’une montre pour augmenter la hauteur, ou tournez-les dans le sens des aiguilles d’une montre pour réduire la hauteur. -
Page 31: Mode D'emploi
MODE D’EMPLOI Panneau de commande Télécommande Pour utiliser la télécommande, enlevez d’abord la languette en plastique en la tirant délicatement hors de la télécommande. Commandes et affichage Le panneau de commande affiche le réglage du chauffage lorsque l’appareil est sous tension. L’icône de commande sur laquelle vous appuyez affiche le réglage actuel de la fonction correspondante. - Page 32 MODE D’EMPLOI (SUITE) Fonction de chauffage • Appuyez sur l’ICÔNE DE CHAUFFAGE pour afficher le réglage actuel du radiateur. • Appuyez de nouveau sur l’ICÔNE DE CHAUFFAGE pour faire défiler les paramètres du radiateur. Remarque : Appuyez longuement sur l’icône pour faire défiler rapidement les paramètres. •...
-
Page 33: Entretien
ENTRETIEN • Assurez-vous que l’appareil est éteint et débranché et que les éléments chauffants ont refroidi lorsque vous nettoyez le radiateur ou le foyer. • Nettoyez la garniture métallique à l’aide d’un linge doux, propre et humecté d’eau. N’UTILISEZ PAS de produits pour polir le laiton ni de nettoyants à... -
Page 34: Dépannage
DÉPANNAGE PROBLÈME CAUSE POSSIBLE MESURE CORRECTIVE Le panneau de Le détecteur de surchauffe Débranchez l'appareil et attendez de 15 à 20 minutes; le commande affiche s'est déclenché. détecteur se réinitialisera. Rebranchez l'appareil et allumez le message <<Error le radiateur. Si le problème persiste, communiquez avec E1>>... -
Page 35: Garantie Limitée De Un An
GARANTIE LIMITÉE DE UN AN Le fabricant garantit votre nouveau foyer électrique contre les défauts de matériaux et de fabrication pour une période de un an à compter de la date d’achat, sous réserve des conditions et des restrictions suivantes. Respectez en tout temps les instructions pour l’installation et le mode d’emploi fournis avec le foyer électrique. -
Page 36: Liste Des Pièces De Rechange
1 866 439-9800, entre 8 h et 20 h (HNE), du lundi au dimanche. PIÈCE DESCRIPTION Nº DE PIÈCE PF-2267FM-28-201-INSERT Manteau du foyer SURROUND SET Panneaux centraux de 2267FM-28-201-DOOR CENTER porte rabattable PANELS Base et radiateur YEH-KDI-28-HEATER Mur de briques du foyer YEH-KDI-28-INSERT WALL BRICK Vitre avant du foyer YEH-KDI-28-GLASS FRONT Bûche... - Page 37 • sophisticated • inspiring ARTÍCULO #2416658 BASE PARA TELEVISOR ® allen + roth es una marca o marca registrada de LF, LLC. Todos los derechos reservados. CON CHIMENEA ELÉCTRICA MODELO #2267FM-28-201 ADJUNTE SU RECIBO AQUÍ Número de serie __________________ Fecha de compra__________________ ¿Preguntas, problemas, piezas faltantes? Antes de volver a la tienda, llame a nuestro Departamento...
- Page 38 ÍNDICE Contenido del paquete ........................39 Aditamentos............................40 Información de seguridad ........................40 Preparación ............................44 Instrucciones de ensamblaje ......................44 Ensamble de esquina (opcional) ....................... 47 Cambio de los paneles de puerta (opcional) ..................48 Instrucciones de funcionamiento ....................... 49 Cuidado y mantenimiento ........................
-
Page 39: Contenido Del Paquete
CONTENIDO DEL PAQUETE PIEZA DESCRIPCIÓN CANTIDAD PIEZA DESCRIPCIÓN CANTIDAD Parte superior Pared de ladrillos de la chimenea Panel de esquina Parte frontal del vidrio Pared izquierda de la chimenea Pared derecha Leño para chimenea Panel frontal izquierdo Rejilla para chimenea Panel frontal derecho Control remoto (batería Panel central... -
Page 40: Aditamentos
ADITAMENTOS (NO SE MUESTRAN EN TAMAÑO REAL) PIEZA DESCRIPCIÓN CANTIDAD Perno largo Arandela Espiga de madera Aplicador de retoque Tornillo Soporte en L INFORMACIÓN DE SEGURIDAD Lea y comprenda completamente este manual antes • Reorientar o reubicar la antena de recepción. de intentar ensamblar, usar o instalar el producto. - Page 41 INFORMACIÓN DE SEGURIDAD (CONTINUACIÓN) Las modificaciones que no estén aprobadas por la • Este electrodoméstico se calienta cuando está en funcionamiento. Para evitar quemaduras, parte responsable del cumplimiento podrían anular la autorización del usuario para utilizar el equipo. NO toque superficies calientes sin protegerse la piel.
- Page 42 INFORMACIÓN DE SEGURIDAD (CONTINUACIÓN) • Mantenga el cable alejado de superficies calientes. • “ADVERTENCIA: La colocación de equipos • Nunca opere el mueble con las aberturas de de audio y/o video en muebles no diseñados ventilación obstruidas. Mantenga las aberturas de específicamente para soportar tales equipos puede ventilación libres de pelusa, cabello y materiales causar la muerte o lesiones graves debido al...
- Page 43 INFORMACIÓN DE SEGURIDAD (CONTINUACIÓN) Conexión eléctrica Instrucciones de puesta a tierra • Se requiere un circuito de 15 amperios, 120 voltios, • Este calentador se diseñó para usarse con 60 Hz con un un tomacorriente con la debida puesta 120 voltios. El cable tiene un enchufe como se a tierra.
-
Page 44: Preparación
PREPARACIÓN Antes de empezar a ensamblar el producto, asegúrese Tiempo estimado de ensamblaje: de que todas las piezas estén presentes. Compare las minutos piezas con la lista del contenido del paquete y de los Herramientas necesarias para el aditamentos. No intente ensamblar, instalar o usar el ensamblaje (no se incluyen): destornillador producto si faltan piezas o si están dañadas. - Page 45 INSTRUCCIONES DE ENSAMBLAJE (CONTINUACIÓN) 3. Coloque dos espigas de madera (CC) en los orificios centrales superiores en el panel frontal izquierdo (E) y panel frontal derecho (F). Coloque cuidadosamente el panel central (G) en su lugar entre el panel frontal izquierdo (E) y el panel frontal derecho (F).
- Page 46 INSTRUCCIONES DE ENSAMBLAJE (CONTINUACIÓN) 6. Coloque la rejilla para chimenea (N) haciendo coincidir los pasadores inferiores con los orificios en la base (J). Pase el cable USB del calentador por debajo a través del orificio para cable en la base (J). 7.
-
Page 47: Ensamble De Esquina (Opcional)
INSTRUCCIONES DE ENSAMBLAJE (CONTINUACIÓN) 9. Inserte la pared de ladrillos de la chimenea (K) en la repisa, introduciéndolo en las ranuras de la base (J). Fíjela con dos tornillos (EE) en el soporte en L (FF). Aditamentos utilizados Tornillo ENSAMBLE DE ESQUINA (OPCIONAL) 1. -
Page 48: Cambio De Los Paneles De Puerta (Opcional)
ENSAMBLE DE ESQUINA (CONTINUACIÓN) NOTA: use los niveladores preensamblados en la base de la chimenea para nivelar la unidad. Gire los niveladores en dirección contraria a las manecillas del reloj para aumentar la altura y gírelos en dirección de las manecillas del reloj para disminuir la altura. -
Page 49: Instrucciones De Funcionamiento
INSTRUCCIONES DE FUNCIONAMIENTO Panel de control Control remoto Para utilizar el control remoto, primero retire la lengüeta plástica. Para ello retírela jalándola suavemente hacia afuera del control remoto. Controles y pantalla El panel de control mostrará la configuración del calentador cuando la unidad esté encendida. El icono de control que presione mostrará... - Page 50 INSTRUCCIONES DE FUNCIONAMIENTO (CONTINUACIÓN) Función de calentador • Presione el ICONO DE CALENTADOR para mostrar la configuración actual del calentador. • Presione el ICONO DEL CALENTADOR nuevamente para desplazarse hacia abajo a través de la configuración del calentador. Nota: mantenga presionado el icono para desplazarse rápidamente por la configuración. •...
-
Page 51: Cuidado Y Mantenimiento
CUIDADO Y MANTENIMIENTO • Asegúrese de que la unidad esté APAGADA, desenchufada y que los elementos de calefacción estén fríos cada vez que limpie el calentador o la chimenea. • Limpie el borde metálico con un paño suave y limpio humedecido con agua. NO use pulidores de latón ni limpiadores domésticos, ya que estos productos dañarán el borde metálico. -
Page 52: Solución De Problemas
SOLUCIÓN DE PROBLEMAS PROBLEMA CAUSA POSIBLE ACCIÓN CORRECTIVA El error E1 se muestra Se ha activado el sensor Desenchufe la unidad, espere de 15 a 20 minutos, luego el en el panel de control. de sobrecalentamiento. sensor se reiniciará automáticamente. Vuelva a enchufar la unidad y encienda el calentador. -
Page 53: Un Año De Garantía Limitada
UN AÑO DE GARANTÍA LIMITADA El fabricante garantiza que su nueva chimenea eléctrica no presentará defectos de fabricación ni en los materiales durante un período de un año a partir de la fecha de compra, siempre y cuando se cumplan las siguientes condiciones y limitaciones. Instale y use el la chimenea eléctrica según lo indican las instrucciones de instalación y funcionamiento provistas con el producto en todo momento. -
Page 54: Lista De Piezas De Repuesto
Leño para chimenea YEH-KDI-28-FIRELOG Parrilla para chimenea YEH-KDI-28-FIRE GRATE Control remoto RC-HE85EL01 Sujetadores de vidrio 2267FM-28-GLASS CLIPS Paquete de aditamentos KD PH-2267FM-28-201-HARDWARE PACK Juego de aditamentos PU17-1267FM-II/JJ/LL para puertas abatibles Manija para puerta Impreso en Malasia PU17-2267FM-HANDLE abatible Nivelador T-1007 ®...
Need help?
Do you have a question about the 2267FM-28-201 and is the answer not in the manual?
Questions and answers
Remote Control functions on the allen + roth 53-in W Sedona Free standing Infrared quartz Flat wall Electric Fireplace Remote Control functions What does the center button around the heat + or - do it goes to L0 L1 L2 L3
The center button around the heat + or - on the remote control is the heater icon. Pressing this button displays the current heater setting. Press it again to cycle through the available heat settings, including "HI" for continuous operation and "OF" to turn off the heat while keeping flame effects. Holding the button scrolls through settings more quickly.
This answer is automatically generated
Heat want work on allen roth electric fireplace. Everything else works. Mmodel KDI-02
@Katrn preston
Have Allen +Roth fireplace ,heater quit working, everything else works