Table of Contents
Advertisement
Quick Links
M U S E 2
mixer with diver ter
REGISTER ONLINE
ENTER A PRIZE DRAW
WIN
£100
LOVE2SHOP VOUCHERS
VISIT OUR WEBSITE TODAY
TRITONSHOWERS.CO.UK/REGISTER
PRODUCT REGISTRATION IS ONLY AVAILABLE
TO UNITS PURCHASED & INSTALLED IN THE UK
FOR YOUR SERVICE REFERENCE
NOTE DOWN THE PRODUCT CODE BELOW
(FROM THE FRONT OR TOP OF THE BOX)
ALTERNATIVELY REGISTER BY TEL: 024 7637 8321
INSTALLATION AND OPERATING INSTRUCTIONS
Please read this book thoroughly and familiarise yourself with all instructions before commencing
installation and keep it for future reference.
The mixer shower installation MUST be carried out by a suitably qualified person, in the sequence
of this instruction book.
IMPORTANT SAFETY ADVICE
The shower head and hose supplied with
this product are a safety critical part of your
shower. Failure to use genuine Triton parts may
cause injury and invalidate your guarantee.
2181409C - January 2021
Advertisement
Table of Contents

Subscribe to Our Youtube Channel
Related Manuals for Triton Muse 2


Summary of Contents for Triton Muse 2
- Page 1 The shower head and hose supplied with (FROM THE FRONT OR TOP OF THE BOX) this product are a safety critical part of your shower. Failure to use genuine Triton parts may cause injury and invalidate your guarantee. ALTERNATIVELY REGISTER BY TEL: 024 7637 8321...
-
Page 2: Table Of Contents
FAULT FINDING ................22 - 23 GUARANTEE, SERVICE POLICY, ETC.......... rear cover nstallers please note these InstructIons are to be left wIth the user To check the product suitability for commercial and multiple installations, please contact Triton’s speci cation advisory service before installation. Telephone:... -
Page 3: Main Components
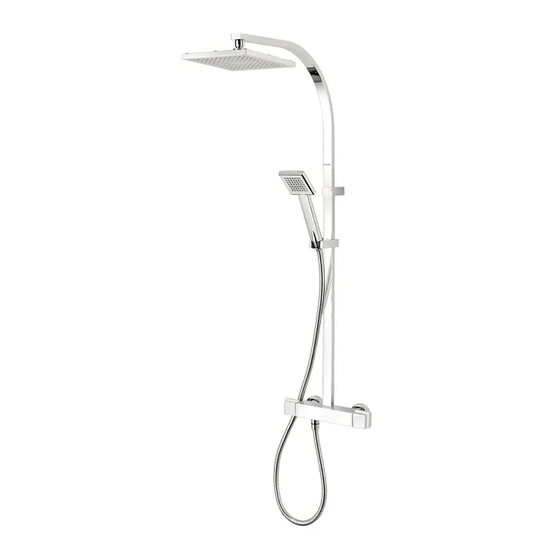
Bar mixer shower MAIN COMPONENTS Fig.1 A. Thermostatic mixer valve B. Slider C. Bracket D. Lower arm E. Upper shower arm Fixed head - Kelsey G. Handheld head - Kate H. Showerhose 1.25m Compression fitting X2 Trimplate kit X2 IMPORTANT INFORMATION: This mixer should ONLY be fitted with the compresison fitting (I) supplied. -
Page 4: Dimensions
Bar mixer shower DIMENSIONS G3 3/4 All dimensions listed in this fitting book regarding the product and installation are approximate. -
Page 5: Introduction
Bar mixer shower INTRODUCTION Water Minimum Flow Rate For best performance within the specified This book contains all the necessary fitting and running pressure range a minimum flow of operating instructions for your mixer shower. 8 litres per minute should be available to both Please read them carefully and read through inlets. - Page 6 DO NOT solder fittings near the mixer shower have to be fitted. For advice on the Triton as heat can transfer along the pipework and scale inhibitor, please contact Customer damage the shower.
-
Page 7: Typical Domestic Installations
Bar mixer shower TYPICAL DOMESTIC INSTALLATIONS *Diagrammatic view – not to scale. *Fig.2 For illustration purpsoes only. Pumped Gravity Fed Systems ( fig.2) Stop valve The mixer shower MUST be fed from a cold water cistern and hot water cylinder providing Cold water Cold supply cistern... - Page 8 Bar mixer shower Unvented mains pressure systems ( fig.4) *Diagrammatic view – not to scale. *Fig.4 For illustration purpsoes only. The shower control can be installed with an unvented, stored hot water cylinder. For systems with no cold water take off after the appliance reducing valve, it will be necessary to fit an additional drop tight pressure reducing valve when the mains pressure is over 5 bar.
-
Page 9: Preparing The Shower
Bar mixer shower INSTALLATION *Diagrammatic view – not to scale. *Fig.6 For illustration purpsoes only. PREPARING THE SHOWER Check the contents to make sure all parts are present. Before starting the installation, make sure all the openings on the shower are carefully covered to stop ingress of any debris etc, while routing the supply pipework. -
Page 10: Supply Pipework
Bar mixer shower SUPPLY PIPEWORK IMPORTANT Complete the pipework to the shower area Consideration must be given for having decided on the position of the shower adequate ceiling space for the and direction of pipe entry, for example rising, installation of this shower. Please see falling or rear entry. -
Page 11: Compression Fittings
Bar mixer shower IMPORTANT: These bar mixer brackets Fig.8 are designed to be mounted onto a solid structure. If installing to a stud partition wall, dry lined wall or similar, it is recommended that the brackets are secured to the studs or noggins. - Page 12 Bar mixer shower Make sure the outer surface of the pipes are Fig.12 clean and free of any debris or damage. Clean the surface if necessary. Finished wall Mark the positions of the wall bracket holes and drill the wall/tiles to suit. Slide the wall bracket over the pipework and securly fix to the wall.
-
Page 13: Fitting The Shower
Bar mixer shower FITTING THE SHOWER Fig.16 Offer the shower valve to the fittings and, checking that the sealing washers are in place, screw the unions onto the fittings. FITTING THE LOWER/UPPER SHOWER ARM Drill and plug the wall. An appropriate drill bit should be used. -
Page 14: Leak Testing
Bar mixer shower Offer the assembled riser rail up to the mixer and Fig.18 adjust the mounting bracket until it fits over the mounting plate (fig.18). Remove the riser and tighten the bracket retaining screws (fig.17b). Once the mounting bracket is secured, fit the riser onto the top fitting of the mixer and the mounting plate. -
Page 15: Temperature Adjustment
Bar mixer shower FITTING THE HOSE AND SHOWERHEAD Fig.19 Connect one end of the flexible hose to the bottom outlet connector on the diverter valve Showerhead (fig.19), making sure that the sealing washer is in place. Screw the other end of the hose to the showerhead then locate the it into the showerhead holder. -
Page 16: Operating The Shower
Bar mixer shower OPERATING THE SHOWER Fig.23 To start the shower, rotate the diverter/flow control (left-hand side). The anti-clockwise position allows the user to select the fixed showerhead and the clockwise position selects the handset showerhead (fig.23). To stop the water flow, rotate the diverter/flow control into the OFF position (fig.23). - Page 17 Bar mixer shower To adjust the water temperature, rotate the Fig.25 temperature control (right-hand side) clockwise for a cooler shower or anti-clockwise for a hotter shower (fig.25). NOTE: The temperature override button on the top of the temperature control MUST be pressed in to allow the mixer to be turned anti- Temperature clockwise and the temperature go above the...
-
Page 18: Approvals
Bar mixer shower APPROVALS BS EN 1111 This mixer valve has been designed to comply with the requirements of: BS EN 1287 WRAS PRODUCT FLOW RATES - For guidance only Flow rate l/m 5.1 9.0 9.5 12.0 13.0 18.5 27.0 33.4 39.4 42.5 Pressure (bar) 0.1 0.2 0.3... -
Page 19: Spare Parts
Bar mixer shower SPARE PARTS Ref. Description Part No. 1. Knob set chrome ......86005140 2. Diverter control Assembly ..83316180 3. Thermostatic cartridge ....83316190 4. Trim plate kit x2 ......22013605 5. Compression fitting 5.1. Plastic seal ......7053573 5.2. - Page 20 Bar mixer shower SPARE PARTS Ref. Description Part No. 6. Shower hose 1.25m ....28100210 7. Lower arm ....... P88400042 8. Slider ...........22013587 9. Hand held head - Kate ....88500020 10. Wall Bracket .......22013589 11. Fixed head - Kelsey ....88600025 12.
-
Page 21: Maintenance
Bar mixer shower MAINTENANCE Cleaning It is recommended that all products are cleaned The following maintenance procedure must using warm, soapy water. be carried out for commercial and health care premises, but is not necessarily required for Do not use abrasive or aggressive chemical domestic installations. -
Page 22: Fault Finding
Bar mixer shower FAULT FINDING The following can be carried out by a competent person Problem Cause Action 1 Water too hot. 1.1 Temperature 1.1.1 Refer to the Commissioning section. control incorrectly commissioned. 1.2 Not enough cold 1.2.1 Reposition temperature control knob water flowing through shower. - Page 23 Bar mixer shower FAULT FINDING Problem Cause Action 3 Water does not 3.1 Water supplies cut off. 3.1.1 Check water elsewhere in house and if flow or shower necessary contact local water company. pattern collapses 3.2 Shower unit blocked. 3.2.1 Inspect the inlet filters. Clean if necessary. when another 3.3 Blockage in pipework.
- Page 24 Trade Installer Hotline: 024 7637 8344 Nuneaton www.tritonshowers.co.uk Warwickshire, CV11 4NR E-mail: serviceenquiries@tritonshowers.co.uk E-mail: technical@tritonshowers.co.uk Triton is a division of Norcros Group (Holdings) Limited Triton reserve the right to change product specifi cation without prior notice. E&OE. © TRITON SHOWERS 2020...
Need help?
Do you have a question about the Muse 2 and is the answer not in the manual?
Questions and answers