Table of Contents
Advertisement
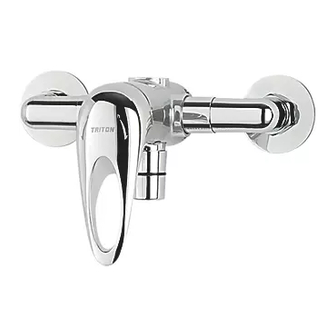
Kaho
Manual Mixer Shower
CAUTION!
THIS PRODUCT IS NOT
THERMOSTATICALLY
CONTROLLED
Installation and
operating instructions
I
nstallers please note these InstructIons are to be left wIth the user
The showerhead and hose supplied with this product are an
integral part of the safety of your shower. Failure to use genuine
Triton parts may cause injury and will invalidate your warranty
2180970D - July 2019
Advertisement
Table of Contents

Related Manuals for Triton Kaho


Summary of Contents for Triton Kaho
- Page 1 InstructIons are to be left wIth the user The showerhead and hose supplied with this product are an integral part of the safety of your shower. Failure to use genuine Triton parts may cause injury and will invalidate your warranty 2180970D - July 2019...
-
Page 2: Table Of Contents
DIMENSIONS ..................11 SPARE PARTS ..................12 FAULT FINDING ..................13 GUARANTEE, SERVICE POLICY, ETC...........rear cover To check the product suitability for commercial and multiple installations, please contact Triton’s speci cation advisory service before installation. Telephone: 024 7637 2222 E mail: technical@tritonshowers.co.uk... -
Page 3: Main Components
Manual mixer shower MAIN COMPONENTS Fig.1 Ref. Description Mixer shower body (non thermostatic) Control handle Fixing plinth Outlet adaptor Blanking plug Elbows and fittings X2 Olive, nut, trim X2 All dimensions listed in this fitting book regarding the product and installation are approximate. All kits and fittings are for illustration purposes only and are not supplied unless otherwise stated. -
Page 4: Introduction
THIS PRODUCT IS NOT can provide nominally equal pressures at the THERMOSTATICALLY CONTROLLED mixer shower. Replacement parts can be ordered from Triton Customer Service. See ‘spare parts’ for details. -
Page 5: Plumbing Requirements
DO NOT solder fittings near the mixer unit have to be fitted. For advice on the Triton as heat can transfer along the pipework and scale inhibitor, please contact Customer damage the mixer valve. -
Page 6: Typical Suitable Installations
Manual mixer shower TYPICAL SUITABLE INSTALLATIONS *Fig.2 (diagrammatic view – not to scale) Instantaneous gas-heated systems, e.g. combination boilers (fig.2) The shower control MUST be installed with a multipoint gas water heater or combination boiler of a fully modulating design, i.e. to maintain relatively stable hot water Mixer temperatures. - Page 7 Manual mixer shower Mains pressurised thermal store systems (fig.4) *Fig.4 (diagrammatic view – not to scale) Packages of this type, fitted with a tempering valve (blender valve) can be used. A drop tight pressure reducing valve MUST be fitted if the supply pressures exceed 5 bar running.
-
Page 8: Siting Of The Shower
Manual mixer shower INSTALLATION WARNING! Preparing the mixer valve The shower must not be Check the contents to make sure all parts are positioned where it will be present. subject to freezing conditions. Before starting the mixer installation, make sure all the openings on the valve are carefully covered to stop ingress of any debris etc. -
Page 9: Fitting The Mixer
Manual mixer shower FITTING THE MIXER Fig.8 Mark the position of the four locating screws for the mounting plate, although if installing to a solid brick wall, using two diagonal holes will usually be enough. Drill and plug the wall. An appropriate drill bit should be used. -
Page 10: Fitting To The Wall
Manual mixer shower IMPORTANT: Make sure that all the supply Fig.11 pipework has been flushed through before fitting the mixer (fig.11). Fitting to the wall Fig.12 Fit the trim onto the inlet water pipes followed by the nut and olive (fig.12). Trim Connect the hot water supply to the inlet marked HOT, ‘H’... -
Page 11: Operating The Shower
Manual mixer shower OPERATING THE SHOWER Fig.14 To start the shower, pull the control lever upwards for maximum flow. To stop the water flow, push the control lever down (fig.14). To start the shower To stop the shower To adjust the water temperature, turn the Fig.15 control lever clockwise for a hotter shower and anti-clockwise for a cooler shower (fig.15). -
Page 12: Cleaning
Manual mixer shower CLEANING DO NOT use abrasive or solvent cleaning fluids. The shower unit, riser rail, hose, etc. should be cleaned using a soft cloth and warm water. IT IS IMPORTANT TO KEEP THE SPRAYHEAD CLEAN TO MAINTAIN THE PERFORMANCE OF THE SHOWER. -
Page 13: Dimensions
Manual mixer shower DIMENSIONS 130mm ø1/2 BSP 150mm All dimensions listed in this fitting book regarding the product and installation are approximate. -
Page 14: Spare Parts
Manual mixer shower To purchase a genuine Triton spare part for your product, please visit www.tritonshowers.co.uk/spares for product codes and prices. Alternatively please call our Customer Services team on 024 7637 2222 to order direct. Please have your model name available. -
Page 15: Fault Finding
1.3 Cold water supply 1.3.1 Turn off shower and consult a competent blocked. plumber or contact Triton Customer Service. 1.4 High volume of cold 1.4.1 Reduce the simultaneous demand from water drawn off elsewhere. the mains supply. - Page 16 Trade Installer Hotline: 024 7637 8344 Nuneaton www.tritonshowers.co.uk Warwickshire, CV11 4NR E-mail: serviceenquiries@tritonshowers.co.uk E-mail: technical@tritonshowers.co.uk Triton is a division of Norcros Group (Holdings) Limited Triton reserve the right to change product specifi cation without prior notice. E&OE. © TRITON SHOWERS 2019...
Need help?
Do you have a question about the Kaho and is the answer not in the manual?
Questions and answers