Triton ELINA Installation And Operating Instructions Manual
Sequential built-in thermostatic mixer
Hide thumbs
Also See for ELINA:
- Installation and operating instructions manual (24 pages) ,
- Installation and operating instructions manual (20 pages) ,
- Installation and operating instructions manual (20 pages)
Table of Contents
Advertisement
Quick Links
ELINA
Sequential built-in
thermostatic mixer
REGISTER ONLINE
ENTER A PRIZE DRAW
WIN
£100
LOVE2SHOP VOUCHERS
VISIT OUR WEBSITE TODAY
TRITONSHOWERS.CO.UK/REGISTER
PRODUCT REGISTRATION IS ONLY AVAILABLE
TO UNITS PURCHASED & INSTALLED IN THE UK
FOR YOUR SERVICE REFERENCE
NOTE DOWN THE PRODUCT CODE BELOW
(FROM THE FRONT OR TOP OF THE BOX)
ALTERNATIVELY REGISTER BY TEL: 024 7637 8321
INSTALLATION AND OPERATING INSTRUCTIONS
Please read this book thoroughly and familiarise yourself with all instructions before commencing
installation and keep it for future reference.
The mixer shower installation MUST be carried out by a suitably qualified person, in the sequence
of this instruction book.
IMPORTANT SAFETY ADVICE
The shower head and hose supplied with
this product are a safety critical part of your
shower. Failure to use genuine Triton parts may
cause injury and invalidate your guarantee.
2180687O - July 2021
86002260
Advertisement
Table of Contents

Related Manuals for Triton ELINA


Summary of Contents for Triton ELINA
- Page 1 The shower head and hose supplied with (FROM THE FRONT OR TOP OF THE BOX) this product are a safety critical part of your shower. Failure to use genuine Triton parts may cause injury and invalidate your guarantee. ALTERNATIVELY REGISTER BY TEL: 024 7637 8321...
-
Page 2: Table Of Contents
FAULT FINDING ................21 - 22 GUARANTEE, SERVICE POLICY, ETC..........rear cover NSTALLERS PLEASE NOTE THESE INSTRUCTIONS ARE TO BE LEFT WITH THE USER To check the product suitability for commercial and multiple installations, please contact Triton’s specification advisory service before installation. Telephone:... -
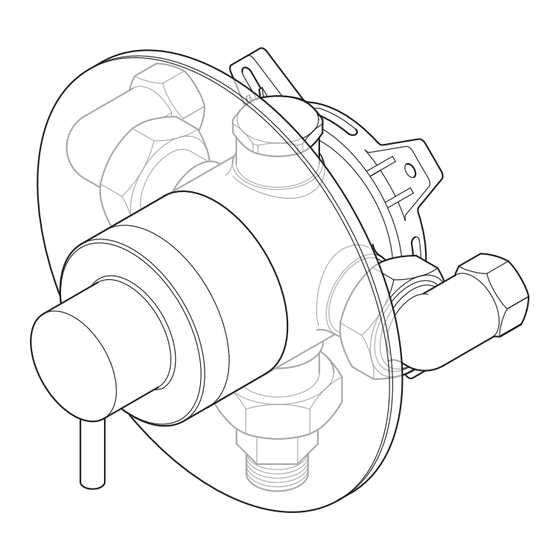
Page 3: Main Components
Thermostatic mixer valve MAIN COMPONENTS Fig.1 Ref. Description Mixer shower body Mounting plate Outlet bulkhead Blanking plug Flow regulator X2 Nutted long thread connector Inlet nut and Olive X2 Cover plate... -
Page 4: Introduction
For best performance within the specified running This book contains all the necessary fitting and pressure range a minimum flow of 8 litres per operating instructions for your Triton mixer minute should be available to both inlets. shower. Please read them carefully and read... -
Page 5: Plumbing Requirements
DO NOT solder fittings near the mixer shower have to be fitted. For advice on the Triton as heat can transfer along the pipework and scale inhibitor, please contact Customer damage the mixer valve. -
Page 6: Typical Commercial Installations
Thermostatic mixer valve TYPICAL COMMERCIAL INSTALLATIONS *Fig.2 *Diagrammatic view – not to scale. For illustration purpsoes only. Commercial Gravity Fed Systems (fig.2) Vent Cold feed to Calorifier The mixer shower MUST be fed from a cold Cold water to taps water cistern and hot water cylinder providing Cold water cistern <20°C... -
Page 7: Installation
Thermostatic mixer valve INSTALLATION *Fig.4 *Diagrammatic view – not to scale. For illustration purpsoes only. Preparing the Shower Check the contents to make sure all parts are present. Before starting the installation, make sure all the openings on the valve are carefully covered to stop ingress of any debris etc, while routing the supply pipework. -
Page 8: Built In Fitting
Thermostatic mixer valve BUILT-IN FITTING Fig.6 The following are typical thicknesses and are given as a guide only: 55mm Tile 6 − 10mm minimum Adhesive 2 − 3mm Plaster finish Plasterboard 9.5 − 12.5mm Adhesive Plaster finish 2 − 3mm Tile Maximum tile thickness to be 10mm. -
Page 9: Installation In A Hollow Wall
Thermostatic mixer valve NOTE: The valve body requires a deeper recess Fig.8 than the inlet and outlet fittings. The outlet pipework must end in a suitable female thread parallel 15mm x ½” BSP fitting (not supplied). Offer the valve body up to the wall and mark the fixing holes. -
Page 10: Fitting The Shower
Thermostatic mixer valve FITTING THE SHOWER Fig.9 Mark the position of the four locating screws for the mounting plate, although if installing to a solid brick wall, using two diagonal holes will usually be enough. Drill and plug the holes using the wall plugs provided. -
Page 11: Fitting The Bulkhead Or Fixed Head Pipework
Thermostatic mixer valve Outlet Adapter and Plug Fig.12 The outlet adapter and plug can be repositioned dependant on the outlet required - top or Rubber seal bottom. The adapter is suitable for a 15mm rigid pipe connection. The rubber seal MUST be fitted between the outlet adaptor and nut connector (fig.12). -
Page 12: Bulkhead Assembly
Thermostatic mixer valve BULKHEAD ASSEMBLY Fig.15 Screw the bulkhead elbow to the bulkhead body with the three screws supplied. Screw the completed assembly onto the threaded connector temporarily to mark the position of the two fixing holes for securing the bulkhead to the wall. -
Page 13: Anti-Scald Protection
Thermostatic mixer valve ANTI-SCALD PROTECTION Fig.17 It is important that the mixer valve is tested regularly to prevent the risk of scalding and guarantee user safety. This can be carried out as follows: with the mixer blend temperature set at 38°C isolate the cold water supply. The outlet flow rate will reduce to a safe level. -
Page 14: Commissioning (Type3)
Thermostatic mixer valve COMMISSIONING (TYPE 3) The following conforms to Department of Health (doH), Health Technical Memorandum HTM 04-01: Supplement Performance specification D 08: thermostatic mixing valves (healthcare premises) for when the mixer has been installed in healthcare premises. Important: Make sure that all supply pipework has been flushed through before commissioning. The maximum set temperature for showering should not exceed 41°C. -
Page 15: Adjusting The Maximum Temperature Setting
Thermostatic mixer valve ADJUSTING THE MAXIMUM Fig.18 TEMPERATURE SETTING and fitting the lever The mixer shower is supplied with the flow and temperature knob fitted and the maximum temperature stop factory set to 38°C (this can be adjusted during installation). The lever is supplied loose in the box. -
Page 16: Operating The Shower
Thermostatic mixer valve OPERATING THE SHOWER (fig.20) Fig.20 To start the shower, turn the on/off temperature control anti-clockwise. To adjust the showering temperature rotate the temperature control clockwise for cooler and anti-clockwise for hotter. CAUTION: Exposed metal surfaces may become hot during use. OFF position MAXIMUM temperature... -
Page 17: Approvals
Thermostatic mixer valve APPROVALS D 08 This mixer valve has been designed to comply with the requirements of: KIWA MARKING The unique reference for this product is: 86002260 This can be found laser marked onto the body of the mixer valve. PRODUCT FLOW RATES - For guidance only Flow Rate (l/m) 7.0 10.0 12.5 15.0 17.0 25.5 38.0 47.5 51.5 63.0... -
Page 18: Dimensions
Thermostatic mixer valve DIMENSIONS 132.5mm 32.5mm 20 - 52mm 150mm ø 165mm All dimensions listed in this fitting book regarding the product and installation are approximate. -
Page 19: In Service Testing/Frequency Of Testing
Thermostatic mixer valve IN-SERVICE TESTING b) Record the temperature of the mixed water at the largest draw-off flow rate. Maintenance of the unit is required to give c) Record the temperature of the mixed water continued performance after installation and that at a smaller draw-off flow rate, which shall be it continues to provide scald prevention. - Page 20 Thermostatic mixer valve FREQUENCY OF IN-SERVICE TESTS General In the absence of any other instruction or guidance on the means of determining the appropriate frequency of in-service testing, the following procedure may be used: a) 6 to 8 weeks after commissioning carry out the tests detailed in: In-Service Tests b) 12 to 15 weeks after commissioning carry...
-
Page 21: Test Record
Thermostatic mixer valve COMMISSIONING, MAINTENANCE and IN-SERVICE TESTING RECORD Where installed: Mixer valve location: Date installed: Installed by: Commissioning details: Hot water - Temp: °C Pressure: Cold water - Temp: °C Pressure: Maximum temperature setting - Temp: °C Pressure: Equipment used: Inspection and maintenance record:... -
Page 22: Cleaning
Thermostatic mixer valve CLEANING Triton recommends that all products are cleaned using warm, soapy water. WARNING! DO NOT use powerful abrasive or solvent cleaning fluids when cleaning the shower as they may damage the surface finish and fittings, and invalidate your guarantee. -
Page 23: Fault Finding
Thermostatic mixer valve FAULT FINDING The following can be carried out by a competent person Problem Cause Action 1 Water too hot. 1.1 Temperature 1.1.1 Refer to the Commissioning section. control incorrectly commissioned. 1.2 Not enough cold 1.2.1 Reposition the temperature control. water flowing through shower. - Page 24 Thermostatic mixer valve FAULT FINDING Problem Cause Action 4 Water does not 4.1 Water supplies cut off. 4.1.1 Check water elsewhere in house and if flow or shower necessary contact local water company. pattern collapses 4.2 Shower unit blocked. 4.2.1 Inspect the filters. Clean if necessary. when another 4.3 Blockage in pipework.
- Page 25 Thermostatic mixer valve...
- Page 26 Thermostatic mixer valve...
- Page 27 Thermostatic mixer valve...
- Page 28 Trade Installer Hotline: 024 7637 8344 Nuneaton www.tritonshowers.co.uk Warwickshire, CV11 4NR E-mail: serviceenquiries@tritonshowers.co.uk E-mail: technical@tritonshowers.co.uk Triton is a division of Norcros Group (Holdings) Limited Triton reserve the right to change product specifi cation without prior notice. E&OE. © TRITON SHOWERS 2021...
Need help?
Do you have a question about the ELINA and is the answer not in the manual?
Questions and answers