Table of Contents
Advertisement
Quick Links
Advertisement
Table of Contents

Subscribe to Our Youtube Channel
Related Manuals for Alesis Data Disk

Summary of Contents for Alesis Data Disk
- Page 1 ALESIS Data Disk Reference Manual...
-
Page 2: Table Of Contents
INTERFACING DATADISK... 10 DATADISK CONNECTED TO A SINGLE MIDI DEVICE... 10 HANDSHAKING ... 10 DATADISK USED TO STORE HR-16/MMT-8 SEQUENCES... 12 DATADISK IN A MORE COMPLEX MIDI SETUP ... 13 SECTION 4 DATADISK FUNCTIONS ... 14 THEORY OF OPERATION ... 14 SYSTEM EXCLUSIVE... - Page 3 TO DISPLAY FILE INFORMATION... 36 TO BACKUP A FILE ... 37 TO BACKUP AN ENTIRE DISK ... 39 TO BACKUP AN ENTIRE DISK OVER MIDI TO ANOTHER DATADISK ... 40 SECTION 6 REAL-TIME MIDI SEQUENCE PLAYBACK ... 41 TO RECEIVE A MIDI SEQUENCE ... 41 TO SEND A MIDI SEQUENCE...
- Page 4 APPLICATIONS ... 47 STORAGE OF DATADISK MIDI SETUP PER DISK ... 48 TO STORE THE DATADISK... 48 SECTION 7 APPENDEX... 49 TROUBLESHOOTING ... 49 PROBLEM SAVING TO DISK ... 49 RECEIVING INSTRUMENT WON'T RECEIVE... 49 SPECIFICATIONS ... 51 BOOKS ON MIDI ... 52...
- Page 6 Alesis DATADISK Direct MIDI to Disk/Universal Data Storage USERS MANUAL...
-
Page 7: Introduction
The disk functions are used to transfer data between the disk drive and MIDI. Because the disk size is fixed, data can not exceed 800K bytes. Each disk can hold 53 MIDI data files, but the total size of the data cannot exceed the maximum disk size, or 800K. -
Page 8: How To Use This Manual
Actual display readouts of are also included. DATADISK SECTION 6 - REAL-TIME MIDI SEQUENCE PLAYBACK This section decribes the DataDisk's Real-Time MIDI sequence recording and playback functions. SECTION 7 - APPENDIX Section 6 provides a simple troubleshooting guide and operational... -
Page 9: Datadisk Quick Start
1) Press the RECEIVE ONE SYSEX: WAITING FOR DATA". 2) Send the MIDI exclusive file from the sequencer, syn- thesizer, or sampler. The display will tell you that it's re- ceiving the data. 3) When the transmission is complete, the display that the file has been stored and assign a file number. -
Page 10: Sending A Single Stored File
2) Send the MIDI exclusive files from the sequencer, syn- thesizer, or sampler. The display will tell you that it's re- ceiving the data. 3) At the end of the data transmission, the ask if the file is complete. Send more data or press the button to store all of the data received into one file. -
Page 11: Section 2 Description Of Controls
3 1/2" floppy diskettes, the same as those used in many syn- thesizers, samplers, and computers. Each disk will store up to 53 MIDI data files as long as the total size of file data does not exceed a maximum of 800K. -
Page 12: Backup
MIDI output of the MIDI echo the data received at the MIDI input. MIDI ECHO ON sets the MIDI output to operate as a MIDI THRU port. MIDI ECHO OFF sets the MIDI output to send only MIDI file data initiated from the... -
Page 13: Backpanel
MIDI data from a sequencer, MIDI IN sampler, synthesizer, or effects processor for storage on diskette. MIDI OUT jack is used to send MIDI file data to a sequencer, MIDI OUT synthesizer, or sampler. This jack can also be selected to function as a... -
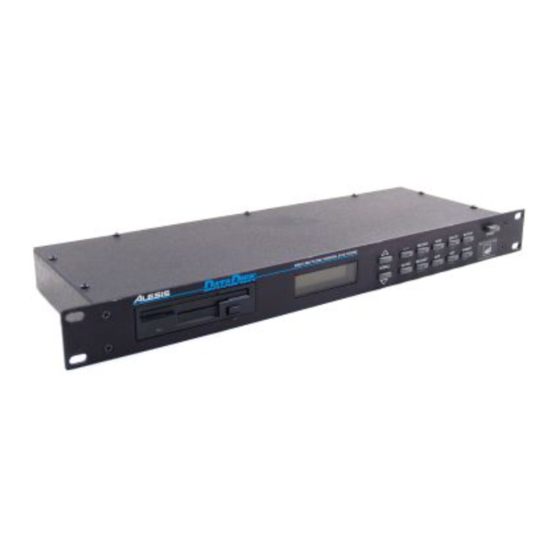
Page 14: Datadisk Front And Back Panel
DESCRIPTION OF CONTROLS FIGURE 1 DATADISK FRONT AND BACK PANEL... -
Page 15: Section 3 Interfacing Datadisk
Simply connect the MIDI DATADISK Out of the synthesizer, sequencer, effects processor, or other MIDI device that is to send system exclusive data, to the MIDI In of . To off-load data, connect the MIDI Out of DATADISK DATADISK the MIDI Input of the MIDI device that will be receiving the data. - Page 16 INTERFACING DATADISK FIGURE 2 A/B WITH A SINGLE MIDI DEVICE DATADISK A. WITH HANDSHAKING B. WITHOUT HANDSHAKING...
- Page 17 SECTION 3 FIGURE A. WITH HANDSHAKING FIGURE B. WITHOUT HANDSHAKING Alesis MMT-8 sequencer, synthesizer, sampler, or other MIDI device MIDI OUT MIDI IN MIDI IN MIDI OUT DATADISK Alesis MMT-8 sequencer, synthesizer, sampler, or other MIDI device MIDI IN MIDI OUT...
-
Page 18: Datadisk Used To Store Hr-16/Mmt-8 Sequences
In the setup shown below, to the HR-16, which has been set to echo System Exclusive information received at its MIDI Input and send it back out of its MIDI Output (see HR-16 manual for specific instructions). The data is then sent to the MMT-8's MIDI Input. -
Page 19: Datadisk In A More Complex Midi Setup
DATADISK IN A MORE COMPLEX MIDI SETUP If you are using DATADISK you may wish to use a programmable MIDI patcher to route their MIDI inputs and outputs to will enable you to perform loads and dumps to and from any or all of your MIDI devices without having to manually change any of your connections. -
Page 20: Section 4 Datadisk Functions
If there is more than 1/2 second but less than 1 second, then will have stored the first file but will not have had enough DATADISK time to store the directory of that file before the next set of MIDI messages arrive. When this occurs, will display "MIDI DATADISK OVERFLOW"... -
Page 21: Software Functions
There are nine functions in the send and receive MIDI data, prepare a disk for send/receive oper- ations, and view files stored on the disk. Each function has several choices, called pages, which further allows the user to tailor the function to his specific needs. -
Page 22: Receive Midi Data Function
SCROLL DOWN played. The files are viewed alphabetically. In this page, all files stored on the disk will be sent over MIDI to their respective instruments. This way, an entire setup of a number of instruments, sequencers, samplers, and processors can quickly be sent from just this one page. -
Page 23: Delete File From Disk Function
SECTION 4 This function is used to erase unwanted files from a disk. There are two pages, which are: This page is used to delete (erase) a single file from the disk, where NNN is the size of the selected file in kilobytes (1024 bytes = 1K), XXXXXX is the manufacturers name of the file, YYYYYY is the product name of the file, and ZZZZZZZZ is the name of the file to delete. -
Page 24: Backup All Files
Backup is complete. Rather than making a Backup copy of your data to a disk, it's also possible to send all files out via MIDI to another are sent out in alphabetical order. can store samples as well as synth programs and se- DATADISK quencer data. -
Page 25: Disk Info Function
MIDI channel is used. Therefore, only two MIDI pages are re- quired. They are: MIDI ECHO This function is used to echo the signal that arrives at the the MIDI input to the MIDI output of . Effectively, this makes the... -
Page 26: Rcv Program Change
MIDI system exclusive data on any DATADISK channel, a single channel must be selected to receive a MIDI pro- gram change command. When such a command is received, will initiate a file send with the program number (#0 to DATADISK 52) selecting the file to be sent. -
Page 27: Disk Status And Info Messages
SECTION 4 character set key until the desired character is displayed. These steps are repeated until all characters are changed as desired. Pressing the button stores the new name. DO/YES DISK STATUS AND INFO MESSAGES is an intelligent device and its display will either prompt DATADISK the user to make decisions, or describe the current disk status. -
Page 28: Disk Write Protected
OPERATION ABORTED PLEASE NOTE: Disk data will be unaffected if a Receive op- eration is aborted. Aborting a Send operation will result in incom- plete data being sent over MIDI. Entering any DISK DISK EMPTY DISK FULL... -
Page 29: Duplicate File Name
This display occurs if there is not enough space left on the disk to store the incoming data. This display occurs if MIDI data is received while a file is being stored. Try receiving in RECV MULT mode. MIDI OVERFLOW TRY RECV MULT These displays occur if data was incorrectly stored onto disk. - Page 30 DATADISK FUNCTIONS REPLACE FILE WITH SAME NAME?
-
Page 31: Target Unit Not Responding
SECTION 4 This display occurs when the Data Disk sends a file to an instru- ment that requires handshaking and receives no handshaking re- sponse. TARGET UNIT NOT PLEASE NOTE: There are safeguards to prevent against tricking by swapping disks before initiating an operation. For... -
Page 32: Operation
DATADISK TO FORMAT A DISK button on the front panel. The display Pressing any other function will exit the Format page or prevent button a second time to start format- REAL TIME MIDI SEQUENCING SCROLL... -
Page 33: To Receive A File
DATADISK 2) Send a Sysex dump from the synthesizer, sequencer, effects processor, or other MIDI device. This can be ac- complished by sometimes just changing a program on the MIDI device, or by a separate front panel command... -
Page 34: To Receive Multiple Files
MIDI sample dump, the manufacturer and product name will be displayed as "Sample Dump". After all the data is received (when no MIDI data re- ceived for 1/2 second), the display will change to the following:... -
Page 35: To Request A Dump
3) Exit the function by pressing another function button. This function allows the user to request sample dumps from MIDI devices which require a request before sending sample dump data. is going to receive in-... -
Page 36: Product Specific Dump Request
2) Select the correct sample number by using the SCROLL DOWN 3) Press the DO/YES transfer is handled as in the Receive MIDI data function. Product specific dumps for products that can't initiate dumps from their own front panel can be requested by lowing:... - Page 37 SECTION 6 5) Press the button to transmit a request. DO/YES transfer is handled as in the Receive MIDI data function.
-
Page 38: To Rename A File
This will appear in the display as: TO RENAME A FILE buttons until the desired DO/YES NAME DO/YES button for a space (blank FORMAT SCROLL UP SCROLL DOWN REAL TIME MIDI SEQUENCING button. buttons... -
Page 39: Duplicate File Name
SECTION 6 RENAME XXXXXX YYYYYY ZZZZZZZZ? 4c) Repeat steps 4a and 4b until all characters are changed as desired. 5) When the file has been renamed, complete the operation by pressing the the beginning of the Rename function, allowing other files to be selected to be renamed, if desired. -
Page 40: To Send All Files
Send All mode. This makes setup of an entire MIDI system very fast and easy since all files will be sent with just one com- mand, and all MIDI units will instantly reset as soon as their system exclusive file data is received. To accomplish a Send All com-... -
Page 41: To Delete (Erase) A File From Disk
SECTION 6 3) Press the DO/YES is being sent, the display will read: SENDING: XXXXXX YYYYYY ZZZZZZZZ In this display, XXXXXX is an abbreviation of the manu- facturer's name of the device sending the data, YYYYYY is an abbreviation of the model name, and ZZZZZZZZ is the name of the file being sent. -
Page 42: To Delete (Erase) All Files From Disk
ZZZZZZZZ is the name of the file to be erased. 2) Pressing the DELETE display read: button. The dis- DO/YES will return to the DATADISK button on the front panel. The fol- button a second time will make the REAL TIME MIDI SEQUENCING DISK... -
Page 43: To Set Midi Echo
Use the Format function to properly format a disk. 1) Press the MIDI read the following: 2) To turn the MIDI Echo to On (or Off if it is already On), press the SCROLL UP button. The display will then read: button. The dis-... -
Page 44: To Set Up A Midi Program Change
3) Press another function button to exit the MIDI Echo func- tion. TO SET UP A MIDI PROGRAM CHANGE 1) Press the button on the front panel twice. The dis- MIDI play will read: RCV PROG CHANGE ON MIDI CH: XXX... -
Page 45: To Backup A File
SECTION 6 ber of bytes to indicate if the file if the file was received in RECV MULT, otherwise it is blank. 2) Press the SCROLL UP the desired file. Files are arranged alphabetically by manufacturer, with numbers coming before letters, except in the following cases: Unknown manufacturer names (either displayed as "Id xxH"... - Page 46 Writing to the Backup Disk . . . After backup is complete, the following is temporarily displayed before DATADISK Backup function. button again. The display will button again. The display will returns to the start of the REAL TIME MIDI SEQUENCING...
- Page 47 SECTION 6 8) Backup another file or exit the Backup function by pressing another function button. 9) Check backup procedure by sending the backed-up file(s) to their appropriate destinations and checking the data. BACKUP COMPLETE...
-
Page 48: To Backup An Entire Disk
4) Follow steps 4 through 9 as in "To Backup A File". Pressing any other button on the front panel. The display button a second time. The display will ) and destination disks (the one that REAL TIME MIDI SEQUENCING... -
Page 49: To Backup An Entire Disk Over Midi To Another Datadisk
SECTION 6 TO BACKUP AN ENTIRE DISK OVER MIDI 1) Press the BACKUP 2) Press the DO/YES IS DEST DATADISK "DEST DATADISK" stands for Destination DATADISK 3) Press the DO/YES THIS WILL ERASE DEST DISK. OK? 4) Press the DO/YES... -
Page 50: Real-Time Midi Sequence Playback
All MIDI data received is time-stamped and can therefore be sent from the DataDisk with the same timing with which it was received (a MIDI tape recorder)! This allows the DataDisk to be used in several new ways. -
Page 51: Operation Aborted
Receiving Seq. . . 3) Press the DO/YES been received to store the data into a file. If no MIDI data is received for 1 minute, the DataDisk will automatically store the received data into a file. If either SCROLL button is pressed before the minute is up, the sequence data WILL NOT BE STORED ON DISK. -
Page 52: To Send A Midi Sequence
2) Press one of the sequence is displayed. The display will read: SEND FILE MIDI Seqnce FILE ZZ ? FILE ZZ is the desired MIDI Sequence name. 3) Press the button to play back the sequence. The DO/YES display will read:... -
Page 53: Syncing Datadisk To A Sequencer
The display will then return to the Send File MIDI Sequence page. If a MIDI Sequence is aborted while being sent or if a MIDI Stop command is received while the file is being sent, the DataDisk will... - Page 54 The sequence recorded by the DataDisk MUST be recorded with MIDI clock in order to use the external sync feature. If the file does not contain MIDI clock, then all file data will be sent with the first MIDI CLOCK received.
- Page 55 1 bar ahead of the original sequence's location as well. c) Since a Continue command may occur anywhere within a MIDI Sequence File, there may be a slight delay while the DataDisk searches through the disk for the specified location before executing the command. The DataDisk will, however, remain in sync.
-
Page 56: Applications
To record a MIDI sequence from the DataDisk to the Alesis MMT-8 MIDI Recorder for editing purposes: 1) Connect both units as shown: a) Place the MMT-8 into MIDI & INTERNAL b) The MMT-8's countdown should be set to 00, and length should be changed either to the highest number available or the known length of the sequence. -
Page 57: Storage Of Datadisk Midi Setup Per Disk
(ignore incoming MIDI clock), or 2) Set the DataDisk's MIDI clock filter to ON. NOTE: In either case MIDI echo on the DataDisk should be set to OFF. STORAGE OF DATADISK MIDI SETUP PER DISK It is possible to store the DataDisk MIDI parameters (MIDI Echo, MIDI Program Change Channel, MIDI Sync, and MIDI Filter) to disk. - Page 58 REAL TIME MIDI SEQUENCING b) If the DataDisk is powered-on with a disk that has no MIDI setup stored on it, all MIDI parameters will default to OFF.
-
Page 59: Appendex
SECTION 7 SECTION 7 The wonderful world of MIDI makes our musical lives much so much easier most of the time. Still, there are those moments when things just won't work. Below are some hints regarding sending and receiving problems and possible solutions. This is just general info since there is no way of knowing each and every instrument, connections, and system setup. - Page 60 5) Although the MIDI System Exclusive status byte does not specify a channel number, some manufacturers include a channel or device number within the message and will only respond to a sysex message with a matching channel/device number.
-
Page 61: Specifications
70 seconds Upper case alphabet, A to Z, 0 to 9, 15 characters, space Name, Receive, Send , Delete, Backup, Request, Info, MIDI, Format, Do/Yes, Scroll Up, Scroll Down, Power LCD display;16 Character by 2 lines Disk Drive In Operation LED... -
Page 62: Books On Midi
Descubriendo MIDI by José Valenzuela; Alesis Publishing. A thorough overview of MIDI in Spanish, suitable for beginners and/or advanced users. VIDEOS ON MIDI The Basics Of MIDI featuring Craig Anderton with Steve Smythe; Alesis Publishing. An overview of the concepts and applications of MIDI interface. Available through... -
Page 63: Real-Time Midi Sequence Playback
• Storing and retrieving sysex messages from devices that do not handle MIDI data at full speed and/or require time gaps of up to one minute between bytes. Although it is not possible to edit a sequence stored by the DataDisk, it is possible to have some control over the sending of a sequence. - Page 64 ABORTED To exit this display, press any function button. PLEASE NOTE: MIDI Echo (MIDI Thru) function is ignored when in the Receive MIDI Sequence mode. When recording to a sequencer from the DataDisk, keep in mind that the incoming data is subject to the quantize resolution that the sequencer is currently set at.
- Page 65 Press the Press one of the is displayed. The display will read: Seqnce FILE ZZ ? FILE ZZ is the desired MIDI Sequence name. Press the display will read: SENDING : MIDI When playback is complete, the display will return to the start of the send function with the next file ready to be sent.
- Page 66 OPERATION ABORTED The display will then return to the Send File MIDI Sequence page. If a MIDI Sequence is aborted while being sent or if a MIDI Stop command is received while the file is being sent, the DataDisk will automatically send...
- Page 67 The sequence recorded by the DataDisk MUST be recorded with MIDI clock in order to use the external sync feature. If the file does not contain MIDI clock, then all file data will be sent with the first MIDI CLOCK received.
- Page 68 DataDisk is syncing to. To record a MIDI sequence from the DataDisk to the Alesis MMT-8 MIDI Recorder for editing purposes: Connect both units as shown: button four times.
- Page 69 Set the sequencer's clock source to INTERNAL ONLY (ignore incoming MIDI clock), or Set the DataDisk's MIDI clock filter to ON. NOTE: In either case MIDI echo on the DataDisk should be set to OFF.
-
Page 70: Storage Of Datadisk Midi Setup Per Disk
It is possible to store the DataDisk MIDI parameters (MIDI Echo, MIDI Program Change Channel, MIDI Sync, and MIDI Filter) to disk. When a new disk is loaded, the MIDI setup will be automatically loaded as well. This means that the MIDI setup can be unique per disk.
Need help?
Do you have a question about the Data Disk and is the answer not in the manual?
Questions and answers