Table of Contents
Advertisement
Quick Links
Advertisement
Table of Contents

Related Manuals for finder 1T Series


Summary of Contents for finder 1T Series
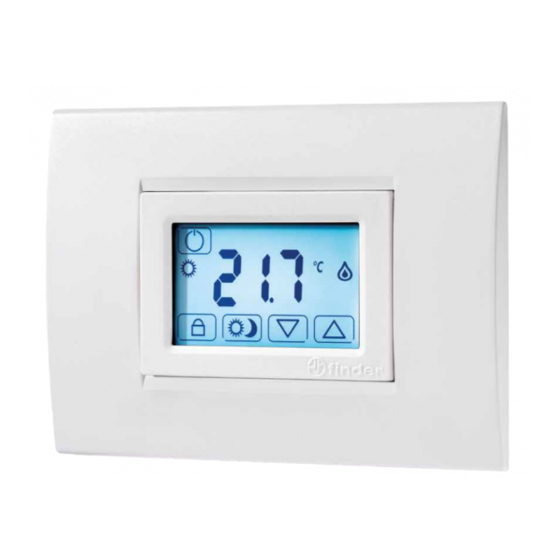
- Page 1 1T.51 DIGITAL TOUCH SCREEN THERMOSTAT...
-
Page 3: Table Of Contents
INDEX TECHNICAL DATA page 2 DIMENSIONS page 2 INSTALLATION page 3 WIRING DIAGRAM page 5 BATTERY page 6 START UP page 7 KEYS page 8 SYMBOLS page 9 MAIN SCREEN page 10 DAY SETTING page 10 NIGHT SETTING page 11 DISPLAY LOCK page 12 FULL LOCK MODE (WITH PIN) -
Page 4: Technical Data
TECHNICAL DATA Power supply: 2 Alkaline Batteries 1.5 V AAA WINTER temperature range: (+ 5…+ 37)°C SUMMER temperature range: (+ 5…+ 37)°C (+ 2…+ 8)°C FROST protection temperature range: (0.1…0.9)°C Temperature differential ∆T: 2 (day & night) Operating modes: Protection degree: IP20 PIN lock: Output:... -
Page 5: Installation
INSTALLATION SAFETY REQUIREMENTS The installation of electrical equipment must be performed by experienced staff. Before connecting the thermostat, make sure that the load (heater, pump, etc.) is not connected to the supply and that the load is within the ratings marked on the thermostat. - Page 6 Frame Frame Extender Extender ABB: Chiara ABB: Mylos Ave: Serie 44 Bticino: Living, Light, Light Tech, Livinglight, Axolute Bticino: Matix Gewiss: Chorus Vimar: Arke Vimar: Eikon, Eikon Evo, Plana Vimar: Idea Bticino: Livinglight Air with 01C.51 - d) = remove the side supports...
-
Page 7: Wiring Diagram
WIRING DIAGRAM MANUAL/REMOTE override contact... -
Page 8: Battery
BATTERY Insert the batteries into the compartment, observing the indicated polarities. ATTENTION - Incorrect placement of the batteries (reverse polarity) may damage the thermostat - If the battery charge falls below the minimum level, the thermostat is placed in the OFF state and the output relay releases - If the thermostat remains unused for long periods it is advisable to remove the batteries The thermostat provides 3 different reports of battery condition:... -
Page 9: Start Up
START UP Insert the batteries and the display will show all the symbols and the software version, for a few seconds. After that, the main screen will be displayed NOTE Touch the display to illuminate the backlight. -
Page 10: Keys
KEYS Thermostat ON/OFF key Selecting the temperature for night or for day Pressed for 3 seconds - activates or deactivates the display lock function Pressed for 3 seconds - enters the advanced menu Changes the data displayed (increase) Changes the data displayed (decrease) Press to confirm the information displayed on the display Returns to the previous setting Press for 3 seconds to exit the function... -
Page 11: Symbols
SYMBOLS Administrator set limits Frost protection ON ∆T Temperature differential Remote control Low battery Display only, or full thermostat, locked Day mode Night mode Heating ON (in WINTER mode) Cooling ON (in SUMMER mode) -
Page 12: Main Screen
MAIN SCREEN The main screen showing the operational keys for everyday use. They are, the temperature control keys , the key (if enabled in the advanced menu), the key to lock the product and the key, to turn off. with key without key DAY SETTING key followed by the sun icon... -
Page 13: Night Setting
NIGHT SETTING key allows you to set a different temperature from the Day temperature. The the moon symbol shows that the night temperature can now be set using the keys. NOTE When switching from day to night with the key (and vice versa), the set temperature will be displayed momentarily. -
Page 14: Display Lock
DISPLAY LOCK This function protects the thermostat from accidental touch, blocking ONLY the display. To activate, press for 3 seconds. symbol will then appear on the display and 3 beeps will indicate its activation. To deactivate, press for 3 seconds. NOTE To use the DISPLAY LOCK function, the PIN set in the FULL LOCK MODE (with PIN) in the advanced menu, must be set to 000 (see page 19). -
Page 15: Full Lock Mode (With Pin)
FULL LOCK MODE (WITH PIN) This advanced feature is used to lock the thermostat completely. To activate it, you must set a 3-digit PIN that will be required every time you want to lock or unlock the thermostat. To set the PIN: - Switch off the thermostat with the - Press for 3 seconds to access the ADVANCED MENU... - Page 16 Use the keys to enter the PIN previously set in the advanced menu and press . 3 beeps will confirm the lock, and the display that will show the following screen: To unlock the thermostat, hold down for 3 seconds. The display will show Enter your PIN and confirm with 3 beeps confirm that the device has been unlocked.
-
Page 17: Frost Protection Function
FROST PROTECTION FUNCTION FROST PROTECTION function is active when the thermostat is set to WINTER and it is off. It is used to protect plant and equipment from low temperatures. When the set threshold is reached, the function will be activated and the display will show the symbol. -
Page 18: Advanced Menu
ADVANCED MENU The advanced settings are useful for customizing the thermostat. The settings are: SUMMER-WINTER MODE FROST PROTECTION FUNCTION TEMPERATURE DIFFERENTIAL ANTI-SEIZE PUMP FUNCTION FULL LOCK MODE (with PIN) EXTERNAL FORCING CONTACT ENERGY SAVING E1 RESET To enter the advanced menu, starting from the main screen, press to turn off the thermostat. - Page 19 FROST PROTECTION FUNCTION After setting the Summer or Winter mode, pressing will show the following screen. With it is possible to set the desired value, between 2°C and 8°C. Press to confirm and proceed to the next menu. To step back in the menu, press , whilst to exit the advance menu hold down for 3 seconds, or press...
- Page 20 To return to the previous menu, press whilst to exit the advanced menu hold down for 3 seconds, or press repeatedly, until you see the OFF screen. If something has changed, 3 beeps will confirm the change. ANTI-SEIZE PUMP FUNCTION After programming the thermal differential, pressing will bring up the following screen.
- Page 21 FULL LOCK MODE (with PIN) With this mode it is possible to lock the display, using a PIN code - preventing tampering. In the advanced menu, press until the following appears on the screen: To lock the display only, you must set the PIN to 000 using the keys .
- Page 22 EXTERNAL FORCING CONTACT This setting allows you to force the thermostat by means of an external contact connected to terminals 4 and 5. The function is useful for forcing the system off during certain hours (by using a time-switch) or for turning it OFF remotely. SET= 0 Unlock the night button and the forcing can be done by a command External (eg: clock) SET= 1 1 The night button is present and the forcing can be executed ONLY...
- Page 23 RESET This will restore all factory settings. Using , set Confirming with the thermostat will turn off completely and then turn back on showing first, the software version and then the screen main. The product will then be reset to the factory settings.
-
Page 24: Administrator Function
ADMINISTRATOR FUNCTION From the OFF position and while holding down the center of the display for about 1 second you can enter the “ADMINISTRATOR” configuration. This is used to set the maximum and minimum user-adjustable temperature values that can be set for the selected season, ie WINTER and SUMMER Setting the “ADMINISTRATOR”... - Page 25 ADMINISTRATOR PIN “000” From the OFF position press and hold the center of the display for a few seconds. Then select SUMMER or WINTER mode. Confirm with and proceed to the next menu. Set the maximum value of user-adjustable temperature. Confirm with and proceed to the next menu.
- Page 26 ADMINISTRATOR PIN other than “000” From the OFF position, hold down the center of the display for a few seconds. Set the code with the arrows (if previously entered) and press OK. Confirm with and proceed to the next menu. Select SUMMER or WINTER mode.
-
Page 27: Calibration
CALIBRATION The thermostat is supplied already calibrated by the factory. If you want to change the measured temperature value as displayed on the display, proceed as follows. Starting from the main screen, press the (OFF) button for 4 seconds, On the screen will appear and then to set the desired value and then press to confirm the... - Page 28 NOTE ................................................................................................................................................................................................................................................................................................................................................................................................................................................................................................................................................................................................................................................................................................................................................................................................................................................................................................................................................................................................................................................................................................................................................................................................................................................................................................................
- Page 29 NOTE ................................................................................................................................................................................................................................................................................................................................................................................................................................................................................................................................................................................................................................................................................................................................................................................................................................................................................................................................................................................................................................................................................................................................................................................................................................................................................................................
- Page 30 NOTE ................................................................................................................................................................................................................................................................................................................................................................................................................................................................................................................................................................................................................................................................................................................................................................................................................................................................................................................................................................................................................................................................................................................................................................................................................................................................................................................
- Page 32 IB1T51_EN - 07/19 - Finder S.p.A. con unico socio - 10040 ALMESE (TO) - ITALY...
Need help?
Do you have a question about the 1T Series and is the answer not in the manual?
Questions and answers